Jenn-Air SVE47500W Owner's manual

Category
Kitchen & houseware accessories
Type
Owner's manual

This manual is also suitable for

JENN.AIR
Use and Care Manual
Grill-Range with
Self-Cleaning Conventional
and Convection Oven
Models SVE47500 and SVE47600
Model SVE47600
Congratulations on your choice of a Jenn-Air grill-range. The indoor grilling
of meats, fish or fowl is one of the most attractive and succulent methods
of preparing these foods ... a unique flexibility made possible by Jenn-Air's
patented integral ventilation system.
Your Jenn-Ai r serf-cleaning oven combines the best of four cooking methods,
conventional baking or roasting, convection baking, convection roasting and
broiling. (Note: Only Model SVE47600 has the convection options.)
The Jen n-Air convection oven is actually a conventional oven that circulates
heated air within the oven. As both bake and broilheating elements cycle on
and offwith the thermostat, a fan keeps the heated air circulating around the
food. The constantly recimulating heated air in the convection oven strips
away the layer of cooler air that surrounds the food. Consequently, many
foods cook more quickly. Evenly distributed heat makes multiple rack
cooking possible. Convection roasted meats retain their natural flavor and
juiciness with less shrinkage than conventional roasting.
In addition to the many exclusive benefits of convection cooking, your Jenn-
Air oven is also a fine full featured conventional bake and broil oven. You can
cook your "old favorite" recipes as you have in the past. The conventional
bake oven also gives you the flexibility of preparing various foods when
convection cooking may not be as beneficial, as when cooking foods in
covered casseroles or clay pots. The broil element is convenient for top
browning and oven broiling of foods.
Before you begin cooking with your new range, please take a few minutes to
read and become familiar with the instructions inthis book. On the following
pages you willfind a wealth of information regarding all aspects ofusing your
new range. By following the instructions carefully, you will be able to fully
enjoy and properly maintain your range and achieve excellent results withthe
food you prepare.
Should you have any questions about using your Jenn-Air range or need a
Use and Care manual for your cooktop cartridge, write to us. Be sure to
provide the model number.
Jenn-Air Customer Assistance
c/o Maytag Customer Service
P.O. Box 2370
Cleveland, TN 37320-2370
Appliance Usage
BeforeYou Cal! for Service .......................................................................................... 46-48
Caring for yourRange
AccessPane! ............................................................................................................. 44
AdjustOven Temperature .......................................................................................... 44
Child ProtectionLock................................................................................................. 43
Cleaning Other PartsofYour Range ..................................................................... 42-43
Oven Light Bulb ......................................................................................................... 45
RangeComponents............................................................................................................. 8
Safety Precautions ........................................................................................................... 4-7
Using the Cooktop and Grill
Accessories .................................................................................................................. 50-51
Cooktop Cartridges
Home Canning ........................................................................................................... 11
Installation ................................................................................................................. 1t
Cookware .......................................................................................................................... 12
Ducting Information ........................................................................................................... 49
Grilling
C_eaning ................................................................................................................ 16-17
GdUing Guide .............................................................................................................. 15
Grilling Tips ................................................................................................................ 16
Installation .................................................................................................................. 13
Usage ......................................................................................................................... 14
Sudaq, e Controls ................................................................................................................ 10
Ventilation System ............................................................................................................... 9
Using the Oven
Baking
Baking Chart .............................................................................................................. 27
Causes of Cake Failure ............................................................................................. 28
Convect Baking ..................................................................................................... 28-29
General Recommendations ....................................................................................... 26
Broiling ......................................................................................................................... 34.35
Clock Controls
Clock Controlled Baking or Roasting .................................................................... 24-25
Time of Day Clock ..................................................................................................... 22
_mer ......................................................................................................................... 23
Oven Cleaning
Self-Cleaning Process .......................................................................................... 3641
Oven Operation
Oven Control Panei ............................................................................................... !8-19
Rack Positions ........................................................................................................... 21
Setting Controls ......................................................................................................... 20
Roasting
Convect Roasting ...................................................................................................... 32
Frozen Convenience Foods ....................................................................................... 33
Roasting Chart ........................................................................................................... 31
General Roasting Recommendations ........................................................................ 30
3
Read before operating your range
All appliances -- regardless of the manufacturer -- have the potential
through improper or careless use to create safety problems. There-
fore the following safety precautions should be observed:
1. Be sure your appliance is properly installed and grounded by a
qualified technician.
2, Never use your appliance for warming or heating the room.
3. Children should not be left alone or unattended in area where
appliance is in use. They should never be allowed to sit or stand
on any part of the appliance.
4. Wear proper apparel. Loose-fitting or hanging garments should
never be worn while using the appliance.
5, Do not repair or replace any part of the appliance unless
specifically recommended in this manual, All other servicing
should be referred to an authorized Jenn-Air Service Contractor.
6, Flammable materials should not be stored in an oven or near
surface units.
7, Do not use water on grease fires. Smother fire or flame or use
dry chemical or foam-type extinguisher.
8. Use only dry potholders. Moist or damp potholders on hot
surfaces may result in burns from steam. Do not let potholder
touch hot heating elements. Do not use a towel or other bulky
cloth.
9, Use proper pan size. Many appliances are equipped with one
or more surface units of different size. Select cookware having
flat bottoms large enough to cover the surface unit heating
element. The use of undersized cookware will expose a portion
of the heating element to direct contact and may result in
ignition of clothing. Proper relationship of cookware to heating
element will also improve efficiency and performance,
10. Never leave surface units unattended at high heat settings. Boil
over causes smoking and greasy spitlovers that may ignite.
11.Glazed cookware -- only certain types of glass, glass-ceramic,
ceramic, earthenware or other glazed cookpots are suitable for
rangetop surface without breaking due to the sudden change
intemperature. Use only such cookware as you know has been
approved for this purpose.
12.Cookware handles should be turned inward and not extend
over adjacent surface heating elements to avoid bums, ignition
of flammable materials and spillage due to unintentional contact
with the cookware.
13.CAUTION -- Do not store items of interest to children in
cabinets above a range or on the backguard of a range --
children climbing on the range to reach items could be seriously
injured.
14.Do not soak or immerse removable heating elements in water.
15. Do not touch surface units or areas near units, heating elements
or interior surfaces of oven. Surface units or heating elements
may be hot even though they are dark in color. Areas near
surface units and interior surfaces of an oven may become hot
enough to cause burns. During and after use, do not touch or
let clothing or other flammable materials contact these areas
until they have had sufficient time to cool. Other surfaces may
become hot enough to cause burns --among these surfaces
are the cooktop, the upper door frame and glass, oven vent
opening and surfaces near the opening, and the top edge of the
control panel.
16. Use care when opening oven door. Let hot air or steam escape
before removing or replacing food.
17.Do not heat unopened food containers. Build-up of pressure
may cause container to burst and result in injury.
18. Keep oven vent ducts unobstructed. The oven vent is located
underneath the air grille.
19.Always place oven racks in desired location while oven is cool.
If rack must be moved while oven is hot, do not let potholder
contact hot heating element in oven.
20.Do not clean door gasket. The door gasket is essential for a
good seal. Care should be taken not to rub, damage or move
the gasket.
21.Do not use oven cleaners. No commercial oven cleaner or
oven liner protective coating of any kind should be used in or
around any part of the oven.
22.Clean only parts listed in this manual and use procedures
recommended.
23. CAUTION: BEFORE SELF-CLEANING THE OVEN, REMOVE
FOOD, BROILER PAN AND OTHER UTENSILS.
24. Listen for fan. A fan noise should be heard during the broil and
cleaning cycles. If not, call a serviceman before self-cleaning
again.
25. Do not cook on glass-ceramic cooking surface if the cooktop is
broken. Cleaning solutions and spillovers may penetrate the
broken cooktop and create a shock hazard. Contact an
authorized Jenn-Air Service Contractor.
26.Clean glass-ceramic cooktops with caution. If wet sponge or
cloth is used to wipe spills on a hot cooking area, be careful to
avoid steam burns. Some cleansers can produce noxious
fumes if applied to a hot surface.
27.Do not operate with damaged cooking element after any
product malfunction until proper repair has been made.
28.Keep all switches "OFF' when unit is not in use.
29. Do not allow aluminum foil to contact heating elements.
30.On conventional element cartridges make sure that drip pans
are in place. Absence of these pans during cooking may
subject wiring or components underneath to damage.
31. Do not use aluminum foil to line surface unit drip pans, grillbasin
or oven bottom. Installation of these liners may result in electric
shock or fire hazard.
32.WARNING; To reduce the risk of tipping of the appliance, the
appliance must be secured by properly installed anti-tip devices.
To check if devices are installed properly, remove the access
panel and verify that the anti-tip devices are engaged.
33.This appliance has been tested for safe performance using
conventional cookware. Do not use any devices or accessories
that are not specifically recommended in this manual. Do not
use eyelid covers for the surface units, stovetop grills, or add-
on convection systems. The use of devices or accessories that
are not expressly recommended in this manual can create
serious safety hazards, result in performance problems, and
reduce the life of the components of the appliance.
34.PREPARED FOOD WARNING: Follow food manufacturer's
instructions. If a plastic frozen food container and/or its film
cover distorts, warps or is otherwise damaged during cooking,
immediately discard the food and its container. The food could
be contaminated.
IMPORTANT SAFETY NOTICE AND WARNING
The California Safe Drinking Water and Toxic Enforcement Act of 1986
(Proposition 65) requires the Governor of California to publish a list of
substances known to the State of California to cause cancer or repro-
ductive harm, and requires businesses to warn customers of potential
exposures to such substances. Users of this appliance are hereby
warned that when the range is engaged in the self-clean cycle, there
may be some low level exposure to some of the listed substances,
including Carbon Monoxide. Exposure to these substances can be
minimized by properly venting the range to the outdoors during the
self-clean cycle.
-SAVE THESEINSTRUCTIONS-
7
OvenVent
Oven
Controls
Surface, ;urface
Indicator Indicator
Lights Lights
Controls
Controls
Use to capture smoke and steam. (See p. 9.)
Will glow when a surface unit is on. (See p. 10,)
Usetoprovideflexibilityinsettingselectionwhen usingthecooktopelementsorgrilf
elements. (See p. 10.)
Use the electronic touch controls to set Clock or Oven functions. (Crock - see pp.
22-25, Oven Operation - see pp. 18-21.)
Thebuilt-inventilationsystemremovescookingvapors,odorsandsmokefrom foodsprepared
on the cooktop, grilland gril!accessories. Regular use of this system will insure a more
comfortableandlesshumidkitchenwhichisfree ofheavycookingodorsandfumes thatnormally
create a frequentneed for cleaning and redecorating.
The downdraffventitationsystemfeatures a twospeedfan.
The fan positionsare: HI, Lo, and OFF. To turn on the
ventilationsystem,touchtheFan Pad. The fan wiUcome on
at the Hi speed. To set on Lo speed, touchthe Fan Pad
(once from Hi settingor twicefrom the OFF position).
Abeep wiltsound everytimethe Fan Pad is touched=
Toturn the ventilationsystemOFF, touchtheFan Pad (oncefremLo speed ortwicefrom
Hi speed).
The ventilationsystemwilloperateautomatica/ly onHi speed when the grillelement isin
use. Dudng grilling,the fan speed isautomaticallyset for the Hi setting AND cannot be
changedtoLo speed.
Use theHi fan speed for capturing steam. Use Lo fan speed for capturing smokewhen
panfrying.
Thefancanbeusedtoremovestrongodorsfmmthekitchenaswhenchoppingonionsnear
thefan.
Besides using the ventilation system to remove cookingvapors and fumes, itcan be used
tocoolbaked pies or cakes, To cootan item,setit on the air grilleandtum on the fan. The
air being pulledover the item willquickly cool it. Be careful not to cover the oven vent or
the entireair grille.
Air Grille
The air grilleliftsoffeasily. Wipe cfeanorwash insinkwith mild household detergents, Stmay
be cleaned inthe dishwasher. Note:Theovenventislocated undertheairgri|le, When using
orcleaningthe oven,hotandmoistairmaybe noticed_nthis area. Be careful nottospillanything
intothis vent, Remove the airgrille beforeself-cleaningthe oven. (See p. 36.)
Filter
Turnoffventilationsystembeforeremoving. The fitteris apermanent
typeandshouldbecleaned whensoiied.Cleaninsinkwithwarmwater
and liquiddishwashing detergentorindishwasher. Important: Filter
shouldalwaysbeplacedatan angle. Asyouface thefront oftherange,
thetopofthefiltershouldrest against theleftside oftheventopening
and the bottom ofthe filter should restagainst the rightside ofthe
ventilationchamberat the bottom.DO NOT OPERATE SYSTEM WITHOUT FILTER.
Ventilation Chamber
Thisarea,whichhousesthefilter,shouldbe cleanedintheevent ofspillsor wheneveritbecomes
coated witha filmofgrease, It may be cleanedwithpapertowel,dampcloth,orspongeand mild
householddetergent, 9
Since thecontrolsare a push-turntype,theymust bepushed downbeforetuming_To set
(fromthe OFF position),pushdown on the controlknob and turnin eitherdirectionto
desired setting.
Whenthecontrol isin any position,other thanOFF, itmay beturnedinanydirectionwithout
pushingdown,
A green indicatorlightwill glowwhen a surface heating element is ON. There are four
indicatorlights,one for each element.
1. Leftrear element (rear Energy-Saver orstandardgrill)
2. Leftfront element (frontEnergy-Saver)
3. Rightfront element (frontEnergy-Saver or standardgrill)
4. Rightroarelement (rear Energy-Saver)
NOTE: The "Energy-Saver" grillelement (right) is Included with Model
SVE47600 and may bepurchased asan option forother models, it permits
utilizing only halfof the grillarea, ifdesired, orusing dlfferentsettings forths
front and rear position of the element. When using this element, both
cooktop controls, front and rear, must be turned on inorder to use the fu/!
grillarea.
NOTE SVE47500 Model: Only the left rear or the rightfront controls must
be turned on touse the full grill.
3. 4.
The size andtype ofcookwareand theamountandtypeoffoodbeing cookedwillinfluencethe
settingneeded for bestcookingresults. Electdca!voltagemay alsovary,whichwillaffect the
neededcontrolsetting.Thesetting{ndic.atedshouldserveasa guidewhileyoubecomefamiliar
w_thyour range.
Hi Afast heat to start cooking quickty, tobring liquids to a boil, to preheat oUfor deep
fat frying. Use for most grtlllng.
7-10 (Medium High) For fast frying or browning foods, to maintain rapid boil of large
amounts of food, to maintain oi_temperature for deep fat frying.
5-6 (Medium) For foods cooked in a double boiler, sauteing, slow boil of large
amounts of food, and most frying.
34 (Medium Lo) To continue cooking foods started on higher settings.
Lo-2 Maintaining serving temperatures of foods, simmering foods, melting butter or
chocolate.
The controlsofferflexibilityinsetting selection. On settingsotherthan Hi, you may adjustthe
controlaboveorbelowthenumberedsettingforbestresults. This appliestosettingswhenusing
cooktop cartridgesorwhen usingthegrillorany ofthegrillaccessories. Suggestedsettingsare
providedas generalguidelines.
10
Cooktopcartridges,either conventional coil, halogen, radiant or solid element, can be
installed on either side ofthe range. (See page 51 for all available cartridges and model
numbers.)
To Install Cartridges
1. If the grill e_ement, grill-rocks or grates are in place, remove before installing a
cooktop cartridge. Clean porcelain basin pan of any grease accumulation. (See
page 17 for cleaning recommendations.)
2. To install any of the optional cooktop cartridges, be sure controls are turned OFF.
Positionthe cartridge terminal plugtowards the terminal receptacle. This receptacle
is located at the front of the left side and at the back of the rightside ofthe range.
3, Siide the cartridge towards the receptacle until the cartridge terminal plug is
completely engaged.
4. Lower the opposite end of the cartridge into the rangetop until it is flush with the
surface. Your range is now ready to use.
To Remove Cartridges
1. Controls must be OFF and the cartridge should be cool.
2. Lift up on the "tab" located on the cartridge untiltop of cartridge clears the opening
on the range by about 2 inches. Liftingthe cartridge too high while still engaged in
the receptacle could damage the terminal plug.
3. To disengage terminal, hold cartridge by the sides and slide away from the terminal
receptacle. Liftout when fully unplugged.
4. A storage tray, Model A350, is available and can be used for storing a cartridge.
5. Do not stack cartridges where they may fall or be damaged. Never store other
materials on top ofthe glass-ceramic cartridges since this could damage or scratch
the surface.
Canning should be done on the conventional coil cartridge only. Canning element
accessory, Model A145A, makes it possible to use large canners with the conventional
coil cartridge.
11
Select heavy gauge cookpots. Usually heavy gauge cookpots will not change
shape when heated.
Use cookpots with flat, smooth bottoms. The two ways to determine ifcookpots
have a flat, smooth bottom are the ruler test and the cooking test.
Ruler Test
1. Place the edge of ruleracross the bottom
of the pot.
2. Hold up to the light.
3. No light should be visible under the ruler.
Cooking Test
Put 1 inch of water intothe cookpot.
2. Place cookpot on the element. Turn control to the Hi setting,
3. Observe the bubble formation to determine the heat distribution, ifthe bubbles
are uniform across the cookpot, the cookpot will perform satisfactorily. If the
bubbles are not uniform, the bubbles will indicate the hot spots.
Match the size of the cookpot to the size of the element, ideally the cookpot
will be the same size or slightly larger.
Heavy gauge cookpots with fiat, smooth bottoms will usually work in a similar way.
However, there are some differences in the cooking performance ofvarious materials.
Aluminum cookpots heat quickly and evenly. Best suited for simmering, braising,
boiling and frying.
Stainless steel cookpots will evenly distribute heat if constructed of tri-ply or
combined with other metals such as aluminum and copper. Use for cooking
functions similar to aluminum.
Cast iron cookpots are slow to heat but cook more evenly once temperature is
reached. Use for long term low heat cooking or for browning and frying,
Glass ceramic, earthenware, heat-proof glass or glazed cookpots can be used if
recommended by the manufacturer for cookpot cooking. Do not use with trivets.
Best used on low to medium control settings.
Porcelain enamel-on-stee! or porcelain enamel-on-cast iron should be used
according to manufacturer's directions. Do not allow to boil dry.
12
Thegrillaccessoryconsistsoftwoblackgrillgrates,agrillelement,and two grill-rocks.
To Install Grill
1, Before installing grill components, be certain controls are OFF.
2. Place the two grill-rocks into an empty basin pan with their handlas running parallel
tothe front ofthe range, These grill-rocks must be used since they support the grill
element.
3, Position the grill element with the terminat plug towards the terminal receptacle.
This receptacle is located at the front of the left side and at the back ofthe right side
of the range. Slide the element towards the receptacle until the terminal plug is
completely engaged. The grillelement should now rest onthe handles of the grill-
rocks.
4. Place the black grill grates on the top of the rangetop.
To Remove Grill
1. Remove grill components once they are cool. Be sure controls are OFF.
2. To remove grill element, pull away from receptacle until it is unplugged. (Note;
Lifting the element more than 2 inches above the rangetop surface while it is
engaged in the receptacle could damage the terminal plug.)
3. A storage tray, Model A350, is available for purchase and can be used for storing
the grill assembly.
Installing Other Grill Accessories
1. Remove the two black grill grates from the grill. Now you are ready to use the
optional grill accessories.
2. Review the instructionsfor installing and using the accessories that are packaged
with the accessory.
Note: Accessory options are shown on page 50.
13
Before the first use, wash your new grill grates in hot soapy water, rinse and dry,
Then "season" the surface by wiping on a thin coating of cooking oil. Remove
excess oil by wiping again with another paper towel. This procedure should be
repeated when either: a) cleaning in the dishwasher since the detergent may
remove seasoning, or b) anytime a sugar-based marinade (for example, barbecue
sauce) is going to be used.
Preheat the grill on Hi for 5 minutes. Preheating improves the f_avor and
appearance of meats and quickly sears the meat to help retain the juices, The
heating element should glow a bright cherry red,
Use nonmetallic spatulas or utensils to prevent damaging the Excalibur ®nonstick
gnT/grate finish.
Excessive amounts of fat should be trimmed from meats. Only a normal amount
is necessary to produce the smoke needed for that smoked, "outdoor" ftavor.
Excessive fat can create cleaning and flare-up problems.
Allowing excessive amounts of grease or drippings to constantly flame voids the
warranty on the grillgrates. Excessive flare-ups indicate that either the grill interior
needs to be cleaned or that excessive amounts of fat are in the meat or the meat
was not properly tdmmed.
Grease drLppingswi!l occasionally ignite to produce harmless puffs of flame for a
second or two. This is a normal part of the cooking process.
NEVER LEAVE GRILL UNATTENDED DURING GRILL OPERATION,
Should excess grease cause sustained flare-up
1. Turn on FAN manually.
2. Immediately turn grill control(s) to OFF,
3. Remove meat from grill.
IMPORTANT
Do not use aluminum foi! inside the grill area.
Do not use chamoal or wood chips in the grill area.
Do not a_low grill-rocks to become overloaded with grease. Clean frequently.
Do not cover grates completely with meat. Leave air space between each steak,
etc. to allow proper ventilation as well as prevent flare-ups.
14
Preheat gril! on HI, 5 minutes, for best flavor,
Note: This chart is a suggested quide. Cooking times and control settings are
approximate due to variations in meats and voltage,
15
WithyourJenn-Air grilland accessories,literallyanyfood you'veconsidered"atits best" when
preparedoutdoorscannow be prepared indoorswithlessfuss and greatflavor. The following
suggestionsare goodrulestofollow and willincreaseyour enjoymentofthe equipment.
Besureto folrowdirectionsonpage 14for usingthe gdfi.
Suggestedcookingttmesandcentrolsettingsareapproximateduetovariationsinmeats.
Experiencewillquickly indicate cookingtimesas wellas whichsettingsworkbest.
Usethe Energy-Savergrillelement forgrillingsmall amountsof food on halfofthe grillor
forkeepingcookedfoods warmorpreparingfoods requiringdifferentcontrelsettings.Note
SVE47500 Owners: The Energy-Saver gdll element can be purchased as an optional
accessory. (See p.50.)
Forbestresults,buytopgrade meat. Meat thatisat least s_inchthickwillgrill betterthan
thinnercuts.
Scon_fat on edges ofsteak, but donot cutintomeat, to prevent cudJngwhi_ecooking.
Forthe attractive '_branded"lookon steaks, be sure grillispreheated. Mow one side of
meattocooktodesireddoneness, oruntiljuicesappear onthetopsurface,beforeturning.
Tum steaksand hamburgersjust once. Manipulatingfood causes loss ofjuices.
Whenbastingmeatsorapptyingsaucestofoods, rememberthatexcessiveamountswind
up_nsideyour grilland donotimprovethe food flavor. Applysauces during the last 15to
20 minutesof cookingtime unlessrecipespecifiesotherwise.Sugar-basedsauces,when
used excessively,will carmelizeonthe grill-rocksand create extra cleaning.
Therearemanymeatmarinadeswhichwiflhelptenderizelessexpensivecutsofmeatfor
cookingon the grill.
Certain foods, suchas poultryand non-oilyfish, mayneed some extrafat. Brushwithoil
or meltedbutteroccasionallywhile grilling.
Usetongswithlonghandlesorspatulasfor turuingmeats. Donotuseforks as thesepierce
the meat, allowingjuices to be lost.
To help retainmeat juices,saltafter cookingis completed.
Shouldgrilledfoodsbe prepared and ready before you're ready toserve, turncontroltoa
lowsettingand covermeatwitha singlesheetofaluminumfoil. Foodwillcontinuetocook.
Be sure the grillis cool and controls areOFF.
Grill Grates
These aremade fromcastaluminumandare coatedwiththe Excalibur_ nonstickfinish.
Afterthe grillgrateshavecooled,wipeoffgrateswithapapertowel Wash coolgrates(DO
NOT IMMERSEHOTGRILL GRATES IN WATER) withsoapordetergent inhotwaterinthe
sinkorwashthem inthe dishwasher.Be suretoremoveall foodresiduebeforecookingon
the grillgratesagain.
Remove stubbornspotswitha plasticmeshpuffor pad. For best results,use onlythose
cleaningproductswhich state they are recommended for use when cleaning nonstick
surfaces.
if grateswere washed inthe dishwasher,seasonwith oil priorto gri!ling,(See p. 14.)
Donotusemetalbrushesorabrasivescouringpadsorotherscrubbersintendedtoc/ean
outdoor charcoalgrills. These willremove thefinish as wetlas scratchthe grates. Donot
cleanin self-cleaningovenoruse ovencleaners onthe grates.
16
Grill Element
Foflowinstructionson page "r3 forremoving thegrillelement. The grillelement shouldnever
be immersed inwater. Most soilwillburn offduringuse. The terminal block may be cleaned
with a soapy sponge, Dry thoroughly before reinserting Inthe range.
Grill-Rocks
These are made fromcast-iron which have been coated with porcelain enamel.
The gri!l-rocksshould be cleaned frequentlyor after any excessive build-upofgrease.
To clean tight soit, use detergent and a plasticscrubber, such asTufty, or wash in the
dishwasherifburnedonresidueisfirstremoved, Forheavy soil,soakinhot,soapywater
towhicha cleanser, suchas householdammonia, hasbeen added. Stubbornspotson
grill-rocks,such as burned on residue from sauces, can be scrubbed witha stiffbristle
brush.
Anovencleaner, suchasEasy-Off, canbe usedforburnedonsoil. Fotlowmanufacturer's
directions;spray oncleaner and let soak overnight. Do not clean grill-rocksin the self-
cleaningoven.
Porcelain Basin Pan
This area located under the grill-rocksand/orcartridges. Ctean after each use ofthe grill.
To remove light soil, clean with soapy water or spraywithcleansers suchas Fantastik
or 409, For easier cleanup: a) spray with a household cleanser; b) cover with paper
towels;c) add small amount ofhotwater to keep the paper towels moist; d) coverand
wait 15 minutes; and e) wipe clean.
To remove moderate soil, scrub with Comet, Bon Ami, a softscrub cleanser or plastic
scrubber.
To remove stubborn soil, spray with an oven cleaner such as Easy-Off; let soak
overnight, wipe clean, rinse and dry.
Note: Clean the grease drain after each use. Toclean: Pour about lt3 cup of very hot tap
water mixed with 1teaspoon dish detergent down the drain. Inthe event the drainis clogged,
due to large food particles being trapped, use the nylon string that was packaged with your
range. To use the nylon string,simplyinsert one endinto the drain opening inthe basin pan.
Feed the nylon stringdown until itisvisible under the range. Now pull upon the end extending
out from the top while holding a paper towel around the string, toclean the stringas it isbeing
pulled. Thisshould freeanytrapped particlesoffood. Pouranotherl/3cupofveryhotwater
mixed with dish detergent to assure the drain is opened and clear.
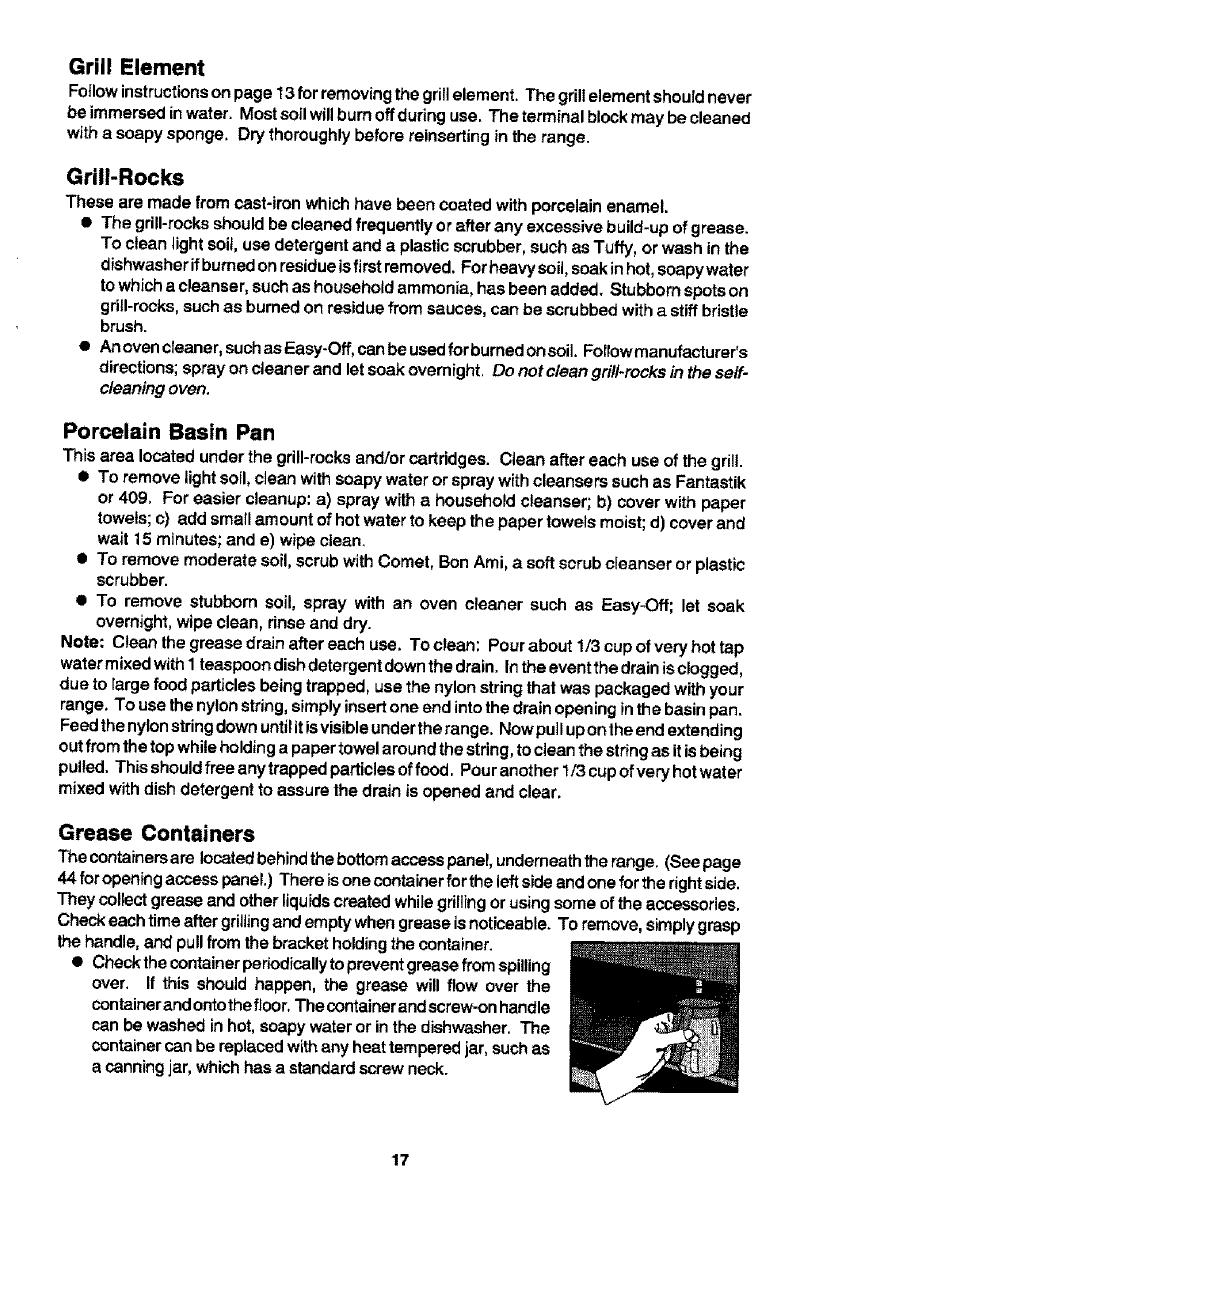
Grease Containers
The conta_ers are locatedbehind the bottom access panel, underneath the range. (See page
44 foropeningaccesspanel.) There isone containerfor the leftsideand one forthe rightside.
They collectgrease and otherliquids created while grillingor usingsome ofthe accessories.
Checkeach time after gdJlingand empty when greaseisnoticeable. To remove, simplygrasp
the handle,and pullfromthe bracketholdingthe container.
Checkthe container periodicaUytopreventgreasefrom spilling
over. If this should happen, the grease will flow over the
containerand ontothefloor,The containerandscrew-onhandle
can be washed in hot,soapy water or inthe dishwasher, The
containercan be replacedwith any heat tempered jar, suchas
a canningjar, whichhas astandard screwneck.
17
The control panel is designed for ease in programming, The Display Window features
Indicator Words which will flash to prompt you for the next step.
To program
1. Touch the function pad to give command desired.
2, Touch the appropriate number pads to enter time or temperature.
Note: Four to fifteen seconds after entering the number, the time or temperature
will automatically be entered. If more than fifteen seconds elapse between touching
a function pad and touching a number pad, the contro! is not set and Display will
return to previous Display. =_=_.aF-NN-A_
Oven Con_o_
Function Pads
IGtcben 11mor
Use for conventional baking or roasting.
Use for top browning or oven broiling.
Use to set self-cleaning process,
Uee for convect roaeting, (Model SVE47600 only)
Use for convect baking. (Model SVE47600 only)
Use for dock controlled cooking and cleaning when delayed start is desired.
(For lock function see page 43,)
Use for clock controtled cooking.
(For lock function see page 43.)
Cancels all programming except Timer.
Use to turn the Ventilation System on or off. (See p. 9,)
Use to signal expiration ofa time period up to 11 hours and 55 minutes.
Use to signal expiration of a time period up to 11 hours and 55 minutes,
Use to set time of day.
Use to turn oven light on and off,
18
Number Pads
Use to set time or temperature.
Oven Light Pad (Control Panel)
The oven lightautomatically comes on whenever the oven door is opened. When door
is closed, touch the Oven Light Pad to turn oven light on or off.
Display Window
Shows time of day, timer, and oven functions.
I DELAYSTARTCOOSTIMED
STOP TIMER _][] OVEN A
Display Numbers:
Show time of day.
Countdown of time remaining when using time functions.
Show temperature of oven as it rises to reach programmed temperature and the
set temperature once it is reached.
•Recatl programmed temperature or time when commanded.
Rounding of Display Numbers: Temperature range is 100° to550°F and can be set
in 5° increments. When setting temperature, the control will round itto the nearest
10°. For example, if237° is entered, the control will roundthe temperature to 240 °.
Prompts:
Serve as a reminder to shut oven door, if itis open, for self-cleaning operation when
the word, door, is displayed.
"Err" will appear in the Display when an improper temperature or time has been
entered. "Err" willflash and a beep will be heard three times. Then, the Display will
return to the previous Display before the error was entered.
Indicator Words:
Flash to prompt next step.
Indicate status of programmed function.
Show programmed function when recalled.
Chimes vs. Beeps
A chime sound is used to designate the end of a timing or cooking operation.
A beep sound is used to designate an incorrect entry, door is open when set for a
self-clean, and a fault code,
!
NOTE: To change the oven to a 24 hour clock or Celsius (C) degrees, contact your I
authorized Jenn-Air service contractor or installer.
1
19
To set oven on Bake or Convect Bake or Convect Roast
1. Place oven racks on proper rack positions° (See p. 21.)
2, Touch Bake Pad or Conveet Bake Pad or Convset Roast Pad,
Indicator Words BAKE or CONV BAKE or CONV ROAST wi|l flash and three
dashes will be shown.
Note: If more than fifteen seconds elapse between touching a pad and touching a
number pad, Display will return to previous Display.
3. Touch the appropriate number pads for desired oven temperature,
Allowable temperature range is 100°to 550°F. After four seconds the oven wilt begin
to preheat. The Indicator Words ON, PREHEAT, and either BAKE or CONV BAKE
or CONV ROAST will appear in the Display. The temperature shown will be 100_
or the oven temperature whichever is higher.
Example: If at 10 o'clock you set the oven for 3500 for convect baking, after four
seconds the Display wilt show:
j o;oo
During the preheat, the Display will show a rise in 5° increments until programmed
temperature is reached. When the oven is preheated, the oven will chime, the ON
and PREHEAT Indicator Words will go off, and programmed overt temperature will
be displayed,
Note: Oven will preheat for approximately 7 to 11 minutes.
Important: Whenever ON appears in the D_splay, the oven is heating.
temperature set during preheat: Touch the appropriate Bake or
Convect Bake Pad or Convect Roast Pad, Temperature will be briefly displayed,
then will automatically return to on-going program.
_temperature set: Touch appropriate Bake Pad or Convect Bake Pad
or Convect Roast Pad and the appropriate number pads for the new desired
temperature.
Note: Ifyou are _owedng the temperature below the current oven temperature, the
word PREHEAT and ON willappear briefly in the Display and the preheat chime will
sound. Then, the Display will show programmed temperature and indicator word
BAKE or CONV BAKE or CONV ROAST only.
4. Touch Cancel Off Pad to turn oven off at end of baking. The oven wilt continue
operating until the Cancel Off Pad is touched,
20
  • Page 1 1
  • Page 2 2
  • Page 3 3
  • Page 4 4
  • Page 5 5
  • Page 6 6
  • Page 7 7
  • Page 8 8
  • Page 9 9
  • Page 10 10
  • Page 11 11
  • Page 12 12
  • Page 13 13
  • Page 14 14
  • Page 15 15
  • Page 16 16
  • Page 17 17
  • Page 18 18
  • Page 19 19
  • Page 20 20
  • Page 21 21
  • Page 22 22
  • Page 23 23
  • Page 24 24
  • Page 25 25
  • Page 26 26
  • Page 27 27
  • Page 28 28
  • Page 29 29
  • Page 30 30
  • Page 31 31
  • Page 32 32
  • Page 33 33
  • Page 34 34
  • Page 35 35
  • Page 36 36
  • Page 37 37
  • Page 38 38
  • Page 39 39
  • Page 40 40
  • Page 41 41
  • Page 42 42
  • Page 43 43
  • Page 44 44
  • Page 45 45
  • Page 46 46
  • Page 47 47
  • Page 48 48
  • Page 49 49
  • Page 50 50
  • Page 51 51

Jenn-Air SVE47500W Owner's manual

Category
Kitchen & houseware accessories
Type
Owner's manual
This manual is also suitable for

Ask a question and I''ll find the answer in the document

Finding information in a document is now easier with AI