Page is loading ...

Installation and
Configuration Guide
SMART Board™ 600i Series
Interactive Whiteboard System

FCC Warning
This equipment has been tested and found to comply with the limits for a Class A digital device, pursuant to Part 15 of the FCC
Rules. These limits are designed to provide reasonable protection against harmful interference when the equipment is operated
in a commercial environment. This equipment generates, uses and can radiate radio frequency energy and, if not installed and
used in accordance with the manufacturer’s instructions., may cause harmful interference to radio communications. Operation of
this equipment in a residential area is likely to cause harmful interference in which case the user will be required to correct the
interference at his own expense.
Trademark Notice
SMART Board, smarttech, Notebook, Unifi and the SMART logo are trademarks or registered trademarks of SMART Technologies ULC
in the U.S. and/or other countries. Microsoft and Windows are either trademarks or registered trademarks of Microsoft Corporation in
the U.S. and/or other countries. DLP and DMD are registered trademarks of Texas Instruments. Vikuiti is a trademark of 3M company.
All other third-party product and company names may be the trademarks of their respective owners.
Copyright Notice
© 2006–2007 SMART Technologies ULC. All rights reserved. No part of this publication may be reproduced, transmitted, transcribed,
stored in a retrieval system or translated into any language in any form by any means without the prior written consent of
SMART Technologies ULC. Information in this manual is subject to change without notice and does not represent a commitment on
the part of SMART.
Patent No. US5448263; US6141000; US6326954; US6337681; US6741267; US6747636; US7151533; and CA2058219. Other patents
pending.
11/2007
Product Registration
If you register your SMART product, we’ll notify you of new features and
software upgrades.
Register online at
www.smarttech.com/registration.
Keep the following information available, in case you need to contact
Technical Support:
Serial Number ____________________________________________
Date of Purchase _________________________________________

99-00737-25 Rev A0 Important Information i
Important Information
NOTE: If you own a SMART product other than a SMART Board™ 600i series interactive
whiteboard system, refer to the installation manual that came with your product for relevant
warnings and maintenance instructions.
Before you install and use the 600i SMART Board interactive whiteboard system, please read
and understand the safety warnings and precautions in this guide. These safety warnings and
precautions describe the safe and correct operation of the 600i interactive whiteboard system
and its accessories, helping you prevent injuries and equipment damage. You must always
ensure that the system is being used correctly.
In this document, “600i series interactive whiteboard system” refers to the interactive
whiteboard and its Unifi™ 35 projector, accessories and options. Please also read the safety
warnings and precautions that came with the peripheral products, such as the computer.
The Unifi 35 projector included with your new 600i interactive whiteboard system is designed
to work only with SMART Board Model 660 or 680 interactive whiteboards.
Safety Warnings
WARNING
Do not stare into the beam of light created by the projector. Instruct children not
to look in the direction of, or stare at, this beam of light.
WARNING
Failure to follow the installation instructions included with the 600i series
interactive whiteboard system (and found in this guide) could result in personal
injury or damage to the product.
WARNING
To reduce the risk of fire or electric shock, do not expose any component of the
600i series interactive whiteboard system to rain or moisture.
WARNING
Two people are required to mount the projector or the interactive whiteboard on
a wall because they may be too heavy for one person to maneuver onto their
wall-mounting brackets.
WARNING
Do not climb (or allow children to climb) on any
part of the wall-mounted SMART Board 600i
series interactive whiteboard system.
Do not climb on, hang from, or suspend objects
from the Unifi 35 projector’s arm.
Climbing on the interactive whiteboard or projector
arm could result in personal injury or product
damage.

ii Important Information 99-00737-25 Rev A0
Other Precautions
To ensure operating safety and to avoid product damage, observe the following precautions.
• Do not set up or use the interactive whiteboard in an area with excessive levels of dust,
humidity and smoke.
• Do not leave cables on the floor. If you must run a cable over the floor, lay the cable in a
flat, straight line, and secure it to the floor with tape or a cable management strip in a
contrasting color. Handle cables carefully and don’t bend them excessively.
• Do not add extra weight or apply pressure to the Unifi 35 projector arm, the wall-mounted
interactive whiteboard or its pen tray. SMART designed the brackets to support only the
weight of the components during normal use.
• To reduce the risk associated with leaking batteries:
– use only AA type batteries
– do not mix used and new batteries
– orient the battery’s plus (+) and minus (-) terminals according to the markings found on
the remote control
– do not leave the batteries in the remote control for an extended period
– do not heat, disassemble, short or recharge the batteries, or expose them to fire or
high temperature
– avoid eye and skin contact if batteries have leaked
– dispose of exhausted batteries and product components in accordance with applicable
regulations
• If the interactive whiteboard system requires replacement parts, make sure the service
technician uses replacement parts specified by SMART Technologies, or parts with the
same characteristics as the original.
Transporting the 600i Interactive Whiteboard System
If you need to ship any part of your interactive whiteboard system, repack it with the original
packaging. If the original packaging is no longer available, you may purchase replacement
packaging from SMART Technical Support (see page 73 for contact information).
If you prefer to use your own packaging materials, make sure you adequately protect the unit.
Ship the interactive whiteboard in an upright position to deter shippers from placing heavy
objects on it.
If you ship your interactive whiteboard frequently, consider purchasing a more durable, hard
shipping case from SMART Technologies. With its foam-lined interior, aluminum edges and
valances, and steel-reinforced corners, this shipping case protects your SMART Board
interactive whiteboard. The case has dual tilt wheels for ease of transport. To purchase these
items, contact the SMART reseller from whom you purchased your 600i interactive whiteboard
system.
WARNING
Do not attempt to service the projector other than performing routine lamp
replacement. Service should only be performed by an authorized service
provider. Aside from the lamp module, there are no user serviceable parts
inside the unit.
Do not remove any screws other than those specified in the lamp replacement
instructions.

99-00737-25 Rev A0 Table of Contents iii
Table of Contents
Important Information i
Safety Warnings .................................................................................................................... i
Other Precautions ..................................................................................................................... ii
Transporting the 600i Interactive Whiteboard System .............................................................. ii
About 600i Interactive Whiteboard Systems 1
600i Interactive Whiteboard System Features .......................................................................... 1
Standard Accessories ............................................................................................................... 3
Optional Accessories ................................................................................................................4
Installing 600i Series Interactive Whiteboard Systems 5
Environmental Requirements.................................................................................................... 6
Before Installing Your 600i Interactive Whiteboard System ......................................................7
Installing the 600i Interactive Whiteboard System .................................................................... 8
Adjusting Keystone Alignment Errors...................................................................................... 20
Securing the Pen Tray and Interactive Whiteboard ................................................................ 24
Upgrading a 600 Series Interactive Whiteboard to a 600i System.......................................... 25
Preparing for the Upgrade.......................................................................................................26
Updating 600i System Firmware .............................................................................................30
Connecting the 600i System to a Computer 33
Operating Safety and Precautions .......................................................................................... 33
Connecting with a USB Cable................................................................................................. 34
Connecting With a Serial (RS-232) Cable...............................................................................36
Connecting a Guest Laptop ....................................................................................................39
Orienting the SMART Board 600i Series Interactive Whiteboard ...........................................40
Configuring the Room Control Feature ...................................................................................42
Command Summary ............................................................................................................... 43
Finding More Information ........................................................................................................44
Using a 600i Series Interactive Whiteboard System 45
The 600i System’s Indicators and Controls.............................................................................46
Working with Your 600i Series Interactive Whiteboard System .............................................. 50
Using a Stand-Alone 600i Series Interactive Whiteboard System .......................................... 50
Using a 600i Series Interactive Whiteboard System with a Video Source .............................. 52
Using a 600i Series Interactive Whiteboard System with a Computer....................................53
Configuring the 600i System Input Options 55
Unifi 35 Projector Configuration .............................................................................................. 55
Customizing the Input Configuration .......................................................................................56
Maintaining 600i Interactive Whiteboard Systems 57
Tips for Trouble-Free Performance ......................................................................................... 57
The Pen Tray .......................................................................................................................... 59
Servicing the Pen Tray............................................................................................................ 59
Maintaining the Unifi Projector ................................................................................................61
Replacing the Projector Lamp................................................................................................. 62

iv Table of Contents 99-00737-25 Rev A0
Troubleshooting 600i Interactive Whiteboard Systems 65
Resetting the 600i Interactive Whiteboard System .................................................................65
General 600i System Troubleshooting.................................................................................... 67
Troubleshooting the Unifi Projector.........................................................................................68
Isolating the Interactive Whiteboard from the Unifi Projector .................................................. 70
Regulatory Compliance 71
Waste Electrical and Electronic Equipment Regulations ........................................................ 71
Restriction of Certain Hazardous Substances (RoHS) Directives...........................................71
Contacting SMART Technologies 73
Online Support ........................................................................................................................ 73
Training ...................................................................................................................................73
Contacting SMART Technical Support.................................................................................... 73
General Inquiries.....................................................................................................................73
Registration ............................................................................................................................. 73
Index 75

99-00737-25 Rev A0 About 600i Interactive Whiteboard Systems 1
About 600i Interactive Whiteboard Systems
In this Chapter
The SMART Board™ 600i interactive whiteboard systems combine the SMART Unifi 35 wall-
mounted short-throw projector with the 660 and 680 model interactive whiteboards. These
topics describe the features of the 600i system components and some of the accessories and
options you can use with your 600i.
• 600i Interactive Whiteboard System Features (this page)
– Interactive Whiteboard Features (page 2)
– Unifi 35 Projector System Features (page 2)
– Unifi Software Features (page 3)
• Standard Accessories (page 3)
– Standard SMART USB Cable (page 3)
– Extended Connection Panel and Cable (page 3)
– Remote Control (page 3)
– Computer Connection Cables (page 3)
– SMART Board 600 Series Pens (page 4)
– SMART Board 600 Series Eraser (page 4)
• Optional Accessories (page 4)
– Active USB Extension Cables (page 4)
– Cat 5 to USB Extender (page 4)
– GoWire™ SMART Board Software Auto-Launch USB Cable (page 4)
600i Interactive Whiteboard System Features
The SMART Board 600i interactive
whiteboard systems use the Unifi 35 short-
throw, high-offset projector. This projector
supports video, audio and data connections
from a variety of devices, including DVD
players, VCRs, digital cameras and TV
tuners. When the Unifi 35 projects an image
from one of these sources onto the touch-
sensitive interactive whiteboard, you can
draw over the image in digital ink using a
pen tray pen or your finger, and then save
the image to a USB storage device, without
using a computer.
When you use the system with a computer,
you can do everything you can do at a
computer workstation—open files,
conference with others, work on
documents, visit websites, play video clips
and more—simply by touching the screen.
You can also write over any application in digital ink using a pen tray pen or your finger, and
then save these notes to a Notebook™ file for future reference and distribution.

2 About 600i Interactive Whiteboard Systems 99-00737-25 Rev A0
Interactive Whiteboard Features
The 600i system interactive whiteboards include many features of other SMART Board
interactive whiteboards, such as analog resistive touch screens and pen trays. Although the
basic operation is the same, SMART has made many improvements to make the 600i system
look more up-to-date and easier to use, service and install. The two available models, the 660
and 680, are 64" and 77" respectively, measured diagonally.
Other features of the interactive whiteboard systems include:
• a SMART Pen Tray that automatically detects when you’ve selected a pen tray pen or the
eraser.
• pen tray buttons that activate Help functions, and, when used with a computer, activate the
on-screen keyboard and right-click functions.
• a durable hard-coated polyester surface that is tear proof, optimized for projection,
compatible with dry-erase markers and easily cleaned with whiteboard cleaner.
• a standard USB interface to connect the SMART Board interactive whiteboard to the Unifi
35 projector.
• a security device to prevent theft of the pen tray or the interactive whiteboard.
Unifi 35 Projector System Features
The Unifi 35 projector system includes:
• a wall-mounted, high-offset projector that uses Vikuiti™ Super Close Projection
technology from 3M.
• an integrated 2 × 20 W stereo sound system, with two speakers in the base of the
projector assembly.
• VGA/SVGA/XGA/SXGA/MAC (UXGA) computer compatibility.
• native XGA resolution of 1024 × 768
• NTSC, PAL, SECAM, composite, S-video, component (YPbPr / YCbCr), SDTV (480i,
576i), EDTV (480p, 576p) and HDTV (720p and 1080i) video compatibility.
• serial RS-232 interface for connecting a second computer or a room control system.
• 16.7 million colors (24-bit) display.
• automatic image synchronization (auto-tracking/frequency/position adjustment/phase
detection).
• automatic saving of user settings.
• self-protection timer for hot re-strike of compact P-VIP lamp.
• a control panel expansion module located in the interactive whiteboard’s pen tray,
including a connection cable.
• an accessible extended connection panel, including:
– USB, VGA, S-video, composite video, RCA and 3.5 mm stereo audio inputs.
– a USB storage device adapter.
• a secure mounting and installation system that includes:
– a template that positions both the interactive whiteboard and the projector.
– mounting hardware for framed wall, with metal or wood studs, and concrete wall
installations.
– a security device to prevent projector theft or fall.
• cable routing behind the interactive whiteboard, including a cable cover to hide the cables
in the space between the projector and top of the interactive whiteboard.

99-00737-25 Rev A0 About 600i Interactive Whiteboard Systems 3
Unifi Software Features
The projector’s firmware has additional features that you can use when the 600i is operating in
Stand-alone mode, with a video source or with an attached computer. These features include:
• interactive whiteboard capability with a simplified interface.
• on-screen menu with five languages (English, French, German, Spanish and Italian).
• drawing over projected images from all video sources, including RGB, S-video and
composite. You can capture the video images with your notes or drawings as ScratchPad
pages, and save them to a USB storage device as PDF, JPEG or Notebook files.
• a built-in online Help menu
• a 9-point orientation tool for aligning the touch screen with the projected image
When you use the 600i with a computer, you can also use all of the features of SMART Board
software.
Standard Accessories
SMART provides the following accessories with each 600i interactive whiteboard system. If
you need to purchase replacements, contact your authorized SMART reseller.
Standard SMART USB Cable
Your 600i interactive whiteboard comes with a 16' (5 m)
USB cable. Use this cable to connect the SMART Board 660
or 680 interactive whiteboard to the Unifi projector’s USB
receptacle.
Extended Connection Panel and Cable
The extended connection panel cables provides convenient
access to the audio, video and USB inputs to your 600i
system. The extended connection panel includes VGA-HD,
S-video and composite video inputs, 3.5 mm stereo and
RCA audio jacks, a USB-B receptacle to connect your
computer and a USB-A receptacle to connect a USB
storage device.
Remote Control
The remote control that accompanies the 600i provides an
alternate way to control the system and set up your Unifi
projector. All of the functions of the remote control are
duplicated in the Unifi projector’s on-screen menus.
Computer Connection Cables
SMART provides a set of computer connection cables with
your 600i system. The set includes a 6' (1.8 m) VGA-HD
cable, a 6' (1.8 m) 3.5 mm stereo phone cable, and a
6' (1.8 m) USB cable.

4 About 600i Interactive Whiteboard Systems 99-00737-25 Rev A0
SMART Board 600 Series Pens
The pens have a rubberized grip area, colored to match the
four colors of electronic ink: black, green, red and blue.
You can use dry-erase markers instead of the supplied
pens, as long as they are a similar shape, do not scratch or
mark the surface of the interactive whiteboard and are
reflective to infrared light. If the pens you provide don’t reflect infrared light, the pen tray sensor
might not detect the presence of the pen. EXPO® markers make excellent substitutes.
Pens from earlier interactive whiteboards weren’t designed to reflect infrared light, so the
sensors may not detect them reliably. You can wrap light colored tape around the pen to
improve the reflection of infrared light, helping with tool detection.
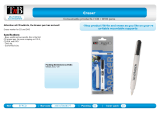
SMART Board 600 Series Eraser
The eraser resembles a rectangular chalkboard eraser. You
can use a substitute eraser, provided it has a similar shape,
does not scratch or mark the surface of the interactive
whiteboard and reflects infrared light.
Optional Accessories
You can purchase these optional accessories when you order your interactive whiteboard, or
you can purchase them later from your authorized SMART reseller.
Active USB Extension Cables
You can connect up to three 16' (5 m) USB active extension
cables (Part No. USB-XT) to extend the USB connection to
a maximum of 64' (20 m). See page 35 for more information.
Cat 5 to USB Extender
You can use the SMART Cat 5 to USB extender (Part No.
CAT5-XT) shown to extend the USB connection up to 120'
(36.6 m) using RJ45 Cat 5 cable (purchased separately).
The extender includes two 6' (1.8 m) USB cables to connect
your computer and the Unifi projector to the extender units.
Don’t connect the Cat 5 to USB extender to the extended
connection panel (ECP). For more information, see
page 35.
GoWire™ SMART Board Software Auto-Launch
USB Cable
The GoWire cable contains SMART Board software and
launches it automatically, providing full access to all
software tools without installing SMART Board software on
your computer.

99-00737-25 Rev A0 Installing 600i Series Interactive Whiteboard Systems 5
Installing 600i Series Interactive Whiteboard Systems
In this Chapter
Before installing your 600i interactive whiteboard system, review the topics below. In addition
to installation instructions, this chapter contains environmental and safety information.
• Environmental Requirements (page 6)
– Temperature (page 6)
– Humidity (page 6)
– Water and Fluid Resistance (page 6)
– Dust and Scratching (page 6)
– Electrostatic Discharge (ESD) (page 6)
– Conducted and Radiated Emissions (page 6)
• Before Installing Your 600i Interactive Whiteboard System (page 7)
– Recommended Heights for Mounting (page 7)
– Tools required (page 7)
– Preparing the Installation Template (page 8)
• Installing the 600i Interactive Whiteboard System (page 8)
To mount the SMART Board 600i projector bracket on a framed wall
To mount the SMART Board 600i projector bracket on a concrete wall
To mount the projector on the bracket
To connect the extended connection panel and cables
To prepare for mounting the interactive whiteboard
To mount the interactive whiteboard and align the image
To install the control module
To install the pen tray
To install the wire cover
To complete the installation
• Adjusting Keystone Alignment Errors (page 20)
– About Correcting Keystone Errors (page 20)
– Aligning the Interactive Whiteboard (page 20)
To prepare to align the interactive whiteboard
To adjust the projected image if it is wider at the bottom
To adjust the projected image if it is wider at the top
– Aligning the Unifi 35 Projector Boom (page 22)
To adjust the Unifi 35 projector boom alignment
• Securing the Pen Tray and Interactive Whiteboard (page 24)
To lock the pen tray to the interactive whiteboard
To secure the pen tray to the pen tray brackets
• Upgrading a 600 Series Interactive Whiteboard to a 600i System (page 25)
– Upgrade Checklist (page 25)

6 Installing 600i Series Interactive Whiteboard Systems 99-00737-25 Rev A0
• Preparing for the Upgrade (page 26)
To remove the existing interactive whiteboard (page 26)
To position the projector above the interactive whiteboard — framed wall
To position the projector above the interactive whiteboard — concrete wall
• Updating 600i System Firmware (page 30)
– Updating the Unifi Projector Firmware (page 30)
– Updating the Interactive Whiteboard’s SC9 Firmware (page 30)
To update the SC9 firmware
Environmental Requirements
Before installing your SMART Board 600i series interactive whiteboard system, review the
following environmental requirements.
Temperature
SMART Board 600i series interactive whiteboard systems can operate in a temperature range
of 50°F to 95°F (10°C to 35°C). The product can withstand storage temperatures from -22°F to
120°F (-30°C to 50°C) with 90% humidity, non-condensing.
Humidity
SMART Board 600i series interactive whiteboard systems can operate between 5% and 80%
(20–80% humidity, non-condensing) relative humidity non-condensing. Humidity above 80%
might cause slight wrinkling in the sheet. The wrinkles disappear once the humidity lowers.
Water and Fluid Resistance
SMART Board 600i series interactive whiteboard systems are for indoor use only and do not
meet any salt-spray or water ingress requirements. Do not pour or spray any liquids directly
onto the interactive whiteboard, the Unifi projector or any of its sub-components. These liquids
might get into areas where they could damage sensitive electronic components. Refer to (page
58) for detailed instructions on cleaning your system’s components.
Dust and Scratching
SMART Board 600i series interactive whiteboard systems are for use in office and classroom
environments and are not for industrial use, where heavy dust and pollutants can cause
malfunctions or impaired operation. The design is for pollution degree 1 (P1) as per
EN61558-1, which is defined as “No pollution or only dry non-conductive pollution.”
Electrostatic Discharge (ESD)
SMART Board 600i series interactive whiteboard systems meet the requirements of EN61000-
4-2 severity level 4 for direct and indirect ESD. No malfunction or damage up to 15kV (both
polarities) with a 330 ohm, 150 pF probe (air discharge). Un-mated connectors meet 8kV for
direct (contact) discharge.
Conducted and Radiated Emissions
The narrowband radiated electric field from SMART Board 600i series interactive whiteboard
systems meets the limits for Class B performance as defined in EN55022/CISPR 22.

99-00737-25 Rev A0 Installing 600i Series Interactive Whiteboard Systems 7
Before Installing Your 600i Interactive Whiteboard System
Choose a location for your SMART Board 600i interactive whiteboard system that’s far from a
bright light source, such as windows or overhead lighting. Bright light sources can cause
distracting shadows on the interactive whiteboard and reduce the contrast of the projected
image.
Recommended Heights for Mounting
SMART includes a mounting template with each of its 600i interactive whiteboard systems.
Using this template ensures that you:
• mount the Unifi projector at a safe height, while maintaining enough space for airflow
above the unit.
• position the projector at the correct height above the interactive whiteboard to make sure
that the projected image aligns with the touch screen.
Dimensions on the template recommend a distance from the floor that is suitable for adults of
average height. Although you should consider the general height of your user community when
you choose a position for your 600i interactive whiteboard, consult your local regulations
before mounting the unit lower.
Tools required
• Phillips® No. 1 and No. 2 screwdrivers
• a ruler or tape measure
• a carpenter’s level
• a pencil or other marking device
• an electric drill with a variety of drill bits, including:
– 1/8" (3 mm) drill bit for pilot holes
– 5/16" (8 mm) drill bit for wooden stud drywall mounting
– 7/16" (11 mm) drill bits for metal stud and concrete wall mounting
• a stud finder, if mounting on a framed wall
IMPORTANT
You must follow the instructions in this guide carefully to safely install the 600i
interactive whiteboard system. Failure to follow these instructions may result in
product damage and personal injury.
CAUTION
If you need to lean the interactive whiteboard against a wall before you mount
it, make sure it remains in an upright position, resting on the pen tray brackets,
which can sustain the weight of the interactive whiteboard.
Do not rest the interactive whiteboard on its side or on the top of the frame.

8 Installing 600i Series Interactive Whiteboard Systems 99-00737-25 Rev A0
Preparing the Installation Template
You must position and install the Unifi projector before you mount and adjust the position of the
interactive whiteboard. SMART provides the installation template to help you mount the
projector and the interactive whiteboard correctly.
Before starting the installation, cut the extended
connection panel part from the included installation
template and reserve it for a later step. If you are
installing the projector close to the ceiling, cut along the
template’s top line.
The first procedure in the following section illustrates
the mounting of the 600i interactive whiteboard system
onto a framed wall surfaced with gypsum or drywall. If
you are mounting your 600i system on a concrete wall,
go to the To mount the SMART Board 600i projector
bracket on a concrete wall procedure page 10.
Installing the 600i Interactive Whiteboard System
NOTE: To mount the Unifi projector safely on a framed wall, you must attach the mounting
plate to a stud. If the wall doesn’t have a stud in a suitable location, you can secure a sheet of
1/2 " (13 mm) or thicker plywood to the wall, and then mount the projector on it.
1. Locate a stud near the center of the area where
you want to mount the 600i interactive whiteboard
system using a stud finder.
2. Draw a vertical line on the wall marking the
centerline of the stud using a pencil and a
carpenter’s level.
WARNING
Two people are required to safely mount the 600i interactive whiteboard system
on a wall.
To mount the SMART Board 600i projector bracket on a framed wall

99-00737-25 Rev A0 Installing 600i Series Interactive Whiteboard Systems 9
3. Position the installation template on the wall with
the three indicated holes centered on the stud.
4. Slide the template up or down the wall until it is at
the desired height as recommended by the line at
the bottom of the template using a measuring tape
or ruler. Use a carpenter’s level to ensure that the
template is level.
NOTE: Be sure to position the projector bracket at
least 5" (12.7 cm) from the ceiling to provide
adequate airflow around the projector.
5. Pin or tape the template to the wall.
6. Locate the row of marks on the template that
identify the location of the bracket mounting holes
for your model of interactive whiteboard. Mark the
wall at each anchor location using a pencil.
IMPORTANT
When mounting the projector on a framed wall, you must attach the
mounting bracket to a stud to safely support the projector’s weight. If you
use drywall anchors only, the anchors or the drywall can fail, resulting in
product damage and possible personal injury.
Center
Holes on
Stud

10 Installing 600i Series Interactive Whiteboard Systems 99-00737-25 Rev A0
7. Mark the six holes for the projector mounting plate
anchors and the security cable anchor, and then
remove the template from the wall.
8. For a wooden stud wall, drill a 1/8" (3 mm) pilot
hole at the center three marks, and then screw in
one of the included pan-head wood screws with a
washer into each of the top two holes in the center
column, leaving the heads about 1/4" (6 mm) from
the wall surface. Don’t screw in the security cable
screw at this time.
For a metal stud wall, drill 7/16" (11 mm) holes
through the drywall and the stud at each of the two
center marks and the security cable mark.
Drill 5/16" (8 mm) holes at the remaining three marks.
9. Insert the included drywall anchors into all of the
drilled holes, and screw them in until they are flush
with the drywall surface. Do not use a hammer to
insert the anchors.
10. Screw the anchor bolts with washers into the
bracket anchors, leaving the heads about 1/4"
(6 mm) from the wall surface. Don’t screw in the
bolt for the security cable at this time.
11. Hang the projector bracket on the five screws and
anchor bolts, use a carpenter’s level to ensure that
the bracket is level, and then tighten the screws
and bolts securely.
1. Draw a vertical line on the wall about 2" (5 cm) to
the right of the center of the interactive
whiteboard’s planned position using a pencil and a
carpenter’s level.
To mount the SMART Board 600i projector bracket on a concrete wall
Wood
Screws
Drywall Anchor
and Bolt
Center of
lnteractive
Whiteboard

99-00737-25 Rev A0 Installing 600i Series Interactive Whiteboard Systems 11
2. Position the installation template on the wall with
the three indicated holes centered on the line.
3. Slide the template up or down the wall until it is at
the desired height as recommended by the line at
the bottom of the template using a measuring tape
or ruler. Use a carpenter’s level to ensure that the
template is level.
NOTE: Position the projector bracket at least 5"
(12.7 cm) from the ceiling in order to ensure
adequate airflow around the projector.
4. Locate the row of marks on the template that
identify the location of the bracket mounting holes
for your model of interactive whiteboard. Use a
pencil to mark the wall at each anchor location.
5. Mark the six holes for the projector mounting plate
anchors and the security cable anchor, and then
remove the template from the wall.
6. At each of the marks (including the security cable
mark) drill 5/16" (8 mm) holes into the concrete
wall.
7. Insert the included concrete anchors into all of the
drilled holes, pushing them in until the sleeve is
flush with the wall surface. Tighten the nuts to
secure the anchor in the wall, and then remove the
nuts.
Center
Holes on
Line
Concrete
Anchor Bolt

12 Installing 600i Series Interactive Whiteboard Systems 99-00737-25 Rev A0
8. Place a washer on each bolt, and then replace the
nuts, leaving them about 1/4" (6 mm) from the wall
surface. Don’t screw in the bolt for the security
cable at this time.
9. Hang the projector bracket on the five anchor bolts,
use a carpenter’s level to ensure that the bracket is
level, and then tighten the nuts securely.
1. Remove the two screws from the lower corners of
the projector base using a Phillips No. 1
screwdriver, and then remove the connection panel
cover.
2. Mount the Unifi projector on the projector bracket,
ensuring that both hooks are fully engaged.
3. Tighten the locking screw through the access hole
located on the right side of the projector base using
a Phillips No. 2 screwdriver.
To mount the projector on the bracket
WARNING
Make sure that both mounting hooks are fully engaged before releasing the
projector. Failure to do so can result in product damage and personal
injury.
WARNING
The locking screw contributes to the structural integrity of the projector’s
mounting system. You must use it. It prevents the removal of the projector
from the mounting bracket. Make sure that the locking screw is fully
inserted and tightened. Failure to do so can result in image alignment
problems, product damage, personal injury or theft.
Cover Screw
Cover Screw
Projector Base
Mounting Hooks
Locking Screw
Access Hole

99-00737-25 Rev A0 Installing 600i Series Interactive Whiteboard Systems 13
4. Attach the security cable to the wall using the
included large washer and the remaining screw (for
a wooden stud) or anchor bolt (for a metal stud or
concrete wall).
1. Plug all the extended connection panel (ECP) cable connectors into their receptacles on
the projector base’s connection panel, as shown. Don’t mount the ECP at this time.
2. Connect the Type A connector of the 16' (5 m) USB cable (included with the interactive
whiteboard) to the unused Type A USB receptacle on the projector’s connection panel.
3. Connect the power cable to the power connector on the connection panel, and then turn
on the master power switch. Don’t connect the cable to a power source at this time.
WARNING
Make sure that the security cable is securely attached to the wall. If
excessive force placed on the boom causes the projector to break away
from the wall, the cable prevents the projector from falling and causing
injury.
To connect the extended connection panel and cables
IMPORTANT
Do not use the shorter 6' (1.8 m) USB cable included with your projector to
connect the projector to the interactive whiteboard. Reserve this cable to
connect the projector’s extended connection panel to your computer.
Security Cable
To ECP
2 × RCA
Audio
Jacks
To ECP
Mini
Stereo
Jack
To ECP
Reset
Button
To ECP
RCA
Video
Jack
To ECP
S-video
Connector
USB Cable
to USB B
SC9
Module
Connector
To ECP
USB B
Computer
Connector
Power
Cable to
Outlet
To ECP
USB A
Storage
Device
Connector
To ECP
HD-DB15
Video
Connector

14 Installing 600i Series Interactive Whiteboard Systems 99-00737-25 Rev A0
1. NOTE: If you’re upgrading an existing 600 series
interactive whiteboard to a 600i system, go to step
3 below (see page 25).
For a framed wall, screw in one of the included self-
tapping wall anchors at each mark. Do not use a
hammer to tap these anchors into the wall.
For a concrete wall, drill holes at the marks, and
insert concrete anchors (not included) into the
holes.
2. Attach the wall mount bracket using the screws
included with the anchors.
3. Temporarily hang the interactive whiteboard on the
wall mount bracket.
1. Plug the projector’s power cable into a wall outlet,
and then use the remote control to turn on the
projector.
2. Unlatch the projector boom clamp closest to the
base, extend the first section completely, and then
latch the clamp.
3. To adjust the image size, unlatch the other clamp
and extend or contract the last section of the
boom.
4. Adjust the projector focus using the knob on the
side of the projector head before latching the boom
clamp, as focusing the image changes the size
slightly.
5. Slide the interactive whiteboard sideways on its
bracket to align it with the projected image.
To prepare for mounting the interactive whiteboard
To mount the interactive whiteboard and align the image
IMPORTANT
Leave a 3/8" (1.0 cm) margin between the projected image and each outer
edge of the screen’s surface. Don’t extend the image to the edge of the
screen’s surface.
4
Boom Clamps Focus Knob
/