Page is loading ...

Contact
(ver.1.3 2017/6)
[Applicable Wheel Size]
650c – 700c, 26 – 29 inch
[Applicable Wheebase Size]
950 – 1,200mm
Caution
• This trainer is designed for use only on stable or indoor surfaces. The trainer is not
designed to be used in muddy or off road conditions. Getting dirt in the resistance unit
may cause damage. Using muddy or dirty tires will cause premature wear on the rollers.
• Using 24" or smaller wheels may put undue stress on the unit and will alter the angle of
the bicycle signicantly.
• When setting up the FG540 pedal slowly at rst to make sure the rear wheel stays on
the roller and is positioned properly.
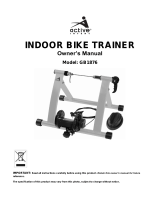
Indoor Bike Trainer
(Shown with 700c road bike)
MINOURA North American Tech Center MINOURA Japan Headquraters
(for U.S. residents ONLY)
(for ALL customers)
Hayward, California, U.S.A. 1197-1 Godo, Anpachi, Gifu 503-2305 Japan
Phone: 1-510-538-8599 (8 am - 5 pm, Mon - Fri, PST) Phone: +81-584-27-3131
Fax: 1-510-538-5899 Fax: +81-584-27-7505
Web: www.minoura.jp
MADE IN JAPAN
If you need help, please contact the shop first where you originally purchased this product or call the distributors
in your country. The distributors list can be found on our web site.

Important Notes
• For use with a standard 2-wheel bike with the wheel size between 650c and 700c or 26 and 29 inch
and the wheelbase size between 950 and 1,200mm.
Any longer wheelbase bike such as a tandem or long-tail or other types of bike such as recumbent
or folding bike won't t FG540.
• The front hub is 100mm width and equipped with 9mm standard or 15mm thru-axle type. Any other
hub size cannot be used.
Boost hub and 12mm Thru Axle can be used by using the optional adapter (sold separately).
• The rear triangle of your bike rides freely on the roller. Be careful not to fall down while getting on or
off the bike. Use the handlebar to steady yourself put do not pull on the bars as this may cause the
bike to tip.
The best way to mount the trainer is to stand close to the side of the saddle. Center yourself low
and to the center of the bike, clip into one pedal then slowly swing your other leg over the bike and
clip into the second pedal.
• The quick release skewer in the front fork support is oating mounted with a plastic bushing to avoid
the damage caused by side-to-side shaking during riding. For this reason, the bolts which hold the
bushing are not fully tightened intentionally and there is some space above the bolt.
• Minoura recommends the use of a completely slick (no tread) tire to reduce noise and increase the
longevity of the tire and rollers.
• The FG540 comes equipped with a standard quick release skewer (Q/R) for the front fork mount.
Tighten the Q/R as you would your wheel to your bike, close it rmly and tightly.
If you are unsure, consult your local bike shop for help.
• Your rear tire must contact both rollers evenly. Adjust the center arm/frame exactly.
Incorrect adjustment will result in unbalanced resistance and poor bike stability.
• For your safety, place the FG540 on a at, even oor or surface. Make sure all legs are fully opened.
Make sure to check the trainer stability, especially when raising the front fork mount.
• DO NOT USE YOUR BRAKE TO REDUCE SPEED!
Doing so will decrease stability, cause your tire to burst or throw you off the bike. Simply reduce your
cadence and let the bike come to a natural stop.
• Keep the children and pets away from the spinning wheel or moving parts.
• It's impossible to change to non-remote type. Removing the remote shifter will automatically set the
resistance level at the maximum position.
• Minoura recommends to use a mat underneath the trainer to protect the oor from sweat or stain
from the rubber feet.
• If you hear a strange noise or smell something unusual, immediately stop using the the trainer and
contact your Minoura dealer. Do not try to disassemble the product without consulting your dealer
or Minoura rst.
• Any warranty will be void if you use FG540 for other purpose than instructed.
Minoura offers 1-year limited warranty on this product from the date of your purchase for any
problem caused by manufacturer's defect. Natural wear will not be covered.
Any damage or problem caused by transporting process is not covered under warranty. Any damage
from shipping or moving must be made to the shipping company.
Read the enclosed "Minoura Limited Warranty Policy" card for more detail.
For the latest information, refer Minoura web site (http://www.minoura.jp).
- 2 -
Please Read Carefully Before Use

- 3 -
Part Names
Front Fork Support
(9mm Q/R, 15mm Thru Axle compatible)
Stopper Pin
Front Frame /
Tripod Right Side Leg
Rubber Cap
Remote Cable Guide
(backside, Right side only)
Front Frame
/
Tripod Left Side Leg
Front Frame /
Tripod Center Leg
Center Frame Connecting Q/R
Center Frame
Center Frame Locking Knob
Magnetic Resistance Unit
Front Roller
(free spinning side)
Rear Roller
(driven side)
Knob Lever (backside)
Adapter Sleeve for 15mm Thru Axle
(Red, inside)
Remote Cable
V-belt
Flywheel
Remote Shifter
How To Setup FG540
No Tool Required
1
Fully open all tripod
legs, and place on the
floor.
!
Conrm all legs
are fully opened.
!
Do not pinch
your nger when
closing the legs.
Rear Frame

2
3
Flip out the retracted center frame, and place
on the floor.
Loosen the center frame locking knob to
prepare for sliding.
-
4
-
Connect the center frame to the tripod
center leg. Tighten the Q/R firmly.
Assembling FG540 is now finished.
!
Firmly tighten
the Q/R.

1
5
- 5 -
How To Adjust The Front Fork Support Height
2
3
4
Simulating Uphill Angle
0%
3%
6%
8%
10%
Each hole corresponds to an angle that simulates
climbing. (based on a 700c wheel)
Turn the knob lever counter-clockwise to loosen,
and pull up the front fork support.
The lever becomes free by pulling the lever. You can
set the lever at your favorite angle.
The stopper pin can be removed only while the fork
mount is lifted up.
Insert the pin into the hole that corresponds best to
the incline you want.
Slide down the fork mount until the stopper pin
reaches the front frame.
Turn the knob lever clockwise and tighten
firmly.

- 6 -
How To Use The 15mm Thru Axle
!
The front fork support is compatible with both the standard 9mm quick release
skewer and the 15mm thru type axle.
To use 15mm thru axle, remove the headless bolts under the sleeve guide end
in the fork mount (do not remove the normal bolts) and pull out both the red
adapter sleeve and the Q/R.
Align the front fork and the fork support hole, insert the 15mm axle to set the
front fork.
(The bottom side of the fork mount)
Make sure the bolt type you are going to remove.
Do not remove the standard bolt with head.
Adapter Sleeve (red)
Headless
Bolt
How To Mount Your Bike
1
2
3
Remove the front wheel from your bicycle and set the front fork into the mount firmly.
3
Place the rear wheel on both rear rollers.
Slide and adjust the center frame position so that your rear tire contacts both rollers evenly.
Finally, tighten the center frame locking knob firmly.
Required Tool : 3mm Hex Wrench
(not included)
!
Do NOT grasp brake lever after
removing the wheel if your bike is
equipped with hydraulic disc brake.

- 7 -
!
!
There is a guide bracket on
the right side tripod leg to
hold the remote cable.
It's normal for the rear tire to sway or move back and forth slightly
while using. As long as the tire doesn't touch the sides of the rollers
!
With normal use you may nd that the roller belt has become loose. A loose
belt could be a serious issue if unattended. If you nd the belt has become
loose, it is important to tighten the tension on the belt correctly.
To do so, use an M4 hex wrench to loosen the previously mentioned bolts
while sliding the mag unit forward to increase the tension on the belt until
the correct tension has been achieved.
this is ok.
If you find the tire is not centered properly, check if the front fork is mounted
on the quick release skewer properly, or if the handlebar has been twisted a
little.
If the bike has been slanted, loosen the quick release skewer and push down
the front fork until end.
If the handlebar has been twisted, loosen the Knob Lever, adjust the steering
angle, and tighten the lever firmly.
(図 14)
The rear tire sits in the center of the
roller and doesn't touch any other parts.
Adjust the center frame position properly that the rear tire contacts both rollers.
If the tire touches the rear roller only and a clearance exists between the tire and the front
roller, the center frame repeats jumping while riding. Set the rear frame backward.
If the tire touches the front roller only, slippage occurs and it will bring premature tire wear.
Set the rear frame forward.

- 8 -
Increase
Decrease
How To Operate Remote Shifter
FG540 comes with a convenient remote shifter device.
By installing it on your handlebar or stem, you can adjust the resistance
level in 13 levels without getting off the bike.
The plastic band is soft enough to fit aero-shaped carbon handlebar or
round shaped stem as well as the standard round dimension handlebars.
How to install the remote shifter
1) Loop the plastic band around the handlebar
2) Hook the tip to the edge on the plastic shifter base
①
3) Flip up the lever to lock
②
How to increase the resistance level
Twist the shifter dial toward "H" symbol
How to reduce the resistance level
Twist the shifter dial toward "L" symbol
!
"L" does not mean no resistance. Due to the tire contact
to the roller, there will still be some small resistance.
The remote shifter is pre-adjusted to fit the standard handlebar size;
22mm (7/8") diameter.
If it becomes loose or too tight, or you need to install the shifter onto an
oversized handlebar or stem, adjust the band length by turning the plastic
screw with an M4 hex wrench.
How To Adjust Cable Tension
If you cannot shift at L or H position, it's time to adjust the cable tension.
1) Set the remote shifter lever at "H" position and straighten the cable.
2) Pull off the black plastic cap on foot of the cable, then the adjusting
screw with two lock nuts will appear.
3) While pushing the outer cable toward the shifter, push the adjusting
screw to the outer cable.
4) Turn the left side lock nut until it touches the Mag unit. You should
not overtighten the nut, otherwise you won't be able to set the shifter
at "L" position.
5) Turn the right side lock nut until it touhes the left side nut, then twist
the nuts each other to be locked as the method of "Double Nut".
6) Put the plastic cap over the screw again.
Lock
Lever
Indicator
(red dot)
1
2
!
Do not overtighten the plastic screw. It will break
the plastic band. Release the hook before adjusting.
You must release the
hook for adjusting screw.
4mm Hex
Wrench
Required Tool : 8mm Spanner
(not included)
x 2
Required Tool : 4mm Hex Wrench
(not included)
Cap
Adjust Screw
Lock Nut x 2
Turn the nut and tighten
/