Cisco Small Business Pro SPA 508G Configuration manual

Category
Routers
Type
Configuration manual
Cisco
IP Phone
Configuration Guides
Yeastar Technology Co., Ltd.
Cisco IP Phone Configuration Guides
www.yeastar.com Page 2
Table of Cotents
Introduction ............................................................................................. 3
Register Cisco IP Phone with MyPBX Manually ......................................... 4
Provisioning for MyPBX ............................................................................ 7
Cisco IP Phone Configuration Guides
www.yeastar.com Page 3
Introduction
This guide is applicable to CISCO IP 7940, IP7960, SPA 501G, 502G, 504G,
508G, 509G, 514G, 512G, 525G2.
Please Note:
This guide has been tested with firmware version 7.4.6. Be aware that different
firmware versions may have different web interface formats and functionality.
This is based on a new phone OR one that has been reset to factory defaults. If
in doubt, reset the phone to Factory Defaults.
Cisco IP Phone Configuration Guides
www.yeastar.com Page 4
0BRegister Cisco IP Phone with MyPBX Manually
1. Start up the phone and identify its IP Address using the menu key on the
phone, go to the "Network" option and press the "Select" button. For this
example we will assume the IP Address of the phone is 192.168.5.126, and
IP Address of the MyPBX machine is 192.168.5.150.
2. Point your browser to the web interface of the phone: http://192.168.5.126
3. Click on the "Admin Login" link, and next click on the "Advanced" link at the
top of the page to the phone's advanced administration page
Figure 1-1
4. We now need to set the phone to register with MyPBX. Click on the "Ext1"
tab, and configure as follows:
1) Set the "Line Enable" field to "yes
Figure 1-2
2) In the "Proxy and Registration" section, set the "Proxy" field to the IP
Address of the MyPBX server in this example, 192.168.5.150.
Figure 1-3
3) In the Subscriber Information section:
Figure 1-4
Cisco IP Phone Configuration Guides
www.yeastar.com Page 5
Set the "Display Name" field to the name you want to appear on the
Phone display
Set the "User ID" field to the extension number you want to
associate with this phone
Set the "Password" field to the extension's Authentication Password
Set the "Use Auth ID" field to "yes"
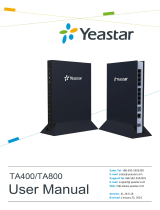
Set the "Auth ID" field to the extension's Authentication ID In the
"Dial Plan" section, set the "Dial Plan" field to "[x*]." (without the
quotes)
Figure 1-5
5. Next, we need to configure the Voice Mail Number on the phone to be able
to retrieve Voice Mail messages from MyPBX. Click on the "Phone" tab and set
the "Voice Mail Number" field to Voice Mail Number you have set in MyPBX.
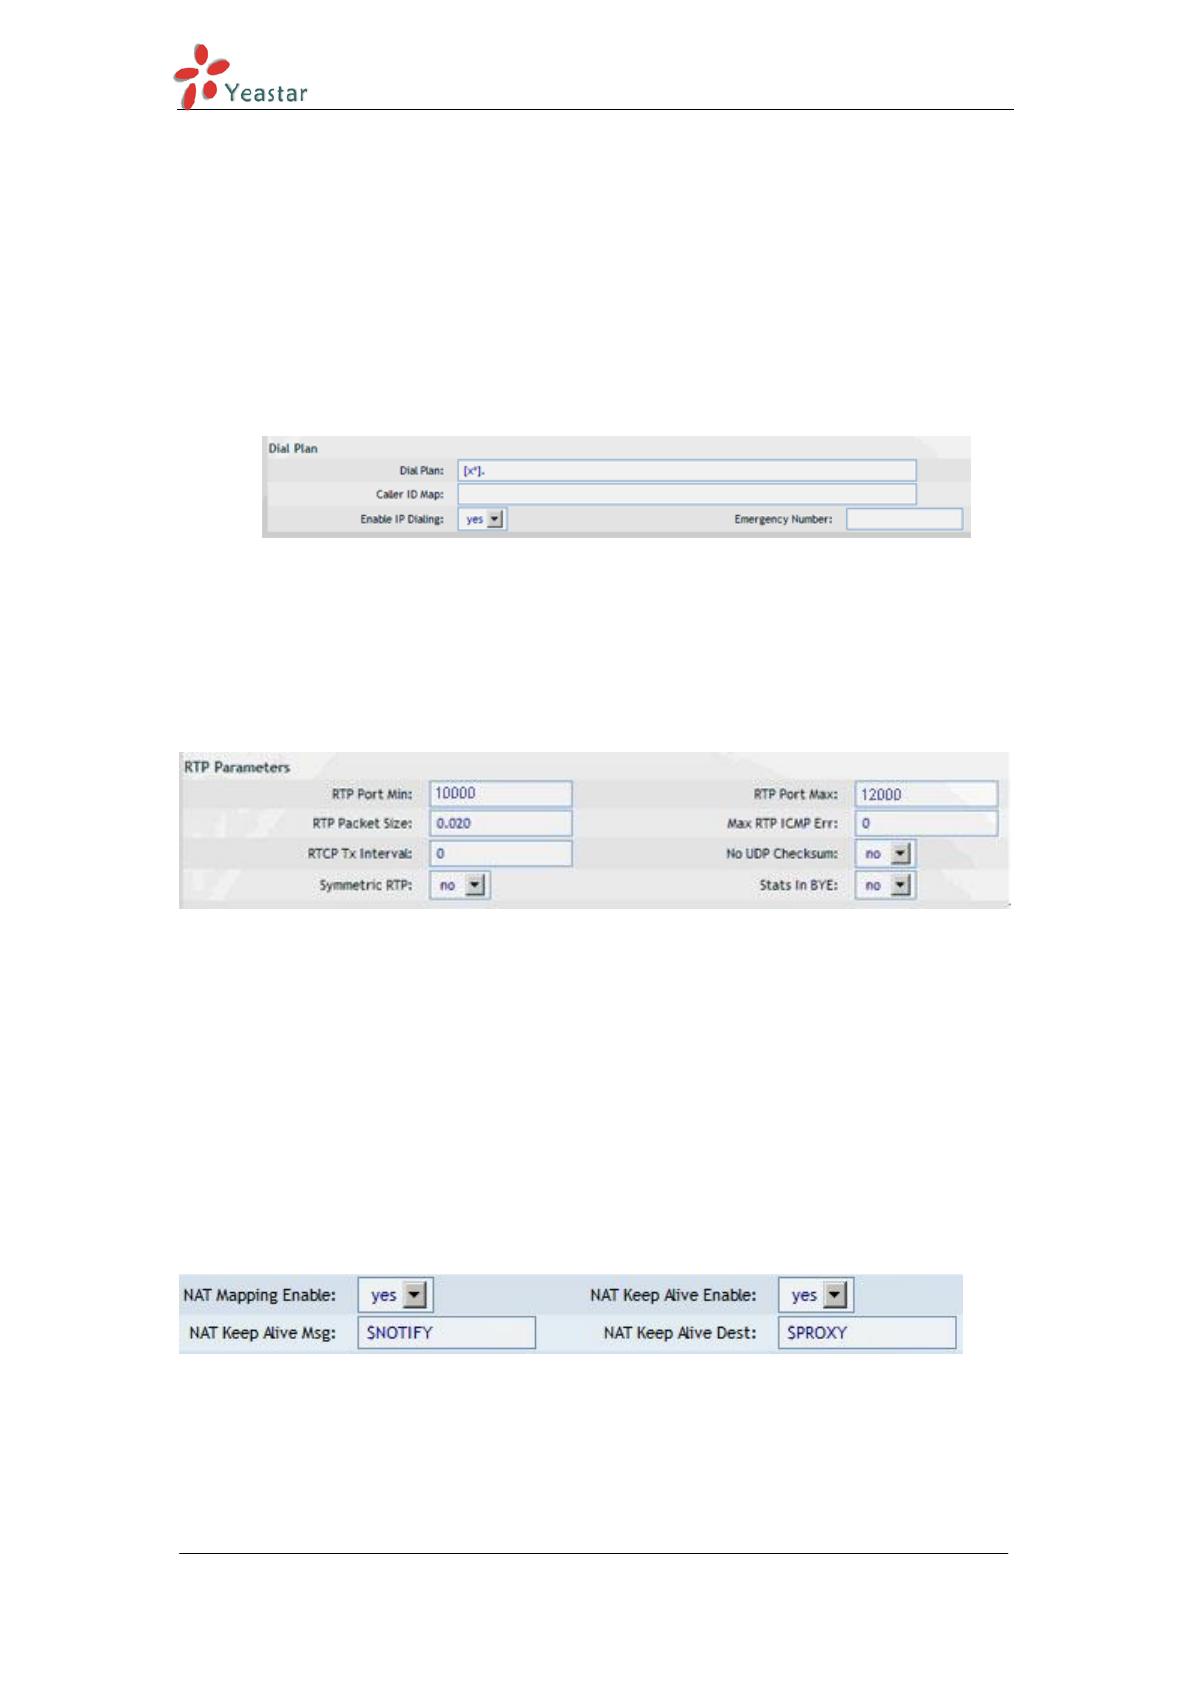
6. Next, we need to adjust the audio parameters. Click on the "SIP" tab and, in
the "RTP Parameters" section, set the "RTP Packet Size" field to "0.020"
Figure 1-6
Click the "Submit All Changes" button at the bottom of the page. Your phone will
restart. After rebooting, the phone will register with the MyPBX. This can be
verified via the "line Status" page of the MyPBX Management Console.
Configuration for Remote Extensions
If you want to configure the phone as a Remote Extension, you will need to
ensure that the “Proxyfield is set to the Public IP Address of the PBX, and also
perform the following configuration adjustments:
Figure 2-1
1. Go to the “Ext1” tab
2. Go to the “NAT Settings” section
3. Set the “NAT Mapping Enable” field to “yes”
4. Set the “NAT Keep Alive Enable” field to “yes”
Cisco IP Phone Configuration Guides
www.yeastar.com Page 6
Figure 2-2
5. Go to the “SIP” tab
6. Go to the “NAT Support Parameters” section
7. Set the “Handle VIA rport” field to “yes”
8. Set the “Insert VIA rport” field to “yes”
9. Set the “STUN Enable” field to “yes”
10. Set the “STUN Server field to “stunserver.org to allow the phone to
discover its external IP Address, and the port mappings that will be applied
to the traffic sent and received by the phone ,the default port is 5060 for
TCP and 10000-12000 for RTP
11. Click the "Submit All Changes" button at the bottom of the page. Your phone
will restart.
Cisco IP Phone Configuration Guides
www.yeastar.com Page 7
Provisioning for MyPBX
Important:
MyPBX supports phone provisioning for Cisco IP 7940, IP7960, SPA 501G, 502G,
504G, 508G, 509G, 514G, 512G, 525G2. This guide has been tested on Cisco IP
7940 with firmware version pos3.08.12.00. Be aware that different firmware
versions may have different web interface formats and functionality. Here we
guide you how to do phone provision for Cisco 7940/7960.
1. Verify Firmware Installed on your Phone
Make sure your Cisco 7940/7960 is configured to use the SIP protocol. By
default these phones are configured to use the proprietary SCCP which only
works will Cisco Call Manager.
2. Plug phone into the network
Plug your Cisco 7960/7940 IP phone into your LAN. (The Phone must be on the
same LAN as that of MyPBX IP PBX).
3. Approve phone and Assign an Extension
To do provisioning with Cisco 7960/7940 IP phones, you need to set MyPBX
working as the only DHCP server any more.
Cisco IP Phone Configuration Guides
www.yeastar.com Page 8
Step1. Disable DHCP Server on your local network.
E.g. Disable DHCP Server on Linksys Router.
Figure 3-1
Cisco IP Phone Configuration Guides
www.yeastar.com Page 9
Step2. Enable DHCP Server on MyPBX.
Login MyPBX web interface, go to System Network Preferences DHCP
Server, enable DHCP server.
Figure 3-2
Step3. Configure phones on MyPBX Auto-Provision page.
1) Login MyPBX web interface, go to PBX Extensions Phone Provisioning
click Add Phone.
Figure 3-3
Cisco IP Phone Configuration Guides
www.yeastar.com Page 10
2) Fill in the phone detail message on the pop-up window.
Input IP Phone’s MAC address, configure Name, Call waiting, Line, Extension,
Label, Line active for the phone.
Figure 3-4
3) Save it and apply the changes on web.
Cisco IP Phone Configuration Guides
www.yeastar.com Page 11
Step4. Save the settings and reboot the IP phone. After you save the
changes, system will prompt you to save the changes and reboot to save
changes without rebooting. Click OK to reboot the IP phone and provisioning the
phone.
Figure 3-5
Note: The IP phone will reboot twice to apply the configuration take effect.
When done, you can see extension 500, 501, 503 have been registered on the
screen of Cisco IP phone.
Figure 3-6
Remark:
The factory default setting of DHCP for IP Phone is “enable”, so you can skip this
step.
If the DHCP is disabled, please follow below step to enable it.
1) Login IP phone’s web page.
Cisco IP Phone Configuration Guides
www.yeastar.com Page 12
2) Enable DHCP.
Step5. Done.
<End>
  • Page 1 1
  • Page 2 2
  • Page 3 3
  • Page 4 4
  • Page 5 5
  • Page 6 6
  • Page 7 7
  • Page 8 8
  • Page 9 9
  • Page 10 10
  • Page 11 11
  • Page 12 12

Cisco Small Business Pro SPA 508G Configuration manual

Category
Routers
Type
Configuration manual

Ask a question and I''ll find the answer in the document

Finding information in a document is now easier with AI