ENGLISH 11-0260
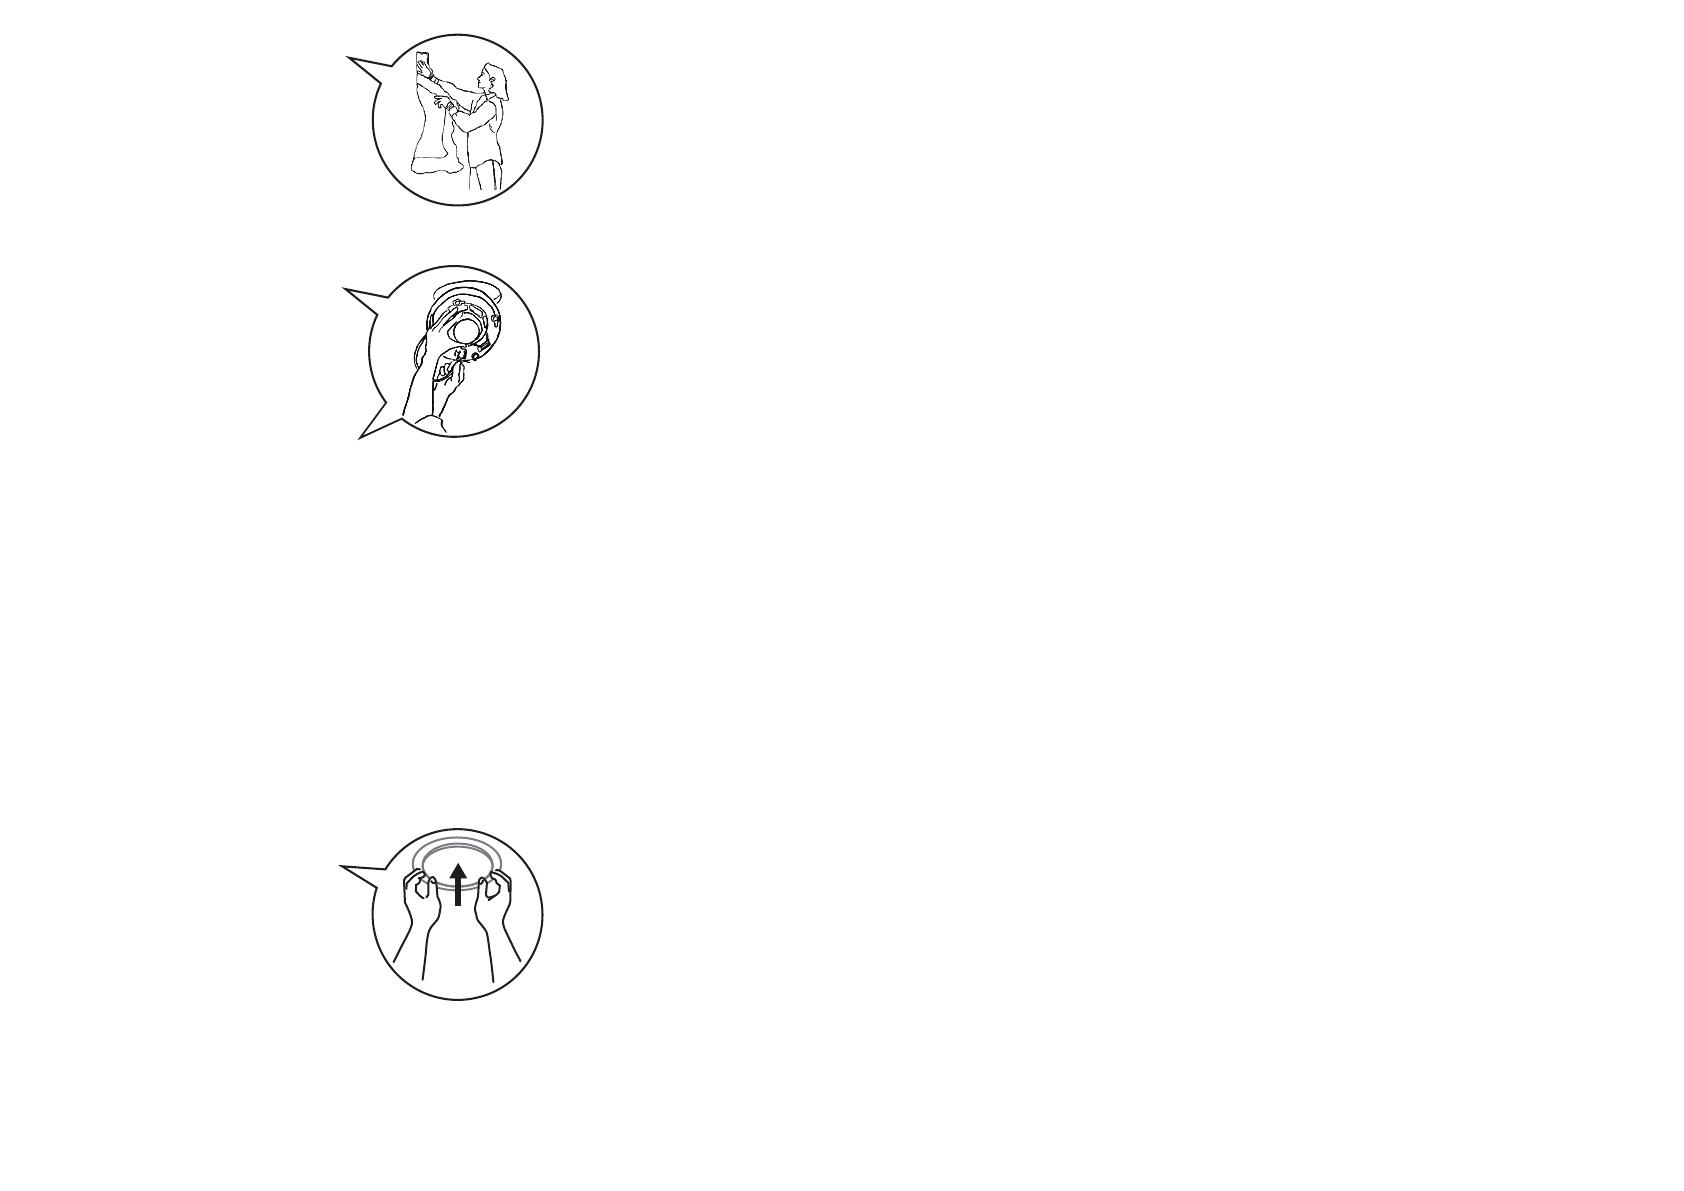
7 (Optional) To improve speaker perfor-
mance, insert unbacked berglass
insulation behind and around the
speaker.
Warning: To avoid personal injury, wear
gloves when inserting the insulation.
8 Pull the wires through the hole in the
ceiling. Strip o the end of the outer wire
jacket, then strip about ½ inch of the
insulation from the ends of the wires.
9 Connect the positive wire on your audio
equipment to the red terminal on the
speaker, then connect the negative wire
on your audio equipment to the black
terminal on the speaker.
Warning: Make sure that your audio
equipment is turned o before you
connect the speaker wires.
3 Insert one of the supplied paint plugs into the speaker to protect the
speaker.
4 Carefully paint the exposed part of the speaker. Remove the plug
when you have nished painting.
5 Spray the grill with thin paint (5 parts thinning agent to 1 part paint).
Make sure that you do not plug the holes on the grill with paint. Too
much paint may adversely aect the speaker sound.
Specications
• Woofer 6 1/2” aluminum cone with a rubber surrounding
• Tweeter ¾” pivoting aluminum dome
• Frequency response 50 Hz to 20 kHz
• Eciency 90 dB 1w 1m
• Power 5 watts minimum to 100 watts maximum
• Impedance 8 ohms nominal
• Grill metal dimensions 9" (228mm) Diameter x 3.7" (94mm) Depth
• Cut-out dimension 7.68” (195 mm) diameter
• Weight 6.9 lbs (3.12 kg) per pair
One-year warranty
Insignia Products (“Insignia”) warrants to you, the original purchaser of this new Product, that the
Product shall be free of defects in the original manufacture of the material or workmanship for a
period of 1 year from the date of your purchase of the Product (“Warranty Period”). This Product
must be purchased from an authorized dealer of Insignia brand products and packaged with this
warranty statement. This warranty does not cover refurbished Product. If you notify Insignia during
the Warranty Period of a defect covered by this warranty that requires service, terms of this
warranty apply.
How long does the coverage last?
The Warranty Period lasts for 1 year from the date you purchased the Product. The purchase date is
printed on the receipt you received with the Product.
What does this warranty cover?
During the Warranty Period, if the original manufacture of the material or workmanship of the
Product is determined to be defective by an authorized Insignia repair center or store personnel,
Insignia will (at its sole option): (1) repair the Product with new or rebuilt parts; or (2) replace the
Product at no charge with new or rebuilt comparable products or parts. Products and parts
replaced under this warranty become the property of Insignia and are not returned to you. If
service of Products or parts are required after the Warranty Period expires, you must pay all labor
and parts charges. This warranty lasts as long as you own your Insignia Product during the
Warranty Period. Warranty coverage terminates if you sell or otherwise transfer the Product.
How to obtain warranty service?
If you purchased the Product at a retail store location, take your original receipt and the Product to
the store you purchased it from. Make sure that you place the Product in its original packaging or
packaging that provides the same amount of protection as the original packaging. If you
purchased the Product from an online web site, mail your original receipt and the Product to the
address listed on the web site. Make sure that you put the Product in its original packaging or
packaging that provides the same amount of protection as the original packaging.
www.insigniaproducts.com
Where is the warranty valid?
This warranty is valid only to the original purchaser of the product in the United States, Canada,
and Mexico.
What does the warranty not cover?
This warranty does not cover:
• Customer instruction
• Installation
• Set up adjustments
• Cosmetic damage
• Damage due to acts of God, such as lightning strikes
• Accident
• Misuse
• Abuse
• Negligence
• Commercial use
• Modication of any part of the Product, including the antenna
• Plasma display panel damaged by static (non-moving) images applied for lengthy periods
(burn-in).
This warranty also does not cover:
• Damage due to incorrect operation or maintenance
• Connection to an incorrect voltage supply
• Attempted repair by anyone other than a facility authorized by Insignia to service the Product
• Products sold as is or with all faults
• Consumables, such as fuses or batteries
• Products where the factory applied serial number has been altered or removed
Contact Insignia:
For customer service, call 1-877-467-4289.
www.insigniaproducts.com
Distributed by Best Buy Purchasing, LLC 7601 Penn Avenue South,
Richeld, Minnesota, U.S.A. 55423-3645
Painting the speakers and grills
The speakers have a weather resistant, ABS nish that you can paint.
To paint the speakers and grills:
1 Remove the grills from the speakers.
2 Make sure that the interior of the speaker is covered so no paint will
get inside.
10 Remove the speaker grill by pushing one of the mounting clip screws
towards the front of the speaker, then insert the speaker into the hole
in the ceiling.
11 Tighten the screws evenly until the speaker is at against the ceiling.
Caution: If you use a drill to tighten the screws, make sure that you set
the drill to its lowest torque speed. Do not overtighten screws.
12 Reinstall the speaker grill.
NS-C6500_11-0260_QSG_V2_EN.eps 2 4/26/2011 10:09:39 AMNS-C6500_11-0260_QSG_V2_EN.eps 2 4/26/2011 10:09:39 AM


