Page is loading ...

1byone Products Inc.
1230 E Belmont Street, Ontario, CA, USA 91761
Customer Service: +1 909-391-3888
www.1byonebros.com
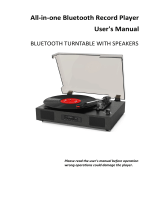
Nostalgic Wooden Turntable
Instruction Manual
SKU: 471NA-0007

1
INTRODUCTION
Thank you for purchasing 1byone Nostalgic Wooden Turntable. This instruction
manual contains important information about safety, usage, and disposal. Use the
product as described and keep this manual for future reference. If you sell this
turntable or pass it on, also give this manual to the new owner.
SAFETY INSTRUCTIONS
• The turntable should not be exposed to dripping or splashing water. Keep it far
away from water, particularly near sinks, baths, or other similar areas.
• Put the turntable on a solid and flat place and avoid any inclination.
• Place the turntable in a dry and ventilated place to protect it from overheating.
• Connect the power cable plug into a power outlet of the correct specification.
• The power cable should be positioned so it cannot be tripped over or become an
obstruction.
• Only use officially-provided attachments and accessories. If the power cable
needs replacing, please contact the seller or qualified technicians.
• Disconnect the turntable from power when there is the danger of lightning from
stormy weather.
• It is recommended to not plug in any other appliances into the same circuit
when the turntable is in use to avoid overload.
• Make sure no foreign objects penetrate or enter into the casing of the turntable.
• Excessive volume when listening with headphones can cause hearing loss.
• The turntable should not be exposed to intense heat such as direct sunshine or
fire.
• Disconnect the turntable from power completely after use or if any malfunction
is identified.
• To protect against electrical shock or fire, do not make modifications to the power
cord unless done so by qualified technicians.
• Only place on a flat, sturdy table or use with the cart, stand, tripod, or
bracket as specified by the manufacturer, or sold with the turntable.
When a cart is used, use caution when moving the cart/turntable
combination to avoid injury from tip-over.
• Do not attempt to service this turntable yourself. The turntable should be
checked and repaired by qualified technicians only.
• Refer all servicing to qualified service personnel. Servicing is required when the
turntable has been damaged in any way such as damage to the power-supply
cord or plug, liquid being spilled or objects having fallen into the turntable, the
turntable being exposed to rain or moisture and not operate normally after, or
being dropped.

2 3
IMPORTANT WARNING
WARNING: TO REDUCE THE RISK OF FIRE OR SHOCK, DO NOT
EXPOSE THIS PRODUCT TO RAIN OR MOISTURE
The exclamation mark inside an
equilateral triangle is intended
to alert the user of the presence
of important operating and
maintenance (servicing)
instructions in the literature
accompanying the product.
The lightning flash with arrow
symbol inside an equilateral
triangle is intended to alert the user
of the presence of un-insulated
“hazardous voltage” within the
product’s enclosure, which may be
of sufficient magnitude to induce a
risk of electric shock.
CAUTION
RISK OF ELECTRIC
SHOCK NOT OPEN
CAUTION: TO REDUCE THE RISK OF FIRE OR SHOCK, DO NOT
REMOVE COVER OR BACK. NO USER-SERVICEABLE PARTS
INSIDE. REFER SERVICING TO QUALIFIED PERSONNEL
Class II equipment symbol
This symbol indicates that
the unit has a double system.
NOTES
Please do not attempt to open the back cover or power adapter as opening or
removing the cover may expose you to dangerous voltage or other hazards. Also,
there are no user-serviceable parts within the turntable and opening the turntable
yourself can lead to a void in warranty.
NOTES
• The label is located on the rear of the turntable.
• No naked flame sources, such as lighted candles, should be placed on the
turntable.
• The turntable is only intended to be used in moderate climates.
This device complies with Part 15 of the FCC rules. Operation is subject to the
following two conditions: (1) this device may not cause harmful interference, and (2)
this device must accept any interference received, including interference that may
cause undesired operation.
NOTE: This equipment has been tested and found to comply with the limits for a Class B
digital device, pursuant to Part 15 of the FCC rules.
These limits are designed to provide reasonable protection against
harmful interference in a residential installation.
This equipment generates, uses, and can radiate radio frequency energy and, if
not installed and used in accordance with the instructions, may cause harmful
interference to radio communications. However, there is no guarantee that
interference will not occur in a particular installation.
If this equipment does cause harmful interference to radio or television reception,
which can be determined by turning the equipment off and on, the user is
encouraged to try to correct the interference by one or more of the following
measures:
• Reorient or relocate the receiving antenna.
• Increase the separation between the equipment and receiver.
• Connect the equipment into an outlet on a circuit different from that to which the
receiver is connected.
• Consult the dealer or an experienced radio/TV technician for help.
WARNING: Changes or modifications to this unit not expressly approved by the party
responsible for compliance could void the user's authority to operate the equipment.

4 5
PRODUCT DESCRIPTION
USB
AUX IN
FM
90929898104106108
MH
z
AM
53060070090010001700
KH
z
1
2
3
4
5
6
7
8
9
10
11
12
13
14
15
16
17
18
19
20
21
22
23
24
25
26
27
28
29
30
31
32
REAR VIEW
FRONT VIEW
FUNCTIONRECORDPROG
CLK SET
+10/PAIR
PROG
CD
33
34
35
8894102
100
80012001400
1. Dust Cover 19. Screw Lock
2. 45 RMP Adapter 20. Hold Down Clip
3. Turntable 21. Tone Arm Control Lever
4. Repeat Button 22. Speed Selector
5. PROG/CLK Set Button 23. Auto Stop Control
6. Record Button 24. Tone Arm Rest
7. Function Button 25. Cassette Slot
8. Power Button 26. Eject / Button
9. LCD Display 27. Speaker
10. Volume Control Dial 28. +10 Track Button
11. USB Port 29. Play / Pair Button
12. Dial Scale 30. Stop Button
13. CD Door 31. Skip
/
Button
14. FM Wire Antenna 32. Tuning Control Dial
15. AUX Out (RCA Jack) 33. Phones Jack
16. DC Input Jack 34. AUX Jack
17. Head Shell 35. CD Door Open Button
18. Tone Arm
GETTING STARTED
Connecting The AC Adapter
1. Plug the AC adapter into a normal power outlet.
2. Insert the DC plug of the AC adapter cord into the DC INPUT Jack at the back of
the turntable.
REAR VIEW
To Wall Outlet
NOTE:
• Only use the supplied power adapter.
• Please ensure that your outlet voltage is compatible before connecting the turntable to
power.

6 7
Switching On The Turntable For The First Time
Plug into AC power by following the instructions on the previous "Connecting The
AC adapter" section. Press the button to turn on the turntable, and press it again
to turn off the turntable.
Switching Between Different Sources
After turning on the turntable, press the Function button to switch between CD/
USB/BLUETOOTH/PHONO/FM Radio/AM Radio/AUX/CASSETTE TAPE sound sources.
Adjusting Sound Volume Level
After turning on the turntable, turn the Volume control dial to adjust the level of
sound volume.
Power Management Function
The turntable will automatically go into standby mode after 15 minutes of inactivity.
To resume operation, simply press the button to wake the turntable.
Display Dimmer
In standby mode, press and hold the button for 3 to 5 seconds, the display
brightness will dim. To resume operation, simply press and hold the button for 3
to 5 seconds again.
SETTING THE CLOCK
1. The clock can be set when the turntable is in Standby mode and the screen is
displaying the time.
2. Press and hold the CLK SET button until the display digits flash on the display.
3. Press the
/
buttons to select a 12 or 24-hour format for the clock.
4. Press the CLK SET button to confirm the hour format and the hour digits will flash
on the display.
5. Press the
/
buttons to increase or decrease the hour time.
6. Press the CLK SET button to confirm the hour setting and the minute digits will
flash on the display.
7. Press the
/
buttons to increase or decrease the minute time.
8. Finally, press the CLK SET button to confirm and set the time.
NOTE:
• When the turntable is disconnected from power, the clock settings will be erased. Please
set the clock again when the turntable is plugged back into power.
• When the hour format is set on 12H, carefully check that the AM/PM indicator is correct.
LISTEN TO THE PHONO (TURNTABLE)
Gently Open The Dust Cover
1. Lift the Dust Cover all the way up until it stops. The cover will now stay open.
2. Use a screwdriver and turn the screw lock clockwise to unlock the turntable plate
(if the screw lock is locked).
3. Remove the tie-wrap from the Tone Arm (if the tie-wrap is still in place).
4. Remove the white protective needle cover by gently pulling it forward.
5. Release the Tone Arm Hold Down Clip by gently pushing it to the right. This will
unlock the Tone Arm from its arm rest.
NOTE: Re-lock the Hold Down Clip when moving the turntable to another location.
Turntable Operation
1. Connect to power and press the button to turn on the turntable.
2. Press the Function button until the “PHONO and PHO” indicator shows on the
display, indicating PHONO mode has been selected.
3. Toggle the Speed selector to the correct position (33, 45 or 78 RPM).
4. Gently place a record on the turntable.
5. Lift the Tone Arm Control lever and move the Tone Arm to the desired starting
point over the record.
6. Lower the Tone Arm Control lever and the Tone Arm will move down and music
will start playing.
7. Turn the Volume Control dial to adjust the volume to the desired level.
8. Toggle the Auto Stop Control switch to select the auto stop function.
9. At the end of the record, the Tone Arm will stop automatically when Auto Stop
Control is selected. You must return the Tone Arm to the Tone Arm Rest manually
when the record is finished.
NOTE: When playing records, sound output of the built-in amplifier is limited to avoid
feedback and rumble. This is normal. Keep the volume as low as possible on the turntable
and instead increase volume on the external amplifier.

8 9
Adapter for 45 RPM (Included Accessory)
This adapter allows for the playing of 45 RPM records.
1. Gently place your 45 RPM record onto the turntable.
2. Place the 45 RPM Adapter over the spindle.
3. Follow normal turntable operation steps to play the record.
LISTENING TO CD DISCS
Loading a Disc
1. Connect to power and press the button to turn on the turntable.
2. Press the button to open the CD compartment door, the "Cd" indicator shows
on the display, indicating CD mode is selected. Dashes “---” will flash on the display
after one second.
3. Place a CD into the CD compartment.
4. Press the button to close the CD door.
Playing a Disc
1. After loading the CD, the CD will auto play and the track number will show on the
display. If necessary, press the button to begin playing the disc.
NOTE: An “ERR” error will be displayed if the disc is facing wrong-side-up in the CD
compartment. Eject the CD and insert it again with the correct side facing up.
2. Turn the Volume control dial to adjust the volume to the desired level.
3. To temporarily stop playback, press the button once and the display digits will
flash. To resume play, press the button again.
4. Press the
/
buttons to skip between previous or next tracks.
5. Press and hold the
/
buttons to fast search through the current track.
6. Press the +10 button to skip the next 10 tracks.
NOTE: +10 function is for MP3 discs only.
7. Press the button to stop playback.
Repeat Function
1. During disc playback:
• Press the Repeat button once and the “REP 1” indicator will show on the display.
The turntable will then keep repeating the currently playing track.
• Press the Repeat button twice and the “REP FOLDER” indicator will show on the
display. The turntable will play the desired disc folder repeatedly.
NOTE: Repeat folder function is for MP3 discs only.
• Press the Repeat button three times and the “REP ALL” indicator will show on the
display. The turntable will play the entire disc repeatedly.
2. To cancel all repeat functions, press the Repeat button repeatedly until the
REPEAT indicator on the display turns off.
Programming a Disc Playlist (Up to 20 Tracks) (Disc Only)
1. When a disc is playing, press the button to stop playback.
2. Press the PROG button and “P01” will show on the display.
3. Press the
/
buttons or + 10 button to select the track from the loaded disc
you wish to play first.
4. Press the PROG button to confirm the track selection.
5. Repeat steps 3 and 4 to confirm more songs in the order you wish them to be
played. Up to 20 songs can be selected for the playlist.
6. Press the button to start playing the programmed playlist. The “PROG” indicator
will show on display.
7. Press the button twice to cancel a programmed playlist.
LISTENING TO RADIO
1. Connect to power and press the button to turn on the turntable.
2. Press the Function button until the AM or FM indicator shows on the display.
Select AM or FM mode.
3. In FM mode, the “FM and rAD” indicator will show on the display.
4. In AM mode, the “AM and rAD” indicator will show on the display.
5. Rotate the Tuning control dial to search and select the desired station.
6. Rotate the Volume control dial to adjust the volume.
NOTE:
• To obtain the best AM reception, slightly rotate the turntable or move the turntable to
a different area of the room until the best reception is obtained.
• To obtain the best FM reception, fully extend the FM wire antenna at the back of the
turntable. Avoid close proximity to the speakers and other electrical appliances.
LISTENING TO A BLUETOOTH DEVICE
Connecting to a Smartphone or Tablet by Bluetooth
1. Connect to power and press the button to turn on the turntable.
2. Turn on Bluetooth mode by pressing the Function button until the "bt" indicator
shows on the display. The indicator will flash on the display.
3. Turn on the Bluetooth of the playback device and use it to search for other
Bluetooth devices.
4. Select "1byone BS012" from the list of found devices on your Bluetooth playback
device.

10 11
5. The indicator will stop flashing and become solid if pairing is successful.
6. The playback device’s music can now be played through the turntable’s speakers
using Bluetooth.
NOTE:
• If problems arise, hold the / Pair button to reconnect again.
• If it is necessary to connect another device, hold the / Pair button to reconnect.
• If a mobile call is received, the music will stop playing until the call ends.
LISTENING TO A USB DEVICE
Loading a USB Device (Supports MP3 Files)
1. Connect to power and press the button to turn on the turntable.
2. Insert a USB device into the USB port.
3. Turn on USB mode by pressing the Function button until the USB indicator shows
on the display. The USB will auto play and the track number will show on the
display. If necessary, press the button to begin playing the USB’s music.
4. Make sure the Volume control dial is in the correct position.
5. Before removing the USB device, press the button to stop playback first.
Play/Pause Control
1. When a USB memory stick is connected, press the button to play the USB’s
music.
2. Pause playback temporarily by pressing the button again. Music playback will
be paused and the current track number will flash on the display.
3. Press the button again to resume playback.
Stop Playback
Press the button to stop playback.
Skip Track
During playback, press the
/
buttons to skip to the previous or next tracks.
During playback, press the +10 button to skip the next 10 tracks.
High-Speed Music Search
1. During playback, press and hold the USB Skip/Search
/
buttons to skip/
search through the current track at high speed in a forward or backward
direction.
2. When the USB Skip/Search
/
buttons are released, normal playback speed
will be immediately resumed.
Repeat Function
1. During disc playback:
• Press the Repeat button once and the “REP 1” indicator will show on the display.
The turntable will then keep repeating the currently playing track.
• Press the Repeat button three times and the “REP ALL” indicator will show on the
display. The turntable will play all songs repeatedly.
• To cancel all repeat functions, press the Repeat button repeatedly until the REPEAT
indicator on the display turns off.
LISTENING TO AUX IN (LINE IN/AUDIO IN)
1. Plug a 3.5mm audio cable into the 3.5mm port of the mobile device or the Aux
out/Line-out/Audio of the MP3 or MP4 player.
2. Plug the other end into the AUX IN jack on the turntable.
3. Make sure the turntable and media device are turned on.
4. Press the Function button until the “AUX and AU” indicator confirming AUX mode
has been selected shows on the display.
5. Set your media device to start playing.
6. This setup will allow external device sound to be broadcast through the turntable.
LISTENING TO AUX OUT (LINE OUT/AUDIO OUT)
1. Audio from the turntable can be run through a home stereo system, television or
other stereo source using the AUX OUT RCA Jacks.
2. To make this connection, you need a standard RCA cable. Plug the red and white
connectors on one end of the cable into the red and white AUX OUT RCA Jacks
on the rear of the turntable. Plug the other end of the cable into the AUX INPUT
Jacks (LINE INPUT/AUDIO INPUT) of your selected device.
3. Operate the turntable as usual.
NOTE: You can still listen to the turntable when using the Audio Output feature.
LISTENING TO A CASSETTE
Loading a Cassette Tape
1. Connect to power and press the button to turn on the turntable.
2. Turn on Cassette mode by pressing the Function button until the “TAPE and tAP”
indicator shows on the display.
3. Insert the cassette tape into the cassette slot. The side of the cassette you wish to
listen to or record onto should be facing up.
Playing a Cassette Tape
1. When a cassette tape is inserted, its music will start playing after a few seconds.

12 13
2. Make sure the Volume control dial is in the correct position.
3. When removing or stopping playback of the cassette tape, fully press the Eject
/ button.
Skipping Tracks
When the cassette tape is playing, press the Eject / button halfway down to
fast forward through the tape.
NOTE: To avoid damage to the cassette mechanism and your tape, always eject the
tape after each listening session.
CONNECTING HEADPHONES
Adjust the turntable volume to minimum before connecting headphones/
earphones to the headphone jack. Headphones/earphone should have a 3.5mm
diameter stereo plug and an impedance of 8-32 ohms. When headphones are
connected, sound from the turntable’s internal speakers will automatically stop.
NOTE: Extended listening of music at high volume may damage hearing. It is highly
recommended to listen at comfortable volume levels.
RECORDING
This turntable can record music from a CD disc/Record/Cassette/Aux to a USB
memory/storage device.
1. Connect to power and press the button to turn on the turntable.
2. Insert a USB device into the USB port.
3. Press the Function button to select the desired mode you want to record.
• Recording from a CD: Place the CD disc into the CD compartment. Press the
button to start playing and press
/
or +10 button to search for the track to
be recorded.
• Recording from a vinyl record: Place the record on the turntable and move the
Tone Arm to the desired starting point over the record.
• Recording from a cassette: Place a cassette tape into the cassette slot. Press in the
Eject / button halfway down to fast forward through the tape.
• Recording from Aux In: Connect the external device to the AUX IN Jack. Start
playback of the device’s music.
4. After the above media’s playback has started, press the Record button to start
recording. "rEO" will show on the display.
5. To stop recording, press the Record button once.
6. To play the recorded file, press the Function button to select USB mode and
press the button to start playback. Press the
/
buttons to search
previous/next tracks.
NOTES:
• Don’t forget that you must return the Tone Arm to the Tone Arm Rest manually after
recording.
• Make sure the USB device has enough available memory for all the recordings.
• Bluetooth/AM Radio/FM Radio and Aux Out cannot be recorded.
MAINTENANCE AND CARE
• Always remove the power cable plug from the power outlet before cleaning the
turntable.
• Clean the turntable with a slightly damp cloth. Do not use any chemical or
abrasive cleaning agents.
• If you do not intend to use the turntable for a long period of time, store it in a
clean, dry place away from direct sunlight.

14 15
TROUBLESHOOTING
If you have followed the instructions and are having difficulty operating the unit,
locate the PROBLEM in the left column below. Check the corresponding POSSIBLE
CAUSES AND SOLUTIONS column to locate and fix the problem.
Problem Possible Causes and Solutions
No power
• Ensure that the turntable is powered ON.
• Check that the master volume is not turned to a minimum.
• Remove the power adapter/connection cable and reconnect
again after 2 minutes.
No sound on
phono source
• Ensure the turntable is on the correct source.
• The protective needle cover was not removed. Remove it.
• The tie-wrap was not removed from underneath the tone arm.
Remove it.
• Unlock the Screw Lock using a screwdriver.
• The Tone Arm Hold Down Clip was not released. Release it.
Poor sound on
phono source
• The stylus is dirty. Remove dust on the stylus with a stylus-
cleaning brush.
• Dust or dirt has collected on the record. Clean the record with a
good-quality record cleaner.
No sound on
USB source
• Ensure the turntable is on the correct source.
• Ensure the USB file is MP3 format.
• Remove the USB memory stick and reconnect again.
No/Poor sound
on radio source
• Ensure the turntable is on the correct source.
• Radio signal is too weak. Move the turntable to another place or
extend the wire antenna.
No/Poor sound
on CD source
• Ensure the turntable is on the correct source.
• Make sure the disc printing is face up.
• Make sure the disc is CD format or MP3 format.
• The disc is dirty. Clean the disc and play again.
No/Poor sound
on cassette
• Ensure the turntable is on the correct source.
• Remove the cassette tape and reinsert it with the opposite side
facing up.
• The cassette tape is broken. Insert a new tape.
No sound on
Aux mode.
• Ensure the turntable is on the correct source.
• Check that all devices are powered on.
• Check that the volume level on the external device is not turned
to a minimum.
• Check that the correct source is playing on the external device.
• Remove the audio cable and reconnect again.
No recording
• Ensure the turntable is on the correct source.
• Ensure the USB is correctly connected.
• USB memory is full. Insert a new USB storage device.
• Remove the USB storage device and reconnect again.
SPECIFICATIONS
AC Power Adapter AC Input= 100-240V 50/60Hz
DC Output= 10V, 1.5A
Turntable Speed 33 1/3, 45, 78 RPM
USB Supports MP3 format
CD Player Supports CDs and MP3 Discs
Radio FM: 88-108 MHz, AM: 513-1719 KHz
Power Output for Phono 2W X2 RMS
Power Output for USB/Radio/Cassette/
CD/AUX 5W X2 RMS
All specifications are typical, though individual units may vary. Units are subject to
continuous improvements without notice and without incurring any obligation.
DISPOSAL
Disposal of the Appliance
Under no circumstances should you dispose of the appliance in normal
domestic waste.
This product is subject to the provisions of European Directive 2012/19/
EU.
Dispose of the appliance via an approved disposal company or your municipal
waste facility. Please observe currently applicable regulations.
Please contact your waste disposal center if you need any further information.
The appliance’s packaging is made from environmentally friendly material
and can be disposed of at your local recycling plant.

16
Customer Service/Kundenservice
Service Clients/Atención al cliente/Assistenza Clienti
US
To ensure speedy handling of your issue,
please call or email us for assistance.
Phone: +1 909-391-3888
(Mon-Fri 9:00am - 6:00pm PST)
Email: ushelp@1byonebros.com
CA
To ensure speedy handling of your
issue, please email us for assistance.
Email: cahelp@1byonebros.com
UK
To ensure speedy handling of your issue,
please call or email us for assistance.
Phone: +44 158 241 2681
(Mon-Fri 9:00am - 6:00pm UTC)
Email: [email protected]
DE
Für eine zügige Bearbeitung ihres
Problems, melden Sie sich bei uns wie
folgt.
Email: euhelp@1byonebros.com
FR
Pour vous assurez une assistance rapide
en cas de problème, veuillez envoyer un
e-mail.
Email: euhelp@1byonebros.com
ES
Para garantizar una rápida atención de
su problema, favor envíenos un email
para ayudarle.
Email: euhelp@1byonebros.com
IT
Per supporto immediato in caso di
bisogno, la invitiamo a contattarci via
email.
Email: euhelp@1byonebros.com
/