Sony RM-AV2000 User manual

Category
Remote controls
Type
User manual
3-861-979-11(1)
Integrated Remote
Commander
Operating Instructions
© 1997 by Sony Corporation
RM-AV2000
2
For the customers in the U.S.A.
INFORMATION
This equipment has been tested and
found to comply with the limits for a
Class B digital device, pursuant to Part 15
of the FCC Rules.
These limits are designed to provide
reasonable protection against harmful
interference in a residential installation.
The equipment generates, uses, and can
radiate radio frequency energy and, if not
installed and used in accordance with the
instructions may cause harmful
interference to radio communications.
However, there is no guarantee that
interference will not occur in a particular
installation. If this equipment does not
cause harmful interference to radio or
televison reception, which can be
determined by turning the equipment off
and on, the user is encouraged to try to
correct the interference by one or more of
the following measures:
Reorient or relocate the receiving
antenna.
Increase the separation between the
equipment and receiver.
Connect the equipment into an outlet
on a circuit different from that to which
the receiver is connected.
Consult the dealer or an experienced
radio/TV technician for help.
You are cautioned that any changes or
modifications not expressly approved in
this manual could void your authority to
operate this equipment.
3
Features
The RM-AV2000 Remote Commander provides centralized control of all your AV
components from a single remote commander and saves the trouble of operating
different AV components with different remote control devices. The following are its
main features.
Centralized control of Sony AV components with this one remote commander
This Commander is preset at the factory to operate Sony brand components, so you can
use it out of the box as a control center for your Sony AV components.
Remote control signals for non-Sony components are also preset
This Commander is preset for most major brands components including Sony. You can
remote control your components by setting their code numbers.
Learning function for programming other remote control signals you need
This Commander has a learning function, to learn remote control signals to operate
non-preset components or functions. In addition, the Commander can learn remote
control signals (infrared signals only) of non-Audio Visual components such as air-
conditioners, lights, etc. (some specific appliances or functions may not be available).
Adding or reassigning new components
You can use the OPTION button as an extra Component Select button. What’s more,
you can assign other Component Select Buttons to freely operate other components.
This is useful when you have more than two of the same kind of AV components.
System Control function allows one-touch operation to execute a series of
commands
You can program up to 16 consecutive operation steps to execute a series of operations
by pressing a single button.
Easy-to-operate touch key LCD with blue back light
This Commander has a touch key LCD that changes the key display according to the
selected component. The Commander is easy to operate as only the keys necessary to
operate the selected component are displayed. The display backlight allows operation
even in the dark.
4
Table of Contents
Getting Started
Installing the Batteries ......................................................................................................... 6
When to replace the batteries.............................................................................................. 6
Location and Function of Controls ....................................................................................... 7
Basic Operations
Setting the Code for Preset Audio and Visual Components ................................................. 8
Setting a Component Code ................................................................................................. 8
Checking if the code number works ................................................................................ 10
Operating Your Components with the Remote Commander .............................................. 11
Using Non-Preset Remote Control Operations — Learning Function ................................ 13
Changing or erasing the function of a learned key or button...................................... 16
Using the OPTION button ................................................................................................... 17
Advanced Features
Controlling the Volume of Visual Components Connected to an Audio System................. 18
Executing a Series of Commands — System Control Function .......................................... 20
Programming a series of commands to the SYSTEM CONTROL buttons ................ 20
Executing the programmed commands .......................................................................... 22
Changing the programmed commands .......................................................................... 23
Adding an Extra Function to the Component Select Buttons............................................. 24
Programming the Power-On Command of the Selected Component (for Sony
Components only) ........................................................................................................... 24
Adding a Command that is Required when Selecting a Component ........................ 25
Turning Off the Power of All Components by a Single Button Operation
— System Power-Off Function (for Sony Components only) ........................................... 26
Assigning Other Components to the Component Select Buttons ...................................... 27
Programming a Frequently Used Key Operation to SYSTEM CONTROL Buttons ................ 29
5
Using Other Functions
Locking the Controls — Hold Function............................................................................... 30
Protecting your settings and “learned” signals — Preset Lock Function .......................... 31
Changing the Auto Power-Off Time of the Commander ..................................................... 32
Adjusting the Backlight of the Display Window ................................................................. 33
Additional Information
Precautions ......................................................................................................................... 34
Maintenance ....................................................................................................................... 34
Specifications...................................................................................................................... 34
Troubleshooting .................................................................................................................. 35
Appendix
Table of Preset Functions.................................................................................................... 37
TV.......................................................................................................................................... 37
VCR 1, 2, 3............................................................................................................................ 37
DVD ...................................................................................................................................... 38
VD (LD player) ................................................................................................................... 38
DBS ....................................................................................................................................... 39
CBL (Cable box) .................................................................................................................. 39
AMP...................................................................................................................................... 40
CD ......................................................................................................................................... 40
MD ........................................................................................................................................ 41
DAT....................................................................................................................................... 41
DECK B/A........................................................................................................................... 42
TUNER ................................................................................................................................. 42
DSP (Digital Surround Processor).................................................................................... 42
LCD Touch Key Display Table ............................................................................................... 43
Quick Reference of Operations........................................................................................... 51
Index ......................................................................................................................back cover
6
Getting Started
Installing the Batteries
Slide open the battery compartment lid
and insert six size AA(R6) batteries (not
supplied). Be sure to line up the + and -
on the batteries with the + and - on the
battery compartment.
When to replace the batteries
Batteries for remote control
operation (Four size AA (R6)
batteries)
Under normal conditions, batteries will
last up to six months. If the Commander
does not operate properly, batteries
might be worn out and i is displayed
on the LCD touch panel. When the
display dims, replace the batteries with
new ones.
Note
Do not take more than one hour to replace
the batteries; otherwise, your setting of the
code numbers (page 8) and learned remote
control signals (page 13) will be erased.
Batteries for backlight (Two size
AA (R6) batteries)
When the backlight for the touch keys
grows dim, replace its batteries.
Notes on batteries
Do not mix old batteries with new ones or
mix different types of batteries together.
If the electrolyte inside the battery should
leak, wipe the contaminated area of the
battery compartment with a cloth and replace
the old batteries with new ones. To prevent
the electrolyte from leaking, remove the
batteries when you plan not to use the
Commander for a long period of time.
(for backlight)
(for remote control
operation)
}
}
]
}
]
}
]
]
}
]
}
]
7
SYSTEM CONTROL COMMANDER
OFF
LIGHT
TV VCR1 VCR2 VCR3 DVD DBS/CBL
AMP CD MD/DAT DECK B/A TUNER OPTION
CHANNEL VOLUME
MUTING
+
+
±
123
1
2
3
4
5
6
7
8
9
5 COMMANDER OFF button
Turns the power of the Commander
off.
6 Component Select buttons
Selects the component to control.
7 OPTION button (page 17)
You can assign this button to operate
any component and use it as a
Component Select button.
8 VOLUME +/– buttons*
Adjust the volume.
9 MUTING button*
Mutes the volume.
0 CHANNEL +/– buttons
Select the channel.
* The Commander controls or mutes the TV’s
volume when you select a visual component.
The Commander controls or mutes the
amplifier’s volume when you select an audio
component.
You can change this setting also (page 18).
Note on the power on and off of the
Remote Commander
To turn on the power, press any button except
the COMMANDER OFF button.
To turn off, press COMMANDER OFF, or if
you don’t use the Commander, it automatically
turns off after 10 minutes. This interval can also
be changed (page 32).
To turn off the key touch
confirmation beep
Press the key. “OFF” is displayed and the
Commander no longer makes the key touch
confirmation beep. To switch the key touch
confirmation beep back on, press the key
again.
Location and Function
of Controls
1 Component display area
Displays the name of the component
selected.
2 LCD touch key display
The keys used for operating each
component are displayed.
Note
Do not press the touch keys using sharp
objects such as pins or ball-point pens.
3 SYSTEM CONTROL buttons (page
20)
You can program up to 16 consecutive
key operations to each of the three
SYSTEM CONTROL buttons . You can
automatically carry out the entire
program by pressing one button.
4 LIGHT button
Used to light up the LCD display in
the dark. Press the button once to turn
on the light, and once again to turn it
off. You can also set the backlight to
go off automatically after a certain
period of time (page 33).
8
SYSTEM CONTROL COMMANDER
OFF
LIGHT
TV VCR1 VCR2 VCR3 DVD DBS/CBL
AMP CD MD/DAT DECK B/A TUNER OPTION
CHANNEL VOLUME
MUTING
+
+
±
123
4
3
2
6
TV
123
456
78
+10
0
9
ENTER
DISPLAY
Example: To set up a Philips’ TV
1 See the tables in the supplied
“Component Code Numbers”,
and find the double digit code
number for the desired
component.
If more than one code number is
listed, use the number that is listed
first.
For example, to set up a Philips’ TV,
you would use the code number 11.
2 While pressing COMMANDER
OFF, press MUTING.
All the component names in the
display flash.
Basic Operations
Setting the Code for
Preset Audio and Visual
Components
The Commander is preset at the factory
to operate Sony brand AV components
(see the table below). If you are using the
Commander with a factory-set Sony
components, skip the following
procedures.
You can use the Commander with other
preset AV components also. To use with
other AV components, you need to follow
the procedures to set the correct codes for
each component.
COMMANDER
OFF
MUTING
+
TV VCR123 DBS TUNER
CBL CD OPMD DECKAMP
DVD
AB
* Analog audio compact cassette deck
Component
Select
Button
TV
VCR1
VCR2
VCR3
DVD
DBS/CBL
AMP
CD
MD/DAT
DECK B/A
TUNER
OPTION
Factory setting
Sony TV
Sony Beta VCR
(VTR1)
Sony 8mm VCR
(VTR2)
Sony VHS VCR
(VTR3)
Sony DVD
player
Sony DBS tuner
Sony amplifier
Sony CD player
Sony MD deck
Sony cassette
deck
Sony FM/AM
tuner
Preset
component(s)
TV
VCR
VCR
VCR
DVD player
(DVD)/LD
player (VD)
DBS tuner
(DBS)/Cable
box (CBL)
Amplifier
CD player
MD deck/DAT
deck
Cassette deck*
FM/AM tuner/
Surround
processor
(You can preset
any of the
above.)
See “Table of Preset Functions” (page 37)
for the functions of keys and buttons as
for each component.
Setting a Component Code
9
5 If you want to set a code for
another component, repeat Steps
3 and 4.
6 Press COMMANDER OFF.
Notes
If you press a component code number that is
not on the table in the supplied “Component
Code Numbers”, the Commander beeps and
“NG” flashes after you press the ENTER key.
If this happens,check the component code
number, and try setting again.
If you don’t input anything into the
Commander for over two minutes between
each step, the setup procedure will be
canceled. To set the code, you must again
press MUTING while pressing
COMMANDER OFF.
To check which code number is
set
Press the DISPLAY key. The code number
and “ENTER” appear twice.
To set a component code on the
OPTION button
Assign a component to the OPTION
button first (see page 17), and then follow
the procedure on page 8 to 9.
3 Press the Component Select
button* for the desired
component.
The selected component remains
displayed, and the 0 – 9, ENTER and
DISPLAY keys flash.
* When you set the component code of the
DVD or DBS/CBL button,press
repeatedly until the desired component is
displayed.
4 Press the double digit component
code number followed by the
ENTER key on the touch-key
display.
A beep sounds, and the code numbers
and “ENTER” appear twice.
Continued
TV
1
m
1
m
ENTER
COMMANDER
OFF
123
456
78
0
9
ENTER
VIDEO2
DISPLAY
TV
ENTER
123
456
78
0
9
10
Setting the Code for Preset Audio
and Visual Components
(continued)
Checking if the code number
works
1 Press the corresponding
Component Select button for the
component you have set up.
The Commander turns on and the
touch-keys appear on the display.
2 Power on the component with its
power switch.
3 Aim the Commander at the
component and press the POWER
key in the touch-key display.
When the remote control signal is
sent, is displayed on the display.
The component should power off.
4 If you have succeeded, check that
the Commander is operating the
other functions of your
component, such as channel and
volume control.
See page 11 for details.
If the Commander does not seem to
be working...
Try repeating these setup procedures using the
other codes listed for your components (see
page 8).
Notes on keys which have
“learned” a remote control
signal already
If another signal has alreday been
programmed on that key or button by the
learning function (page 13), that
“learned” signal will work even after you
set the component code number. To use it
as a preset component key or button, first
erase its learned signal.
Note on the touch-key display
When you set a component code number,
only the keys that have been preset with
the signals for the desired component
will be displayed. Preset signal of each
key varies according to the brand.
By using the learning function, you can
program remote control signals to both
the displayed keys and keys that are not
displayed (see page 13).
POWER
TV
TV
123
456
78
0
9
ENTER
TV/VIDEO
RECALL
DISPLAY
POWER
EXECUTE
SLEEP
MENU
11
Example: To play a CD player
1 Press the desired Component
Select button.
The Commander comes on and the
keys for operating the selected
component are displayed.
Operating Your
Components with the
Remote Commander
When you operate a non-Sony
component, make sure you set the
component code first (page 8).
CD
Continued
2 Press the desired key in the touch
key display.
When the remote control signal is
sent, is displayed on the display.
You may also use the VOLUME +/–
buttons, the MUTING button and the
CHANNEL +/– buttons if necessary.
3 When you are done using the
Commander, press
COMMANDER OFF to power off
the Commander.
Note
The remote control signals may be different for
some components or functions. In this case,
program the remote control signals with the
learning function (see page 13). Note, however,
that components and functions that do not
support the remote control of infrared signals
will not work with this Commander.
To control the volume
Press the VOLUME +/– buttons to
control the volume, and the MUTING
button to mute. When you select a visual
component, the TV’s volume will be
controlled, and when you select an audio
component, the amplifier’s volume will
be controlled. You can change this setting
also (page 18).
COMMANDER
OFF
SYSTEM CONTROL COMMANDER
OFF
LIGHT
TV VCR1 VCR2 VCR3 DVD DBS/CBL
AMP CD MD/DAT DECK B/A TUNER OPTION
CHANNEL VOLUME
MUTING
+
+
±
123
2
1
CD
123
456
78
+10
0
9
ENTER
D.SKIP
SHUFFLE
REPEAT
CONTINUE
CLEAR
POWER
PGM
CD
123
456
78
+10
0
9
ENTER
D.SKIP
SHUFFLE
REPEAT
CONTINUE
CLEAR
POWER
PGM
12
When you operate a Sony VCR
Select the VCR1, 2, or 3 button to match
the VTR1, 2 or 3 switch on your VCR. If
your VCR does not have a VTR1, 2, or 3
switch, select VCR1, 2, or 3 according to
the type of VCR as follows.
Betamax VCR1
8mm VCR2
VHS VCR3
When you operate a VCR REC
(record) key
In order to avoid recording by mistake,
the REC key does not work by itself. To
record, you must press the ( key while
pressing the REC key.
When you use a double cassette
deck
You need to select deck A or B before
operating. To select the deck, press DECK
B/A to switch the display between
“DECK A” and “DECK B”.
If the remote control for your cassette
deck has only one set of operating
buttons and has an A/B button for
selecting a deck, press the D.SKIP key in
the touch-key display instead.
Operating Your Components with
the Remote Commander
(continued)
About the input select of a TV
It is also possible to select directly as
follows when you are connecting more
than two VCRs.
“TV/VIDEO” + “0” : TV tuner
“TV/VIDEO” + “1” : VIDEO1
“TV/VIDEO” + “2” : VIDEO2
“TV/VIDEO” + “3” : VIDEO3
“TV/VIDEO” + “4” : VIDEO4
“TV/VIDEO” + “5” : VIDEO5
“TV/VIDEO” + “6” : VIDEO6
When you use a Sony TV, the above
commands are preset. For other brands, it
is possible to “teach” the above double-
key operations using the learning
function (see page 13).
13
SYSTEM CONTROL COMMANDER
OFF
LIGHT
TV VCR1 VCR2 VCR3 DVD DBS/CBL
AMP CD MD/DAT DECK B/A TUNER OPTION
CHANNEL VOLUME
MUTING
+
+
±
123
3
2
6
LEARN
C+C- V+ V-
MU
VCR
1
RESET
123
456
78
+10
0
9
ENTER
TV/VIDEO
ANT SW
CLEAR
P IN P
DISPLAY
POWER
EXECUTE
WIDE
SLEEP
REC
MENU
ON/OFF
SOUND
FIELD
Using Non-Preset
Remote Control
Operations
— Learning Function
To operate non-preset components or
functions, use the following “learning”
procedure to “teach” any of the
programmable buttons and keys to
operate the functions of another remote
control. You can also use the learning
function to change the signal of
individual keys and buttons after setting
the component code number (page 8).
It is useful if you make a memo of the
learned key functions in the LCD touch
key display table (See page 43).
Note
Some specific remote control signals may not
be learned.
Continued
Example: To program the (
(Play) signal of your component
to the VCR1 ( (Play) key of the
Commander
1 Place the RM-AV2000 head to
head with your component’s
remote control.
2 While pressing COMMANDER
OFF, press the Component Select
button for the component whose
signals are to be learned.
All the learnable keys flash.
Display for CHANNEL, VOLUME and
MUTING buttons
The “C+ C- V+ V- MU” display
indicates if CHANNEL
+/–, VOLUME +/– and MUTING
buttons are learnable or not.
Note on the flashing display
The keys or buttons that are already preset
for that component flash twice while those
that are not preset flash once.
about 2 – 4 inches
(5 – 10 cm) away
RM-AV2000
Remote control for
your component
COMMANDER
OFF
+
VCR1
LEARNNG
C+C- V+ V-
MU
VCR
1
RESET
123
456
78
0
9
ENTER
TV/VIDEO
ANT SW
DISPLAY
POWER
REC
14
5 Repeat Steps 3 and 4 to teach
functions to other kyes or
buttons.
To learn another component’s
remote control signal
After positioning the two remote
commanders as in Step 1 on page 13, press
the corresponding Component Select
button, and then follow Steps 3 and 4 on
the left to perform learning.
6 Press COMMANDER OFF.
Notes
If you do not perform learning steps within
two minutes, learning mode ends.
If you do not perform Step 4 within 10
seconds after Step 3, the display turns back to
the display in Step 2. (All the learnable keys
flash.) In this case, perform Step 3 again
while the display is flashing,
If “NG” appears while learning, the memory
is full. To free memory, clear learned
functions from keys that you do not use often
(page 16). Then continue the learning steps.
If you touch a key by mistake, while pressing
“RESET” key, press the mistaken key. Then
repeat from Step 2 to continue learning.
If the Commander does not seem to
be working
If the learned key or button does not operate
properly, teach once again. (For example, if the
volume becomes very loud after pressing the
VOLUME+ button only once, noise may have
interfered during the learning procedure.)
Using Non-Preset Remote Control
Operations — Learning Function
(continued)
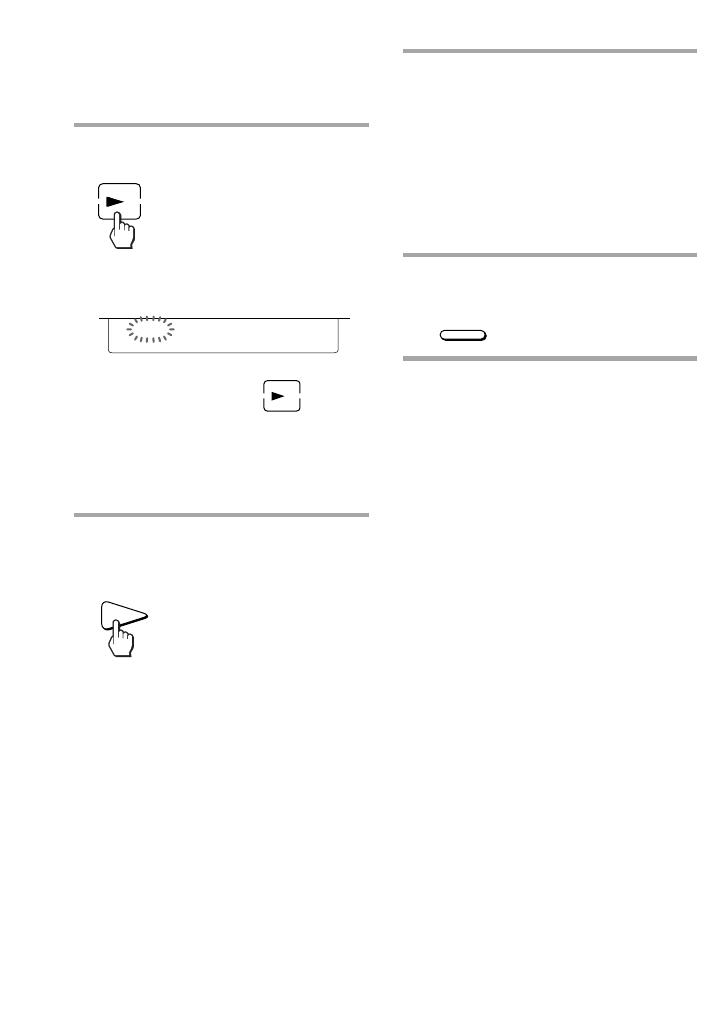
3 Press the key or button on the
Commander you want to “teach”.
“LEARN” flashes and the only
pressed key remains on the dislplay.
To teach on the CHANNEL +/–,
VOLUME +/– or MUTING buttons
Press the corresponding button. “LEARN”
flashes, “C+, C–,” “V+,V–,” or “MU”
remains on the display.
4 Press and hold down the button
on the other remote control until
you hear a beep.
“LEARN” stops flashing and stays lit.
When the comand has been learned
successfuly, the learned keys stay lit
and the other learnable keys flash.
If you hear beeps and “NG”
flashes on the display
Learning did not succeed. Try Steps 3 and 4
again.
Certain signals may require the learning
procedure more than once to complete
learning. In this case, try Step 4 again if
“NG” appears after Step 4.
COMMANDER
OFF
LEARN
VCR
1
15
For accurate learning
Do not move the remote units during
the learning procedure.
Be sure to keep holding down the
button of the other remote control until
you hear the confirmation beep.
Use fresh battery in both remote units.
Avoid learning in places under direct
sunlight or a strong fluorescent light.
The remote control detector area may
differ depending on each remote unit. If
learning does not work, try changing
the positions of the two remote control
units.
To “teach” to the keys for the
component to the OPTION button
Assign your desired component, first (see
page 17).
IMPORTANT
Be sure to place the Commander out
of the reach of small children or pets.
Components such as air conditioners,
heaters, electric appliances, and
electric shutters or curtains receiving
an infrared signal can be dangerous if
misused.
When you teach the signals for a
double cassette deck
Press DECK B/A to select deck A or B.
When you teach the REC (record)
signal for VCR1, 2, or 3
In Step 3, while pressing the REC key,
press the ( key to display both keys,
then follow Steps 4 to 6. The Commander
can not learn the remote control signal
with just the REC key lit up.
When you teach signals on the
VOLUME or MUTING buttons
For components other than TV or AMP,
see the notes on page 19 for details.
To display only the frequently
used keys
You can hide keys you do not use. This
makes operations even easier to
understand, when the components have
many keys.
After Step 2 on page 13, while pressing
the RESET key, press the key you want to
hide (flashing). The pressed key changes
to slower flashing and will no longer be
displayed during remote control
operations.
To display it again, perform the same
procedure again.
Note
You can not hide a key which has “learned”
any signal.
Continued
16
Using Non-Preset Remote Control
Operations — Learning Function
(continued)
To clear all signals learned for a
specific component
1 While pressing COMMANDER
OFF, press the corresponding
Component Select button.
When you want to clear signals
learned for DECK B/A
Press DECKB/A to display “DECK A”or
“DECK B”. You can not clear both decks at
the same time.
2 While pressing the RESET key,
press that Component Select
button again. The Commander
beeps, the learned contents are
cleared. The keys for the
component return to their
original states before learning.
Note
If you perform the steps above when no signal
is “learned”, the component code setting (page
8) will be reset to the factory setting.
Note that for DECK B/A, if you reset either
deck (A or B), the component code for both A
and B will be reset to the factory setting.
Changing or erasing the
function of a learned key or
button
To change the learned function, clear it
first and perform learning again.
To clear the learned function of a
single key or button
1 After Step 2, while pressing the
RESET key, press the key or
button you want to erase.
The cleared key flashes together with
other learnable keys.
COMMANDER
OFF
+
CD
+
RESET
+
RESET
CD
17
SYSTEM CONTROL COMMANDER
OFF
LIGHT
TV VCR1 VCR2 VCR3 DVD DBS/CBL
AMP CD MD/DAT DECK B/A TUNER OPTION
CHANNEL VOLUME
MUTING
+
+
±
123
1
3
2
LEARNNG
C+C- V+ V-
MU
CD
RESET
123
456
78
+10
0
9
ENTER
D.SKIP
SHUFFLE
REPEAT
CONTINUE
CLEAR
POWER
PGM
Example: To assign a CD player
(CD) to the OPTION button
1 While pressing COMMANDER
OFF, press OPTION.
When a component is already
assigned to OPTION, the component
name and learnable keys flash. To
perform learning, skip to Step 3.
2 While pressing OPTION again,
press the desired Component
Select button.
The Commander beeps, and the
Commander automatically goes into
learning mode (page 12).
When you assign an LD player
(VD) or a cable box (CBL)
Repeat this step again so that the desired
component (“VD” or “CBL”) flashes.
When you assign a cassette deck
(DECK B/A)
You cannot assign both decks A and B to
the OPTION button at a time.
If the desired deck (A or B) is not displayed,
finish the procedure by pressing
COMMANDER OFF and press DECK B/A
to select the desired deck, and then start
over from Step 1.
COMMANDER
OFF
+
OPTION
+
OPTION CD
Using the OPTION
button
You can use the OPTION button as an
extra Component Select button.
For example, if you have two CD players,
you can set the remote control signals of
the second CD player to the OPTION
button to select its key operation.
To use the OPTION button, first assign a
component on it. Then you can either use
it as it is with a Sony component, set a
component code (page 8), or “teach” the
keys and buttons necessary remote
control signals (page 15).
LEARNNG
C+C- V+ V-
MU
CD OP
RESET
123
456
78
+10
0
9
ENTER
D.SKIP
RETURN
GENRE MODE
SHUFFLE
REPEAT
CONTINUE
CLEAR
DISPLAY
POWER
EXECUTE
ANGLE
PGM
SLEEP
ON/OFF
SUBTITLE
SOUND
FIELD
Continued
LEARN
OP
RESET
18
3 If the newly assigned
component is a Sony
component, press
COMMANDER OFF to finish
this procedure.
•If you need to set the
component code, follow the
steps on pages 8 and 9.
•If you need to program some
signals by the “learning”
function, follow the Steps 1 and
3 to 6 on pages 13 and 14.
To change the component
assigned to the OPTION button
Follow Step 1 to 3 above.
Note
If you leave the Commander with the
component names flashing for over two
minutes, the operation will be cancelled. To
assign a component to the OPTION button,
start over the procedure from the beginning.
Component
Select button
TV
VCR1,2,3
DBS/CBL
DVD
AMP
CD
MD/DAT
DECK B/A
TUNER
OPTION
Controls the volume of
TV
TV
TV
TV
amplifier
amplifier
amplifier
amplifier
amplifier
TV/amplifier (depending
on the assigned component)
Advanced Features
Controlling the Volume
of Visual Components
Connected to an Audio
System
The Commander is factory preset based
on the assumption that you hear the
sound of your visual components from
your TV speakers, and that you hear
sound of your audio components from
the loudspeakers connected to your
amplifier.
The following table shows the factory
setting of which volume would be
controlled for each component.
This feature enables you to control the
volume of your TV or amplifier without
having to select TV or AMP each time
you want to control the volume.
For example, to control the volume while
using a VCR, you don’t need to press the
TV button to control the TV volume.
Using the OPTION button
(continued)
19
Notes
If you have programmed any signal on the
VOLUME or MUTING buttons by learning
(page 13) for certain components, that signal
will be transmitted instead of controlling the
volume of TV or amplifier when you select
that component.
When the VOLUME or MUTING buttons of
TV or AMP have “learned” any signal, that
signal will be transmitted only when you
select TV or AMP. When you select other
components, the original signals preset for
TV or AMP will be transmitted.
To change the Factory Preset of
the Volume Control
However, if your visual components are
connected to an audio system, you
probably hear TV or VCR sound from the
loudspeakers via your amplifier, not
from your TV speakers. In this case, you
need to change the factory preset so that
you can control the volume of your
visual components without first having
to switch to the amplifier.
SYSTEM CONTROL COMMANDER
OFF
LIGHT
TV VCR1 VCR2 VCR3 DVD DBS/CBL
AMP CD MD/DAT DECK B/A TUNER OPTION
CHANNEL VOLUME
MUTING
+
+
±
123
1
COMMANDER
OFF
++
VOLUME
+
1 While pressing COMMANDER
OFF, press VOLUME + and
VOLUME –.
You hear a beep and the volume
control setting of visual components
(TV,VCR1,2 and 3, DBS/CBL, and
DVD) changes to the displayed
component.
Notes
If you have already programmed the
VOLUME or MUTING button of each
component any signals by “learning”, the
procedure above will not change the function
of the VOLUME and MUTING buttons.
If you have programmed volume control
signals on VOLUME or MUTING buttons of
TV or AMP, you can only use that signal
when you select TV or AMP. For other
component, the preset volume control signals
for TV or AMP (depending on the above
setting procedure) will be transmitted. To use
the new signals, you need to program each
button for each component by the learning
procedure (page 13).
When set to
amplifier volume
When set to
TV volume
V+ V–
MU
TV
V+ V–
MU
AMP
20
SYSTEM CONTROL COMMANDER
OFF
LIGHT
TV VCR1 VCR2 VCR3 DVD DBS/CBL
AMP CD MD/DAT DECK B/A TUNER OPTION
CHANNEL VOLUME
MUTING
+
+
±
123
3
1
2
5
LEARNNG
C+C- V+ V-
SC1 SC2 SC3 MU
TV
RESET
123
456
78
0
9
ENTER
TV/VIDEO
RECALL
P IN P
DISPLAY
POWER
EXECUTE
WIDE
SLEEP
MENU
Example: To program the
procedure on the left to the
SYSTEM CONTROL 1 button
1 While pressing COMMANDER
OFF, press one of the SYSTEM
CONTROL buttons (in this case,
SYSTEM CONTROL 1).
All the component names flash.
Programming a series of
commands to the SYSTEM
CONTROL buttons
TV VCR
123
DBS TUNER
CBL CD OPMD DECKAMP
DVD
AB
Executing a Series of
Commands
— System Control Function
With the System Control function, you
can program a series of operating
commands, and execute them by
pressing just one button.
For example, when you watch a video, a
series of operations like the ones below
are necessary.
Example:
1 Power on the TV.
2 Power on the video (VCR 1).
3 Power on the amplifier.
4 Set the imput selector of the amplifier
to VIDEO 1.
5 Set the input mode of the TV to
VIDEO.
6 Start video playback
You can program up to 16 consecutive
operation steps to each of the SYSTEM
CONTROL 1, 2 or 3. At the factory,
SYSTEM CONTROL 1 and 2 are not
programmed yet, but a series of Power-
on Commands for Sony Components is
programmed on the SYSTEM CONTROL
3 button.
COMMANDER
OFF
+
SYSTEM CONTROL
1
  • Page 1 1
  • Page 2 2
  • Page 3 3
  • Page 4 4
  • Page 5 5
  • Page 6 6
  • Page 7 7
  • Page 8 8
  • Page 9 9
  • Page 10 10
  • Page 11 11
  • Page 12 12
  • Page 13 13
  • Page 14 14
  • Page 15 15
  • Page 16 16
  • Page 17 17
  • Page 18 18
  • Page 19 19
  • Page 20 20
  • Page 21 21
  • Page 22 22
  • Page 23 23
  • Page 24 24
  • Page 25 25
  • Page 26 26
  • Page 27 27
  • Page 28 28
  • Page 29 29
  • Page 30 30
  • Page 31 31
  • Page 32 32
  • Page 33 33
  • Page 34 34
  • Page 35 35
  • Page 36 36
  • Page 37 37
  • Page 38 38
  • Page 39 39
  • Page 40 40
  • Page 41 41
  • Page 42 42
  • Page 43 43
  • Page 44 44
  • Page 45 45
  • Page 46 46
  • Page 47 47
  • Page 48 48
  • Page 49 49
  • Page 50 50
  • Page 51 51
  • Page 52 52

Sony RM-AV2000 User manual

Category
Remote controls
Type
User manual

Ask a question and I''ll find the answer in the document

Finding information in a document is now easier with AI