Page is loading ...

Ruckus Wireless, Inc. | Part No. 800-70167-001
QUICK SETUP GUIDE
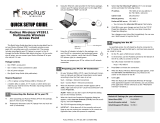
Ruckus Wireless
ZoneFlex 2942-OT/7942-OT
Access Point
This Quick Setup Guide describes in step-by-step detail how to
set up a Ruckus Wireless ZoneFlex 2942-OT (ZF2942-OT) or Zone-
Flex 7942-OT (ZF7942-OT) Access Point (AP), serving users in a
wi-fi hotspot. The process includes reconfiguring your PC/laptop
to connect to the Ruckus AP through the Ruckus Wireless Web
Admin Interface. At the conclusion of setup, you can place and
connect your hotspot AP at your site and put it in use.
Package Contents
• One ZF2942-OT or ZF7942-OT Access Point
• Bag with four plastic mount arms and four screws
•This ZoneFlex 2942-OT/7942-OT Quick Setup Guide
Required Equipment
• A PC or laptop running Windows 2000 or Windows XP
• A Power over Ethernet (PoE/802.3af) switch or injector
1 After unpacking your Ruckus Wireless Outdoor AP from the
package, place it next to your PC/laptop and PoE injector or
switch. Make sure that the PoE device is plugged into AC
power.
2 Temporarily disconnect your PC/laptop from any local net-
work (if connected).
3 Do not turn the enclosure vent (labeled #3 below), it will be
damaged.
4 Remove the cable gland nut (labeled #1 below), by turning it
counterclockwise while holding its base (labeled #2 below)
still, to prevent it from turning. This will expose the internal
PoE Ethernet connector. Set the cable gland nut aside safely
for later use in outdoor mounting location.
5 Using an Ethernet cable, connect your PC/laptop network
port to a PoE data port on the PoE injector or switch.
6 Using an Ethernet cable, connect the PoE injector or switch
(PoE powered port) to the exposed internal PoE Ethernet
connector on the AP. This step connects the Ethernet and
power to the AP unit. There are no externally visible indica-
tors that the AP unit is powered on.
You have completed connecting the AP to your PC and PoE
device.
1 On your Windows 2000 or XP PC, open the Network Con-nec-
tions (or Network and Dial-up Connections) control panel
according to how the Start menu is set up:
Start > Settings > Network Connections
Start > Control Panel > Network Connections
2 When the Network Connections window appears (XP or
2000), right-click the icon for “Local Area Connection” and
select Properties.
ALERT!—Make sure you do not open the Properties dialog box
for the wireless network.
3 When the Local Area Connection Properties dialog box
appears, select Internet Protocol (TCP/IP) from the scrolling
list, and click Properties.
The TCP/IP Properties dialog box appears.
IMPORTANT— Write down all of the currently active settings
so you can restore your computer to its current configuration
later (when this process is complete).
4 Select Use the following IP address (if it’s not already
active) and make the following entries:
IP Address 192.168.0.22 (or any address in
the 192.168.0.x network)
Subnet mask 255.255.255.0
Default gateway 192.168.0.1
Preferred DNS server 192.168.0.1
Leave the Alternate DNS server field empty.
5 Click OK to save your changes and exit first the TCP/IP Prop-
erties dialog box, then the Local Area Connection Properties
dialog box.
Your changes are put into effect immediately.
As specified earlier, the AP should be connected through your PoE
device to you PC/laptop, and will have powered on, ready for
use.
1 On the PC, open a Web browser window.
2
In the browser, type this URL to connect to the AP:
https://192.168.0.1
3 Press Enter to initiate the connection.
4 When a security alert dialog box appears, click OK/Yes to
proceed.
5 When the Ruckus Wireless Admin login page appears, enter
the following:
Username super
Password sp-admin
6 Click Login.
When the Ruckus ZoneFlex 2942-OT/7942-OT AP Web inter-
face appears, you can proceed.
Important
If the AP is deployed with a ZoneDirector, follow the ZoneDi-
rector Quick Setup Guide and the directions in section 6 of this
guide for attaching and connecting the AP to your PoE powered
Ethernet network.
1 Connecting the Ruckus AP to Your PC
2 Preparing Your PC for AP Setup
3 Logging into the AP
Default AP Settings (for your reference)
Network Names (SSIDs) Wireless1—Wireless4
Security (Encryption method) Disabled for each hotspot
Default Management IP Address 192.168.0.1

Ruckus Wireless, Inc. | Part No. 800-70167-001
If your computer cannot connect to the AP...
• Ensure that the PoE device is plugged into AC power and any
indicator lights for proper operation are on.
• Disconnect the AP from the power source, wait 5 seconds,
then reconnect it—and wait 60 seconds before attempting a
reconnection.
1 In the left-hand menu column of the Ruckus Web Admin
interface, choose Wireless (under Configuration).
The Configure::Wireless::Common options appear.
2 Verify that the following options are active:
Wireless Mode “Auto-select” must be selected
Channel “SmartSelect” must be selected
Country Code If not in the United States, select the
current country.
3 Click Update Settings if you made any changes.
4 Click any of the four “Wireless #” tabs.
5 Delete the text in the SSID field and type the name of your
network. (If your network doesn’t have a “name”, type a
short name that will help your users identify the AP in their
wireless network connection application.
6 Click Update Settings to save your settings.
7 Repeat the preceding steps with each Wireless # tab.
8 [-Steps 8–11 Optional-] To switch from DHCP (the default) to
Static IP, choose Internet (under Configuration).
9 Click the button by Static IP.
10 Fill in the IP Address and Mask fields.
11 Click Update Settings to save your settings.
12 Click Logout to exit the Ruckus Web Admin interface.
13 When the Web Admin login page reappears, you can exit your
browser.
14 Disconnect the AP from the PC/PoE device and restore your
PC to the normal network connections.
To restore the network settings for your PC/laptop, do one of the
following first steps, according to which OS your PC/laptop is
using:
1 Click Start > Settings > Network Connections.
(If Windows 2000, click Start > Settings >Network and Dial-
up Connections.)
2 When the Network Connections window appears, right-click
the icon for the “Local Area Connection” designated for your
home network and choose Properties.
3 When the Local Area Connection Properties dialog box
appears, select Internet Protocol (TCP/IP) from the scrolling
list, and click Properties.
The TCP/IP Properties dialog box appears.
4 Replace the recent AP connection entries with the entries
from your standard network configuration.
5 Click OK to save your settings and exit first the TCP/IP Prop-
erties dialog box, then the Local Area Connection Properties
dialog box.
Your PC/laptop is now ready for normal network use.
1 Install each of the four mount arms (labeled #4) as shown,
with each of the four screws (labeled #5 above). Maximum
torque 7.5 lbf-in. If the screws are over tightened, they will
strip the enclosure threaded inserts. Note that the mount
arms will still be able to pivot slightly, this is normal and
allows for easier installation.
2 If not already done, remove the cable gland nut (labeled #1
above), by turning it counterclockwise while holding its base
(labeled #2 above) to prevent it from turning. This will
expose the Ethernet connector.
3 Pass the PoE enabled Ethernet cable end through the cable
gland nut and connect the cable to the exposed Ethernet
connector in the center of the connector base (#2).
4
Install the cable gland nut (#1) by hand, turning it clockwise
into the base (#2), until is it firmly in place. This will tighten
the internal sealing gland to prevent water intrusion.
5 Mount the unit onto the outdoor structure, out of direct sun-
light, using the four available holes in the mounting arms and
fasteners of a type and length that is appropriate for the
intended mounting surface. Secure the Ethernet cable as
appropriate for the chosen installation location.
Congratulations! You have completed mounting the AP.
1 Using any wireless-enabled computer or mobile device,
search for and select the wireless network you’ve previously
configured.
2 If you can connect, open a browser and link to any public
Web site.
Your wireless network is active and ready for use.
You can now use the wireless network to log in to the AP with the
Web Admin interface. Use this tool to review and fine-tune a
wide range of settings and options, to make your hotspot opera-
tions more secure and more efficient.
See the separate Ruckus Wireless ZF2925/ZF2942/ZF7942 AP
User Guide (downloadable from the Ruckus support Web site) for
all the details, or open and browse the Help window in the Web
Admin interface for topical assistance.
4 Customizing Wireless Settings
Important
If you anticipate logging into the AP regularly to perform mon-
itoring or maintenance (once it is in place), you may want to
consider assigning a static IP address to the AP. This would sim-
plify connections made to the AP for all post-installation main-
tenance.
In a default AP configuration, the AP uses a DHCP-assigned IP
address. Any post-installation connections require (1) a
reverse ARP lookup or (2) logging into the DHCP server, to
determine which IP address is in effect in the AP.
See the Ruckus Wireless ZF2942/ZF7942 AP User Guide for
more information on IP address assignment options and logging
into the AP through either a static IP or dynamic IP address.
5 Restoring Your PCs Network Settings
6 Mounting the AP
Important
To protect the AP from voltage spikes, Ruckus Wireless recom-
mends installing a surge protector with the AP.
7 Testing the Ruckus Wireless AP
** For More Information
/