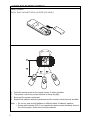
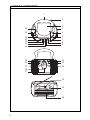
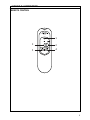
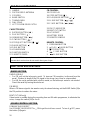
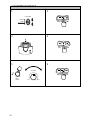
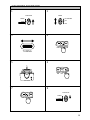
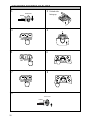
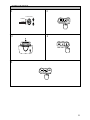
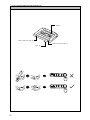
Hitachi CX-38E(BS) features a CD player, radio, and cassette recorder. It can play audio CDs and radio stations, and record audio to cassette tapes. The device has a variety of playback options, including the ability to skip tracks forward or backward, and to program the order of playback. It also has a beat cut switch to reduce bass frequencies, and a D.B.B. (Dynamic Bass Boost) button to enhance bass frequencies. The device can be powered by either AC power or by 8 C batteries, making it portable and convenient to use.
Hitachi CX-38E(BS) features a CD player, radio, and cassette recorder. It can play audio CDs and radio stations, and record audio to cassette tapes. The device has a variety of playback options, including the ability to skip tracks forward or backward, and to program the order of playback. It also has a beat cut switch to reduce bass frequencies, and a D.B.B. (Dynamic Bass Boost) button to enhance bass frequencies. The device can be powered by either AC power or by 8 C batteries, making it portable and convenient to use.


-
 1
1
-
 2
2
-
 3
3
-
 4
4
-
 5
5
-
 6
6
-
 7
7
-
 8
8
-
 9
9
-
 10
10
-
 11
11
-
 12
12
-
 13
13
-
 14
14
-
 15
15
-
 16
16
-
 17
17
-
 18
18
-
 19
19
-
 20
20
-
 21
21
-
 22
22
-
 23
23
-
 24
24


Hitachi CX-38E(BS) features a CD player, radio, and cassette recorder. It can play audio CDs and radio stations, and record audio to cassette tapes. The device has a variety of playback options, including the ability to skip tracks forward or backward, and to program the order of playback. It also has a beat cut switch to reduce bass frequencies, and a D.B.B. (Dynamic Bass Boost) button to enhance bass frequencies. The device can be powered by either AC power or by 8 C batteries, making it portable and convenient to use.
Ask a question and I''ll find the answer in the document
Finding information in a document is now easier with AI