Page is loading ...

Installation Instructions for
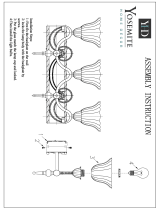
Chandelier
GP I :ENERAL RODUCT NFORMATION
These fixtures are intended to be installed utilizing
NEC compliant junction boxes.
This product is suitable for damp locations.
Incandescent version may be dimmed with a standard incandescent
dimmer. LED version may be dimmed with a LED dimmer. Consult
lamp manufacturer for additional information.
1
Line Wave 2 Linear
980LWAVE2CH
1.2
SU952
Install the Mounting Plate
CANOPY
1
1A
Separate the mounting plate from the canopy by
unscrewing the four mounting plate screws on the
canopy using the provided Allen wrench.
1B
CAUTION RISK OF FIRE-
This product must be installed in accordance with
the applicable installation code by a person familiar
with the construction and operation of the product
and the hazards involved.
Use minimum 90°c supply conductors.
MOUNTING
PLATE SCREW
Remove the mounting plate from the canopy.
MOUNTING PLATE
2
1B
CANOPY
1C
3
Secure the mounting plate to the electrical box with the
two #8-32 screws provided.
MOUNTING
PLATE
#8-32 SCREW
#8-32 SCREW
ALLEN WRENCH

1E
1D
Line up an anchors with the center of a backplate holes
and push the anchors in, up to the threads.
Screw the anchors the rest of the way in with a
screwdriver.
4
5
4
5
Secure the backplate to the anchors with screws and
washers.
6
6
6
STEM
FIXTURE
1
2A
Determine desired length of fixture using the provided
stems and assemble them by screwing them together.
Feed the fixture wires through the stem assemblies and
screw them to the fixture.
3
Assemble the Fixture
2
2
1
1
4
2
2B
Feed the fixture wires through the canopy and place the
canopy onto the stem assemblies.
Secure the canopy to the stems by installing the flat
washers, lock washers, and nuts (in that order) onto the
stems, then secure them in place by screwing the nuts
onto the stems. Slide the sleeves over the wires and into
the stems.
FLAT WASHER
FIXTURE WIRES
STEM
NUT
LOCK WASHER
SLEEVE

Leave 12" of the cord behind the canopy for power
connections. Cut the excess cord.
Strip the end of the wires.
1
2
3A
12"
Install the Fixture
MOUNTING
PLATE
ELECTRICAL BOX
3B
5
7
6
3
Connect the ground wire to a suitable ground in
accordance with local electrical codes.
Connect the black wires to the neutral power wire with
a wire nut.
Connect the red wires to the hot power wire with a wire
nut.
Neatly place all wires and wire nut connections in the
canopy and reinstall the canopy to the mounting plate
(reversal of step 1A).
4
5
6
Install the Lamps
1
Screw the lamps into the sockets.
C AUTION: To reduce the risk of a burn or electric
shock during re-lamping, disconnect the power to
the fixture.
Refer to fixture marking for lamp information.
4A
SOCKET
LAMP
3

4
SAVETHESE INSTRUCTIONS!
7400 Linder Ave, Skokie, 60077IL
800.323.3226 - 847.626.6300
www.lbllighting.com
© 2017 Lighting.All rights reserved.The " Lighting" graphic is aLBL LBL
registered trademark of Lighting. Lighting reserves the right toLBL LBL
change specifications for product improvements without notification.
A Generation Brands Company
/