Page is loading ...

1
Fan Wall Mount
Installation and User
Instructions
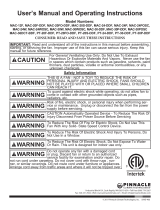
IMPORTANT: READ AND SAVE THESE INSTRUCTIONS
Read all instructions carefully before attempting to assemble, install, operate or service the
product described. Failure to comply with instructions could result in personal injury and/or
property damage.
Using this product for any other purpose than it was intended, or not within the operating
specifications in this manual will void the warranty and may cause damage to the fan or serious
injury to personnel.
1
SCVA-411

2
DESCRIPTION
Schaefer’s wall mounts offer the flexibility to
mount circulation fans up to 42" on a wide
variety of surfaces using four distinct mounting
configurations. Mounts allow for 180° swivel
adjustment from side to side with the capability
to tilt up to 45° to direct the air where desired.
Assembled in the USA of heavy-duty steel, these
mounts will provide years of dependable fan
support for your cooling and air circulation needs.
MOUNTING CONFIGURATIONS
Schaefer’s wall mount bracket can be assembled in four
configurations. Some configurations will limit the fan
angle adjustment range. The Long Leg Out, Short Leg Up
configuration allows the maximum listed fan to swivel and
tilt with no interference of the support structure or diagonal
brace.
Note: The swivel tab must always be mounted downward as
shown.
WALL BRACKET ASSEMBLY
Kit Contents:
Formed Bracket, Diagonal Brace, Swivel Tab
(2) 1/4"-20 x 3/4" Bolts, (2) 1/4"-20 Nylock Nuts, (4) 1/4" Washers
(1) 3/8"-16 x 1-1/4" Bolt, (1) 3/8"-16 Nylock Nut, (1) 3/8" Washer
Tools required:
(2) 7/16" Wrenches
(1) 9/16" Wrench
1. Orient the Formed Bracket and Diagonal
Brace so both hole patterns are aligned.
2. Join the Bracket and Brace with the 1/4"
hardware through the desired Swivel Tab end.
Use the 7/16" wrenches and tighten fasteners
securely.
3. Install Swivel Tab using the 3/8" hardware.
Insert the 3/8" Nylock Nut into the Swivel
Tab Slot feature. Hold the nut in position
while installing the 3/8" bolt. Use the
9/16" Wrench to tighten the bolt until the
Swivel Tab is seated against the bracket but
still allows rotational movement.
Long leg out, short leg down
Short leg out, long leg down
Long leg out, short leg up
Short leg out, long leg up
Step 1:
Step 2:
Step 3:
Holes
align
Capture
nut within
Swivel Tab
Slot
Surface
contact
Specifications
Part Number Maximum Fan* Size Finish
WMTA24-B 12" - 24" Powder Coated Black
WMTA24-SS 12" - 24" Stainless Steel
WMTA30-B 12" - 30" (36")* Powder Coated Black
WMTA30-SS 12" - 30" (36")* Stainless Steel
WMTA36-B 12" - 36" (42")* Powder Coated Black
* A larger fan can be mounted with a smaller mount, but it will have
limited swivel range of motion. Maximum fan weight: 75 lbs.

3
INSTALLATION REQUIREMENTS
Support Structure:
The fan mount bracket must be installed on a support structure strong enough
for the added weight of the bracket and fan. Refer to Loading Tables below.
Suitable material choices are wood, cement, brick and steel. Wood supports
must be 3" x 3" square post or larger.
Mounting Hardware:
THE HARDWARE TO ATTACH THE FAN MOUNT BRACKET TO THE
STRUCTURE IS NOT SUPPLIED. HARDWARE MUST BE ADEQUATE TO
SAFELY SUPPORT THE LOADS SHOWN IN THE TABLES BELOW.
Attach the fan mount bracket with (3) washers and (3) screws or bolts with
Nylock nuts suitable for your installation (2 fasteners at the 90° bend; 1 fastener
at the end away from the swivel tab). Fasteners should be 5/16"diameter,
Grade 2 or better. Lag screws used for wood installation must be at least 2"
long. Always follow the fastener manufacturer's installation instructions.
Wall Mount Fastener Loading:
Loading Tables:
F MAX
V MAX
V VMAX
V HMAX
75 lbs
Max.
75 lbs
Max.
F MAX
Fan In-Line with Mount Fan Perpendicular to Mount
Mount F MAX** V HMAX** V VMAX
WMTA24 53 lbs 20 lbs 38 lbs
WMTA30 50 lbs 15 lbs 38 lbs
WMTA36 48 lbs 13 lbs 38 lbs
75 lb Fan In-Line with Mount 75 lb Fan Perpendicular to Mount
Note: F
MAX is "pull out" force (per fastener).
V MAX, V HMAX & V VMAX are shear loadings (per fastener).
Mount F MAX V MAX
WMTA24 63 lbs 38 lbs
WMTA30 58 lbs 38 lbs
WMTA36 54 lbs 38 lbs

4
©2017 Pinnacle Climate Technologies. All rights reserved. 3-1-2017
A DIVISION OF PINNACLE CLIMATE TECHNOLOGIES
www.schaeferventilation.com • 1.800.779.3267
4
Pinnacle Climate Technologies Limited Warranty Policy
Pinnacle Climate Technologies (PCT) provides the following limited warranty from the date of invoice to the initial purchaser of our prod-
ucts or to its customer with a dated proof of purchase:
Two-year coverage (unless otherwise indicated below) applies to all products, components and assemblies provided by PCT that prove to be defec-
tive in material or workmanship. Any such defective product will be repaired or replaced at PCT’s option, with the defective product or component
returned upon approval to PCT, F.O.B. Sauk Rapids, Minnesota.
This warranty does not cover: failure, damage or malfunction as a result of: Improper installation or installation not in accordance with installation
instructions. Operating conditions that vary from PCT’s operating instructions. Misuse, abuse, negligence, alteration, or accident. Transporting the
product. Improper operation or lack of appropriate or regular maintenance of the product. Loss of time, inconvenience, loss of use of the product or
other consequential or incidental damages. Parts that need replacement due to normal wear and tear. Superficial or cosmetic rust or corrosion. Any
product whose name plate has been removed.
A full warranty statement may be printed or downloaded from www.schaeferventilation.com.
WARRANTY
Attach the Fan:
THE HARDWARE TO ATTACH YOUR FAN TO THE FAN MOUNT BRACKET IS NOT SUPPLIED IN THIS KIT.
Note: Fasteners are supplied with all current Schaefer circulation fans.
Note: Stainless steel fasteners should be coated with a lubricant (WD-40) to prevent thread galling and
allow subsequent adjustment.
Install (1) 3/8" x 1-1/4” bolt, (2) washers and (1) Nylock nut through Swivel Tab hole
Install (1) 1/4" x 1” bolt, (2) washers and (1) Nylock nut through Swivel Tab slot
Once fan is securely attached to the Swivel Tab, orient
the fan horizontally and tighten the Swivel Tab hardware
to prevent the fan from turning.
Adjust the fan to desired angle and
securely tighten the hardware.
CAUTION: Fasteners will loosen over time. It is important to check and tighten fasteners frequently.
CAUTION: Inspect mounts and fasteners frequently for corrosion. Replace any corroded fasteners or parts.
Large
Guard
Wires
Safety Cable: (
Safety Cable Kit sold separately.)
A SECONDARY SUPPORT CABLE SHOULD BE INSTALLED ANY TIME THE FAN IS MOUNTED OVERHEAD FOR
ADDITIONAL SAFETY.
Safety Cable must go around the Large Diameter Wires of the Front and Rear Guards.
The other end of Safety Cable must be securely fastened to a building joist, truss, or beam near the fan. Take up
all unnecessary slack in the cable.

1
Instrucciones de instalación
del soporte en pared
paraventilador
IMPORTANTE: LEA Y CONSERVE ESTAS INSTRUCCIONES
Lea detenidamente todas las instrucciones antes de intentar armar, instalar, operar o dar
servicio al producto descrito. De no cumplir con estas instrucciones podría ocasionar lesiones
personales y/o daños materiales.
El uso de este producto para cualquier otro fin para el que fue diseñado, o que no cumpla las
especificaciones de operación en este manual, anulará la garantía y puede ocasionar daños al
ventilador o lesiones graves al personal.
1

2
DESCRIPCIÓN
Los soportes en pared de Schaefer ofrecen la
flexibilidad de montar ventiladores de circulación
hasta de 42 pulg. (107 cm) en una amplia variedad
de superficies, utilizando cuatro configuraciones
de montaje diferentes. Los soportes permiten un
ajuste giratorio de 180° de un lado al otro, con la
capacidad de inclinarse hasta a 45° para dirigir el aire
a donde lo desee. Armados en EE.UU. con acero
de uso pesado, estos soportes brindarán años de
apoyo confiable al ventilador, para sus necesidades
de enfriamiento y de circulación de aire.
CONFIGURACIONES DE MONTAJE
El soporte en pared de Schaefer puede armarse en cuatro
configuraciones. Algunas configuraciones limitarán el intervalo
de ajuste del ángulo del ventilador. La configuración ”pata
larga hacia afuera, pata corta hacia arriba” permite el giro y la
inclinación nominales máximos del ventilador, sin interferencia
de la estructura de apoyo ni del refuerzo diagonal.
Nota: La pestaña giratoria siempre debe montarse hacia
abajo, como se muestra.
CONJUNTO DEL SOPORTE PARA PARED
Contenido del juego:
Soporte formado, refuerzo diagonal, pestaña giratoria
(2) pernos de 1/4 pulg.-20 x 3/4 pulg., (2) tuercas Nylock de 1/4 pulg.-20, (4) arandelas de 1/4 pulg.
(1) perno de 3/8 pulg.-16 x 1-1/4 pulg., (1) tuerca Nylock de 3/8 pulg.-16, (1) arandela de 3/8 pulg.
Herramientas necesarias:
(2) llaves de 7/16 pulg.
(1) llave de 9/16 pulg.
1. Oriente el soporte formado y el refuerzo
diagonal de tal manera que se alineen los dos
patrones de orificios.
2. Una el soporte y el refuerzo con los herrajes de
1/4 pulg. a través del extremo deseado de la
pestaña giratoria. Use las llaves de 7/16 pulg.
y apriete firmemente los sujetadores.
3. Instale la pestaña giratoria con los herrajes de
3/8 pulg. Inserte la tuerca Nylock de 3/8 pulg.
en la ranura de la pestaña giratoria. Sostenga
la tuerca en su lugar mientras instala
el perno de 3/8 pulg. Use la llave de
9/16 pulg. para apretar el perno hasta que
la pestaña giratoria quede asentada contra
el soporte, pero que todavía permita
el movimiento giratorio.
Pata larga hacia afuera,
pata corta hacia abajo
Pata corta hacia afuera,
pata larga hacia abajo
Pata larga hacia afuera,
pata corta hacia arriba
Pata corta hacia afuera,
pata larga hacia arriba
Paso 1:
Paso 2:
Paso 3:
Los orificios
se alinean
Sujete la
tuerca dentro
de la ranura
de la pestaña
giratoria
Contacto de
superficie
Especificaciones
Número de pieza
Tamaño máximo
de ventilador*
Acabado
WMTA24-B 12 - 24 pulg. (30.5 - 61 cm)
Recubrimiento
pulverizado negro
WMTA24-SS 12 - 24 pulg. (30.5 - 61 cm) Acero inoxidable
WMTA30-B
12 - 30 pulg. (36 pulg.)
(30.5 - 76 cm [91 cm])*
Recubrimiento
pulverizado negro
WMTA30-SS
12 - 30 pulg. (36 pulg.)
(30.5 - 76 cm [91 cm])*
Acero inoxidable
WMTA36-B
12 - 36 pulg. (42 pulg.)
(30.5 - 91 cm [107 cm])*
Recubrimiento
pulverizado negro
* Se puede montar un ventilador más grande con un soporte más pequeño,
pero tendrá un intervalo de movimiento giratorio limitado. Peso máximo del
ventilador 75 lb (34 kg).

3
REQUISITOS DE INSTALACIÓN
Estructura de apoyo:
El soporte de montaje del ventilador debe instalarse sobre una estructura de
apoyo lo suficiente resistente para el peso adicional del soporte y del ventilador.
Consulte las tablas de carga que aparecen a continuación. Las opciones de
materiales adecuados son madera, cemento, ladrillo y acero. Los apoyos de
madera deben ser un poste cuadrado de 3 x 3 pulg. (7.5 x 7.5 cm) o más grande.
Herrajes de montaje:
LOS HERRAJES PARA FIJAR EL SOPORTE DE MONTAJE DEL VENTILADOR
A LA ESTRUCTURA NO ESTÁN INCLUIDOS. LOS HERRAJES DEBEN SER
ADECUADOS PARA APOYAR DE MANERA SEGURA LAS CARGAS MOSTRADAS
EN LAS SIGUIENTES TABLAS.
Fije el soporte de montaje del ventilador con (3) arandelas y (3) tornillos o
pernos con tuercas Nylock adecuadas para su instalación (2 sujetadores en el
doblez de 90°; 1 sujetador en el extremo opuesto a la pestaña giratoria). Los
sujetadores deben medir 5/16 pulg. de diámetro y ser grado 2 o mejor. Los
tornillos de fijación utilizados para la instalación en madera deben medir por
lo menos 2 pulg. (5 cm) de largo. Siempre siga las instrucciones de instalación
del fabricante de los sujetadores.
Carga de sujetadores para montaje en pared:
Tablas de carga:
F MÁX
V MÁX
V VMÁX
V HMÁX
75 lb (34 kg)
Máx.
75 lb (34 kg)
Máx.
F MÁX
Ventilador en línea con el soporte Ventilador perpendicular al soporte
Soporte F MÁX** V HMÁX** V VMÁX
WMTA24 53 lb (24 kg) 20 lb (9 kg) 38 lb (17 kg)
WMTA30 50 lb (23 kg) 15 lb (7 kg) 38 lb (17 kg)
WMTA36 48 lb (22 kg) 13 lb (6 kg) 38 lb (17 kg)
Ventilador de 75 lb (34 kg) en línea con el soporte Ventilador de 75 lb (34 kg) perpendicular al soporte
Nota: F
MÁX es la fuerza ”de extracción” (por sujetador).
V
MÁX, V HMÁX y V VMÁX son cargas de esfuerzo cortante (por sujetador).
Soporte F MÁX V MÁX
WMTA24 63 lb (28.5 kg) 38 lb (17 kg)
WMTA30 58 lb (26 kg) 38 lb (17 kg)
WMTA36 54 lb (24.5 kg) 38 lb (17 kg)

4
©2017 Pinnacle Climate Technologies. Todos los derechos reservados. 3-1-2017
DIVISIÓN DE PINNACLE CLIMATE TECHNOLOGIES
www.schaeferventilation.com • 1.800.779.3267
4
Póliza de garantía limitada de Pinnacle Climate Technologies
Pinnacle Climate Technologies (PCT) ofrece la siguiente garantía limitada a partir de la fecha de la factura al comprador original de
nuestros productos, o a su cliente, con un comprobante de compra fechado.
La cobertura de dos años (a menos que se indique otra cosa más adelante) se aplica a todos los productos, componentes y conjuntos suministrados
por PCT que demuestren tener defectos en materiales o mano de obra. Todo dicho producto defectuoso se reparará o reemplazará a opción de
PCT, y el producto o componente defectuoso deberá devolverse previa autorización a PCT, libre a bordo a Sauk Rapids, Minnesota.
Esta garantía no cubre: falla, daño o mal funcionamiento que sea resultado de instalación inadecuada o instalación que no concuerde con las
instrucciones de instalación. Condiciones de operación diferentes a las instrucciones de operación de PCT. Mal uso, abuso, negligencia, alteración
o accidente. Transporte del producto. Operación inadecuada o falta de mantenimiento adecuado o regular del producto. Pérdida de tiempo,
inconveniencia, pérdida de uso del producto u otros daños incidentales o resultantes. Piezas que necesiten reemplazo debido al uso y desgaste
normal. Oxidación o corrosión superficial o cosmética. Cualquier producto cuya placa nominal haya sido retirada.
Puede imprimir o descargar una declaración completa de la garantía en www.schaeferventilation.com.
GARANTÍA
Fije el ventilador:
LOS HERRAJES PARA FIJAR EL VENTILADOR AL SOPORTE DE MONTAJE NO ESTÁN INCLUIDOS CON
ESTE JUEGO.
Nota: Los sujetadores se suministran con todos los ventiladores de circulación Schaefer actuales.
Nota: Los sujetadores de acero inoxidable deben estar recubiertos con un lubricante (WD-40) para prevenir
que las roscas se desgasten y permitan un ajuste posterior.
Instale (1) perno de 3/8 pulg. x 1-1/4 pulg., (2) arandelas y (1) tuerca Nylock a través del orificio de la
pestaña giratoria
Instale (1) perno de 1/4 pulg. x 1 pulg., (2) arandelas y (1) tuerca Nylock a través de la ranura de la
pestaña giratoria
Una vez que el ventilador esté fijo firmemente a la pestaña
giratoria, oriente el ventilador en sentido horizontal y apriete
los herrajes de la pestaña giratoria para prevenir que el
ventilador gire.
Ajuste el ventilador al ángulo
deseado y apriete los herrajes
con firmeza.
PRECAUCIÓN: Los sujetadores se aflojarán con el tiempo. Es importante revisar y apretar los sujetadores
con frecuencia.
PRECAUCIÓN: Inspeccione con frecuencia los soportes y los sujetadores por si hubiera corrosión.
Reemplace todo sujetador o pieza que tenga corrosión.
Cables de
protección
grandes
Cable de seguridad: (
El juego del cable de seguridad se vende por separado.)
PARA MAYOR SEGURIDAD, SE DEBE INSTALAR UN CABLE DE APOYO SECUNDARIO SIEMPRE QUE EL
VENTILADOR SE COLOQUE EN ALTURA.
El cable de seguridad debe quedar alrededor de los cables de diámetro grande de los protectores
delantero y trasero.
El otro extremo del cable de seguridad debe fijarse firmemente a una viga, apuntalamiento o vigueta del edificio,
cerca del ventilador. Elimine toda la holgura innecesaria del cable.
/