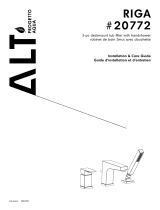
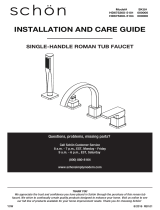
Rubi RAR23Q Installation guide

Type
Installation guide

This manual is also suitable for

Rubi RAR23Q is a 3-piece deck-mounted bath faucet with hand shower. It features a mixer, finishing cap, handle, handle base flange, hex screws, spout base and diverter, hand shower holder base, hand shower, hand shower holder flange, hand shower holder ring, flexible coupling hose, hand shower flexible hose, flexible hoses, fixing rod and nut, rubber mounting ring, metallic mounting ring, sealing cap, cap sealing gasket, spout, mixer sealing flange, and a diverter base.

With its versatile design, the hand shower can be installed on either the left or right side of the spout, making it suitable for various bathroom layouts. Installation is straightforward, with clear instructions provided in the manual.

INSTALLATION VISO - BAIN 3 MORCEAUX / 3 PIECE DECK MOUNT BATH
Doc. # DR009-4 / 30-08-2019 www.rubi.ca - 1.888.988.RUBI (7824)
PIÈCES / PARTS
ÉTAPES / STEPS
Vérifiez que toutes les pièces de votre robinet
sont dans l'emballage.
Make sure you have all the parts in hand.
LISTE DES PIÈCES / PARTS LIST
01 Boyaux flexibles / Flexible hoses
02 Tige de fixation et écrou / Fixing rod and nut
03 Bague de fixation caoutchou / Rubber mounting ring
04 Bague de fixation métal / Metallic mounting ring
05 Bouchon d'obturation / Sealing cap
06 Joint d'étanchéité capuchon / Cap sealing gasket
07 Bec / Spout
08 Bride d'échantéité mitigeur / Mixer sealing flange
Ce manuel couvre les instructions d'installation
de tous les robinets de bain 3 morceaux avec
douchette de la collection Viso. Il se peut que
pour des séries particulières, quelques étapes
diffèrent.
This manual covers the instructions for the ins-
tallation of 3 piece deck mounted bath faucets
with hand shower of the Viso collection. It is
possible that, for some specific models, some
steps differ.
DISPOSITION
La douchette peut être installée à gauche ou à
droite du bec.
Hand shower can be installed on the left or the
right side of the spout.
01
02
03
04
05
06
14
15
08
07
09 10
11
12
13
20
19
17 18
16
09 Mitigeur / Mixer
10 Capuchon de finition / Finishing cap
11 Poignée / Handle
12 Bride de la base de la poignée / Handle base flange
13 Vis à tête hexagonale / Hex screws
14 Base du bec et déviateur / Spout base and diverter
15 Base support de douchette / Hand shower holder base
16 Douchette / Hand shower
17 Bride de support douchette / Hand shower holder flange
18 Anneau de support de douchette / Hand shower holder ring
19 Flexible de raccord / Flexible coupling hose
20 Flexible douchette / Hand shower flexible hose
03
Insérez la bride de support douchette. Puis,
insérez l'anneau de support de douchette.
Insert hand shower holder flange. Then, insert
hand shower holder ring.
05
Séparez les jeux d'écrous et d'anneaux de la
base du déviateur.
Separate the sets of nuts and rings from the
diverter base.
06
Dévisser la vis hexagonale qui retient la base
support au robinet mitigeur.
Free the support base from its body by uns-
crewing the hex screw.
02
Glissez le deuxième jeu d'anneaux de caout-
chouc et de métal et vissez l'écrou de la base.
Slide the second set of rubber and metal rings
and tighten base top nut.
01
Après avoir séparé les jeux d'écrous et
d'anneaux, insérez la base support de la
douchette avec un jeu d'anneaux de caout-
chou et de métal.
After separating the sets of nuts and rings,
insert the hand shower support base with a
rubber and a metallic ring set.
04
Serrez bien les vis de fixation de la base de
la douchette.
Tighten hand shower base fixation screws
properly.
PRÉPARATION / PREPARATION
Diamètre de perçage / Drilling diameter:
Robinet / Faucet: 1 1/2" (38 mm)
Bec / Spout: 1 1/4" (32 mm)
Douchette / Hand Shower: 1 1/4" (32 mm)
** Image à titre indicatif uniquement
** Image for illustrative purposes only.
Dana RCA23D
Evita RLA23E
Gabriella RLA23G
Hadria RLA23H
Jawa RAF23J
Kali RAF23K
Qabil RAR23Q
Saida RAR23S
Usagi RAS23U
Yodo RAS23Y
INSTALLATION VISO - BAIN 3 MORCEAUX / 3 PIECE DECK MOUNT BATH
Doc. # DR009-4 / 30-08-2019 www.rubi.ca - 1.888.988.RUBI (7824)
07
Séparez les 2 pièces. Placez le bec sur sa base.
Separate the 2 parts. Insert spout on its base.
ÉTAPES / STEPS
08
Après vous être assuré de l'alignement du bec,
insérez la vis à tête hexagonale fixant le bec à
sa base. Serrez la vis.
After ensuring the alignment of the spout,
insert the hex screw fixing the spout to its
base. Tighten screws.
09
Insérez la base support du déviateur avec un
jeu d'anneaux de caoutchouc et de métal.
Insert the diverter support base with a rubber
and a metallic ring set.
10
Glissez le deuxième jeu d'anneaux de caout-
chouc et de métal. Vissez l'écrou supérieur de
la base.
Slide the second set of rubber and metal rings
and Tighten base top nut. Tighten base top nut.
11
Vissez l'écrou inférieur de la base.
Tighten base bottom nut.
14
Glissez le déviateur en place.
Slide diverter in place.
15
Insérez et vissez la vis à tête hexagonale
du déviateur.
Insert and screw the hex screw of the diverter.
12
Serrez bien les vis de fixation de la base de
déviateur.
Tighten diverter base fixation screws properly.
13
Ajuster le niveau de la base du déviateur.
Adjust the level of the diverter base.
16
Insérez la tige de fixation du robinet mitigeur.
Insert faucet mixer fixing rod.
INSTALLATION VISO - BAIN 3 MORCEAUX / 3 PIECE DECK MOUNT BATH
Doc. # DR009-4 / 30-08-2019 www.rubi.ca - 1.888.988.RUBI (7824)
17
Retirez l'écrou de la tige de fixation.
Remove the fixing rod nut.
ÉTAPES / STEPS
18
Insérez les 2 flexibles d'entrée d'eau. Insérez
le flexible du déviateur. Serrez la base des
flexibles.
Insert the 2 water intake flexible hoses. Insert
the diverter flexible hose. Tighten flexible base.
19
Glissez la bride d'étanchéité du mitigeur le
long des flexibles. Placez la bride en position.
Slide the mixer sealing flange along the
flexibles. Place flange in position.
20
Glissez la tige et les flexibles dans le trou de la
surface prévue pour le robinet. Sous la surface,
placez les bagues de fixation de caoutchou et
de métal et vissez l'écrou de la tige de fixation.
Serrez fermement.
Slide rod and hoses through the hole of the
surface planned for the tap. Beneath the sur-
face, place the rubber and metallic mounting
rings and tighten the rod nut. Tighten firmly.
21
Raccorder le flexible reliant le déviateur au
robinet mitigeur.
Connect the flexible linking the diverter to the
mixer.
22
Insérez le joint d'étanchéité dans le bouchon
d'obturation. Serrez fermement.
Insert sealing gasket in the sealing cap.
Tighten firmly.
23
Fixez le flexible de raccord de la douchette à la
base du déviateur.
Affix the hand shower flexible coupling hose to
the diverter base.
25
Insérez le joint d'étanchéité à la tête du flexible
de la douchette. Raccordez la douchette à son
flexible.
Insert sealing gasket at the head of the head
shower flexible hose. Connect hand shower to
its flexible hose.
24
Glissez le flexible de la douchette à travers la
base support de la douchette. Raccordez le
flexible de la douchette au flexible de raccord.
Slide hand shower flexible hose through hand
shower base. Connect the hand shower flexible
hose to the flexible coupling hose.
26
Placez la douchette sur son support.
Place hand shower to its support base.
INSTALLATION VISO - BAIN 3 MORCEAUX / 3 PIECE DECK MOUNT BATH
Doc. # DR009-4 / 30-08-2019 www.rubi.ca - 1.888.988.RUBI (7824)
27
Dévissez la tige de la poignée de la tête du
mitigeur.
Unscrew the handle bar from mixer base.
ÉTAPES / STEPS
28
Placez la tête du mitigeur sur sa base.
Serrez la vis hexagonale pour fixer la tête du
mitigeur à son corps.
Place mixer head on its base. Tighten the hexa-
gonal nut to affix the head to the mixer.
29
Revissez la tige de la poignée et serrez la tige
de la poignée avec une clé hexagonale.
Screw back the handle bar in place. Tighten
the handle with an hex key.
30
Placez le capuchon de finition.
Insert the finishing cap.
31
Raccordez les flexibles aux entrées d'eau froide
et chaude. Les points rouge et bleu de la
manette servent d'indicateurs.
Connect the hoses to the hot and cold water
intakes. Red and blue points on the handle are
used as indicators.
ENTRETIEN / MAINTENANCE
Pour nettoyer votre robinet, un savon doux, de l’eau chaude et un linge doux suffiront pour faire
disparaître saletés, tâches et traces d’accumulation de savon. Rincez après le nettoyage et asséchez
avec un linge doux et sec pour retrouver le lustre original de votre robinet. La garantie sera nulle
et non avenue dans les cas d’utilisation de produits nettoyants inadaptés (particulièrement ceux
contenant des agents abrasifs, cires, alcools, ammoniaques, javelisants, acides, des solvants
ou autres produits chimiques corrosifs), qu’ils soient utilisés par l’acheteur ou par un tiers pour
l’acheteur/propriétaire.
A mild detergent, warm water and a soft cloth will remove normal dirt and soap accumulations on
your faucet. Rinse thoroughly after cleaning and wipe with a soft dry cloth to restore original luster
on its surface. Do not use harsh abrasives cleaners to clean your faucet. The warranty will be void in
case of use of unsuitable cleaning products (especially those containing abrasive cleansers, waxes,
alcohols, ammoniated, bleach, acids, solvents or other harsh chemicals), whether they are used by
the purchaser or a third party for the buyer/owner.
ATTENTION / WARNING
Installation adéquate /
Proper installation
L'illustration ci-dessous montre une ins-
tallation appropriée du flexible. La courbe
du flexible n'est pas écrasée et permet un
raccord adéquat.
The illustration above shows a proper installa-
tion of the hose. The curve of the hose is not
crushed and allows an adequate fitting.
L'utilisation avec une substance autre que l'eau pourrait endommager et causer un bris d’équi-
pement. Éviter tout contact, ainsi que l’entreposage, avec les produits ménagers, chimiques et
corrosifs. Ne pas nettoyer avec des produits rugueux ou des matières abrasives. Serrez à la main
+ 1/4 de tour.
Using a substance other than water could damage and cause equipment failure. Avoid contact and
storage, with household products, chemicals and corrosive. Do not clean with rough or abrasive
materials. Hand tighten + 1/4 turn.
Installation inadéquate /
Improper installation
L'illustration ci-dessous montre une
installation inadéquate du flexible. La
courbe du flexible est trop aplatie et ne
permet pas une bonne circulation d'eau.
The illustration above shows an improper instal-
lation of the hose. The curve of the hose is too
flattened and does not allow a good water flow.
  • Page 1 1
  • Page 2 2
  • Page 3 3
  • Page 4 4

Rubi RAR23Q Installation guide

Type
Installation guide
This manual is also suitable for

Rubi RAR23Q is a 3-piece deck-mounted bath faucet with hand shower. It features a mixer, finishing cap, handle, handle base flange, hex screws, spout base and diverter, hand shower holder base, hand shower, hand shower holder flange, hand shower holder ring, flexible coupling hose, hand shower flexible hose, flexible hoses, fixing rod and nut, rubber mounting ring, metallic mounting ring, sealing cap, cap sealing gasket, spout, mixer sealing flange, and a diverter base.

With its versatile design, the hand shower can be installed on either the left or right side of the spout, making it suitable for various bathroom layouts. Installation is straightforward, with clear instructions provided in the manual.

Ask a question and I''ll find the answer in the document

Finding information in a document is now easier with AI

in other languages