Audio / Video Power Isolation Units
with Automatic Voltage Regulation
Maximum Available
Output Current
10A
4A
4A
4A
10A
Input
Voltage
120VAC
Operating Range
(85-135VAC)
220-240VAC
Operating Range
(170-270VAC)
220-240VAC
Operating Range
(170-270VAC)
220-240VAC
Operating Range
(170-270VAC)
127VAC
Operating Range
(100-150VAC)
Output
Connector
6 outlets
15A
NEMA 5-15R
3 outlets
16A/250V
CEE7 Continental
European Schuko
3 outlets,
13A/250V
UK Socket
3 outlets,
15A/250V
AS/NZ 3112
6 outlets
15A
NEMA 5-15R
TOT AVR
TOT AVR SMSS
TOT AVR CE
TOT AVR CE SMSS
TOT AVR UK
TOT AVR UK SMSS
TOT AVR AUS
TOT AVR AUS SMSS
TOT AVR MX
TOT AVR MX SMSS
Output
Voltage
120VAC
±5V
220-240VAC
±10V
220-240VAC
±10V
220-240VAC
±10V
120VAC
±5V
TOT AVR Series Manual
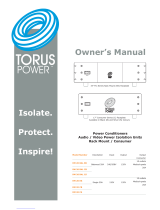
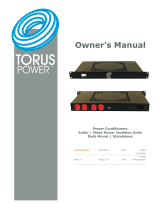
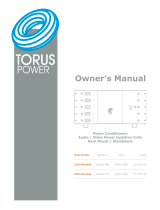
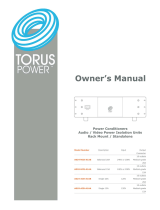
TOT AVR shown with CB black faceplate. Other configurations are available.
Receptacle panel of TOT AVR, North American model shown.
SMSS
√
√
√
√
√

Table of Contents
Table of Contents
Torus Power AVR Series Power Conditioners -
User Notes and Manual
Front Panel Display
Rear Panel Connections and AVR Software
AVR Software - Menu Selection
Block Diagram - AVR System
Schematic
Front Panel Layout
Electrical Specifications
Mechanical Specifications
Rear Panel Layout
Page 1
Page 3
Page 4
Page 5
Page 6,7,8
Page 9
Page 12-15
Page 10
Page 11
Page 11
Page 10
Page 1
Important Safety Instructions Page 2
Shipping Carton & Packing Material Page 2
Home Automation Interface Page 16
Warranty Page 16
www.TorusPower.com
REV.01/23/2017
Owners Manual Audio / Video Power Isolation Units TOT AVR SERIES 01/17 Power Conditioners

Important Safety Instructions
Please keep the original shipping box and all packing material.
This will ensure the AVR is protected in future transport.
In the unlikely event you have a problem and must return it for
service you must use the original packing material.
Ship the AVR only in the original packing material, as the unit
is not insurable by carriers otherwise.
Shipping Carton & Packing Material
CAUTION! To reduce the risk of electric shock and fire, do not remove the cover of this device. There
are no user serviceable parts inside. Please refer all servicing to licensed service technicians.
CAUTION! The international symbol of a lightning bolt inside a triangle is intended to alert the user to
uninsulated “dangerous voltage” within the device’s enclosure. The international symbol of an
exclamation point inside a triangle is intended to alert the user to the presence of important
operating, maintenance and servicing information in the manual accompanying the device.
CAUTION! To prevent electrical shock, match wide blade of plug to wide slot, fully insert.
CAUTION! To reduce the risk of electrical shock, do not expose this equipment to rain or moisture.
1. Read Instructions—All safety and operating instructions
should be read before operating the device.
2. Retain Instructions—The safety and operating
instructions should be retained for future reference.
3. Heed Warnings—All warnings on the device and in the
operating instructions should be adhered to.
4. Follow Instructions—All operating and safety instructions
should be followed.
5. Water & Moisture—The device should never be used in,
on or near water for risk of fatal shock.
6. Ventilation—The device should always be located in such
a way that it maintains proper ventilation. It should never
be placed in a built-in installation or anywhere that may
impede the flow of air through its ventilation slots.
7. Heat—Never locate the device near heat sources such as
radiators, floor registers, stoves or other heat-generating
devices.
8. Power Cord Protection—Power cables should be routed
so they are not likely to be stepped on or crushed by items
placed on them or against them. Special attention should
be paid to areas where the plug enters a socket or fused
strip and where the cord exits the device.
9. Periods Of Non-Use—The device should be unplugged
when not being used for extended periods.
10. Dangerous Entry—Care should be taken that no foreign
objects or liquids fall or are spilled inside the device.
11. Damage Requiring Service—The device should be
serviced by licensed technicians when:
• The plug or power supply cord has been damaged.
• Objects have fallen or liquid has spilled inside the device.
• The device has been exposed to moisture.
• The device does not appear to be operating properly or
exhibits a marked change in performance.
• The device has been dropped or the enclosure becomes
damaged.
12. Service—The device should always be serviced by
licensed technicians. Only replacement parts specified by
the manufacturer should be used. The use of unauthorized
substitutions may result in fire, shock, or other hazards.
13. Do not position the equipment so that it is difficult to
operate the disconnecting device (power cord).
14. If the equipment is used in a manner not specified by
the manufacturer, the protection provided by the
equipment may be impaired.
15. The power switch should be in the “off” position when
connecting or disconnecting equipment from a Torus Power
unit.
16. CAUTION Some units can be very heavy, please use
safe practices when lifting.
18 kg (39.7 lb) 32 kg (70.5 lb) 55 kg (121.2 lb)
Page 2
www.TorusPower.com
REV.01/23/2017
Owners Manual Audio / Video Power Isolation Units TOT AVR SERIES 01/17 Power Conditioners

Torus Power AVR Series Power Conditioners - User Notes and Manual
Page 3
Placement and ventilation
Allow 1” distance on all sides when positioning the AVR for proper ventilation, and allow 6” behind
the AVR for adequate wiring space. Do not place heat-generating devices directly below the AVR.
Connecting components and using the AVR
Using the AVR is as simple as plugging in audio and video components to the outlets on the rear
panel. The order and position in which you connect your components will not affect the performance
of the AVR or your components. Connect the AVR to the wall outlet, and switch it on. Turn on the
components individually.
While the AVR has built-in software that can be accessed via the Ethernet connection, there is no
need for you to use this software. The AVR system provides all the standard features, performance,
and benefits out of the box by simply plugging it in as described in this section. You can use the AVR
software to monitor the voltage conditions via your computer, and for such additional features as
being able to turn your system on/off remotely and change the duration of displays backlight.
Torus AVR – Description
Torus Power AVR (Automatic Voltage Regulation) is a full-feature state-of-the-art power conditioner,
isolating and protecting your system. Like all Torus Power products, the AVR series provides true
isolation (using massive toroidal transformers) and protects all connected equipment from the risk of
severe power line surges using series-mode surge suppression. In addition, Torus AVR provides
stable voltage to keep equipment running in the optimal range of 115VAC to 125VAC for any input
voltage from 90V to 130VAC. (International units operate within nominal input voltage such as
220V, 230V, 240V; Torus AVR keeps them operating within a range of +/- 10V.). See table on page 7
for more details.
Torus Power AVR series uses a micro-processor to monitor and control the power provided to
connected components. The front panel display on the Torus Power AVR indicates input and output
voltages, and displays output current, as well as displaying fault conditions.
The Torus Power AVR is pre-programmed to power down the system when a high or low fault
conditions occurs (user can over-ride).
There are multiple interfaces built into the Torus Power AVR:
1) Ethernet interface with built-in web browser allows any computer to view voltage and current
readings and turn the AVR unit on or off.
2) RS-232 is provided for connection to media control systems.
3) Two 12V triggers are provided.
Does your system need automatic voltage regulation?
Under ideal conditions, when the supplied power line is stable and dependable, you may not need
voltage regulation. In such an ideal situation, your equipment can operate within the normal
tolerance of the line voltage.
In reality, the power supplied to most areas is less than ideal due to 0utdated power grids. In most
areas, the power regularly drops or rises above the acceptable range (in North America +/– 5V,
Europe/Asia/Australia +/- 10V) . These voltage sags, brownouts, and surges can stress components
and shorten equipment life. In the worst case, catastrophic events can destroy valuable equipment.
In such real-world conditions, Torus Power AVR can protect your equipment, and improve the quality
and enjoyment of your audio and video experience.
www.TorusPower.com
REV.01/23/2017
Owners Manual Audio / Video Power Isolation Units TOT AVR SERIES 01/17 Power Conditioners

Figure 1: AVR Rear Panel connections.
Ethernet
Allows access to the AVR and internal software. See AVR Software section for more details.
RS232
Allows access to automation and external control. See Home Automation Interface commands at end
of manual.
12V Trigger On/Off
The AVR can be turned on and off by a 12 volt trigger input. Applying 12 volts turns on the AVR and
removing the 12 volts turns it off.
12V Fault Output
The AVR provides a 12 volt fault output through a jack on the back panel. The output goes to 12 volts
when a relay or voltage fault is detected. The maximum current that can be drawn from this output is
75mA.
AVR Software
AVR software is resident in the microprocessor on the internal control board. There are two methods
to access the software.
1) Connect the AVR to the Ethernet port. Open a browser window on a PC that is connected to the
same network through another Ethernet port. Enter AVR (or the I.P address displayed on the LCD)
into the browser window. Press ENTER and the software will open.
2) Use a three way Hub, which is connected to an existing network. You then connect both PC and
AVR to the same Hub. Open a browser window from the PC. Type AVR, (or the I.P address displayed
on the LCD) into the browser window. Press ENTER and the software will open.
Username and Password
The password is required to change the setup of the Torus unit.
Username is admin This is factory set and cannot be changed
Password is avr This is the default password, and can be changed.
In case you forget your password, the AVR can be restored to the factory default password avr
by pressing and holding the button on the front panel for at least 10 seconds.
Rear Panel Connections and AVR Software
Page 5
www.TorusPower.com
REV.01/23/2017
Owners Manual Audio / Video Power Isolation Units TOT AVR SERIES 01/17 Power Conditioners

Page 6
AVR Software - Menu Selections
AVR Menu Selections
AVR Status
Switch Power
Setup
Email Configuration
Set Password
Torus Power Home (website)
Network configuration
Below is a screen by screen description of software options.
To access AVR software, enter user
name and password.
User name :
admin
is factory set and cannot be changed
Default Password :
avr
You can change your password.
Select Set Password
AVR Status
This screen indicates the overall status
of the system, showing Voltage In,
Voltage Out, and Current output.
It also reports if the system is
functioning normally or whether there
is a fault condition.
AVR Power Control
This screen allows ON or OFF control
of the AVR unit.
Press SET button to implement your
selection.
www.TorusPower.com
REV.01/23/2017
Owners Manual Audio / Video Power Isolation Units TOT AVR SERIES 01/17 Power Conditioners

Page 7
AVR Software - Menu Selections (continued)
AVR Setup
This screen allows the user to configure
two AVR parameters.
1. Shutdown on Low or High line
voltage. (The factory default is YES –
to shut down in case of fault
conditions.) Unselecting this button
will override, and the AVR will remain
on even if voltage drops or rises beyond
the acceptable range.
2. LCD Display. Always ON is the
default setting. If you don’t want the
display on all the time, you can select a
time from 0 to 255 seconds. When
you have made your selections, press
SAVE SETUP.
Email Fault Alert Notification
In the unlikely event your AVR
experiences an issue the AVR will shut
down and send an email notification if
this section is configured. After
entering the configuration parameters
use the ‘Send Test Email’ button to
confirm your settings are correct.
Set Password
If you wish to change the password, use
this screen.
In case your forget your new
password, you can restore the AVR to
factory default password by pressing
the button on the front of the AVR unit
and HOLDING it down for at least 10
seconds. The default password is avr
www.TorusPower.com
REV.01/23/2017
Owners Manual Audio / Video Power Isolation Units TOT AVR SERIES 01/17 Power Conditioners

Page 8
Notes:
1. The output current (Amps) displayed on the LCD is the RMS reading of the load. It does
not indicate the peak current loads.
2. There is a 20-second delay built into the AVR system, to prevent nuisance switching. The
AVR will take approximately 20-seconds to change relay taps to switch to the proper
output voltage setting.
3. Torus AVR will keep the output constant within the range of 220-240V ± 10V, with an
input voltage of 170V to 270V.
4. A drop in the Input voltage is normal when increasing the load on the Torus AVR. This is
a result of the impedance of the power line, and is a function of the distance from the
electrical panel.
Switch On Delay Feature
The Automatic Voltage Regulation (AVR) feature is designed to handle normal utility fluctuations
to provide the connected equipment with an optimal voltage supply. It is common when utility
power is restored after a blackout that the voltage supply is unstable for a few seconds. To
further protect connected equipment your AVR is equipped with a start up delay feature. When
the power switch is turned on or when the power switch is on and utility power is restored,
power will not be connected to the output receptacles until the delay time has passed.
AVR Software - Menu Selections (continued)
Each AVR unit has a unique MAC
Address which is factory assigned.
The IP address assigned to the AVR is
dynamically assigned and is displayed
on this screen as well as on the front
panel LCD of the AVR.
The AVR can be programmed through
the web browser to automatically get an
IP address from the network switch or
router and this is the default setting
and should work on most networks.
Some networks require each PC or
device to use a fixed IP address and the
AVR also supports this option.
www.TorusPower.com
REV.01/23/2017
Owners Manual Audio / Video Power Isolation Units TOT AVR SERIES 01/17 Power Conditioners

Block Diagram - AVR System
Page 9
7
7
Available Models:
North American 120V 85V-135V 120V±5V
International CE 220-240V 150V-250V 220-240V±10V
International UK 220-240V 150V-250V 220-240V±10V
Mexico 127V 92-142V 127V±5V
www.TorusPower.com
REV.01/23/2017
Owners Manual Audio / Video Power Isolation Units TOT AVR SERIES 01/17 Power Conditioners

Front Panel Layout
Page 10
The Input Power Switch on the front panel turns the main power to
the AVR unit on and off.
Circuit Protection
Torus AVRs will shutdown if internal unit
temperature reaches excessive levels.
Thermal Protection
Rear Panel Layout
Illuminated Power Switch
LCD Display
TOT AVR, TOT AVR CE,
TOT AVR UK and TOT AVR MX
Medical Grade Outlets
NEMA 5-15R (TOT AVR / TOT AVR MX)
Input Fuse Holder
Ethernet
RS232
12VDC Trigger
12VDC Fault
Power Inlet (IEC 320-C14 )
TOT AVR and TOT AVR MX
USB Power
Adapter
TOT AVR and TOT AVR UK TOT AVR and TOT AVR CE
13A/250V
UK Socket
16A/250V
Ivory Continental
European Socket
www.TorusPower.com
REV.01/23/2017
Owners Manual Audio / Video Power Isolation Units TOT AVR SERIES 01/17 Power Conditioners

Page 11
Mechanical Specifications
Electrical Specifications
Model Number
TOT AVR
TOT AVR SMSS
TOT AVR CE
TOT AVR CE SMSS
TOT AVR UK
TOT AVR UK SMSS
TOT AVR MX
TOT AVR MX SMSS
SMSS
√
√
√
√
Input (Inlet) Connector
(Rear Panel)
IEC 320-C14
IEC 320-C14
IEC 320-C14
IEC 320-C14
Input Voltage
Nominal
120VAC, 60Hz
Range from
85-135VAC
57-63Hz
220-240VAC
Range from
170-270VAC
47-63Hz
220-240VAC
Range from
170-270VAC
47-63Hz
127VAC, 60Hz
Range from
100-150VAC
57-63Hz
Input
Current
10A
4A
4A
10A
Line Cord
Included
Included
Included
Included
Output
Voltage
Nominal
120VAC
±5V
220-240VAC
±10V
220-240VAC
±10V
120VAC
±5V
Output Connector
(Rear Panel)
6 outlets
15A
NEMA 5-15R
3 outlets
16A/250V
Ivory Continental
European Socket
3 outlets,
13A/250V
UK Socket
6 outlets
15A
NEMA 5-15R
Maximum Available
Output Current
10A
4A
4A
10A
Height includes removable rubber mounting feet.
Weight
16 kg
35.2lbs
15.6 kg
34.3lbs
15.6 kg
34.3lbs
16.3 kg
35.9lbs
Over-current
Protection
Input: 10A Fuse (1)
(Rear Panel Mounted)
Input: 4A Fuse (1)
(Rear Panel Mounted)
Input: 4A Fuse (1)
(Rear Panel Mounted)
Input: 10A Fuse (1)
(Rear Panel Mounted)
Size, mm (w x d x h)
Size inch (w x d x h)
318 x 356 x 89
12.5 x 14 x 3.5
318 x 356 x 89
12.5 x 14 x 3.5
318 x 356 x 89
12.5 x 14 x 3.5
318 x 356 x 89
12.5 x 14 x 3.5
Model Number
TOT AVR
TOT AVR SMSS
TOT AVR CE
TOT AVR CE SMSS
TOT AVR UK
TOT AVR UK SMSS
TOT AVR MX
TOT AVR MX SMSS
SMSS
√
√
√
√
www.TorusPower.com
REV.01/23/2017
Owners Manual Audio / Video Power Isolation Units TOT AVR SERIES 01/17 Power Conditioners

Schematic TOT AVR, TOT AVR SMSS
Note:
Schematic drawings are provided for reference only, Torus Power AVR
units have no serviceable parts inside. Please return unit to
manufacturer for repair and service when required.
Page 12
TOT AVR
TOT AVR SMSS
www.TorusPower.com
REV.01/23/2017
Owners Manual Audio / Video Power Isolation Units TOT AVR SERIES 01/17 Power Conditioners

Schematic TOT AVR MX, TOT AVR MX SMSS
Note:
Schematic drawings are provided for reference only, Torus Power AVR
units have no serviceable parts inside. Please return unit to
manufacturer for repair and service when required.
Page 13
TOT AVR MX
TOT AVR MX SMSS
www.TorusPower.com
REV.01/23/2017
Owners Manual Audio / Video Power Isolation Units TOT AVR SERIES 01/17 Power Conditioners

Schematic TOT AVR CE, TOT AVR CE SMSS
Page 14
Note:
Schematic drawings are provided for reference only, Torus Power AVR
units have no serviceable parts inside. Please return unit to
manufacturer for repair and service when required.
TOT AVR CE
TOT AVR CE SMSS
www.TorusPower.com
REV.01/23/2017
Owners Manual Audio / Video Power Isolation Units TOT AVR SERIES 01/17 Power Conditioners

Schematic TOT AVR UK
Page 15
Note:
Schematic drawings are provided for reference only, Torus Power AVR
units have no serviceable parts inside. Please return unit to
manufacturer for repair and service when required.
TOT AVR UK
www.TorusPower.com
REV.01/23/2017
Owners Manual Audio / Video Power Isolation Units TOT AVR SERIES 01/17 Power Conditioners

Home Automation Interface
Serial Port Settings
9600 baud
8 data bits
No parity
Commands are terminated with the carriage return character (13 decimal).
Command Description Response
“C0<CR>” Turn off power “OK<CR>”
“C1<CR>” Turn on power “OK<CR>”
Other
commands
Not supported “ERROR<CR>
Page 16
www.TorusPower.com
REV.01/23/2017
Owners Manual Audio / Video Power Isolation Units TOT AVR SERIES 01/17 Power Conditioners
Warranty
Torus Power Inc. products are warranted to be free from manufacturing defects as follows:
• Five years from the original date of sale for toroidal transformers.
• Two years from the original date of sale for all other components.
The product warranty includes parts, labour and return shipping to the customer. Shipping to Torus Power Inc.
for warranty repair is the responsibility of the customer.
Warranty coverage is not transferrable and original proof of purchase is required for warranty claims.
In the event of a warranty claim, Torus Power Inc. will remedy the issue by repair or replacement, as we deem
necessary, to restore the product to full performance.
This warranty is considered void if the failure of the product or any component part is caused by damage or
misuse. Failure to fully comply with Torus Power operating instructions voids the warranty.

™
01/17
REV.01/23/2017
Specifications subject to change without notice.
© Torus Power 2017
www.TorusPower.com
™
Torus Power
2861 Sherwood Heights Drive
Suite 26
Oakville, ON L6J 7K1
Torus Power products are
marketed worldwide by
Torus Power Inc.
For sales contact:
Phone: (+1) 416-477-4799
Toll free: 1-877-337-9480
Technical inquiries:
Phone: (+1) 416-477-4799
Toll free: 1-877-337-9480
/


