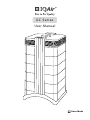
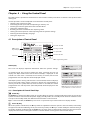
IQAir GC Series is a high-performance air cleaning system designed to improve indoor air quality by removing pollutants such as volatile organic compounds (VOCs), inorganic compounds, ammonia, and amines. It features a modular tower design with multiple filter stages, allowing for customized filtration to address specific air quality concerns. With adjustable fan speeds, auto timer, and day-of-the-week timer functions, the IQAir GC Series provides flexible operation and convenience.
IQAir GC Series is a high-performance air cleaning system designed to improve indoor air quality by removing pollutants such as volatile organic compounds (VOCs), inorganic compounds, ammonia, and amines. It features a modular tower design with multiple filter stages, allowing for customized filtration to address specific air quality concerns. With adjustable fan speeds, auto timer, and day-of-the-week timer functions, the IQAir GC Series provides flexible operation and convenience.


-
 1
1
-
 2
2
-
 3
3
-
 4
4
-
 5
5
-
 6
6
-
 7
7
-
 8
8
-
 9
9
-
 10
10
-
 11
11
-
 12
12
-
 13
13
-
 14
14
-
 15
15
-
 16
16
-
 17
17
-
 18
18
-
 19
19
-
 20
20
-
 21
21
-
 22
22
-
 23
23
-
 24
24
-
 25
25
-
 26
26
-
 27
27
-
 28
28


IQAir GC Series is a high-performance air cleaning system designed to improve indoor air quality by removing pollutants such as volatile organic compounds (VOCs), inorganic compounds, ammonia, and amines. It features a modular tower design with multiple filter stages, allowing for customized filtration to address specific air quality concerns. With adjustable fan speeds, auto timer, and day-of-the-week timer functions, the IQAir GC Series provides flexible operation and convenience.
Ask a question and I''ll find the answer in the document
Finding information in a document is now easier with AI
Related papers
-
IQAir Klaus Series Limited Edition User manual
-
-
-
-
-
-
IQAir 102 40 16 00 Installation guide
-
-
-
Other documents
-
SPT 2011A-UV Operating instructions
-
Ops-Core Rail Adapter Operating instructions
-
Sunpentown AC-2221 Owner's manual
-
-
Vallox MyVallox Control User manual
-
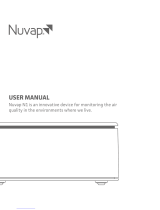 Nuvap ProSystem N1 User manual
-
Emerson ECD1500W User manual
-
-
Trion Port-A-Cart User manual
-
ElectrIQ EAP500-WIFI User manual
