Page is loading ...

Revision:08/2020
Copyright © 2020
Campbell Scientific, Inc.

Table of contents
1. General information 1
1.1 Packing list 1
1.2 General safety 1
1.3 Sensor unit safety 2
1.4 Laser safety 2
1.5 Electrical safety 4
2. Product overview 5
2.1 Introduction 6
2.1.1 Cloud height detection 6
2.1.2 Sky condition 7
2.1.3 Backscatter profile reporting 7
2.2 Optical measurement 8
2.2.1 Optical arrangement 8
2.3 Internal monitoring 8
2.4 Specifications 9
2.4.1 Measurement specifications 9
2.4.2 Mechanical specifications 9
2.4.3 Electrical specifications 10
2.4.4 Optical specifications 12
2.4.5 Environmental specifications 12
2.4.6 Communications specifications 12
2.4.7 Transport, shock, and vibration certification 13
2.4.8 Compliance and testing 13
3. Initial preparation and checks 14
4. Installation 15
4.1 Location and orientation 15
4.2 Grounding 15
4.3 Mounting the SkyVUE 8M 16
4.4 Tilt angle 17
4.5 Connectors and wiring 17
4.5.1 Base connectors 18
Table of Contents - i

4.5.2 Wiring using supplied Campbell Scientific cables 19
4.5.2.1 Power connections 20
4.5.2.2 Communications connections 20
4.5.3 USB connection 21
4.5.4 I/O connection 21
4.6 Military transport case 22
4.7 Bird spike kit 22
4.8 Storage information 24
4.9 Fitting the camouflage cover 24
5. Operation 24
5.1 Terminal mode 24
5.1.1 Entering/exiting the SkyVUE 8M terminal mode 25
5.1.2 Terminal mode commands general 25
5.1.3 Terminal mode command examples 26
5.1.4 Application command message types 41
5.1.5 MCFG command message types 42
5.1.6 Measurement and message intervals 43
5.1.7 Status command 46
5.1.8 Message polling 55
5.1.9 Loading a new operating system (OS) 56
5.1.10 Stratocumulus backscatter calibration 57
5.1.11 CRC-16 codes on terminal commands 59
5.1.12 Service command 59
5.1.13 Locked features 60
5.2 Restoring factory defaults 61
5.3 LED indicator 62
6. Messages 62
6.1 Data messages general 63
6.2 Checksums used in SkyVUE 8M messages 63
6.3 CS messages 64
6.3.1 MESSAGE 001 (no profile, no sky condition) 64
6.3.2 MESSAGE 002 (Profile, no sky condition) 68
6.3.3 MESSAGE 003 (no profile, sky condition) 71
6.3.4 MESSAGE 004 (profile, sky condition) — default message 73
6.4 CL31 messages 77
Table of Contents - ii

6.4.1 MESSAGES 101 - 106, (CL31 MESSAGE 1) 77
6.4.2 MESSAGE 005 (no profile, sky condition, mixing layer heights) 78
6.4.3 MESSAGES 107 - 112, CL31 Message 2 82
6.5 CT25K messages 86
6.5.1 MESSAGE 113, CT25K Data Message No. 1 86
6.5.2 MESSAGE 114, CT25K Data Message No. 6 89
7. Maintenance 91
7.1 General 91
7.2 Cleaning 91
7.3 Diagnostic LED indicators within the enclosure 92
Appendix A. Measurement of the attenuated backscatter profile 94
A.1 Initial measurement 94
A.2 Backscatter onset height detection 94
A.3 Produce attenuated backscatter output message 95
Appendix B. Cloud height calculation 96
Appendix C. Sky condition algorithm description 97
Appendix D. Replacing the SkyVUE 8M PSU 99
Appendix E. SkyVUE 8M Laser/APD module replacement 101
List of figures
FIGURE 1-1. Location of laser warning label 4
FIGURE 2-1. Principle of operation 8
FIGURE 2-2. SkyVUE 8M dimensions 10
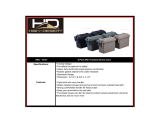
FIGURE 2-3. PSU types 11
FIGURE 4-1. Military base 17
FIGURE 4-2. Connector layout 18
FIGURE 4-3. Cable connections 21
FIGURE 4-4. USB port 21
FIGURE 4-5. Ceilometer bird spike kit installed 22
FIGURE 4-6. Preparing the SkyVUE 8M for installing the bird spikes 23
FIGURE 4-7. Attaching bird spikes to the SkyVUE 8M cowl 23
FIGURE 5-1. Restoring factory defaults 61
FIGURE 5-2. LED indicator 62
FIGURE 7-1. Diagnostic LED indicators 93
Table of Contents - iii

List of tables
Table 1-1: Packing list 1
Table 4-1: Power and communications connectors 18
Table 4-2: Function of the connector pins for the blower/heater connector 19
Table 5-1: Summary of the terminal mode commands available 27
Table 5-2: Summary of applications and applied settings for SkyVUE 8M 42
Table 5-3: Summary of message ID and descriptions 43
Table 6-1: Most significant alarm word for CS messages 65
Table 6-2: Middle alarm word for CS messages 66
Table 6-3: Least significant alarm word for CS messages 67
Table 6-4: Most significant alarm word for CS31 messages 79
Table 6-5: Middle alarm word for CS31 messages 80
Table 6-6: Least significant alarm word for CS31 messages 80
Table 6-7: Most significant alarm word for CT25K messages 87
Table 6-8: Second alarm word for CT25K messages 88
Table of Contents - iv

1. General information
1.1 Packing list 1
1.2 General safety 1
1.3 Sensor unit safety 2
1.4 Laser safety 2
1.5 Electrical safety 4
1.1 Packing list
The following table lists the products shipped with the SkyVUE 8M.
Table 1-1: Packing list
Description Quantity
Ceilometer 1
Cable, USB type A plug to type B plug, 2 m 1
Triangle key 1
Calibration plate 1
Canvas cover, white 1
Canvas cover, olive green 1
T-shaped heavy duty stakes 5
Power and communications cable 1
1.2 General safety
This manual provides important safety considerations for the installation, operation and
maintenance of the SkyVUE™8M. These safety considerations are classified into three levels:
WARNING:
Warnings alert the installer or user to serious hazards. Ignoring these warnings could result in
injury or death and/or irrevocable damage to the sensor unit.
SkyVUE™8M Tactical LIDAR Ceilometer 1

CAUTION:
Cautions warn of potential hazards. Ignoring these cautions could result in the sensor being
damaged and data being lost.
NOTE:
Notes highlight useful information in the installation, use and maintenance of this product.
These should be followed carefully in order to gain the maximum benefit from the use of this
product.
1.3 Sensor unit safety
The SkyVUE 8M sensor has been checked for safety before leaving the factory and contains no
parts that need to be changed during normal use.
WARNING:
Do not modify the SkyVUE 8M unit. Such modifications will lead to damage of the unit and
could expose users to dangerous light levels and voltages.
WARNING:
Do not attempt to repair the SkyVUE 8M unit without consulting Campbell Scientific.
CAUTION:
Ensure that the correct voltage supply is provided to the sensor.
1.4 Laser safety
The SkyVUE 8M sensor incorporates an InGaAs laser diode which is rated as a class 3B device.
This is an embedded laser where the output from the sensor unit, through the optics, is
minimized to class 1M. This classification indicates that viewing of the beam with the naked eye is
safe but looking directly into the beam with optical instruments, e.g. binoculars can be
dangerous.
From the laser head the output has the following characteristics:
Maximum average power: 15.0 mW (through 50 mm)
Maximum pulse energy: 1500 nJ (through 50 mm)
Pulse duration: 100 ns
Pulse frequency: 10 kHz
Wavelength: 912 nm ± 5 nm
SkyVUE™8M Tactical LIDAR Ceilometer 2

Tested to: EN 60825-1:2014
Half angle divergence: 0.44 mrad
The sensor is marked with the following warning information:
INVISIBLE LASER RADIATION
DO NOT VIEW DIRECTLY WITH OPTICAL INSTRUMENTS
CLASS 1M LASER PRODUCT
WARNING:
Removing the laser module with the power applied to the SkyVUE 8M may expose the user to
hazardous class 3B laser radiation.
No attempt should be made to operate the laser module outside of the housing.
WARNING:
Annually, check that the laser warning label on the sensor is still visible and can be clearly
read.
When installing the sensor, avoid pointing the laser housing towards areas where binoculars
are in common use.
WARNING:
Use of controls or adjustments or performance of procedures other than those specified
herein may result in hazardous radiation exposure.
SkyVUE™8M Tactical LIDAR Ceilometer 3

FIGURE 1-1. Location of laser warning label
Before removing the laser module, the sensor must be physically disconnected from its power
supply to ensure that the laser is turned off.
1.5 Electrical safety
The sensor is powered from a low voltage supply (Electrical specifications (p. 10)), but potentially
hazardous voltages are generated within the internal electronics. Wiring of the power and data
cable should only be done by personnel qualified to install electrical equipment. For outside
installations, this usually requires a certified electrician who is familiar with local electrical and
safety legislation. Some general guidance is given in Connectors and wiring (p. 17), but the
responsibility for the installation lies with the installer.
The unit is tested for electrical safety before dispatch but may need subsequent testing according
to local practice.
SkyVUE™8M Tactical LIDAR Ceilometer 4

NOTE:
The unit should only be serviced by trained personnel.
WARNING:
Removal of electronic module covers or connectors while the unit is powered will expose the
operator to potentially hazardous voltages and risk damage to the sensor.
The SkyVUE 8M has electrical and laser warning labels on the exterior and interior of the unit.
It is recommended that the hood and access panel door are not opened in conditions of rain,
hail or snow.
Isolate the sensor before removing internal components, including the cover to the avalanche
photodiode (APD) module. Only trained personnel should disassemble the instrument.
Power connectors are shrouded to prevent touching of the contacts. The power supply should be
isolated when connecting and disconnecting the cables to the sensor.
The SkyVUE 8M must be properly grounded by a licensed and qualified electrician to protect
against voltage leakage shock risk (Grounding (p. 15)).
Campbell Scientific recommends that RCD protection units be used with all sensors. See Power
connections (p. 20) for further information.
Heaters are enclosed to prevent contact.
CAUTION:
When powered, the heaters may operate automatically and without warning. They may
remain hot when not powered. Follow the isolation precautions, to avoid shock and burn
hazards.
2. Product overview
2.1 Introduction 6
2.2 Optical measurement 8
2.3 Internal monitoring 8
2.4 Specifications 9
SkyVUE™8M Tactical LIDAR Ceilometer 5

2.1 Introduction
The SkyVUE 8M is a LIDAR (LIght Detection And Ranging) that emits short pulses of near infrared
light into the atmosphere from a semiconductor laser. The pulses of infrared light are scattered
back by aerosols including cloud droplets. The time between transmission of the pulse and the
return signal gives the range, and therefore height, of the scattering aerosols. The variation in the
strength of the back-scattered light signal with height gives a profile of scatter coefficients and
allows identification of cloud bases. If significant scattering is detected without a defined cloud
base, then a vertical visibility can be calculated.
The control system of the SkyVUE 8M is divided into three modules, DSP, TOP and PSU as
follows:
DSP (Digital Signal Processor) is the main data processing and communications unit of the
SkyVUE 8M. It hosts two separate time keeping circuits that are cross checked. An alarm is
triggered if the circuits disagree.
TOP (top of the unit) provides safety shutdown features such as over and under laser output
level. It also contains the calibration circuitry and dirty windows system.
PSU (Power Supply Unit) controls the power supply including battery charging and deep
discharge protection.
The SkyVUE 8M has a rugged environmental enclosure that protects the instrument from the
harshest conditions and will measure the atmosphere with high stability and repeatability.
2.1.1 Cloud height detection
A scatter profile is measured as described in Measurement of the attenuated backscatter profile
(p. 94).
Cloud height detection is carried out as described in Cloud height calculation (p. 96). Up to four
cloud heights can be detected.
If clouds are not detected, the SkyVUE 8M will give one of these reports:
l No significant backscatter.
l Full obscuration determined but no cloud base detected. This is reported if the criteria for
detecting cloud base is not met but the integrated scattering coefficient reaches the limit
of vertical visibility below a set height limit. The default value is 2000m (6560ft) but can be
changed by the user. The height at which this occurs is given as vertical visibility.
SkyVUE™8M Tactical LIDAR Ceilometer 6

l Some obscuration detected but determined to be transparent is reported if scattering is
detected but no cloud is detected and the calculated vertical visibility exceeds a set height
limit.
If no cloud is detected but significant scattering is detected below 50m (160ft), then vertical
visibility is set to 0.
2.1.2 Sky condition
Sky condition is an assessment of cloud cover measured in units of eighths known as oktas. The
number of oktas is the density of cloud in eighths of that layer. The SkyVUE 8M can report up to
five layers of cloud when reporting sky condition. The algorithm used in the SkyVUE 8M follows
guidance in the ICAO 9837, Manual on Automatic Meteorological Observing Systems at
Aerodromes.
Sky condition is not an instantaneous measurement. It is based on cloud data for the previous 30
minutes, with cloud detection in the previous 10 minutes given an extra weighting. Therefore, sky
condition is not available until sufficient data has been collected. See Sky condition algorithm
description (p. 97) for more detail.
2.1.3 Backscatter profile reporting
Several possible data messages give the two-way attenuated backscatter profile. This consists of
2048 groups of five-character values (10,240 characters in total). Each character is 4 bits long and
therefore each 5 figure group is 20 bits. They are given as signed two complement integers and
numbers greater than 2
19
–1 represent negative integers.
NOTE:
After 1600, the remaining groups have values of 00000 to maintain compatibility of the
backscatter profile reporting with other sensor models.
Therefore, each group actually represents negative, a value between –2
19
to +(2
19
–1), rather than
0 to (2
20
–1), which would be the case for unsigned, positive, 20-bit integers.
Apply the following two-stage process to correct the decimal value:
1. Convert the hexidecimal characters to a decimal number.
2. If the number resulting from this conversion is greater than 524287, subtract 1048576,
which is 2
20
.
To use this backscatter coefficient in units of sr
-1
m
-1
, the sensor multiplies the calculated decimal
number by a factor of 10
-8
. The values are scaled by the Attenuated_SCALE parameter, see
Table 5-1 (p. 27).
SkyVUE™8M Tactical LIDAR Ceilometer 7

NOTE:
The profile is not corrected for tilt angle even if cloud heights are corrected.
2.2 Optical measurement
FIGURE 2-1. Principle of operation
2.2.1 Optical arrangement
The SkyVUE 8M uses a single lens design that increases optical signal-to-noise ratio, while
maintaining Class 1M eye safety by integrating larger optics into a compact package (see FIGURE
2-1 (p. 8)). Half of the lens is used by the transmitter, and the other half is used by the receiver.
This design provides an alternative to traditional two lens or common-optics designs. The optical
isolation of traditional biaxial systems is maintained to increase detector sensitivity, while the low
overlap onset height of common-optics systems is incorporated to allow measurements at close
ranges.
2.3 Internal monitoring
The SkyVUE 8M monitors window contamination, key voltages and currents, internal
temperature and relative humidity, and other parameters relevant to its performance. Data
SkyVUE™8M Tactical LIDAR Ceilometer 8

messages (see Operation (p. 24)) include this information allowing remote diagnosis of the
SkyVUE 8M condition. In addition, a special status message can be polled.
2.4 Specifications
2.4.1 Measurement specifications 9
2.4.2 Mechanical specifications 9
2.4.3 Electrical specifications 10
2.4.4 Optical specifications 12
2.4.5 Environmental specifications 12
2.4.6 Communications specifications 12
2.4.7 Transport, shock, and vibration certification 13
2.4.8 Compliance and testing 13
2.4.1 Measurement specifications
Maximum reporting range: 8 km (26,250 ft)
Minimum reporting resolution:
5 m (15 ft)
Hard target range accuracy:
± 0.25% ± 4.6 m (15 ft)
Reporting cycle:
2 to 600 s
Cloud layers reported:
Up to four layers reported
, instantaneously. Up to five layers
reported in Sky Condition.
2.4.2 Mechanical specifications
Height: 763 mm (30 in) including feet
Width: 253 mm (10 in); 508 mm (20 in) with extended feet
Depth: 360 mm (14.2 in); 435 mm (17 in) with extended feet
Ceilometer weight: 18 kg (40 lb)
, excluding cables
Shipping weight: 24.6 kg (54 lb)
Hard shell transport case
Dimensions:
1000 mm x 600 mm x 600 mm (39.5 x 24 x 24 in)
SkyVUE™8M Tactical LIDAR Ceilometer 9

Weight (empty):
28 kg (62 lb)
Weight with ceilometer and
accessories:
49 kg (108 lb)
FIGURE 2-2. SkyVUE 8M dimensions
2.4.3 Electrical specifications
Power required: 10 to 40 VDC (9 A at 12 VDC; 4.5 A at 24 VDC), 102
W total
maximum
DSP and internal heaters:
10 to 40 VDC input;
3.8
A at 12 VDC;
1.9
A at 24 VDC
12V OUT:
1.7 A for optional or external equipment (if the SkyVUE 8M is
using a DC supply
of less than 14 VDC
,
the 12V OUT will be
less than 12 VDC
.)
Dew heater: 10 W maximum
Hood heater input:
5 A at 12 VDC; 2.5 A at 24 VDC
Fuses:
DSP fuse:
HBC 5A (T)
SkyVUE™8M Tactical LIDAR Ceilometer 10

PSU fuse:
HBC
5A
(T)
All fuses are 5 x 20 mm slow blow (T) and are the same for
both 115VAC and 230VAC.
The heaters are resistive, which is advantageous when connected to generators or when current
consumption is important.
WARNING:
Removing the laser module with a battery connected or power applied to the SkyVUE 8M
may expose the user to hazardous Class 3B radiation. No attempt should be made to operate
the laser module outside of the housing.
FIGURE 2-3. PSU types
SkyVUE™8M Tactical LIDAR Ceilometer 11

2.4.4 Optical specifications
Pulse duration:
100 ns
Pulse frequency:
10 kHz
Wavelength:
912 ± 5 nm
Half-angle laser divergence: 0.44
mrad
Field of view: 2.0
mrad
Laser lifetime:
10 years typical
Eye safety class:
1M
2.4.5 Environmental specifications
Standard operating
temperature range:
–40 to 60 °C
Relative humidity range:
0 to 100%
IP rating:
IP 66
Maximum tested wind speed:
55 m/s
for sensor securely attached to the ground without
camouflage covers
2.4.6 Communications specifications
Supported serial settings:
8 bits, no parity, 1 stop bit (default)
7 bits, even parity, 1 stop bit
7 bits, odd parity, 1 stop bit
Supported data rates: 300 baud 19200 baud
600 baud 38400 baud
1200 baud 57600 baud
2400 baud 76800 baud
4800 baud 115200 baud (default)
9600 baud
Supported standards:
RS-232 (default)
RS-485 full duplex
RS-485 half duplex
SkyVUE™8M Tactical LIDAR Ceilometer 12

Signal voltage levels:
Minimum value Nominal value Maximum value
RS-232 communications
RS-232 input threshold low 0.8 V 1.5 V –
RS-232 input threshold high – 2.0 V 2.4 V
RS-232 input absolute maximum –15 V – +15 V
RS-232 input resistance 12 KΩ – –
RS-232 output voltage low – – 0.4 V
RS-232 output voltage high (into 3 KΩ) 4.4 V – –
RS-485/422 communications
RS-485/422 input threshold voltage –0.2 V – +0.2 V
RS-485/422 output (unloaded) – – 5V
RS-485/422 output (load 50 Ω) 2 V – –
Maximum voltage at any terminal –7 V – +7 V
USB Service Port USB1.1 and 2.0 compatible, fixed 115200 baud.
2.4.7 Transport, shock, and vibration certification
When contained within the military transport case from Campbell Scientific (see Military
transport case (p. 22)), the SkyVUE 8M complies with the following standards:
MIL-STD-810g
DEF STAN 00-035
Further details are available from Campbell Scientific.
2.4.8 Compliance and testing
NOTE:
Further details regarding compliance and testing are available upon request.
EMC compliance:
EN 61326-1:2013
Electrical safety compliance:
EN 61010-1:2010
SkyVUE™8M Tactical LIDAR Ceilometer 13

Laser safety compliance:
EN 60825-1:2014
Eye safety standard:
Class 1M
Vibration:
BS EN 60068-2-6:2008 Test Fc: Vibration (Sinusoidal)
Frequency range:
5 to 150 Hz (exceeds Lloyd's Register test levels)
3. Initial preparation and checks
The following steps will provide basic familiarization with the SkyVUE 8M and perform basic
functionality checks. To do these, and connect the sensor to its power supply.
WARNING:
The laser begins operating as soon as the power is connected. Do not point the laser in any
direction where it could be viewed with magnifying optics.
The green LED visible from above should flash once every 10 seconds (see FIGURE 5-2 (p. 62)).
Connect the SkyVUE 8M USB port (see FIGURE 4-4 (p. 21)) to a computer and use a terminal
emulation program to set to 115200 baud, 8N1 bits/parity settings.
The computer should identify the USB connection and allocate a port number. Enter the port
setting in the terminal emulator program. Older computer operating systems may need
upgrading or additional software.
The SkyVUE 8M will output message type 004 (default) every 30 seconds (see CS messages (p.
64)).
Use the open 0 command to open the terminal mode. You should now see the prompt CS136>.
Type Status to see the sensor status information described in Status command (p. 46). If using
date/time information, checked it since the date/time can drift up to ±14 seconds per day.
If the unit has been in storage or transit for more than a few months, the clock battery may be
discharged. However, it will charge once power is supplied.
Use the Close command to exit the terminal mode. It will close automatically after 10 minutes of
inactivity.
SkyVUE™8M Tactical LIDAR Ceilometer 14

4. Installation
4.1 Location and orientation 15
4.2 Grounding 15
4.3 Mounting the SkyVUE 8M 16
4.4 Tilt angle 17
4.5 Connectors and wiring 17
4.6 Military transport case 22
4.7 Bird spike kit 22
4.8 Storage information 24
4.9 Fitting the camouflage cover 24
4.1 Location and orientation
The SkyVUE 8M measures environmental variables and is designed to be located in harsh
weather conditions. However, there are a few considerations to take into account if accurate and
representative data from a site are to be obtained.
To reduce the service frequency with the unit, place the SkyVUE 8M away from sources of
contamination. More regular maintenance will be required when the instrument is placed in
areas where contamination is unavoidable.
WARNING:
If installing at an airport, check and follow local guidance for allowed locations for a non-
frangible object 1 m (3.2 ft) tall. Please contact Campbell Scientific if frangible fittings are
required.
4.2 Grounding
The SkyVUE 8M is grounded through its metal feet and ground spikes where used.
SkyVUE™8M Tactical LIDAR Ceilometer 15
/