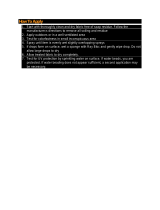
. Disassemble and, if necessary, spray all components with LOCTITE
®
SF
™
Primer. Allow to dry.
. Apply a thin coating of LOCTITE
®
Thread Sealant to union face.
. Apply a band of LOCTITE
®
Thread Sealant to male threads.
. Assemble parts snugly.
Sealant Band Sealant Band
Sealant Band Sealant Band Sealant Band
Sealant Coating (may be used for new or damaged seat)
PIPE UNIONS
. Clean parts of contamination. If necessary, spray LOCTITE
®
SF
™
Primer onto threaded parts (male and female). Allow to dry.
Note: Primer is not required for brass parts.
. Apply a band of LOCTITE
®
Thread Sealant to male threads starting
one to two threads from end of pipe.
. Assemble parts snugly. Do not overtighten.
. If initial pressure exceeds psi*, wait minutes before pressurizing.
Note: •
For stainless steel components, use LOCTITE
®
™
Thread Sealant
or
LOCTITE
®
™
Pipe Sealant Stick.
• For general purpose thread sealing, use LOCTITE
®
™
Thread Sealant or LOCTITE
®
™
Pipe Sealant
Stick
.
• For fine filtration systems requiring zero contamination, use
LOCTITE
®
™
Thread Sealant for hydraulic/pneumatic fittings
or LOCTITE
®
™
Fast Cure Thread Sealant.
• For easier disassembly or large diameter fittings, use
LOCTITE
®
™
Thread Sealant.
• If using with sealing chemicals or strong acids/bases, refer to Fluid
Compatibility Chart (LT-).
• Do not use with systems containing oxygen or strong
oxidizers (chlorine).
• For PVC or ABS pipe, use LOCTITE
®
MR
™
Plastic Pipe Sealant.
STANDARD FITTINGS – PIPES, HYDRAULIC, OR AIR
THREAD SEALING
* Depending on conditions