Page is loading ...

Professional Shop Manual
78/83/90 Series Horizontal Shaft Engines
(277/357/420 cc Engines)
NOTE: These materials are for use by trained technicians who are experienced in the service and repair of outdoor power
equipment of the kind described in this publication, and are not intended for use by untrained or inexperienced individuals.
These materials are intended to provide supplemental information to assist the trained technician. Untrained or inexperi-
enced individuals should seek the assistance of an experienced and trained professional. Read, understand, and follow all
instructions and use common sense when working on power equipment. This includes the contents of the product’s Oper-
ators Manual, supplied with the equipment. No liability can be accepted for any inaccuracies or omission in this publication,
although care has been taken to make it as complete and accurate as possible at the time of publication. However, due to
the variety of outdoor power equipment and continuing product changes that occur over time, updates will be made to these
instructions from time to time. Therefore, it may be necessary to obtain the latest materials before servicing or repairing a
product. The company reserves the right to make changes at any time to this publication without prior notice and without
incurring an obligation to make such changes to previously published versions. Instructions, photographs and illustrations
used in this publication are for reference use only and may not depict actual model and component parts.
© Copyright 2010 MTD Products Inc. All Rights Reserved


I
Chapter 1: Introduction
Professional Service Manual Intent. . . . . . . . . . . . . . . . . . . . . . . . . . . . . . . . 1
Safety . . . . . . . . . . . . . . . . . . . . . . . . . . . . . . . . . . . . . . . . . . . . . . . . . . . . . . 1
Fasteners. . . . . . . . . . . . . . . . . . . . . . . . . . . . . . . . . . . . . . . . . . . . . . . . . . . . 3
Assembly instructions . . . . . . . . . . . . . . . . . . . . . . . . . . . . . . . . . . . . . . . . . . . 3
Model and serial number . . . . . . . . . . . . . . . . . . . . . . . . . . . . . . . . . . . . . . . . 4
Maintenance . . . . . . . . . . . . . . . . . . . . . . . . . . . . . . . . . . . . . . . . . . . . . . . . . . 5
Air filter (summer engines) . . . . . . . . . . . . . . . . . . . . . . . . . . . . . . . . . . . . . . . 6
Oil type and capacity. . . . . . . . . . . . . . . . . . . . . . . . . . . . . . . . . . . . . . . . . . . . 7
Changing the oil . . . . . . . . . . . . . . . . . . . . . . . . . . . . . . . . . . . . . . . . . . . . . . . 8
Fuel . . . . . . . . . . . . . . . . . . . . . . . . . . . . . . . . . . . . . . . . . . . . . . . . . . . . . . . . . 9
Fuel filters . . . . . . . . . . . . . . . . . . . . . . . . . . . . . . . . . . . . . . . . . . . . . . . . . . . . 9
Valve lash . . . . . . . . . . . . . . . . . . . . . . . . . . . . . . . . . . . . . . . . . . . . . . . . . . . 11
Cleaning the engine . . . . . . . . . . . . . . . . . . . . . . . . . . . . . . . . . . . . . . . . . . . 13
General torque specifications . . . . . . . . . . . . . . . . . . . . . . . . . . . . . . . . . . . . 14
Maintenance Chart . . . . . . . . . . . . . . . . . . . . . . . . . . . . . . . . . . . . . . . . . . . . 14
Frequently used specifications . . . . . . . . . . . . . . . . . . . . . . . . . . . . . . . . . . . 15
Chapter 2: Basic Troubleshooting
Definitions . . . . . . . . . . . . . . . . . . . . . . . . . . . . . . . . . . . . . . . . . . . . . . . . . . . 17
Introduction . . . . . . . . . . . . . . . . . . . . . . . . . . . . . . . . . . . . . . . . . . . . . . . . . . 17
Steps to troubleshooting . . . . . . . . . . . . . . . . . . . . . . . . . . . . . . . . . . . . . . . . 17
Define the problem . . . . . . . . . . . . . . . . . . . . . . . . . . . . . . . . . . . . . . . . . . . . 17
Identify factors that could cause the problem . . . . . . . . . . . . . . . . . . . . . . . . 18
Repairing the problem . . . . . . . . . . . . . . . . . . . . . . . . . . . . . . . . . . . . . . . . . 23
Prime test . . . . . . . . . . . . . . . . . . . . . . . . . . . . . . . . . . . . . . . . . . . . . . . . . . . 24
Leak-down test . . . . . . . . . . . . . . . . . . . . . . . . . . . . . . . . . . . . . . . . . . . . . . . 24
Compression test . . . . . . . . . . . . . . . . . . . . . . . . . . . . . . . . . . . . . . . . . . . . . 26
PCV testing . . . . . . . . . . . . . . . . . . . . . . . . . . . . . . . . . . . . . . . . . . . . . . . . . . 27
Chapter 3: Air Intake systems
Heat box (snow engines) . . . . . . . . . . . . . . . . . . . . . . . . . . . . . . . . . . . . . . . 29
Air filter (summer engines) . . . . . . . . . . . . . . . . . . . . . . . . . . . . . . . . . . . . . . 30
Air filter base and control panel (summer engines) . . . . . . . . . . . . . . . . . . . 32
Carburetor and Insulator . . . . . . . . . . . . . . . . . . . . . . . . . . . . . . . . . . . . . . . . 34
Table of Contents

II
Chapter 4: The Fuel System and Governor
Inspecting the fuel . . . . . . . . . . . . . . . . . . . . . . . . . . . . . . . . . . . . . . . . . . . . 37
Test fuel for alcohol . . . . . . . . . . . . . . . . . . . . . . . . . . . . . . . . . . . . . . . . . . . 38
Fuel tank vent . . . . . . . . . . . . . . . . . . . . . . . . . . . . . . . . . . . . . . . . . . . . . . . . 39
The fuel filter . . . . . . . . . . . . . . . . . . . . . . . . . . . . . . . . . . . . . . . . . . . . . . . . . 40
Inspect the fuel lines . . . . . . . . . . . . . . . . . . . . . . . . . . . . . . . . . . . . . . . . . . 40
The fuel tank . . . . . . . . . . . . . . . . . . . . . . . . . . . . . . . . . . . . . . . . . . . . . . . . . 41
Evaporative (EVAP) emissions system . . . . . . . . . . . . . . . . . . . . . . . . . . . . 42
Troubleshooting the EVAP System . . . . . . . . . . . . . . . . . . . . . . . . . . . . . . . 44
Charcoal canister . . . . . . . . . . . . . . . . . . . . . . . . . . . . . . . . . . . . . . . . . . . . . 46
Roll over valve . . . . . . . . . . . . . . . . . . . . . . . . . . . . . . . . . . . . . . . . . . . . . . . 47
Choke . . . . . . . . . . . . . . . . . . . . . . . . . . . . . . . . . . . . . . . . . . . . . . . . . . . . . 48
Primers (snow engines) . . . . . . . . . . . . . . . . . . . . . . . . . . . . . . . . . . . . . . . . 50
Carburetors . . . . . . . . . . . . . . . . . . . . . . . . . . . . . . . . . . . . . . . . . . . . . . . . . . 51
Inspecting the carburetor . . . . . . . . . . . . . . . . . . . . . . . . . . . . . . . . . . . . . . . 51
Disassembly and rebuilding of the carburetor . . . . . . . . . . . . . . . . . . . . . . . 52
Fuel shut-off valve . . . . . . . . . . . . . . . . . . . . . . . . . . . . . . . . . . . . . . . . . . . . 56
Governor . . . . . . . . . . . . . . . . . . . . . . . . . . . . . . . . . . . . . . . . . . . . . . . . . . . . 58
Governor arm . . . . . . . . . . . . . . . . . . . . . . . . . . . . . . . . . . . . . . . . . . . . . . . . 58
Governor shaft . . . . . . . . . . . . . . . . . . . . . . . . . . . . . . . . . . . . . . . . . . . . . . . 59
Governor cup and the governor gear . . . . . . . . . . . . . . . . . . . . . . . . . . . . . . 60
Governor adjustment . . . . . . . . . . . . . . . . . . . . . . . . . . . . . . . . . . . . . . . . . . 61
Chapter 5: Lubrication
Oil type and quantity . . . . . . . . . . . . . . . . . . . . . . . . . . . . . . . . . . . . . . . . . . . 63
Oil dip stick . . . . . . . . . . . . . . . . . . . . . . . . . . . . . . . . . . . . . . . . . . . . . . . . . . 64
Dip stick tube removal . . . . . . . . . . . . . . . . . . . . . . . . . . . . . . . . . . . . . . . . . 65
Lubrication system . . . . . . . . . . . . . . . . . . . . . . . . . . . . . . . . . . . . . . . . . . . . 66
Positive crankcase ventilation valve . . . . . . . . . . . . . . . . . . . . . . . . . . . . . . . 67
Chapter 6: Starter and Charging Systems
Recoil Starter Removal . . . . . . . . . . . . . . . . . . . . . . . . . . . . . . . . . . . . . . . . . 69
Starter Cup . . . . . . . . . . . . . . . . . . . . . . . . . . . . . . . . . . . . . . . . . . . . . . . . . . 70
Starter Rope . . . . . . . . . . . . . . . . . . . . . . . . . . . . . . . . . . . . . . . . . . . . . . . . . 71
Starter pulley and recoil spring . . . . . . . . . . . . . . . . . . . . . . . . . . . . . . . . . . . 73
Electric starter . . . . . . . . . . . . . . . . . . . . . . . . . . . . . . . . . . . . . . . . . . . . . . . . 75
Charging system . . . . . . . . . . . . . . . . . . . . . . . . . . . . . . . . . . . . . . . . . . . . . 77
Charging system testing . . . . . . . . . . . . . . . . . . . . . . . . . . . . . . . . . . . . . . . . 78
Stator . . . . . . . . . . . . . . . . . . . . . . . . . . . . . . . . . . . . . . . . . . . . . . . . . . . . . . 79
Rotor . . . . . . . . . . . . . . . . . . . . . . . . . . . . . . . . . . . . . . . . . . . . . . . . . . . . . . . 79

III
Chapter 7: Ignition System
Troubleshooting the ignition system . . . . . . . . . . . . . . . . . . . . . . . . . . . . . . . 81
Stop switch . . . . . . . . . . . . . . . . . . . . . . . . . . . . . . . . . . . . . . . . . . . . . . . . . . 82
Remote (ignition) stop switch (snow engines) . . . . . . . . . . . . . . . . . . . . . . . 83
Test for ignition that won’t turn off . . . . . . . . . . . . . . . . . . . . . . . . . . . . . . . . 84
The module . . . . . . . . . . . . . . . . . . . . . . . . . . . . . . . . . . . . . . . . . . . . . . . . . . 85
Module removal . . . . . . . . . . . . . . . . . . . . . . . . . . . . . . . . . . . . . . . . . . . . . . 86
Installing the module and setting the air gap . . . . . . . . . . . . . . . . . . . . . . . . 87
Flywheel . . . . . . . . . . . . . . . . . . . . . . . . . . . . . . . . . . . . . . . . . . . . . . . . . . . . 88
About the spark plug . . . . . . . . . . . . . . . . . . . . . . . . . . . . . . . . . . . . . . . . . . . 89
Cleaning the spark plug . . . . . . . . . . . . . . . . . . . . . . . . . . . . . . . . . . . . . . . . 89
Inspection of the spark plug. . . . . . . . . . . . . . . . . . . . . . . . . . . . . . . . . . . . . 89
Spark plug removal . . . . . . . . . . . . . . . . . . . . . . . . . . . . . . . . . . . . . . . . . . . . 89
Chapter 8: Exhaust
Summer engines . . . . . . . . . . . . . . . . . . . . . . . . . . . . . . . . . . . . . . . . . . . . . 91
Spark arrestor (if equipped) . . . . . . . . . . . . . . . . . . . . . . . . . . . . . . . . . . . . . 91
Muffler removal/replacement . . . . . . . . . . . . . . . . . . . . . . . . . . . . . . . . . . . . 92
Muffler removal/replacement (snow engines) . . . . . . . . . . . . . . . . . . . . . . . . 94
Chapter 9: Cylinder Head
Cylinder head removal . . . . . . . . . . . . . . . . . . . . . . . . . . . . . . . . . . . . . . . . . 97
Cylinder head installation . . . . . . . . . . . . . . . . . . . . . . . . . . . . . . . . . . . . . . 100
Valves . . . . . . . . . . . . . . . . . . . . . . . . . . . . . . . . . . . . . . . . . . . . . . . . . . . . . 101
Chapter 10: Crankshaft, piston and Connecting Rod
Crankshaft inspection . . . . . . . . . . . . . . . . . . . . . . . . . . . . . . . . . . . . . . . . . 108
Piston Inspection . . . . . . . . . . . . . . . . . . . . . . . . . . . . . . . . . . . . . . . . . . . . 109
Connecting rod inspection . . . . . . . . . . . . . . . . . . . . . . . . . . . . . . . . . . . . . 111
Cylinder inspection . . . . . . . . . . . . . . . . . . . . . . . . . . . . . . . . . . . . . . . . . . . 111
Balance Shaft (483 & 490) . . . . . . . . . . . . . . . . . . . . . . . . . . . . . . . . . . . . . 112
Reassembly . . . . . . . . . . . . . . . . . . . . . . . . . . . . . . . . . . . . . . . . . . . . . . . . 113
Engine specifications chart . . . . . . . . . . . . . . . . . . . . . . . . . . . . . . . . . . . . . 115
Engine torque values chart . . . . . . . . . . . . . . . . . . . . . . . . . . . . . . . . . . . . . 119
Chapter 11: Failure Analysis
Abrasive Ingestion . . . . . . . . . . . . . . . . . . . . . . . . . . . . . . . . . . . . . . . . . . . 121
Insufficient lubrication . . . . . . . . . . . . . . . . . . . . . . . . . . . . . . . . . . . . . . . . . 124
Engine Overspeed . . . . . . . . . . . . . . . . . . . . . . . . . . . . . . . . . . . . . . . . . . . 125
Overheated . . . . . . . . . . . . . . . . . . . . . . . . . . . . . . . . . . . . . . . . . . . . . . . . . 126
Mechanical Breakage/ Wear . . . . . . . . . . . . . . . . . . . . . . . . . . . . . . . . . . . 127
Detonation/preignition . . . . . . . . . . . . . . . . . . . . . . . . . . . . . . . . . . . . . . . . . 127

IV

Introduction
1
Professional Service Manual Intent
This manual is intended to provide service dealers with an introduction to proven diagnostic and repair proce-
dures for 78/83/90 series MTD horizontal shaft engines.
Disclaimer: The information contained in this manual is correct at the time of writing. Both the product and the infor-
mation about the product are subject to change without notice.
About the text format:
NOTE: Is used to point out information that is relevant to the procedure, but does not fit as a step in the proce-
dure.
• Bullet points: indicate sub-steps or points.
1. Numbered steps indicate specific things that should be done, and the order in which they should be done.
1a. Substeps will be lettered and nested within steps. Two or more substeps may be combined to describe
the actions required to complete a step.
Disclaimer: This manual is intended for use by trained, professional technicians.
• Common sense in operation and safety is assumed.
• In no event shall MTD be liable for poor text interpretation or poor execution of the procedures described
in the text.
• If the person using this manual is uncomfortable with any procedures they encounter, they should seek
the help of a qualified technician or MTD Technical Support.
Safety
This Service Manual is meant to be used along with the Operator’s Manual. Read the Operator’s Manual and
familiarize yourself with the safety and operational instructions for the equipment being worked on. Keep a copy of
the Operator’s Manual for quick reference. Operator’s manuals may be viewed for free at the brand support website.
It will be necessary to have the complete model and serial number for the equipment.
Caution is used to point out potential danger to the technician, operator, bystanders, or sur-
rounding property.
! CAUTION! CAUTION
Warning indicates a potentially hazardous situation that, if not avoided, could result in death
or serious injury.
! WARNING! WARNING
! DANGER! DANGER
Danger indicates an imminently hazardous situation that, if not avoided, will result in death or
serious injury. This signal word is to be limited to the most extreme situations
CHAPTER 1: INTRODUCTION

78/83/90 Series Horizontal Shaft Engines
2
• Be prepared in case of emergency:
Keep a fire extinguisher nearby
Keep a first aid kit nearby
Keep emergency contact numbers handy
• Replace any missing or damaged safety labels on shop equipment.
• Replace any missing or damaged safety labels on equipment being serviced.
! CAUTION! CAUTION
• Grooming and attire:
Do not wear loose fitting clothing that may become entangled in equipment.
Long hair should be secured to prevent entanglement in equipment.
Jewelry is best removed.
• Protective gear: includes, but is not limited to
Clear eye protection ................................ while working around any machinery
Protective gloves..................................... where necessary
Armored footwear.................................... when working around any machinery
Hearing protection................................... in noisy environments
Chemically resistant gloves..................... when working with chemicals or solvents
Respirator................................................ when working with chemical or solvents
Appropriate tinted eye protection............. when cutting or welding
Flame resistant headgear, jacket, chaps. when cutting or welding
! WARNING! WARNING
! CAUTION! CAUTION
• Remember that some hazards have a cumulative effect. A single exposure may
cause little or no harm, but continual or repeated exposure may cause very serious
harm.
• Clean spills and fix obviously dangerous conditions as soon as they are noticed.
• Lift and support heavy objects safely and securely.
• Be aware of your surroundings and potential hazards that are inherent to all power
equipment. All the labels in the world cannot protect a technician from an instant of
carelessness.
• Exhaust fumes from running engines contain carbon monoxide (CO). Carbon
monoxide is a colorless odorless gas that is fatal if inhaled in sufficient quantity.
Only run engines in well ventilated areas. If running engines indoors, use an
exhaust evacuation system with adequate make-up air ventilated into the shop.
! DANGER! DANGER

Introduction
3
Fasteners
• Most of the fasteners used on the MTD engine are metric. Some are fractional inches. For this reason,
wrench sizes are frequently identified in the text, and measurements are given in U.S. and metric scales.
• If a fastener has a locking feature that has worn, replace the fastener or apply a small amount of releas-
able thread locking compound such as Loctite® 242 (blue).
• Some fasteners, like cotter pins, are single-use items that are not to be reused. Other fasteners such as
lock washers, retaining rings, and internal cotter pins (hairpin clips) may be reused if they do not show
signs of wear or damage. This manual leaves that decision to the judgement of the technician.
Assembly instructions
• Torque specifications may be noted in the part of the text that covers assembly. They may be summa-
rized in tables along with special instructions regarding locking or lubrication. Whichever method is more
appropriate will be used. In many cases, both will be used so that the manual is handy as a quick-refer-
ence guide as well as a step-by-step procedure guide that does not require the user to hunt for informa-
tion.
• Lubricant quantity and specification may be noted in the part of the text that covers maintenance, and
again in the section that covers assembly. They may also be summarized in tables along with special
instructions. Whichever method is more appropriate will be used. In many cases, the information will be
found in several places in the manual so that the manual is handy as a quick-reference guide as well as a
step-by-step procedure guide that does not require the user to hunt for information.
• The level of assembly instructions provided will be determined by the complexity of reassembly, and by
the potential for damage or unsafe conditions to arise from mistakes made in assembly.
• Some instructions may refer to other parts of the manual for subsidiary procedures. This avoids repeating
the same procedure two or three times in the manual.

78/83/90 Series Horizontal Shaft Engines
4
Model and serial number
The model and serial number can be found on a white
sticker with a bar code. The sticker is located on the right
side of the engine at the bottom of the block.
See Figure 1.1.
NOTE: The serial number will always start with the
model number.
Figure 1.1
Model /serial number
Front of engine
MTD Horizontal Engine Model Designators
1 6 1 - S H A
Bore Dia. (mm)
Starter/Alternators
1=Recoil start
2=Electric start
3=E. start/alt. 20W/20W
4=E. start/alt. 3A DC/5A
End Product
C Chipper/Shredder
J Snow/No tank
L Logsplitter
R Tiller (slow reverse)
SSnow
T Tiller
V Verticutter
Compliance
U United States (50 State)
H Europe
C California
0 (Zero) 49 State
G U.S.(49) and Europe
W U.S.(50) and Europe
Major Revision
Change
MTDEngineSerialNumbers
Modelnu m b er
1P65FH/0510271A0023
Mont hYea r
ProducingLine#
Date
Engine
number
A=1
st
shift
B=2
nd
shi f t

Introduction
5
Maintenance
The information in this manual applies to the MTD
engine. Some basic principles may apply to engines pro-
duced by other manufacturers.
As the saying goes “an ounce of prevention is worth a
pound of cure”. The same can be said about preventive
maintenance on outdoor power equipment. By changing
the spark plug and oil at recommended intervals many fail-
ures can be avoided.
NOTE: Please refer to Chapter 7: Ignition for the complete
service instructions on spark plugs.
1. The spark plug used in the MTD engine is a F6RTC
gapped to 0.026” - 0.030” (0.65 - 0.75 mm).
See Figure 1.2.
NOTE: The F6RTC plug is the only plug that is EPA certi-
fied for the MTD engine.
2. Wear rate will vary somewhat with severity of use. If the edges of the center electrode are rounded-off, or any
other apparent wear / damage occurs, replace the spark plug before operating failure (no start) occurs.
3. Cleaning the spark plug:
NOTE: MTD does not recommend cleaning spark plugs. Use of a wire brush may leave metal deposits on the
insulator that causes the spark plug to short out and fail to spark. Use of abrasive blast for cleaning
may cause damage to ceramic insulator or leave blast media in the recesses of the spark plug. When
the media comes loose during engine operation, severe and non-warrantable engine damage may
result.
4. Inspection of the spark plug can provide indications of the operating condition of the engine.
• Light tan colored deposits on insulator and electrodes is normal.
• Dry, black deposits on the insulator and electrodes indicate an over-rich fuel / air mixture (too much fuel or
not enough air)
• Wet, black deposits on the insulator and electrodes indicate the presence of oil in the combustion cham-
ber.
• Heat damaged (melted electrodes / cracked insulator / metal transfer deposits) may indicate detonation.
• A spark plug that is wet with fuel indicates that fuel is present in the combustion chamber, but it is not
being ignited.
Figure 1.2

78/83/90 Series Horizontal Shaft Engines
6
Air filter (summer engines)
Generally air filters come in two different types, a
pleated-paper element or foam. A combination of the two
are
used on the MTD engine. See Figure 1.3.
1. The main function of the air filter is to trap air borne
particles before they enter the engine. Dirt ingestion
can cause serious internal engine damage.
NOTE: Snow engines do not have air filters
because the snow will plug up the filter. Gen
-
erally the air is clean enough that there is
minimal risk of dirt ingestion when the
ground is covered with snow.
2. Air filters used on the MTD engine are designed to
prevent particles larger than 3-5 micron from pass
-
ing through into the engine.
3. The filter should be checked on a regular basis pos-
sibly several times in a season.
4. Typically an air filter should be changed before every season.
5. If a foam air pre-cleaner is dirty, but not in bad of condition it can be cleaned and reused. The paper pleated fil-
ters can be shaken or lightly tapped to free the debris from the filter.
NOTE: Never use compressed air on a paper air filter. Compressed air will remove the tiny fibers that are used
to catch the dirt in the air. Without these fibers the filter is useless.
6. Foam pre-filters can be washed in warm soapy water.
NOTE: When drying a foam filter either squeeze it in side of a paper towel or let it air dry DO NOT wring it
because the filter will tear.
7. Before installing any foam filter, after it has been washed, it needs to be free of moisture.
NOTE: Always check with factory specification prior to servicing/replacing any engine components.
NOTE: Do not oil the foam pre-filter. The paper filer will absorb the oil and it will become plugged.
Figure 1.3
Foam pre-filter
Paper-pleated element

Introduction
7
Oil type and capacity
MTD engines use oil with a SF/SG API rating or better is the recommended oil for this engine. The winter
engines use SAE 5W-30 oil and the summer engines use SAE 10W-30 oil. The oil capacity for all of the 78/83/90
series engines is 37 fl.oz (1.1 liters).
• Check the oil level frequently and change the oil more frequently in severe operating conditions such as
exceptionally deep snow falls.
• Synthetic oil is a suitable alternative, but it does not extend service intervals.
NOTE: MTD recommends the use of petroleum oil during the break in period to ensure the piston rings cor-
rectly break in.
• Synthetic vs. Petroleum based oil: To simply look at synthetic oil and to compare it with Petroleum based
oil there is very little difference. However, when you look at the two through a microscope it is easy to see
the difference. Synthetic is made up of smaller molecules. This allows the oil to get into areas that petro-
leum based oil cannot.
• No oil additives or viscosity modifiers are recommended. The performance of a good oil meeting the API
specifications will not be improved by oil additives.
NOTE: Some oil additives may cause severe and non warrantable engine damage, constituting a lubrication
failure.
NOTE: If the oil is noticeably thin, or smells of gasoline, a carburetor repair may be needed before the engine
can be run safely.
NOTE: There are two types of dip sticks that can be found
on MTD engines; a threaded dip stick that was
used on older engines and a quarter turn dip stick
that is used on engines currently being produced.
See Figure 1.4.
Figure 1.4
1/4 turn
Threaded

78/83/90 Series Horizontal Shaft Engines
8
To check the oil with a threaded dip stick:
1. Twist and remove the dip stick from the engine.
2. Clean the oil off of the tip of the dipstick.
3. Re-insert the dipstick without threading it in to get
the oil level reading.
See Figure 1.5.
4. The oil level is determined by the lowest point on
the dipstick that is completely covered with oil.
To check the oil with a 1/4 turn dip stick:
1. Twist and remove the dip stick from the engine.
2. Clean the oil off of the tip of the dipstick.
3. Re-insert the dipstick and turn it until it is fully
seated to get the oil level reading.
See Figure 1.6.
4. The oil level is determined by the lowest point on
the dipstick that is completely covered with oil.
Changing the oil
NOTE: If the engine has been running, allow the
engine to cool before doing any mainte
-
nance work.
NOTE: The oil should be changed after the first 5 hours of operation and every 50 hours there after.
1. Place a suitable drain pan under the drain plug to
collect the oil.
2. Drain the oil by removing the drain plug located at
the end of the extension pipe threaded into the base
of the engine, using a 10mm wrench.
See Figure 1.7.
3. When all of the oil has drained out, reinstall the
drain plug. Tighten the drain plug to a torque of 106-
124 in-lbs (12-14 Nm).
4. Fill the engine with 37 fl.oz (1.1 liters) of fresh, clean
oil that is the appropriate weight for the application.
5. Safely dispose of the used oil according to the local
laws and regulations.
Figure 1.5
Do not thread
dipstick in to check
the oil level
Figure 1.6
Fully seat the
dip stick before
reading it
Figure 1.7
Oil drain

Introduction
9
Fuel
Gasolines currently on the market are not pure gasoline. Today’s fuels have alcohol and other additives in them to
reduce emissions. The fuel make up can vary seasonally and geographically.
Fuel with alcohol added to it is sometimes referred to as “oxygenated fuel”. The extra oxygen carried by the etha-
nol increases the oxidation of the fuel. This speeds up the process that causes the fuel to go bad.
Excessive alcohol in fuel creates a lot of problems for gasoline engines. One of the biggest problems is that alco-
hol attracts and holds water. This corrodes the metal components of the fuel system, especially the carburetor. Alco-
hol also does not produce as much heat as gasoline when burnt. This results in less power for the engine.
A 10% alcohol mix (E10) is acceptable for MTD engines. Anything higher than that will result in performance
issues.
NOTE: E85 and E20 fuels are not to be used in any MTD engines.
NOTE: Use clean, fresh fuel with a pump octane rating of 87 or greater.
• Stale or out-of-date fuel is the leading cause of hard starting issues.
• In areas that have high amounts of alcohol in their fuel, high octane fuel may improve engine performance
and startability.
Fuel filters
Dirty fuel can clog the carburetor and introduce abra-
sive materials into the engine. To help prevent that, MTD
engines are equipped with a fuel filter. The fuel filter is part
of the fuel tank nipple.
See Figure 1.8.
Figure 1.8
fuel filter
Nipple

78/83/90 Series Horizontal Shaft Engines
10
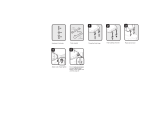
To replace the fuel filter:
1. Siphon the fuel out of the fuel tank.
2. Remove the front fuel tank shroud using a 10 mm
wrench.
See Figure 1.9.
3. Remove the fuel line from the fuel tank nipple:
3a. Squeeze the tabs on the fuel line clamp with a
pair of pliers while sliding the clamp down the
fuel line away from the nipple.
See Figure
1.10.
3b. Gently work the fuel line off of the nipple.
4. Remove the fuel tank nipple using a 17 mm wrench.
5. Install a new filter by following the above steps in
reverse order.
NOTE: Apply a small amount of releasable thread locking compound such as Loctite® 242 (blue) and tighten
the filter by hand and then an additional 3/4 to 1 full turn to compress the gasket.
Figure 1.9
Front fuel tank shroud
Remove these
screws
! WARNING! WARNING
To avoid personal injury or property
damage, use extreme care in han-
dling gasoline. Gasoline is extremely
flammable and the vapors are explosive. Serious
personal injury can occur when gasoline is spilled
on yourself and/or your clothes which can ignite.
Wash your skin and change clothes immediately.
Figure 1.10
Fuel filter
Fuel line clamp
! WARNING! WARNING
Residual fuel in the fuel tank will
come out when the fuel line is
removed. Safety goggles are recom-
mended to help prevent gasoline from splashing
into your eyes.

Introduction
11
Valve lash
Valve lash is the clearance between the top of the valve stem and the rocker arm. The valve lash should be
checked after the first 25 hours of use and every 100 hours after that. Valve lash can be checked and adjusted using
the following steps:
1. If the engine has been run, allow it to cool thoroughly.
Position the equipment for easy access to the cylin
-
der head.
2. Disconnect the high-tension lead from the spark plug
and ground it well away from the spark plug hole.
3. Remove the spark plug using a 13/16” or 21mm
wrench. A flexible coupling or “wobbly” extension
may help.
See Figure 1.11.
4. Disconnect the breather hose from the valve cover.
See Figure 1.12.
5. Remove the five bolts that secure the valve cover
using a 10mm wrench. Remove the valve cover from
the engine.
NOTE: If care is taken not to damage the valve cover gas-
ket, it can be re-used.
Figure 1.11
Muffle
r
Valve cover
Spark plug socket
Figure 1.12
Breather
hose
spring
clamp

78/83/90 Series Horizontal Shaft Engines
12
6. Slowly pull the starter rope until air can be heard
coming out of the spark plug hole.
7. Confirm that the piston is at Top-Dead-Center on
the compression stroke.
See Figure 1.13.
• The compression stroke can be distinguished
from the overlap stroke by the presence of air
pressure at the spark plug hole and the fact that
neither of the valves should move significantly
on the compression stroke.
• There is an automatic compression release
mechanism that “bumps” the exhaust valve as
the piston rises on the compression stroke. At
TDC, the exhaust valve should be fully closed.
8. Check valve lash between each valve stem and
rocker arm using a feeler gauge.
9. Intake valve lash (carburetor side) should be 0.004”-
0.006” (0.10 - 0.15mm).
See Figure 1.14.
10. Exhaust valve lash (muffler side) should be 0.006-
0.008” (0.15 - 0.20mm).
See Figure 1.15.
11. Use a 10mm wrench to loosen the jam nut, and a
14mm wrench to adjust the rocker arm fulcrum nut.
See Figure 1.15.
• Tighten the rocker arm fulcrum nut to close-up
the clearance between the end of the valve
stem and the contact point on the rocker arm.
• Loosen the rocker arm fulcrum nut to open-up
the clearance between the end of the valve
stem and the contact point on the rocker arm.
12. Hold the fulcrum nut with a 14mm wrench, tighten
the jam nut to a torque of 80 - 106 in-lb. (9-12 Nm)
using a 10mm wrench.
Figure 1.13
Valves closed
(push rods slack)
Probe to confirm piston
is at top of travel
Push rods
relaxed
Figure 1.14
.006” feeler
gauge
Figure 1.15
.008” feeler
gauge

Introduction
13
13. Double-check the clearance after tightening the jam nut, to confirm that it did not shift. Re-adjust if necessary.
14. Rotate the engine through several compression cycles:
• Observe the movement of the valve gear.
• Return the piston to TDC compression stroke and re-check the valve lash to confirm consistent movement
of the valve gear, including the slight bump to the exhaust valve from the automatic compression release.
15. Clean-up any oil around the valve cover opening, clean the valve cover, replace the valve cover gasket if nec-
essary.
16. Install the valve cover, tightening the valve cover screws to a torque of 62 - 80 in-lbs (7-9 Nm).
IMPORTANT: Over tightening the valve cover will cause it to leak.
17. Install the spark plug.
Cleaning the engine
1. To maintain a proper operating temperature and to keep the equipment looking good; all debris should be
removed from the engine.
2. It is recommended to use compressed air to blow all of the debris off of the engine.
NOTE: A pressure washer may be used to clean outdoor power equipment but only after the unit has been
allowed to properly cool.
NOTE: Mice and other critters tend to build nests inside the engine shrouds while the snow blower is stored
during the long off season.

78/83/90 Series Horizontal Shaft Engines
14
General torque specifications
Maintenance Chart
00
0H]LV
0
00
0H]LV
VEOWI
VEOQLHGDU*
P1P1
V
E
OW
I
VEOQL
P1
P1
V
E
O
WI
VEOQL
P1
P1
VEOWIV
E
OQL
P1
P1
VEOWIV
E
O
Q
L
P1
P
1
VEOWIVEOQL
P1
P1
O
D
FL
W
LU
F
QR
1
QLVUHQHWVD
)
PX
Q
L
P
XO$
0DLQWHQDQFHLWHP (DFKXVH (DFKKUVXVH (DFKKUVXVH
&KHFNRLO
&KHFNDLUILOWHU
,IDSSOLFDEOH
1RWHRQDLUILOWHU
1RWHRQSUHILOWHU
&KHFNJDSVSDUNSOXJ
&KHFNFRROLQJILQV
&KDQJHRLO
9DOYHODVK
'UDLQRUSUHVHUYHIXHO
)RJRUOXEHF\OLQGHU
5RWDWHHQJLQHWR7'&
'LUWPD\EHVKDNHQRUWDSSHGRXWRIWKHDLUILOWHUEXW
FRPSUHVVHGDLULVQRWWREHXVHGIRUFOHDQLQJ'RQRW
ZDVKRURLOSDSHUILOWHUHOHPHQW
)RDPSUHILOWHUPD\EHZDVKHGLQZDWHUDQGPLOG
GHWHUJHQWDQGUHXVHG'RQRWRLO
5HSODFHLIZRUQ
$IWHUSURORQJHGVWRUDJH
$IWHUWKHILUVWKUVRIXVHDQGHYHU\KUVDIWHUWKDW
1RWHRQRLO
%HIRUHSURORQJHGVWRUDJH
%HIRUHSURORQJHGVWRUDJH
%HIRUHSURORQJHGVWRUDJH
&KDQJHRLODIWHUILUVWKUVRIXVHDQGEHIRUHSURORQJHG
VWRUDJH
/