8 Port /16 Port User Manual
Overview
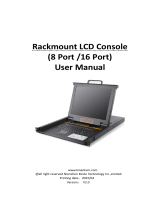
Product Description
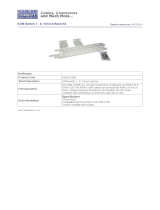
The KVM console integrates multiple port KVM switches in a 1U height console. It
can control multiple computers with a set of device including monitor, keyboard and
mouse, thus saves much cost and space to separately equip keyboard, mouse and
monitor for every computer.
It is easy and fast to install the KVM console, you just need to connect corresponding
cables to the right ports of KVM and its module without software configuration.
The KVM console can control up to 8 or 16 computers, supports multiple hardware
platform and multiple operating system.
Product Features
17.3” TFT LCD monitor, high brightness, high resolution;
1U height, suitable height for standard 19”rack mount, metal structure;
Ultra slim 99 keys keyboard with small numeric keyboard;
High resolution and high flexibility with touchpad; with two function buttons and
scroll wheel.
Switch Functions
A single USB console controls up to 8 or 16 computers
By daisy chaining up to 31additional Combo-KVM, as many as 512 computers
can be controlled from the single KVM console which supports 8 or 16 ports
KVM seamless mixed cascade connection
Dual interface--supports computers with PS/2 and USB keyboard and mouse
Auto PS/2 and USB interface detection
Supports wireless keyboard and mouse from different suppliers
Two level password security--only authorized users view and control
computers ;up to four users and an administrator with a separate profile for
each
Users can set up different hot keys(【Scroll Lock】/【Caps Lock】/【F12】/【Ctrl】,
auto scanning time, port display time, log out time, buzzer on /off and mouse
on/off according to their different needs
Broadcast mode--operations simultaneously performed on all selected
computers
Multiplatform support--Windows2000/XP/Vista, Linux, Mac and Sun
Supports multimedia USB keyboard(PC, Mac and Sun)
Superior video quality--up to 1920×1080
USB or PS/2 keyboard emulation--computer boot even the console focus is
else where
Convenient computer switching via front panel pushbuttons, keyboard hotkeys,
OSD(On-Screen-Display)