Page is loading ...

Mobile Rack for 2.5“ SATA hard drives
User manual
Product-No: 47171
User manual No: 47171-a
www.delock.com

-
2
-
Description
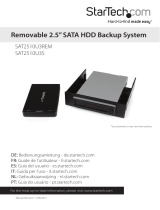
This DeLock Mobile rack can be installed into the 3.5” or 5.25” bay of your
computer. It includes a enclosure for SATA hard disks which you can either
operate in the Mobile rack with SATA or externally via USB.
Specification
• Mobile rack for installation in a 3.5“ or 5.25“ bay
• Internally to be connected via SATA
• Externally to be connected via USB
• 2.5“ enclosure for SATA HDDs
• Data transfer rate: USB 2.0 up to 480 Mbps
SATA up to 1.5 Gbps
• For Windows 2000/XP/ Server 2003
System requirements
• PC with a free 3.5“ or 5.25“ bay and a free SATA Port
• PC or Notebook with two USB Ports for the intray
• Windows 2000/XP/ Server 2003
Package content*
• Mobile rack
• 2.5“ enclosure
• 5.25“ frame
• USB cable, USB power cable
• SATA cable, power cable
• screws
• User manual
* Make sure that product package contains all items before operation. If any
item is missing or damaged, then please contact your dealer immediately.
Hardware Installation
Note:
Follow the general instructions for installation of the enclosure. If necessary,
read the manual of your computer, or ask a specialist for help.
Installation of the 2.5“ hard disk into the enclosure:
1. Open the housing by loosening the screws next to the connectors.
2. Take the plate and pull the slide-in frame out of the enclosure.
3. Put the HDD into the intray and connect the SATA connections.

-
3
-
4. Fasten the hard drive with provided screws to the slide-in frame.
5. Slide the frame back in to the enclosure and close the enclosure with the
screws.
Installation of the 3.5“ enclosure into the 3.5“ bay:
1. Turn off your PC, and unplug the power cord.
2. Open the housing.
3. Remove the panel from the available 3.5“ bay.
4. Insert the mobile rack into the bay and screw it to the housing.
5. Finally connect the cables of the mobile rack with the respective connectors
to your computer.
6. Reattach the housing, and connect the power cord to the AC adapter.
Installation of the 3.5“ enclosure into the 5.25“ bay:
1. Turn off your PC, and unplug the power cord.
2. Open the housing.
3. Remove the panel from the available 5.25“ bay.
4. Insert the mobile rack into the bay and screw it to the housing.
5. After that put the device into the bay and screw it to the bay.
6. Connect the cables of the mobile rack to the respective connectors of your
computer.
7. Reattach the housing, and connect the power cord to the AC adapter.
Driver Installation
Windows 2000/XP/ Server 2003
For use with the 3.5“ mobile rack on the PC:
1. Switch on your computer.
2. Put the 2.5” enclosure into the mobile rack.
3. The HDD will be found and the device can be used immediately.
4. By pushing the eject button you can remove the enclosure from the mobile
rack and use also externally.
For external use via USB port on the PC or notebook:
1. Switch on your computer.
2. Connect the USB data cable and the USB power cable to the enclosure and
connect each cable to a free USB port of your PC.
3. The external drive will be found and the device can be used immediately.

-
4
-
Support Delock
If you have further questions, please contact our customer support
[email protected] / www.delock.com or phone
0700 - DELOCKGE (0700 - 335 625 43).
You can contact our service hotline during the following times:
Mon – Fry: 9:00 – 17:30 pm charge 0,12 € / min*
* A connection fee applies according to fee schedule of Deutsche Telekom AG
or your local telephone provider.
All callers outside of Germany dial please 00493081789324
You can find current product information on our homepage:
www.delock.com
Final clause
Information and data contained in this manual are subject to change without
notice in advance. Errors and misprints excepted.
Copyright
No part of this user's manual may be reproduced, or transmitted for any
purpose, regardless in which way or by which means, electronically or
mechanically, without explicit written approval of Delock.
Stand: 09/2006
/
