Page is loading ...

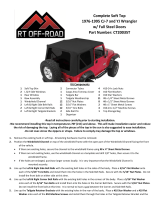
Sprint Top
Installation Instructions
For: Jeep Wrangler JK 2 Door
2007 – 2009
Part Number: 56844
Installation Tips
For a smooth fit:
For easier installation, the top should be installed at a temperature above 72º
F. Below this temperature, the fabric may contract an inch or more, making it
difficult to fit the vehicle.
It is normal for the fabric to contract and wrinkle when stored in the shipping
carton. Within a few days after installation, the fabric will relax and the wrinkles
will disappear.
Tools Needed
Safety Glasses
Phillips Screwdriver
Masking Tape
T25 & T30 Torx
3/8" Wrench

!STOP! Do not proceed unless you have a
Factory Original Soft Top already installed.
You will need these parts to complete the Sprint Top installation
These Parts Are Not Included
If you do not have these parts, they are available for purchase separately from an authorized Mopar dealer.
Door Surround - Left
Qty - 1
Lower Header Assembly
Qty - 1
Upper Header Assembly
Qty - 1
Tailgate Bar Mount
Qty - 1
Tailgate Bar Mount
Qty - 1
Tailgate Bar
Qty - 1
Door Surround - Right
Qty - 1
M8 x 75mm Knob
Qty - 2
M8 x 75mm Knob
Qty - 2

Side Bow
Qty - 2
Part # 486.65
Foam Tape Strips
Qty - 2
Part # 417.43
Parts List - These Parts Are Included
#10-32 Lock Nut
Qty - 4
Part # 316.94
#10-32 x1/2" Screw
Qty - 4
Part # 316.82
Quick Release Bracket
Qty - 2
Part Number 486.16
Rear Bow
Qty - 1
Part # 486.86
J-Hook Strap
Qty - 2
Part # 486.94
Web Strap with
Snap Hook
Qty - 2
Part # 486.95
Deck, Header Assembly, & Fabric Top
Right Side Window
Left Side Window
Rear Window

Step One
Remove Side Windows and Rear Window.
Remove Side and Rear Windows
Section 1

Step One
Release Windshield Latches. Release the
latch that secures the header to the wind-
shield. Pull up on the lever and then down
and out to release the hook from the loop in
the windshield frame
Step Three
Use a phillips screwdriver to remove the four
(4) screws that attach the fl aps in the top to
the Rear Bow. Allow the bow to drop onto the
tailgate Set the screws aside to be reused
later.
Step Two
Release the rear corners of the
top. Pull gently down and then out
to release the plastic strip from the
retainer on the vehicle.
Step Four
Use a phillips screwdriver to remove the fi ve
(5) screws that attach the fl ap in the top to
the Center Bow. Set the screws aside to be
reused later.
Section 2
Remove Fabric and Side Bows from Header

Remove Fabric and Side Bows from Header (cont.)
Step Five
Fold the bow assembly down onto the tailgate to
access the header. Remove the Foam Seals. Use
a phillips screwdriver to remove the two screws
that secure the fabric to the header.
Set the screws aside to be reused later.
Step Six
Raise the bow assembly and lock the header
to the windshield.
Drape the top fabric, backing side up, over
the hood and windshield. Remove all screws
that secure the fabric to the upper and lower
headers. Set the screws aside for use in
installing the new top.
Remove the fabric along the front edge of the
top out of the channel in the lower header
and remove the old top from the vehicle.
Section 2

Remove and Store All Bows
Step One
Remove and store all bows if you
want to re-install your original
soft top later.
Section 3

Step Two
Install the extrusion along the front of the
fabric into the header channel.
Center the fabric and use masking tape to
hold it in position.
Install Sprint Top Fabric on Header
Step One
Lay the Lower Header on the ground and
position the Sprint Top fabric in the same
position as the original top that was removed.
Step Three
Place the Upper Header onto the Lower
Header assembly and reinstall the screws
removed in section 2.
Section 4

Step One
Insert Side Bows into Header Assembly on each side.
Pivot quick release knobs to face toward inside of
assembly.
Attach Side Bows to Header/Fabric Assembly
Step Two
Re-use the original #8 x 1/2"
Screws removed in secrion 2 to
mount a Side Bow to each side of
the Header Assembly.
Section 5

Step Three
Rotate the Header Assembly and re-use the
original #8 x 1/2" Screws removed in section 2
to complete the side bow install.
Attach Side Bows to Header/Fabric Assembly (cont.)
Step Four
Rotate the Header Assembly back
into position and re-use the screws
removed in section 2.
Section 5

Install Foam Tape Strips and Foam Seals
Step One
Peel the backing off the Foam Tape
Strips and install them on each side
of the Header.
Section 6

Replace Latch with Quick Release Bracket on Door Surround
Step Two
Use a #2 phillips screwdriver
and 3/8" wrench to install the
Quick Release Bracket 486.16.
Step One
Use a T25 Torx to remove the latch from
the Door Surround.
T25 Torx
Phillips
Screwdriver
3/8" Wrench
Section 7

Install Door Surround
Step One
Insert the pin in the bottom of the Door
Surround into the hole in the belt rail
behind the door.
Step Two
Press the channels along the top of the
Door Surround around the horizontal
sport bar, above the door opening. Insert
two Knobs into the Door Surround and
tighten them down.
Right Side Right Side
Section 8

Step One
Orient the Tailgate Bar Mounts on the vehicle.
Hook the bottom of one mount under the ledge
and roll the mount toward the outside of the
vehicle until it clips into place under the belt rail.
Repeat this with both Tailgate Bar Mounts.
Install Tailgate Bar Mounts
Section 9

Step One
Fold the Top Fabric toward the front of the
Header. Place the Header Assembly on
vehicle, with the backing up and the Side
Bows on top of the Door Surrounds.
Step Two
Pull back on the Quick Release
Knob on the Side Bow and secure
to the Quick Release Bracket on
both sides of the vehicle. The spring
pin should install all the way into the
pivot when complete.
Mount Header Assembly to Quick Release Bracket
Section 10

Install Rear Bow
Step One
Slide the Rear Bow into the pocket inside
the rear of the Top Fabric. Secure the J-
Hooks on the rear bow fl aps to the ends
of the Rear Bow.
Section 11

Close and Secure Header Latch
Section 12
Step One
Close the Header.
Step Two
Hook the latches on the Header
into the loops in the windshield.
Repeat on opposite side.

Secure Center Strap
Section 13
Step One
Thread a Web Strap with Snap Hook
through each buckle. Hook the straps into
the slot on the underside of the sportbar..
Pull the ends of each strap to tighten
securely.

Secure Rear Strap
Section 14
Step One
Thread a J-Hook Buckle Strap through the
buckle on one of the rear straps.
Step Two
Hook the strap to the ledge inside the rear
corner of the vehicle. Repeat on both sides
of the vehicle.

Install Rear Window
Section 15
Step One
Align the J-slide with the J-slide sewn into
the rear of the Top. Slide them together
until the Rear Window is centered in the
opening.
/