Page is loading ...

Protec Fire Detection plc, Protec House, Churchill Way, Nelson, Lancashire, BB9 6RT, ENGLAND
+44 (0) 1282 717171 www.protec.co.uk [email protected].uk
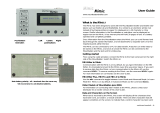
Algo-Tec™ 6500/6600
INTERACTIVE DIGITAL
ADDRESSABLE FIRE CONTROL
SYSTEM (1-4 LOOPS)
COMMISSIONING MANUAL

RDM0002/3 Page 2 of 57 © 2015 - 2019 Protec Fire Detection plc
Document Revision Details
Issue
Modification Detail
Author
Date
2.8
Updated DLP Card addresses
Updated loop Initialisation Fault
Updated device type fault
Added Device Zone Trans Fault
PD
12/12/2018
2.9
Added description of the Promoted master
Updated the description of the MIMIC Device
Missing fault
Added description of Deluge Drive Limit Fault
Updated the description of the Unknown
Active Device Fault
Added damper control module faults
PD
02/05/2019
2.10
Added description of the Loop Disablement
CRC Fault.
Added description of the Loop DLP Queue
fault.
Updated licence fault descriptions.
Added description of the WODU Interface
Board Missing fault.
Updated the description of the Unknown
Active Device Fault.
Renamed Circuit Fault as Supply Out Fault
and updated the description.
Renamed Set Point Position fault as Position
Fault and updated the description.
PD
01/07/2019
3
Minor changes
PD
19/07/2019
Notice
This manual may be revised as a result of enhancements to the system software or hardware. Check
for revisions to this manual, and download them, from the website www.protec.co.uk

RDM0002/3 Page 3 of 57 © 2015 - 2019 Protec Fire Detection plc
Table of Contents
DOCUMENT REVISION DETAILS ................................................................................................................2
INTRODUCTION .........................................................................................................................................5
IMPORTANT INFORMATION FOR 19” RACK SYSTEMS ..................... ERROR! BOOKMARK NOT DEFINED.
1.0 COMMISSIONING MENUS ...............................................................................................................6
1.1 Login ...................................................................................................................................................... 6
1.2 Entering the Menu System ................................................................................................................. 7
1.3 Tools Menu ........................................................................................................................................... 8
1.4 Loop Tools ............................................................................................................................................. 9
1.5 Loop logging ....................................................................................................................................... 10
1.6 Allocate Addresses ............................................................................................................................. 11
1.7 Printer Menu ....................................................................................................................................... 13
1.8 Print current events ........................................................................................................................... 14
1.9 Print Historic Events .......................................................................................................................... 15
1.10 Diagnostic Tools ............................................................................................................................. 16
1.11 Networking ..................................................................................................................................... 17
1.12 Mapping Info .................................................................................................................................. 18
1.13 Quality .............................................................................................................................................. 22
1.14 Loop Info ......................................................................................................................................... 23
1.15 Clear All Disablements .................................................................................................................. 25
1.16 Rebuild ............................................................................................................................................. 25
1.17 Test menu ........................................................................................................................................ 26
1.18 Test options..................................................................................................................................... 27
1.19 Service Info...................................................................................................................................... 28
1.20 Upgrade ........................................................................................................................................... 29
2.0 FAULT EVENTS ................................................................................................................................ 30
2.1 Panel faults (Non-latching) ............................................................................................................... 30
2.2 Panel faults (Latching) ....................................................................................................................... 32
2.3 Network Faults ................................................................................................................................... 35
2.4 Loop faults .......................................................................................................................................... 37
2.5 Loop Device faults .............................................................................................................................. 39
2.6 6000 Digital Device Fault Information ............................................................................................ 41
2.7 IO faults ............................................................................................................................................... 46
2.8 Alarm events ....................................................................................................................................... 47
2.9 DLP Card Identification ..................................................................................................................... 47
3.0 CARD HARDWARE INDICATIONS .................................................................................................. 48
3.1 System Controller Card ..................................................................................................................... 48
3.2 Network Card ..................................................................................................................................... 49
3.3 I/O Card ............................................................................................................................................... 50
3.4 Loop Card ............................................................................................................................................ 51
3.5 Display Card ........................................................................................................................................ 52
4.0 TOUCH SCREEN CALIBRATION ..................................................................................................... 53
5.0 6500 TECHNICAL SPECIFICATION ................................................................................................. 54

RDM0002/3 Page 4 of 57 © 2015 - 2019 Protec Fire Detection plc
6.0 6600 TECHNICAL SPECIFICATION ................................................................................................. 55
7.0 STANDARDS, DIRECTIVES AND REGULATIONS INFORMATION ................................................. 56

RDM0002/3 Page 5 of 57 © 2015 - 2019 Protec Fire Detection plc
Introduction
This manual applies to the Protec 6500 and 6600 fire alarm control panels however for convenience;
reference will be made only to the ‘6500’. Everything in this manual applies to the 6500 and 6600
unless stated otherwise.
The Protec 6500 Fire Alarm Control Panel has been designed and manufactured in the United
Kingdom and complies fully with current standards dictating fire alarm system design practice ( EN54
parts 2 and 4 ).
This equipment and its associated connections must be installed, commissioned and
maintained by a suitably trained skilled and competent person.
This equipment is not guaranteed unless installed and commissioned in accordance with
current national standards
There are no user serviceable parts inside the 6500. The equipment and its associated
connections must be installed, commissioned and maintained by a suitably trained,
skilled and competent person. A separate 6500 Installation Manual is available.
It is assumed that the commissioning engineer has read the 6500 User Manual and is
therefore familiar with the basic operation of a 6500 fire panel.
For information on programming the panel and communicating via the PC using the
commissioning software, refer to the Commissioning Software User Manual

RDM0002/3 Page 6 of 57 © 2015 - 2019 Protec Fire Detection plc
1.0 Commissioning Menus
1.1 Login
Access to the features of the 6500 is achieved by logging in. If it is displayed, Press
Login and the display will show the code entry screen
If the Login button is not displayed, touch the middle of the screen to bring up the code
entry key pad
Enter the engineer code by touching the relevant number buttons then touch Enter. If the code is
correct then the display will show the main menu screen
For information on the Service Info screen and the Upgrade screen
refer to the relevant sections.

RDM0002/3 Page 7 of 57 © 2015 - 2019 Protec Fire Detection plc
1.2 Entering the Menu System
When the engineer code is entered, the ‘Main Menu’ screen will be displayed.
Touch a menu option to select it.
Tools Menu - refer to section 1.3
Test Menu - refer to section 1.17
System View - refer to the user manual
Disable / Enable - refer to the user manual
History - refer to the user manual
Settings - refer to the user manual

RDM0002/3 Page 8 of 57 © 2015 - 2019 Protec Fire Detection plc
1.3 Tools Menu
Touching Tools Menu displays options to show the commissioning tools
The printer menu is displayed if the configuration file downloaded to the panel
included the printer fitted option.

RDM0002/3 Page 9 of 57 © 2015 - 2019 Protec Fire Detection plc
1.4 Loop Tools
Touching Loop tools displays the different loop options.

RDM0002/3 Page 10 of 57 © 2015 - 2019 Protec Fire Detection plc
1.5 Loop logging
Each loop must be logged and allocated. Logging finds all the connected devices, their type, software
version and their physical order whilst Allocating allows the engineer to assign an address to each
device. Until a device is allocated an address on the loop, the panel cannot communicate with it.
To log a loop, touch Loop logging to select the panel, then loop card, and then select the
loop.
Loop logging is a two stage process, first it logs how many devices are connected to
the loop then it maps them to find their physical position on the loop. Knowing their
physical position makes fault finding easier. Loop logging can take several minutes; its
progress is indicated on the display.
Touch Allocate to move direct to the allocation menu (see next section) else touch OK
to exit the logging screen.

RDM0002/3 Page 11 of 57 © 2015 - 2019 Protec Fire Detection plc
1.6 Allocate Addresses
A loop must be logged before it can be allocated
Each Protec ‘6000’ loop device has a unique serial number. This serial number has to be linked to a
unique address. The process of linking the serial number to an address is known as address allocation.
To begin allocating the device addresses, touch Allocate addresses to select the panel,
then loop card, and then select the loop.
Indicates the column used for sorting the data. Touch one of the other column headers to
change the method of sorting.
This button provides a quick way to allocate the selected device to the lowest unused
address, in this case the address is ‘1’.
This button finds the next device in the list to the one selected that has not yet been
allocated an address.
This button finds the previous device in the list prior to the one selected that has not yet
been allocated an address.
This button allocates the selected device the address that has been entered. The address
range is ‘0’ to ‘200’. Each device must have a unique address between ‘1’ and ‘200’. ‘0’ or a
blank address is used to de-allocate a device.
This button deletes the latest digit that has been entered.
On completion of the address allocation, touch Exit.

RDM0002/3 Page 12 of 57 © 2015 - 2019 Protec Fire Detection plc
Touch Exit to leave the allocation menu without saving any changes.
Touch Continue to return to the allocation screen.
Touch Save to store the newly allocated data. A progress bar is displayed as shown
below.

RDM0002/3 Page 13 of 57 © 2015 - 2019 Protec Fire Detection plc
1.7 Printer Menu
Touching Printer Menu displays the printer options.
Note: - The printer menu option is only available on panels configured to have a printer.
Prints Loop Device serial numbers and analogue values after selecting the panel,
the loop card then the loop.
Powers up the printer for a period of time to allow feeding of a new roll of paper.

RDM0002/3 Page 14 of 57 © 2015 - 2019 Protec Fire Detection plc
1.8 Print current events
Touching Print Current Events displays the printer options.
Prints the current faults.
Prints the current disablements.
Prints the current tests.
Prints the current alarms.

RDM0002/3 Page 15 of 57 © 2015 - 2019 Protec Fire Detection plc
1.9 Print Historic Events
Touching Print Historic Events displays the printer options.
Prints the last 100 Fire events from the historic log.
Prints the last 100 Non- Fire events from the historic log.
Prints the last 100 Alarm events from the historic log.

RDM0002/3 Page 16 of 57 © 2015 - 2019 Protec Fire Detection plc
1.10 Diagnostic Tools
Touching Diagnostic tools displays options to show the available tools.
The Networking button is not available on a single panel system.

RDM0002/3 Page 17 of 57 © 2015 - 2019 Protec Fire Detection plc
1.11 Networking
Touching Networking displays options to show the network diagnostic tools.

RDM0002/3 Page 18 of 57 © 2015 - 2019 Protec Fire Detection plc
1.12 Mapping Info
To access all the network information, this must be performed on the master panel.
Slave panels are limited to displaying the network map.
Touch Mapping info then select the Network card. This displays a map of the panels
connected to the network and a summary of the number of panels mapped and
missing.
Pink indicates the master panel with no faults
Green indicates a slave panel with no faults
Yellow indicates that the panel has a fault. A red border to the yellow circle indicates that the
panel is one side of a network break.
Blue indicates a slave panel that is acting as the master.

RDM0002/3 Page 19 of 57 © 2015 - 2019 Protec Fire Detection plc
Touch a panel icon to display its details as shown below.
A panel can have one of three roles:
Master – The master manages all network functions
Slave DM – The deputy master assumes control when the master is offline e.g. whilst being
programmed
Slave – A standard remote network panel
Promoted Master – A slave panel that is acting as the master panel
The master panel may display additional fault information to that shown above:-
Fault map error
The panel sequence found does not match the sequence downloaded to the master panel.
Fault network failed
There are too many network problems for the network to function.
Fault duplicate master
When the system was programmed, two panels have been set up as the master panel. Download the
corrected configuration to both panels.
Fault too many nodes
The master panel discovered too many nodes when it initialised the network.

RDM0002/3 Page 20 of 57 © 2015 - 2019 Protec Fire Detection plc
The cabling information reports cable break information such as:-
Break, a panel is reporting a cable break
When using a fibre optics unit cabling information reports cable break information such as:-
Break-CH1, a panel is reporting a cable break on network Channel 1
Break-CH2, a panel is reporting a cable break on network Channel 2
The status information reports issues such as:-
Missing, a panel that should be on the network is currently missing
Duplicate, two panels have the same panel number
Unknown, an unknown panel is on the network
Reverse, a panel has its channel 1 & 2 wiring reversed
/