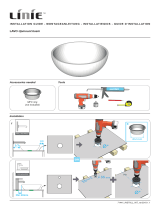
INSTALLATION GUIDE
INSTALLATIEGIDS
GUIDE D’INSTALLATION
MONTAGEANLEITUNG
Disclaimer
If you install the product in a way that diers from this manual, this will void all
guarantees. Before installation check that the product meets all your requirements
and is not damaged. By proceeding with installation, you accept the condition of the
product.
Disclaimer
Indien u het product plaatst op een manier die afwijkt van deze handleiding, vervalt
alle garantie. Controleer voor plaatsing of het product aan al uw eisen voldoet en niet
beschadigd is. Indien u overgaat tot plaatsing, aanvaardt u de staat waarin het product
zich bevindt.
Clause de non-responsabilité
Si vous installez le produit d’une manière diérente de celle présentée dans ce manuel,
toutes les garanties seront invalidées. Contrôlez avant le placement si le produit répond
à toutes vos exigences et n’est pas endommagé. En procédant au placement, vous
acceptez l’état dans lequel se trouve le produit.
Haftungsausschluss
Wenn Sie das Produkt nicht genau nach den Angaben in dieser Montageanleitung ein-
bauen, verfällt die Garantie. Überprüfen Sie vor dem Einbau des Produkts, ob sämtliche
Voraussetzungen erfüllt sind und das Produkt nicht beschädigt ist. Sobald Sie mit der
Montage beginnen, sehen Sie, in welchem Zustand sich das Produkt befindet.
SFERA
201323_INSTALL_INT_ver2022.1.1
Not Incl.
43980
Ø28
FLEX TILE ADHESIVE C2
mild soap
Top • Tablet • Tablette • Tablette
No pre-drilled holes in the top
Geen voorgeboorde gaten in het tablet
Pas des trous pré-percés dans la tablette
Keine vorgebohrten Löcher in der Tablette
MELAMINE
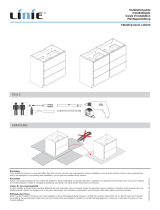
Tools needed
Important
Accessories
(not included) Obliged
Verplicht
Requis
Erforderlich
MFC ring

Drill the faucet holes with appropriate tools. Under no circumstance use the hammer function of the drill.
For details, see the manual of the tool.
Boor de kraangaten met aangepast gereedschap. Gebruik onder geen beding de klopboorstand van de
boormachine. Raadpleeg de handleiding van het gereedschap voor details.
Percez les trous de robinet avec des outils sur mesure. N’ utilisez en aucun cas la fonction à impulsions de
la perceuse. Pour plus de détails, reportez-vous au manuel de l’outil.
Bohren Sie die Löcher für die Armatur mit einem geeigneten Bohraufsatz. Verwenden Sie jedoch auf keinen Fall
die Schlagbohrfunktion. Einzelheiten zur Verwendung finden Sie in der Anleitung der Bohrmaschine.
1a
1b
CUTTING AND DRILLING - ZAGEN EN BOREN - COUPER ET PERCER - SÂGEN UND BOHREN
Drawer with siphon recess
Lade met sifonuitsparing
Tiroir avec découpe pour siphon
Schublade mit Siphonaussparung
!
Ø+1mm
WALL MOUNTED
2/3
1/3
TOP MOUNTED
min 20mm
min 60mm
WALL MOUNTED
2/3
1/3
TOP MOUNTED
min 20mm
min 60mm
*Ø +1 mm
Ø < Ø Bottom washbowl - Bodem waskom -
Vasque inférieur - Unteres Wasschalen
Ø > Ø Drain plug - Afvoerplug - Crepine - Ventil
Obliged
Verplicht
Requis
Erforderlich
!
*Ø

INSTALLATION - INSTALLATIE - INSTALLATION - INSTALLATION
3 mm3 mm
3 mm3 mm
23
3 mm3 mm
6
78 9
45
ASSEMBLY BOWL, FAUCET AND DRAIN - MONTAGE KOM, KRAAN EN SIFON
ASSEMBLAGE VASQUE, ROBINET ET SIPHON - MONTAGE SCHALEN, HAHN UND SIPHON
Please refer to the manuals of the bowl, faucet and drain for further steps in the installation.
Raadpleeg de handleidingen van de waskom, kraan en sifon voor verdere stappen in de installatie.
Veuillez vous référer aux manuels de la vasque, robinet et syphon pour les autres étapes de l’installation.
Beachten Sie den Handbüchern zu Waschschalen, Wasserhahn und Siphon für weitere Schritte in der Installation.
Check for leaks
Lektest
Teste de fuite
Dichtheitsprüfung
/


