Page is loading ...

RS-1 Bushing
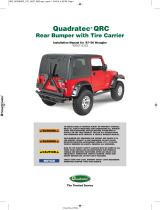
BUMPER WITH TIRE CARRIER INSTALL
MANUAL FOR 2007-2017 JEEP
WRANGLER ALL MODELS.

Rear Bumper Installation Instructions
1) Remove factory rear bumper, (this includes all tow hitch receivers and recovery hooks)
2) Open the tailgate and locate the plastic vent on the inside of the door. Remove the vent by
lightly prying on the upper left corner of it until it pulls out,. Be careful not to force the vent
out or break it.
3) Once the vent is off, locate the small wiring harness just inside the vent and unclip it. This is
the wire to the factory third brake light.
4) Next, remove the rubber plug and wire from the tailgate that is connected to your rear
brake light. The plug should pull through if you disconnected the wires correctly. If it is not
coming out easily, help the rubber fitting
from the inside of the tailgate by pushing
from the rear and pulling at an angle
downward at the same time.

5) Remove the factory spare tire carrier by removing the 8 bolts (13mm) attached to the tail-
gate.
6) With the rear door plate mounted, you are now ready to install the bumper. To start insert
the nut plates into the frame rails and line up the nuts to the factory holes in the frame.
7) Next insert the 4 large 3”x 12mm through bolts through the frame rail with the threads fac-
ing the rear of the Jeep, make sure to put the washers onto the bolts as well. NOTE: You’ll
have to put the head of the bolt above the exhaust canister to get it into the hole.

8) Next place the spacer plate over the bolts.
9) Have a friend or two lift the bumper with you and place the holes in the middle of the
bumper on to the bolts sticking out of the rear of the frame. Install the nylon nuts on the 4
through bolts sticking out of the rear to hold the bumper to the frame. Next, install the
shorter bolts through the sides of the bumper and into the nut plates you previously in-
stalled into the
frame. Note: Once
you have the side bolts in
place let the bumper down
gently so it doesn't move
and damage the body of
your Jeep.
10) Next tighten the four center bolts in the rear cross-member first to allow the bumper to
properly align itself. Torque to 60 ft/lbs.

11) Tighten the 4 side bolts that are loosely inserted into the nut plates with a ratchet. Torque
to 60 ft/lbs
12) Ensure that the bumper is level. If it is not level repeat steps 12-15 making adjustments to
level the bumper. NOTE: If the bumper is not level have a friend hold it level and tighten the
side bolts first and then tighten the rear cross-member bolts. The bumper should be mounted
as level as possible.
13) Take out your new tire carrier and slide the metal sleeve over the rubber shaft
protruding from the bumper.
14) Now take place the two large bolts with washers through the holes in the sleeve and
tighten them until they squeeze the rubber shaft. This setting dictates the difficulty or
stickiness of the carrier during operation.

15) Next is putting the spare tire adapter arm onto the tire carrier. To do this line up the arm
as shown according to your tire size and how high you want the tire mounted. Place the bolts
with washers provided through the four holes and tighten with nuts.
16) Place the final piece of the tire carrier into the slot shown below and use the two bolts
provided to loosely attach it.

17) Now take the spare tire you wish to mount and place it onto the 3 studs while the two
bolts are still loose and use the tire to press the sliding spare carrier piece back until the tire is
snuggly against the carrier. Remove the tire without disturbing the sliding piece. Move the
sliding portion 1/4” inward and tighten. This is done so it presses the spare firmly against car-
rier. NOTE: Mounting the tire as low as possible is highly recommended to reduce movement
and provide better vision out the back window.
18) Now that everything is tight put your spare tire back onto the studs and secure it using the
factory lug nuts. And you’re finished!
/