Page is loading ...

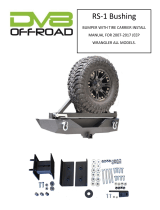
TC-6 TIRE CARRIER
Install Manual
Esmated install me - Approx. 30min -1 hour. Diculty Level: EASY
Patent Pending

2. The re carrier will come o by
unbolng the eight 14mm bolts
holding on the carrier to the tail-
gate. Pull out the wire and plug
from the tailgate door. Just have to
pinch and pull out.
1. Start from inside the tailgate
door, remove the vent. The vent is
held on by two snap-in clips on the
le side. Pull out, on the le side,
using your hand or a tool to pry.
Disconnect the plug directly inside.
4. Aach the new tailgate plate us-
ing the factory hardware. Torque
the bolts to 15lbs. Make sure the
plate orientaon is the same as pic-
tured.
3. Apply the new foam seal to the
new tail gate plate.

5. Slide on one of the new sealed bear-
ings over the axle and follow that with
the re carrier and the second sealed
bearing. Note: Be careful leng go of the
re carrier as it can swing around and hit
the Jeep.
4. Pry out the rubber plug from the top
of the passenger side (right) of the RS-
10 or RS-11 bumper. Drop in the new
axle, tapered side down thru the hole.
Spin on one of the new large nylock
nuts with one of the large washers be-
tween it. You wont be ghtening ll
you have the carrier on.
6. Drop the new washer on top of the
second bearing and spin on the large ny-
lock nut. In order to ghten the carrier
you will be ghtening both the top and
boom of the axle sha at the same
me. You can use a socket for the top
but will need a wrench for the boom
nut. Note: Hand ghten only!
7. Bolt in the composite “U” shaped
piece on to the tailgate plate using sup-
plied nuts, bolts, washers and split-
washers. Firmly hand-ghten.

8. Locate the bracket and hardware shown
in the picture.
9. Install bracket on to the re carrier. This
bracket will line up with the “U” shaped spot
on the tailgate plate. To line up, loosely bolt
up the bracket and close tailgate. Tighten
the bracket once you aligned it with the “U”
shaped area of the tailgate. Hand ghten
only.
10. Locate the heimed rod ends and hard-
ware shown in picture.
11. Screw the heims together and bolt the
female end to the carrier. To set the other
end length, close the tailgate and re carrier.
Rotate the male end of the heim to lengthen
or shorten to line up with the bracket on the
tailgate plate like shown in picture. Open tail-
gate and rotate the male end of hiem 1/2
turn ghter and bolt up to tail gate bracket.
Torque bolts for heims to 20lbs.

12. Install the new rubber cap over the axle
bolt bearing area on re carrier. This piece
will help keep the bearing clean and smooth.
13. Locate the spare re inner mounng
bracket and nuts and bolts for it. See picture.
14. Bolt to the outside of the re carrier. In
order to make sure your re will clear the
bumper use a helper to li spare re up to
see how far up to mount the bracket. Torque
the bolts to 25lbs. Note: To minimize shaking
you want the spare to be at the lowest level
necessary to clear the bumper.
15. Bolt the outer poron of the spare brack-
et to the inner part. Keep the bolts a lile
loose. With the outer all the way extended,
place the spare on it and push re ll re
touches the carrier. Remove re. Slide outer
part of bracket in extra 1/4 inch and torque
bolts to 40lbs. Re-install re using the lug
nuts supplied with our kit. Torque to 50lbs.

16. Open and close and ghten the heim
in 1/2 increments to get the snug t you’re
looking for. Note: You may use your lug
nuts as long as you verify that they are the
same thread pitch as the mounng brack-
et.
17. Tighten all bolts that you previously
le hand ght and you are nished!
/


