Page is loading ...

3
SET
4
1
5
2
Using the app
Using the unit
Appendix
Cover,
Introduction
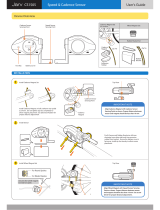
CATEYE
PADRONE
DIGITAL
CYCLOCOMPUTER
CC-PA400B
The Bluetooth® word mark and logos are registered trademarks owned by Bluetooth
SIG, Inc. and any use of such marks by CATEYE Co., Ltd. is under license. Other
trademarks and trade names are those of their respective owners.
1
•
This instruction manual is subject to change
without notice.
•
Please visit our website, where a detailed
Quick Start manual containing videos can be
downloaded.
https://www.cateye.com/instruction/?id=CC-PA400B
Setting up
the
PADRONE DIGITAL
Smartphone
PADRONE DIGITAL
Mounting
the PADRONE DIGITAL
Introduction
Starting measurement
Changing settings
Capabilities with a smart-
phone (Cateye Cycling™)
Warning / Caution
Product Warranty, etc.

3
SET
4
1
5
2
Using the app
Using the unit
Appendix
Cover,
Introduction
2
The PADRONE DIGITAL is a cyclocomputer that uses Bluetooth® SMART sensors. In
addition to the included sensors, optional or commercial sensors can also be connected
for use.
Mounting the PADRONE DIGITAL
•
Mount the bracket (Page 3)
•
Mounting the speed/cadence sensor (ISC-12) (Page 5)
•
Wearing the heart rate sensor (HR-12) Optional (Page 9)
* For detailed explanations on how to use CATEYE sensors such as mounting, or pairing,
see the sensor’s Online Manual (on our website) or the Quick Start Manual (PDF/smart-
phone app).
Setting up the PADRONE DIGITAL
The first time that you use this product, perform the initial setup from the PADRONE
DIGITAL or from a smartphone (Cateye Cycling™).
Use the method corresponding to your device to set up the PADRONE DIGITAL. You can
change the display of its measurement screen and its total distance value as necessary.
* If you have a smartphone, you can use the “Cateye Cycling™” smartphone app (free of
charge) to easily set up the PADRONE DIGITAL.
•
If you do not have a smartphone
1. Setup with the PADRONE DIGITAL (Page 11)
2. Changing settings (Page 22)
•
If you have a smartphone
1. Setup with a smartphone (Cateye Cycling™) (Page 15)
2. Capabilities with a smartphone (Page 31)
Introduction

Cover,
Introduction
3
SET
4
5
2
Using the app
Using the unit
Appendix
1/8
1
3
•
When mounting on handlebar
Mount the bracket
The bracket can be mounted on either the stem or the handlebar.
1
Mount the bracket
•
When mounting on stem
Mounting the PADRONE DIGITAL
Cut
Cutting band after mounting
Caution!:
Cut the bracket band so
that cut end will not cause
injury.
Dial
Handlebar
Bracket band
Bracket
Bracket
rubber pad
Stem
Bracket band
Bracket
Bracket
rubber pad
Bracket band Bracket DialBracket rubber pad


Cover,
Introduction
3
SET
4
5
2
Using the app
Using the unit
Appendix
3/8
1
5
•
Mounting on top of chain stay
Mounting the speed/cadence sensor (ISC-12)
The speed (cadence) sensor can be mounted either on the top or bottom of the chain stay.
•
Mounting on bottom of chain stay
Caution!:
If the speed (cadence) sensor is mounted on the bottom of the chain stay rather than
on the top, the adjustment range between the sensor and the magnet will be narrower.
* If using pedals with steel axles, the cadence magnet can be attached magnetically to the
pedal axle.
* For detailed explanations on how to use CATEYE sensors such as mounting, or pair-
ing, see the sensor’s Online Manual (on our website) or the Quick Start Manual (PDF/
smartphone app).
* The following mounting procedure gives instructions for mounting on the top of the
chain stay.
Mounting the PADRONE DIGITAL
Cadence magnet
Cadence magnet
Speed (cadence)
sensor
Speed (cadence) sensor
Wheel magnet
Wheel magnet
Wheel magnet
Cadence magnet
Nylon tie (x5)
Sensor rubber pad
Speed/Cadence
sensor
(ISC-12)

Cover,
Introduction
3
SET
4
5
2
Using the app
Using the unit
Appendix
4/8
1
6
1
Temporarily attach the sensor to the left chain stay.
(1) Loosen the sensor screw using a Phillips screwdriver and check that the sen-
sor arm moves.
(2) Attach the sensor rubber pad to the sensor.
Sensor rubber pad
(3) Refer to the illustration and temporarily attach the sensor to the left chain stay
with nylon ties.
Caution!:
Do not fully tighten the nylon ties.
Once the nylon ties are fully tightened they cannot be removed.
Nylon tie
Sensor arm
Sensor screw
Left chain stay
Mounting the PADRONE DIGITAL
Mounting the speed/cadence sensor (ISC-12)

Cover,
Introduction
3
SET
4
5
2
Using the app
Using the unit
Appendix
5/8
1
7
2
Temporarily attach the magnet.
Nylon tie
Sensor zone
(CADENCE) side
Sensor zone (SPEED) side
Cadence
magnet
Spoke
Wheel magnetSensor zone (CADENCE)
Sensor zone (SPEED)
(1) Using a nylon tie, temporarily attach the cadence magnet to the inside of the
left crank arm so that it faces the cadence sensor zone.
* If using pedals with steel axles, the cadence magnet can be attached mag-
netically to the pedal axle. In this case, remove the adhesive tape from the
magnet and do not use the nylon tie.
(2) Rotate the sensor arm and temporarily attach the wheel magnet to a spoke
facing the speed sensor zone.
* Reposition the sensor and the magnets if both magnets (speed and cadence)
cannot pass through their respective sensor zones.
Mounting the PADRONE DIGITAL
Mounting the speed/cadence sensor (ISC-12)

Cover,
Introduction
3
SET
4
5
2
Using the app
Using the unit
Appendix
6/8
1
8
3
Adjust the gap between the sensor zone and the magnet.
(1) Tilt the sensor so that the gap between the cadence magnet and the cadence
sensor zone is approximately 3 mm, then fasten the sensor securely with
nylon ties.
3 mm
Cadence magnet
(2) Rotate the sensor arm so that the gap between the wheel magnet and the
speed sensor zone is approximately 3 mm, then tighten the sensor screw
securely.
3 mm
3 mm
Sensor screw
Wheel magnet
4
Secure all parts.
Securely tighten the sensor’s nylon ties, the sensor screw, the wheel magnet, and
the cadence magnet so that they do not move, and then check that these items are
not loose.
Trim off the excess nylon tie.
Mounting the PADRONE DIGITAL
Mounting the speed/cadence sensor (ISC-12)

Cover,
Introduction
3
SET
4
5
2
Using the app
Using the unit
Appendix
7/8
1
9
Wearing the heart rate sensor
(
HR-12
)
Optional
Heart rate is measured by wearing a heart rate sensor around the chest.
Before wearing the heart rate sensor
Warning!!!:
Never use this device if you use a pacemaker.
•
To eliminate measurement errors, it is recommended to moisten the electrode pads
with water or apply electrolyte cream to the pads.
•
If you have sensitive skin, moisten the electrode pads with water and wear it over a
thin shirt.
•
Chest hair may interfere with measurement in some cases.
* For detailed explanations on how to use CATEYE sensors such as mounting, or pair-
ing, see the sensor’s Online Manual (on our website) or the Quick Start Manual (PDF/
smartphone app).
1
Attach the sensor to the HR strap.
Press until you hear a clicking sound.
Heart rate sensor
HR strap
Heart rate sensor
(HR-12)
HR strap

Cover,
Introduction
3
SET
4
5
2
Using the app
Using the unit
Appendix
8/8
1
10
2
Wear the HR strap by sliding the hook over the other end of
the strap.
Wind the HR strap around your body and adjust the length to suit your chest (un-
derbust). Overtightening the strap may cause discomfort during measurement.
Hook
Back side
Electrode pads
* Wear the heart rate sensor so that TOP faces up.
* Ensure that the electrode pads are in close contact with your body.
* If you have dry skin or are wearing the sensor over a shirt, measurement errors
may result. In such cases, moisten the electrode pads with water.
Wearing the heart rate sensor (HR-12) Optional

Cover,
Introduction
3
SET
4
1
5
Appendix
Unit
1/4
2
11
Setting up the PADRONE DIGITAL
Setup with the PADRONE DIGITAL
* Check the locations of the buttons on the PADRONE DIGITAL before starting setup.
AC
MODE
MENU
Battery case cover
Dot section
Short press
Long press
(2 sec.)
MODE
MODE
Pull free the PADRONE DIGITAL insulation sheet.
After you pull free the insulation sheet, return the
battery cover to its previous location.
Insulation sheet
COIN
Open
Close
1
Format (initialize) the unit.
While holding down MENU on the back of the PADRONE DIGITAL, press and
release the AC button.
ACAC MENUMENU
ACAC MENUMENUMENUMENU MENUMENU
1 2 3
The whole display turns on, and then the smartphone search
screen is displayed.
* All data is deleted and the unit is reset to the factory de-
fault settings.
* If the smartphone search screen is not displayed, the unit
could not be formatted. Try to perform the operation again.
2
Select the measurement unit.
Press MODE to select “km/h” or “mph”.
After selecting a value, press MENU to proceed
to the next step.
MENU
MODE
km/h
↔
mph
Confirm
MENU

Cover,
Introduction
3
SET
4
1
5
Appendix
Unit
2/4
2
12
3
Pair with a sensor.
Caution!:
•
To use the PADRONE DIGITAL, you have to pair it with a sensor that sup-
ports the Bluetooth® SMART standard.
•
Avoid pairing sensors at a race venue or in similar locations where there
are a lot of other users. Doing so may cause the PADRONE DIGITAL to be
paired with another device.
The unit switches to the pairing standby screen and Pr
flashes on the screen.
Use one of the methods in the following table to
activate the sensor.
CATEYE sensors Activating the sensor Display
Speed/Cadence sensor
Move the magnet through the sensor zone several times.
(Within 3 mm)
ISC
Heart rate sensor
(Optional)
Rub both electrode pads with your thumbs. Hr
* With the speed/cadence sensor and heart rate sensor, you can also activate the
sensor by pressing the RESET button.
Once pairing is complete, the name of the sensor is shown in the upper display.
* When pairing a sensor with the PADRONE DIGITAL, a “C” is displayed after the
sensor name.
4
To pair multiple sensors, hold down MODE to return to the
pairing standby screen.
Repeat step 3 to pair all the sensors that you intend to use.
Once you are finished pairing sensors with the unit, press
MENU to proceed to the next step.
Setting up the PADRONE DIGITAL
Setup with the PADRONE DIGITAL
MODE
MENU
Re-verify
(press and hold)
Confirm

Cover,
Introduction
3
SET
4
1
5
Appendix
Unit
3/4
2
13
5
Set tire circumference.
Enter the tire circumference (the length of the
outer circumference of the tire) in mm for the
tire on which the sensor is installed.
(100 to 3999 mm)
* Refer to “Tire circumference table” (Page 14)
* In the setup of the PADRONE DIGITAL, sen-
sors capable of speed measurement are set to
the same tire circumference value.
To change the tire circumference for each
sensor, see the menu screen,
“Tire circumference” (Page 24)
, after completing setup.
After entering a value, press MENU to proceed to the next step.
6
Set the clock.
Each time MODE is pressed and held, settings
switch from time display mode, to hours, to
minutes.
* When 12h is selected, press MODE to select
A (a.m.) or P (p.m.).
MODE
A (a.m.)
↔
P (p.m.)
7
Press MENU to complete setup.
Setup is completed and the PADRONE DIGITAL switches
to the measurement screen.
For instructions on how to start measurement, refer to
“Starting measurement” (Page 19).
Setting up the PADRONE DIGITAL
Setup with the PADRONE DIGITAL
MODE
MENU
MODE
Increase
numbers
Move to next digit
(Press and hold)
Confirm
MODE
MODE
Switch between
24h and 12h
or increase
numbers
Switch setting
item
(Press and hold)
Time display mode
MinutesHours
MENU
Setup complete

Cover,
Introduction
3
SET
4
1
5
Appendix
Unit
4/4
2
14
Tire circumference table
Tire circumference can be determined by either of the following two methods:
•
Measure the actual tire circumference (L)
After ensuring that the tire pressure is appropriate, sit on your
bike, roll it forward so that the tire makes one full revolution (use
the valve or other marking as a reference), and measure the dis-
tance traveled on the road.
•
Tire size chart
* The tire size or ETRTO code is indicated on the side of the tire.
ETRTO
Tire size
L (mm)
47-203 12x1.75 935
54-203 12x1.95 940
40-254 14x1.50 1020
47-254 14x1.75 1055
40-305 16x1.50 1185
47-305 16x1.75 1195
54-305 16x2.00 1245
28-349 16x1-1/8 1290
37-349 16x1-3/8 1300
32-369 17x1-1/4 (369) 1340
40-355 18x1.50 1340
47-355 18x1.75 1350
32-406 20x1.25 1450
35-406 20x1.35 1460
40-406 20x1.50 1490
47-406 20x1.75 1515
50-406 20x1.95 1565
28-451 20x1-1/8 1545
37-451 20x1-3/8 1615
37-501 22x1-3/8 1770
40-501 22x1-1/2 1785
47-507 24x1.75 1890
50-507 24x2.00 1925
54-507 24x2.125 1965
25-520 24x1(520) 1753
24x3/4 Tubular 1785
28-540 24x1-1/8 1795
32-540 24x1-1/4 1905
25-559 26x1(559) 1913
32-559 26x1.25 1950
37-559 26x1.40 2005
40-559 26x1.50 2010
47-559 26x1.75 2023
50-559 26x1.95 2050
54-559 26x2.10 2068
57-559 26x2.125 2070
58-559 26x2.35 2083
ETRTO
Tire size
L (mm)
75-559 26x3.00 2170
28-590 26x1-1/8 1970
37-590 26x1-3/8 2068
37-584 26x1-1/2 2100
650C Tubular 26x7/8
1920
20-571 650x20C 1938
23-571 650x23C 1944
25-571 650x25C 26x1(571) 1952
40-590 650x38A 2125
40-584 650x38B 2105
25-630 27x1(630) 2145
28-630 27x1-1/8 2155
32-630 27x1-1/4 2161
37-630 27x1-3/8 2169
40-584 27.5x1.50 2079
50-584 27.5x1.95 2090
54-584 27.5x2.1 2148
57-584 27.5x2.25 2182
18-622 700x18C 2070
19-622 700x19C 2080
20-622 700x20C 2086
23-622 700x23C 2096
25-622 700x25C 2105
28-622 700x28C 2136
30-622 700x30C 2146
32-622 700x32C 2155
700C Tubular 2130
35-622 700x35C 2168
38-622 700x38C 2180
40-622 700x40C 2200
42-622 700x42C 2224
44-622 700x44C 2235
45-622 700x45C 2242
47-622 700x47C 2268
54-622 29x2.1 2288
56-622 29x2.2 2298
60-622 29x2.3 2326
Setting up the PADRONE DIGITAL
Setup with the PADRONE DIGITAL
L mm

Cover,
Introduction
3
SET
4
1
5
Appendix
App
1/4
2
15
Setup with a smartphone (Cateye Cycling™)
You can use the smartphone app “Cateye Cycling™” (free of charge) for setup.
* See Cateye Cycling Recommended Devices for the latest information about smartphones
recommended for use with Cateye Cycling™.
* Check the locations of the buttons on the PADRONE DIGITAL before starting setup.
AC
MODE
MENU
Battery case cover
Dot section
Short press
Long press
(2 sec.)
MODE
MODE
PADRONE DIGITAL
Pull free the PADRONE DIGITAL insulation sheet.
After you pull free the insulation sheet, return the battery cover to its previous location.
Insulation sheet
COIN
Open
Close
Smartphone
1
Install Cateye Cycling™ on your smartphone.
If using an iPhone
If using an Android smartphone
2
Launch Cateye Cycling™.
Follow the on-screen instructions and allow the use of GPS and Bluetooth® devices.
* At the moment you turn on the Bluetooth® in the smartphone setting, the smart-
phone OS will search for devices, but do not configure settings there. Switch to
Cateye Cycling™ and follow the procedure below.
Setting up the PADRONE DIGITAL

Cover,
Introduction
3
SET
4
1
5
Appendix
App
2/4
2
16
PADRONE DIGITAL
3
Format (initialize) the unit.
While holding down MENU on the back of the PADRONE DIGITAL, press and re-
lease the AC button.
ACAC MENUMENU
ACAC MENUMENUMENUMENU MENUMENU
1 2 3
The whole display turns on, and then the smartphone
search screen is displayed.
* All data is deleted and the unit is reset to the factory
default settings.
* If the smartphone search screen is not displayed, the
unit could not be formatted. Try to perform the opera-
tion again.
Smartphone
4
Tap (Menu) at the top left of the screen, turn on [Connect]
and tap [Device].
Setting up the PADRONE DIGITAL
Setup with a smartphone (Cateye Cycling™)

Cover,
Introduction
3
SET
4
1
5
Appendix
App
3/4
2
17
5
Tap [Pair to Device] to start the pairing of the PADRONE
DIGITAL and Cateye Cycling™.
When Cateye Cycling™ detects PADRONE DIGITAL, a message is displayed on the
smartphone.
Tap [Pairing] to complete pairing.
* The clock of the PADRONE DIGITAL is synchronized with your smartphone when
you connect these devices. There is no need to set the clock from the PADRONE
DIGITAL.
6
Tap [Pair to Device] once again to start the pairing of the sen-
sor and Cateye Cycling™.
Caution!:
•
To use the PADRONE DIGITAL, you have to pair it with a sensor that sup-
ports the Bluetooth® SMART standard.
•
Avoid pairing sensors at a race venue or in similar locations where there
are a lot of other users. Doing so may cause the PADRONE DIGITAL to be
paired with another device.
•
Pairing of a commercial sensor and the PADRONE DIGITAL:
If you are an iPhone user, complete the setup with Cateye Cycling™, and
then separately pair the commercial sensor with the PADRONE DIGITAL.
“Pairing” (Page 25)
* When using an iPhone, you cannot sync settings of commercial sensors
with the PADRONE DIGITAL.
Setting up the PADRONE DIGITAL
Setup with a smartphone (Cateye Cycling™)

Cover,
Introduction
3
SET
4
1
5
Appendix
App
4/4
2
18
7
Activate the sensor.
Use one of the methods in the following table to activate the sensor.
CATEYE sensors Activating the sensor Display
Speed/Cadence sensor
Move the magnet through the sensor zone several times.
(Within 3 mm)
ISC
Heart rate sensor
(Optional)
Rub both electrode pads with your thumbs. HR
* With the speed/cadence sensor and heart rate sensor, you can also activate the
sensor by pressing the RESET button.
When Cateye Cycling™ detects the sensor signal, a message is displayed on the
smartphone.
Tap [Pairing]. The paired sensor is displayed under [Device] and pairing is completed.
* When pairing a sensor with Cateye Cycling™, an “A” is displayed after the sensor
name.
8
To pair multiple sensors, repeat the procedure from step 6.
Pair all sensors that you intend to use.
9
Set the tire circumference for a sensor capable of speed mea-
surement.
Tap [Sensor name] displayed under [Device], and then tap [Tire Circumference] (the
outer circumference of the tire) to select the tire circumference according to the
tire size written on the side of the tire.
* Default value: 2096 mm (700x23c)
* The tire circumference must be set for each sensor.
10
If necessary, you can change the display of the PADRONE
DIGITAL’s measurement screen and its total distance value.
For details, see “Capabilities with a smartphone” (Page 31)
11
Tap (Menu) at the top left of the screen, set [Connect] to OFF.
The PADRONE DIGITAL disconnects from the smartphone and switches to a mea-
surement screen to which the setup details have been applied.
Setting up the PADRONE DIGITAL
Setup with a smartphone (Cateye Cycling™)

Cover,
Introduction
SET
4
1
5
2
Using the app
Using the unit
Appendix
1/3
3
19
Starting measurement
On the measurement screen, press MENU to go to the menu screen.
Various settings can be changed on the menu screen.
* If you are using a smartphone, you can easily configure
PADRONE DIGITAL settings from the smartphone.
For details, see “Capabilities with a smartphone” (Page 31).
[Measurement screen]
Current speed (*1)
0.0 (4.0) – 105.9 km/h
[0.0 (3.0) – 65.9 miles]
Clock (*1)
0:00 – 23:59 or
1:00 – 12:59
Current function (*1)
Dot section
MENU
Icon Description
Sensor signal icon
Flashes when a sensor signal is received.
•
S: Speed signal
•
C: Cadence signal
•
H: Heart rate signal (Optional)
Pace arrows
Indicates whether the current speed is faster ( ) or slower ( ) than the average speed.
Memory alarm
This is displayed when the amount of remaining memory on the PADRONE
DIGITAL is low.
While this icon is displayed, the oldest files will be deleted in order to make
room for new measurements.
*1:
You can use the menu screen or the smartphone (Cateye Cycling™) to change the
upper and middle displays and to change the selected function in the lower display.
•
Changing settings (Page 22)
•
Capabilities with a smartphone (Page 31)

Cover,
Introduction
SET
4
1
5
2
Using the app
Using the unit
Appendix
2/3
3
20
*2:
Heart rate data will not be displayed unless heart rate sensor (Optional) is paired.
*3: Regarding the average and maximum values, if only a speed sensor is paired,
the upper display will show the current speed and the lower display will show the
average speed or the maximum speed.
*4: Average values are displayed as .E instead of the measured value when the mov-
ing time exceeds approximately 27 hours. The same applies to the average speed
if the trip distance exceeds 1000 km.
* If the speed, cadence, or heart rate value flashes, the battery of the measuring
sensor has reached the end of its service life.
Switching current function
Pressing MODE switches the current function displayed at the bottom of the screen.
Starting measurement [Measurement screen]
Press the dot section when
mounted on the bracket
Tm Moving Time
0:00’00” – 99:59’59”
With speed sensor
only (*3)
With speed sensor
only (*3)
or
or
MODE operation
Heart rate (*2)
0 (30) – 255 bpm
Cadence
0 (20) – 255 rpm
Dst Trip Distance
0.00 – 999.99 km [miles]
Dst2 Trip Distance 2
0.00 – 9999.99 /
10000.0 – 99999.9 km [miles]
Average Speed (*4)
0.0 – 105.9 km/h
[0.0 – 65.9 miles]
Average Heart rate (*2,*4)
0 – 255 bpm
Average Cadence (*4)
0 – 255 rpm
Maximum Speed
0.0 (4.0) – 105.9 km/h
[0.0 (3.0) – 65.9 miles]
Maximum Heart rate (*2)
0 (30) – 255 bpm
Maximum Cadence
0 (20) – 255 rpm
Odo Total Distance
0.0 – 99999.9 /
100000 – 999999 km [miles]
/