Kanguru External USB2.0 User guide
- Category
- Card readers
- Type
- User guide
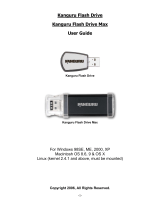
Kanguru External USB2.0 lets you conveniently transfer data stored on portable media cards, including CompactFlash Cards, SmartMedia, MultiMedia Cards, Secure Digital, Sony Memory Stick, eXcellent Digital and USB2.0 connectivity. With its plug-and-play compatibility and hot-swappable memory card support, you can easily exchange data between different cards or media. The device fits into standard 3.5" or 5.25" drive bays for desktop PCs and can be used externally or internally without requiring an additional power supply.
Kanguru External USB2.0 lets you conveniently transfer data stored on portable media cards, including CompactFlash Cards, SmartMedia, MultiMedia Cards, Secure Digital, Sony Memory Stick, eXcellent Digital and USB2.0 connectivity. With its plug-and-play compatibility and hot-swappable memory card support, you can easily exchange data between different cards or media. The device fits into standard 3.5" or 5.25" drive bays for desktop PCs and can be used externally or internally without requiring an additional power supply.


-
 1
1
-
 2
2
-
 3
3
-
 4
4
-
 5
5
-
 6
6
-
 7
7
-
 8
8
-
 9
9
-
 10
10
-
 11
11
-
 12
12


Kanguru External USB2.0 User guide
- Category
- Card readers
- Type
- User guide
Kanguru External USB2.0 lets you conveniently transfer data stored on portable media cards, including CompactFlash Cards, SmartMedia, MultiMedia Cards, Secure Digital, Sony Memory Stick, eXcellent Digital and USB2.0 connectivity. With its plug-and-play compatibility and hot-swappable memory card support, you can easily exchange data between different cards or media. The device fits into standard 3.5" or 5.25" drive bays for desktop PCs and can be used externally or internally without requiring an additional power supply.
Ask a question and I''ll find the answer in the document
Finding information in a document is now easier with AI
Related papers
-
Kanguru Combo Hub User manual
-
-
-
-
-
-
-
-
-
Other documents
-
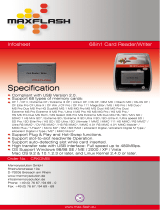 MaxFlash CRKOMBI Datasheet
-
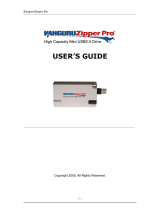 Kanguru Solutions PRO User manual
-
 StarTech.com 35FCREAD20BK Datasheet
-
 ABC Products CARD READER Datasheet
-
LogiLink UA0035 Datasheet
-
Equip 128552 Product information
-
 Kanguru Solutions KFD-8G User manual
-
Digitus DA-70316-1 Datasheet
-
Zonet ZUC2831L Quick Installation Manual
-
Asus 90PD0071-M02120 Datasheet


