Page is loading ...

DVS / 31 Face Installation
Shadowbox Black 95300399, Shadowbox Bronze 95300400, Times Square 95300599
Page 1 of 11 17601830 — 6/2/15 © Travis Industries, Inc.
Packing List
Shadowbox Face
(3) 8-32 Nuts
(10) 10-24 Type F Screws
Face Bracket
Hinge Bracket
Latch Bracket
Switch Bracket (used on 31 DVI only)
LED Switch Bracket
LED Mounting Plate
Compatibility
DVS GSR and GSR2 Insert
31 DVI Insert
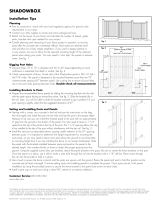
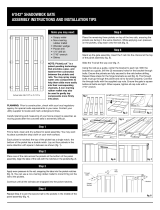
Installation Tips
The insert should be in place with the gas line, vent, and electrical line attached. You may pull the
insert out slightly for better access.
Face Installation
1. Remove the left and right face brackets as shown below.
2. Remove the screw from the upper air deflector on the right side.

DVS / 31 Face Installation
Shadowbox Black 95300399, Shadowbox Bronze 95300400, Times Square 95300599
Page 2 of 11 17601830 — 6/2/15 © Travis Industries, Inc.
3. Attach the hinge bracket to the right side using 3 of the included screws. Replace the screw removed in step
2, securing the bracket to the upper air deflector.
4. Attach the latch bracket to the left side using 3 of the included screws.
1-Piece Panels
If using the 1-piece panel, install it at this time (see instructions included with the panels). Note how the
brackets attach to the hinge and latch bracket.

DVS / 31 Face Installation
Shadowbox Black 95300399, Shadowbox Bronze 95300400, Times Square 95300599
Page 3 of 11 17601830 — 6/2/15 © Travis Industries, Inc.
3-Piece Panels
If using 3-piece panels, attach them to the hinge
and latch brackets at this time (see instructions
included with the panels).
5. Attach the face bracket to the hinge bracket as shown below. The screws insert through the holes in both
brackets.

DVS / 31 Face Installation
Shadowbox Black 95300399, Shadowbox Bronze 95300400, Times Square 95300599
Page 4 of 11 17601830 — 6/2/15 © Travis Industries, Inc.
6. Attach face to the hinge bracket with the included nuts.
The photos below show the completed face installation.

DVS / 31 Face Installation
Shadowbox Black 95300399, Shadowbox Bronze 95300400, Times Square 95300599
Page 5 of 11 17601830 — 6/2/15 © Travis Industries, Inc.
31 DVI ONLY
Route the on/off wires to the left side of the insert
Insert the on/off wires through the switch bracket and attach to the on/off switch.
Insert the switch into the bracket, and then attach the bracket to the insert. Secure the wires to the insert,
making sure they do not contact any hot or moving components (use lock-ties if necessary).

DVS / 31 Face Installation
Shadowbox Black 95300399, Shadowbox Bronze 95300400, Times Square 95300599
Page 6 of 11 17601830 — 6/2/15 © Travis Industries, Inc.
31 DVI and DVS GSR ONLY - LED Switch Bracket Installation
The DVS GSR2 is shipped without an LED control panel light. If installing on
this model, please disregard the following steps.
Remove the 9 volt battery from the battery holder.
Remove the three nuts securing the LED bracket to the concealment cover (retain the nuts). Carefully place
the the LED bracket in front of the insert, making sure the wiring is not damaged.

DVS / 31 Face Installation
Shadowbox Black 95300399, Shadowbox Bronze 95300400, Times Square 95300599
Page 7 of 11 17601830 — 6/2/15 © Travis Industries, Inc.
31 DVI and DVS GSR ONLY - LED Switch Bracket Installation - Continued
Remove the two nuts securing the left hinge bracket to the base of the insert (retain the nuts). Remove the hinge
bracket and place it aside (it is re-installed later).
Remove and discard the concealment cover. NOTE: The two washers on the hinge pins may also be
discarded.

DVS / 31 Face Installation
Shadowbox Black 95300399, Shadowbox Bronze 95300400, Times Square 95300599
Page 8 of 11 17601830 — 6/2/15 © Travis Industries, Inc.
31 DVI and DVS GSR ONLY - LED Switch Bracket Installation - Continued
Remove the 2 nuts on the right hinge bracket (retain the nuts). Leave the hinge bracket in place. Route the
ground wire forward and retain the star washer (it is used later).

DVS / 31 Face Installation
Shadowbox Black 95300399, Shadowbox Bronze 95300400, Times Square 95300599
Page 9 of 11 17601830 — 6/2/15 © Travis Industries, Inc.
31 DVI and DVS GSR ONLY - LED Switch Bracket Installation - Continued
Install the LED Mounting plate as shown below (NOTE: Make sure the left hinge bracket is in place before
installing). Attach the plate to the insert using the nuts removed earlier. When attaching the right side nuts,
place the ground wire connection, and star washer, over the stud before installing the nut (either side).

DVS / 31 Face Installation
Shadowbox Black 95300399, Shadowbox Bronze 95300400, Times Square 95300599
Page 10 of 11 17601830 — 6/2/15 © Travis Industries, Inc.
31 DVI and DVS GSR ONLY - LED Switch Bracket Installation - Continued
Attach the LED bracket to the mounting plate using the nuts removed earlier.
The switch bracket attaches to the Shadowbox face. Remove the two lower inside nuts (see photos below).
Place the switch bracket over the studs and secure using the nuts removed earlier.

DVS / 31 Face Installation
Shadowbox Black 95300399, Shadowbox Bronze 95300400, Times Square 95300599
Page 11 of 11 17601830 — 6/2/15 © Travis Industries, Inc.
31 DVI and DVS GSR ONLY - LED Switch Bracket Installation - Continued
Install the 9 volt battery into the battery holder and verify the led lights turn on.
The last step is to verify the switch bracket properly contacts the micro switch on the insert:
NOTE: This step is best done with the glass removed.
(a) Close the door on the shadowbox face. Look into the gap between the face and insert and check to see if
the lights turn off. If the lights turn off, the switch bracket is working. If it does not turn off, proceed to
step (b).
(b) Use a pair of pliers to carefully bend the tab out slightly (do not overbend – hinders door operation).
Repeat step (a).
/


