Cuisinart SMK0036AS User manual

Category
Barbecues & grills
Type
User manual
Woodcreek 4-in-1 Pellet Grill
OWNER’S MANUAL
OPERATING IN STRUC TIONS
WARNING
PLEASE READ THIS ENTIRE MANUAL BEFORE INSTALLATION
AND USE OF THIS PELLET FUEL-BURNING APPLIANCE.
FAILURE TO FOLLOW THESE INSTRUCTIONS COULD RESULT IN
PROPERTY DAMAGE, BODILY INJURY OR EVEN DEATH. CONTACT
LOCAL BUILDING OR FIRE OFFICIALS ABOUT RESTRICTIONS
AND INSTALLATION INSPECTION REQUIREMENTS IN YOUR AREA.
SAVE THESE INSTRUCTIONS.
NOTICE TO INSTALLER:
LEAVE THESE INSTRUCTIONS
WITH THE GRILL OWNER
FOR FUTURE REFERENCE .
SAVE THIS MANUAL FOR FUTURE REFERENCE
Model SMK0036AS / SMK0036ASO
1
Do NOT use in humid or wet conditions
WARNING
IMPORTANT SAFETY WARNINGS
WE WANT YOU TO ASSEMBLE AND USE YOUR GRILL AS SAFELY AS POSSIBLE.
THE PURPOSE OF THIS SAFETY ALERT SYMBOL
IS TO ATTRACT YOUR ATTENTION TO POSSIBLE HAZARDS AS YOU ASSEMBLE AND USE YOUR GRILL & SMOKER.
WHEN YOU SEE THE SAFETY ALERT SYMBOL, PAY CLOSE ATTENTION TO THE INFORMATION WHICH FOLLOWS!
READ ALL SAFETY WARNINGS AND INSTRUCTIONS CAREFULLY
BEFORE ASSEMBLING AND OPERATING YOUR GRILL & SMOKER.
1. Improper installation, adjustment, service or maintenance can cause injury or property damage.
2. Read all instructions and guidelines carefully and thoroughly before installation, use or service.
3. Failure to follow these instructions could result in  re or electrical shock.
WARNING
NOT for use in or on boats or recreation vehicles.
DANGER
1. Do not store or use gasoline, liquid propane or any other  ammable vapors or
liquids in the vicinity of this appliance.
DANGER
CALIFORNIA PROPOSITION 65 WARNING
WARNING: This product can expose you to chemicals, including carbon monoxide, which are
known to the State of California to cause cancer and birth defects or other reproductive harm.
For more information go to www.P65Warnings.ca.gov
WARNING: CONTAINS LEAD. MAY BE HARMFUL IF EATEN OR CHEWED. COMPLIES WITH
FEDERAL STANDARDS. KEEP OUT OF REACH OF CHILDREN.
2
DANGER: Indicates an imminently hazardous situation which, if not avoided, will result in death or serious injury.
WARNING: Be alert to the possibility of serious bodily injury if the instructions are not followed. Be sure to read and
carefully follow all of the messages.
CAUTION: Indicates a potentially hazardous situation which, if not avoided, may result in minor or moderate injury.
General Warnings . . . . . . . . . . . . . . . . . . . . . . . . . . . . . . . . . . . . . . . . . . . . 3-4
Operating the Grill . . . . . . . . . . . . . . . . . . . . . . . . . . . . . . . . . . . . . . . . . . . 5-10
Proper Care and Maintenance . . . . . . . . . . . . . . . . . . . . . . . . . . . . . . . . . . . .11
Transporting and Storage. . . . . . . . . . . . . . . . . . . . . . . . . . . . . . . . . . . . . . . .12
Grill Cooking Tips. . . . . . . . . . . . . . . . . . . . . . . . . . . . . . . . . . . . . . . . . . . . . .12
Trouble Shooting . . . . . . . . . . . . . . . . . . . . . . . . . . . . . . . . . . . . . . . . . . . . . .13
Wiring Diagram. . . . . . . . . . . . . . . . . . . . . . . . . . . . . . . . . . . . . . . . . . . . . . . .14
Warranty Information . . . . . . . . . . . . . . . . . . . . . . . . . . . . . . . . . . . Back Cover
TABLE OF CONTENTS:
3
WARNING
When using electric appliances, basic safety precautions should always be followed including the following:
Operate only per manufacturers instructions.
Keep all combustible materials at least 60 inches (152.4 cm) away from the grill at all times. Do not use this
grill under any overhang or near any combustible structures.
Minimum clearance from side and back of unit to combustible materials, 60 inches (152.4 cm) from side
and 60 inches (152.4 cm) from back.
DO NOT use on wood decks. Set up this grill on a hard, non-combustible smooth level surface.
In case of  re, turn the control “OFF”. Unplug the grill from the power source and allow the  re to burn out
on its own. Do not use water to try to extinguish a  re.
Keep a  re extinguisher on hand acceptable for use with electric products. Refer to your local authority to
determine proper size and type.
Creosote – Formation and need for removal. When wood pellets are burned slowly, they produce tar and
other organic vapors that combine with expelled moisture to form creosote. The creosote vapors condense
in a relatively cool oven  u and exhaust hood of a slow burning  re. As a result, creosote residue
accumulates on the  ue lining and exhaust hood. When ignited, this creosote makes an extremely hot  re.
The grease duct should be inspected at least twice a year to determine when grease and/or creosote
buildup has occurred.
When grease or creosote has accumulated, it should be removed to reduce risk of  re.
Do not attempt to touch cooking surfaces or other hot surfaces. Use handles or knobs.
To protect against electric shock, do not immerse cord, plugs, or heating element in water or any other
liquids.
Never leave appliance unattended. Hot while in operation. Keep children, clothing and furniture away.
Contact may cause burns.
Unplug this grill from the power source when not in use and before cleaning. Allow appliance to cool down
before attempting to clean or service.
Do not operate any appliance with a damaged power cord or plug, or after the appliance has
malfunctioned or been damaged in any manner.
Do not use accessories or attachments not recommended by the manufacturer, as they may not be
compatible with this appliance, and may cause damage or injury.
Do not place power cord where it may come in contact with hot surfaces, or pose a tripping hazard.
Do not use this appliance for anything other than its intended use.
NEVER add cooking pellets to a hot  re pot by hand. You could be seriously burned. If the hopper runs
out of pellets or your  re goes out while cooking, let the grill completely cool and follow the Initial Lighting
Instructions.
Use only cooking grade wood pellets. Never use heating grade wood pellets as they are not safe for
cooking.
Always store wood pellets away from heat and in a dry location.
NEVER use gasoline, gasoline-type lantern fuel, kerosene, charcoal lighter  uid, or similar liquids to start
or “freshen up” a  re in this appliance. Keep all such liquids well away from the appliance when in use.
This grill is not for use indoors. Do not use inside a building, garage or any other enclosed area.
This product is not designed for commercial use.
GENERAL WARNINGS:
4
This product is not designed for tabletop use. Do not set this product on a tabletop.
Outdoor extension cords must be used with outdoor use products and are marked with suffix “W” and
with the statement “Suitable for Use with Outdoor Appliances.
Only use a properly-grounded power source.
Use only with a properly-grounded GFI (Ground Fault Interrupter) household circuit.
Do not operate this product in rain or wet conditions. Do not allow this product to come in contact with
water. Set this product up more than 10’ from any large body of water (swimming pool, lake, pond, etc).
CAUTION - To reduce the risk of electric shock, keep extension cord connection dry and off the ground.
Never alter or remove the grounding plugs on the power cord or household outlet.
Disconnect electric cord from outlet before cleaning.
Keep appliance clean. See Proper Care and Maintenance section for cleaning.
Do not operate this grill while under the in uence of drugs, alcohol, or while fatigued.
Do not use in the presence of explosive or  ammable gases, vapor or other substances.
Do not use this grill unless it is completely assembled and all parts are securely fastened and tightened.
Use only identical replacement parts.
Do not use this product in high winds.
Do not attempt to move this appliance while it is in use.
Always open the grill hood carefully - heat and steam trapped inside the hood can burn.
Do not use this product for indoor heating, as toxic fumes will accumulate.
After a period of storage, inspect the grill for abrasion, wear, cuts, or damage to the temperature controller
and power cord.
Always use a meat thermometer to ensure food is cooked to a safe temperature.
Keep grill covered when not in use - out of the reach of children. Do not clean this product with a water
spray or the like.
Unplug from outlet when not in use and before cleaning. Allow to cool before putting on or taking off
parts.
Do not operate any appliance with a damaged cord or plug or after the appliance malfunctions
or is dropped or damaged in any manner.
Follow these guidelines to prevent this colorless,odorless gas from poisoning you, your family
or others.
• Know the symptoms of carbon monoxide poisoning; headache, dizziness, weakness, nausea,
vomiting, sleepiness and confusion. Carbon monoxide reduces the blood’s ability to carry
oxygen. Low blood oxygen levels can result in loss of consciousness and death.
• See a doctor if you or others develop cold or  u-like symptoms while cooking or in the vicinity
of this appliance. Carbon monoxide poisoning, which can easily be mistaken for a cold or  u, is
often detected too late.
Alcohol consumption and drug use increase the effects of carbon monoxide poisoning.
• Carbon monoxide is especially toxic to mother and child during pregnancy, infants, the elderly,
grills and people with blood or circulatory system problems, such as anemia or heart
disease.
5
TURNING ON THE GRILL:
Initial Lighting Instructions (To be used on initial  ring or anytime the grill runs out of pellets)
Always allow the auger tube to fully load with pellets to ensure proper lighting of the grill.
Step 1 Open hood to cooking chamber and remove cooking grates, heat plates and heat baffle from
inside the grill. Leave hood open.
Read and follow all warnings and instructions contained in the preceding sections of this manual.
WARNING
OPERATING THE GRILL:
BREAKING IN YOUR GRILL:
In manufacturing and preserving the components of your grill, oil residue may be present on the
cooking surfaces of your grill.
Before cooking on your grill for the  rst time you should follow “Initial Lighting Instructions” to ensure
the auger is fully charged with pellets.
PREHEATING GRILL:
Prior to use, it is recommended that you preheat your grill. This ensures that the cooking grates are at
the desired temperatures to sear the food sugars when cooking. Preheat the grill for 15 to 20 minutes
or until it reaches the desired temperature before adding food. Close the lid during the preheat period.
For searing, allow the controller to reach 500°F and then wait an additional 15 minutes for the cooking
grates and ceramic insert to fully heat up.
• DO NOT leave your grill unattended while in use.
• DO NOT move grill when in use. Lock wheels in place to stabilize grill.
• DO NOT use water to extinguish  are-ups.
WARNING
IF AN EXTENSION CORD IS NECESSARY:
Use a CSA or UL approved 3-prong grounded extension cord that is rated for at least 7-10 Amp
and is marked as suitable for outdoor use.
Keep the power cord connection dry and off of the ground.
Avoid running the power or extension cord across walkways, driveways, or anywhere where it could
pose a tripping hazard.
USE CAUTION AND COMMON SENSE WHEN OPERATING YOUR PELLET GRILL &
SMOKER. FAILURE TO ADHERE TO THE SAFETY WARNINGS AND GUIDELINES IN THIS
MANUAL COULD RESULT IN SEVERE BODILY INJURY OR PROPERTY DAMAGE. SAVE
THIS MANUAL FOR FUTURE REFERENCE.
Step 2 Make sure temperature control knob is “OFF”. Plug power
cord into a GFI (grounded) outdoor electrical outlet. When
connecting,  rst connect plug to the outdoor cooking gas
appliance then plug appliance into the outlet; Use only a
Ground Fault Interrupter (GFI) protected circuit with this
outdoor cooking gas appliance; Never remove the grounding
plug or use with an adapter of 2 prongs; and Use only
extension cords with a 3 prong grounding plug, rated for the
power of the equipment, and approved for outdoor use with a
W-A marking.
Step 3 Open the pellet hopper lid. Make sure the auger is free from
debris and other objects. Turn the temperature control knob
to 200°F.
Step 4 In the cooking chamber, place your hand about 3” above the
re pot and make sure you can feel air blowing out from the
re pot.
Step 5 Look inside the  re pot and make sure the ignitor is getting hot.
It will take a couple of minutes for the ignitor to glow red. DO
NOT TOUCH THE IGNITOR! Turn temperature control knob to
OFF”.
Step 6 Fill the pellet hopper with cooking pellets. NEVER USE
HEATING FUEL PELLETS AS THEY ARE NOT SAFE
FOR COOKING.
Step 7 Turn the temperature control knob to 200°F.
NOTE: During the initial loading of the auger tube, it will
take approximately 2 minutes for the pellets to move
from the pellet hopper to the  re pot
Step 8 When the pellets start falling into the  re pot, turn the
temperature control knob to “OFF”.
Step 9 Replace heat baffle, heat plates and cooking
grates into the cooking chamber.
Step 10 Keep the cooking chamber lid open. Turn temperature
control knob to 200°F. You should see smoke coming out
of the cooking chamber as the pellets ignite in about 2 to 4
minutes.
NOTE: The ignitor will stay on for the  rst 8 minutes and then
turn off.
Step 11 Close cooking chamber lid and set the temperature control knob to the desired setting. See
note below for curing process.
NOTE: Curing the grill is highly recommended before  rst use. Close cooking chamber lid and
set temperature control knob to 400°F and allow grill to cure for 45 minutes. This will
burn off any oil or paint residue inside the cooking chamber before cooking for the  rst
time.
SUBSEQUENT LIGHTING INSTRUCTIONS:
Step 1 Open pellet hopper lid and check the pellet level. Add more pellets if necessary.
WARNING: NEVER add cooking pellets to a hot  re pot by hand. You could be seriously
burned.
Step 2 Open cooking chamber lid and turn temperature control knob to 200°F. You should see smoke
coming out of the cooking chamber as the pellets ignite in about 2 to 4 minutes.
NOTE: Always start the grill on 200°F. setting with the cooking chamber lid open.
Step 3 Close cooking chamber lid and set the temperature control knob to the desired setting. For
best results, preheat the grill for 15 to 20 minutes with the lid closed before placing food in
the grill.
Control Panel
Temperature
Control Dial
Auger
Inside Pellet
Hopper
Fire Pot
6
7
Follow these steps If the grill does not ignite or if the  re in the  re pot goes out while cooking:
Step 1 Turn the temperature control knob to “OFF” and unplug. Open cooking chamber lid and
remove all food, cooking grates, grease tray and heat distribution plate.
CAUTION: Some parts may contain sharp edges. Wear protective gloves if necessary.
WARNING: Always use oven mitts/gloves to protect your hands. Metal parts become hot during
use. Use extreme caution when handling cooking grates, grease tray and baffle.
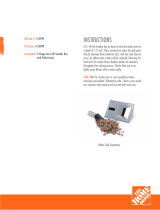
Step 2 Open Ash Clean-out to remove all pellets and ash from the  re pot. Close ash clean-out.
Step 3 Restart the grill and check that the ignitor is working. The ignitor should turn red after 2 minutes
and pellets should be falling into the  re pot from the auger tube.
Step 4 Wearing oven mitts/gloves, replace the baffle, grease tray and cooking grates.
Step 5 Preheat the grill for 10 to 15 minutes with the lid closed before placing food back in the grill.
If this procedure is not successful, see Trouble Shooting section in your owner’s manual.
MANUAL START-UP PROCEDURE (To be used is Ignotor is not working properly):
Step 1 Ensure the control knob is in the “OFF” position. Plug the power cord into a grounded power
source.
Step 2 Check  re pot to ensure there is no obstruction for proper ignition. Fill pellet hopper with
cooking grade pellets.
Step 3 Open the hood. Remove the cooking grates, heat plates, and heat baffle to expose the  re pot.
Place a small handful of pellets into the  re pot. Squirt a gelled  re starter, or other appropriate
pellet starter, over the top of the pellets. A small amount of solid fuel  re starter, such as those
composed of sawdust and wax, or wood shavings, is also recommended. Add another small
handful of pellets in the  re pot.
NOTE: Do not use gasoline, lighter  uid, kerosene, or petrol for lighting a  re in your grill
Step 4 Light the contents of the  re pot using a long match or a long lighter. Allow the starter to burn 3
to 5 minutes. Do not attempt to add more starter into the  re pot as this can cause injury.
Step 5 Quickly and carefully replace the heat baffle, heat plates, and cooking grates. Continue on from
step 2 of the “Subsequent Lighting Instructions.
TURNING OFF THE GRILL:
Turn the temperature control knob to “OFF”. An auto cool down feature will keep the fan running for
12 minutes. If you don’t allow the grill to run the cool down feature it can cause a  re in the  re pot
and catch the pellet hopper on  re.
Unplug the power cord from the wall outlet.
WARNING: NEVER add cooking pellets to a hot  re pot by hand. You could be seriously burned. If
the hopper runs out of pellets or your  re goes out while cooking, let the grill completely
cool and follow the Initial Lighting Instructions.
COOKING:
Set temperature controller to desired level and allow temperature to be reached.
Place food on cooking grill.
With hood closed, cook until desired internal temperature is reached.
Use caution when removing food from Pellet Grill. All surfaces are HOT and may cause burns. Use
protective gloves or long, sturdy cooking tools to remove food.
This grill is HOT while in use and will remain HOT for a period of time afterwards. Use caution.
Pellet grills do not provide smoke 100% of the time. Even though you don’t see smoke you are still
getting smoke  avor.
OPERATING TIPS:
Your Pellet Grill should never be moved while it is hot. If you are transporting your grill in a vehicle after
cooking on it, make sure the  re is completely out and the grill is cold before placing it in any vehicle.
NEVER put water into the  re pot. It will jam the auger and can damage the ignitor.
The Pellet Grill is designed to operate with the lid closed.
Make sure the heat baffle is properly seated on its locating brackets. The opening of the heat baffle
should be pointing left over the  re pot. If not seated properly, direct heat and  ame could come up out
of the  re pot and cause a grease  re or grill damage.
The temperature readout is an approximate and can be affected by the following factors: outside
ambient temperature, the amount and direction of wind, the quality of pellet fuel being used, the lid
being opened, and the quantity of food.
When selecting a temperature setting, the auger will feed pellets for several minutes. This will
momentarily raise the temperature, but the temperature will decrease and stabilize after 10-15 minutes.
The auger will not run 100% of the time, it cycles on and off depending on the temperature setting.
Hot weather can cause the temp to drop very slowly and make it more difficult to cook at lower settings.
This grill is equipped with a pellet hopper sensor. “LOW PELLET” will start  ashing on the controller
and it will start beeping once the pellets are below the sensor.
Pellets can hang up in the pellet hopper after cooking for a long period of time. It’s important to monitor
the pellet level and mix the pellets by hand to ensure they  ow into the auger.
GRILL INSERTS:
Ceramic Sear Insert:
1. Remove right side heat plate and replace with
ceramic sear insert. Turn grill to “SEAR”.
2. Wait approximately 20 minutes for the controller
and cooking grates to get up to temperature before
cooking.
3. Wait until the sear insert is cool before trying to
remove or clean the insert.
4. The ceramic insert can be stored on the left side of
the cart.
Charcoal Insert:
1. Remove right side heat plate and install charcoal
insert.
2. Place approximately 2lbs of charcoal in charcoal
tray and spread evenly so there is only one level of
charcoal
NOTE: DO NOT USE MATCHLIGHT CHARCOAL
3. Turn grill to “SEAR” and keep hood open. Charcoal
should start turning white around 15-20 minutes.
After charcoal is hot, turn the controller to “OFF”
and start cooking.
4. Wait until the charcoal insert is cool before trying to remove the insert or cleaning out the ashes.
5. The charcoal insert can be stored on the left side of the cart.
Storage
Storage
8
9
Griddle:
1. Place Griddle on top of cooking grates with the
grease reservoir toward the back of the grill. Push the
Griddle to the back of the grill. It is best to locate the
Griddle near the middle of the grill.
2. Turn grill to the desired temperature and allow 15 to
20 minutes for griddle to get to desired temperature.
3. Keeping the lid closed during cooking will help
prevent grease splatter.
4. Grease and food particles can be pushed back into the grease reservoir while cooking.
5. Do not let the grease reservoir over ow. Stop cooking, allow griddle to cool and remove excess grease.
6. Wait until the Griddle is cool before trying to remove the Griddle or clean out the grease reservoir.
7. The Griddle can be stored on the right side of the cart.
Ash Clean-Out:
Before each use, open ash clean-out to get rid of ash and burnt
pellets.
1. Lift Ash Clean-Out Handle Lock
2. Pull Ash Clean-Out Handle to open ash door.
Note: Make sure Ash Cup is in place before empting ash.
Pellet Hopper Clean-Out:
If grill will be left un-attended for a long period of time, we recommend you
remove unused pellets.
Always store wood pellets away from heat and in a dry
location.
1. Lift Clean-Out Handle Lock
2. Open Hopper Clean-Out door.
Note: Make sure to hold a pail or bag in place before emptying pellets.
Meat Probes:
Plug the meat probes into the pellet control panel as shown. You can read the temperature of
Probe 1 and Probe 2 at the bottom of the display screen.
Example: “P1:86” — means Probe 1’s temperature is 86 degrees Fahrenheit.
Example: “P2:__” — Displays nothing when the meat probe is not inserted into controller.
Bluetooth App:
1. Your grill is Bluetooth capable.
2. This Bluetooth app allows you to monitor the internal grill
temperature as well as two meat probe temperatures.
3. The Bluetooth range is around 120 ft and can vary with
obstructions such as interior and exterior walls.
888228
888 888 88886250
TEMP
Easy Connect BBQ
Storage
COOK MODE:
The temperature dial can be changed at any time to increase or decrease the cooking temperature of
the grill.
The 200°F to 300°F temperature settings are for slow cooking/smoking.
The 325°F to 450°F temperature settings are for grilling.
The “SEAR” temperature setting is for searing.
Adjust the control knob to a desired temperature. The selected temperature will be in the bottom left
hand corner of the digital display.
ERROR CODES:
“ErP” – Error Power will occur when grill is plugged into power
outlet and the temperature control knob is not in “OFF” position. It
will also appear if power is lost during cooking.
“ErH” – High Temp Limit indicates that the temperature in the
cooking chamber has exceeded 775°F.
“ErL” – Low Temp Limit indicates that the temperature in the
cooking chamber is below 160°F.
“Err”Thermocouple may be unhooked or damaged.
“Er1”The temperature measured by the on-board temperature
sensor of the main control board has exceeded maximum working
temperature (158°F)
“LOW PELLET” 1. Always ON: Low on pellets.
2. Flash once a second: Sensor maybe
unhooked or damaged.
3. OFF: Normal operation.
“IGNITOR ON” 1. Start up
2. The temperature is below 120*F in the
cooking chamber.
3. When falling the temperature is less than
15% of the set temperature.
10
LOW PELLET
IGNITOR ON
PROPER CARE & MAINTENANCE:
Remove wood pellets from hopper if grill will not be used for a long period of time. Wood
pellets can become soggy due to moisture/humidity and can cause the auger to bind up or not
push pellets to burn chamber.
Disposal of ashes – Ashes should be placed in a metal container with a tight- tting lid. The
closed container of ashes should be placed on a non-combustible  oor or on the ground, well
away from all combustible materials, pending  nal disposal. When the ashes are disposed by
burial in soil or otherwise locally dispersed, they should be retained in the closed container
until all cinders have thoroughly cooled.
It’s important to keep your grill always covered when not in use to avoid rain getting inside the grill
and damaging the grill and/or cause excessive corrosion. The grill and pellets must be kept dry in
order to function properly.
Wash cooking grates and heat distribution plate with hot, soapy water, rinse well and dry. Lightly
coat cooking grill with vegetable oil or vegetable oil spray.
Clean inside and outside of grill by wiping off with a damp cloth. Apply a light coat of vegetable
oil or vegetable oil spray to the interior surface to prevent rusting.
Never apply paint to the interior surface. Rust spots on the interior surface can be buffed, cleaned,
the lightly coated with vegetable oil or vegetable oil spray to minimize rusting.
Depending on use, periodically remove the cooking grates, grease tray and heat distribution plate
to clean the ash from in and around the  re pot. Make sure the grill is cold before starting this
procedure.
HELPFUL HINTS:
If you pre-cook meat or poultry, do so immediately before grilling.
Never defrost meat at room temperature or on a counter top.
Refrigerate leftovers within 2 hours of taking food off the grill.
For additional information, please phone the USDAs toll free Meat & Poultry Hotline at 800-535-
4555.
CLEANING AND MAINTENANCE:
Keep the appliance free and clear of combustible materials, gasoline and other  ammable vapors
and liquids.
For safe grilling and peak performance of your grill, perform these checks at least twice per
year or after extended periods of storage.
Be sure to tighten up all hardware (nuts, bolts, screws, etc.) at least twice per year.
CAUTION: Some parts may contain sharp edges. Wear protective gloves if necessary.
Remove the cooking grates, from inside your grill. Use a brush with hot water and detergent to
remove excess residue. NEVER use a commercial oven cleaner. Rinse completely with water.
Towel dry and replace all components as described in the assembly instructions.
11
12
BEFORE STORING YOUR GRILL:
Clean all surfaces.
If storing the grill outdoors, close the wood pellet lid and cover the grill with a cover for
protection from the weather.
If the grill is stored outside during the rainy season, care should be taken to ensure that water does
not get into the pellet hopper. Wood pellets, when wet, expand greatly and will jam your auger.
Never move a grill when it is hot or when objects are on the cooking surfaces.
Never store  ammable liquids or spray canisters under or near the grill.
DO NOT extinguish grease  res using water.
WARNING
TRANSPORTING AND STORAGE:
GRILL COOKING TIPS:
CLEANLINESS:
Always wash hands thoroughly with soap and hot water prior to handling food and after handling raw
meat, uncooked poultry or seafood.
When using a platter to carry raw meat, uncooked poultry or seafood to the grill, make sure to wash
the platter thoroughly with soap and hot water before placing cooked foods back on the platter or use
different platters for raw and cooked foods.
Never use the same utensils when handling raw meat, uncooked poultry or seafood unless you wash
the utensils thoroughly with soap and hot water.
Never re-use marinade from raw meat or uncooked poultry on foods that have been cooked and are
ready to be served.
GRILLING TO PROPER TEMPERATURE:
Use a meat thermometer to be sure food has reached a safe internal temperature.
The US Department of Agriculture recommends the minimum temperature be reached for the
following food items:
Chops . . . . . . . . . . . . . . . . . . . . . 145 degrees F (62.8° C)
Ground Meat . . . . . . . . . . . . . . . 160 degrees F (71° C)
Pork . . . . . . . . . . . . . . . . . . . . . . 145 degrees F (62.8° C)
Poultry . . . . . . . . . . . . . . . . . . . . 165 degrees F (73.9° C)
Roasts . . . . . . . . . . . . . . . . . . . . 145 degrees F (62.8° C)
Seafood . . . . . . . . . . . . . . . . . . . 145 degrees F (62.8° C)
Vegetables . . . . . . . . . . . . . . . . . 145 degrees F (62.8° C)
13
TROUBLE SHOOTING:
PROBLEM CAUSE CORRECTION
LCD screen will not
light up
Grill is
not getting
hot enough
Pellets will not light
Grill is getting too
hot
Temperature
uctuations
1. Grill is not plugged in.
2. The fuse is blown.
3. Check that the GFI outlet has not been
tripped.
4. Control knob is in the “OFF” position.
1. Make sure the grill is plugged into a working
power source. Check and make sure wire
connections are properly connected.
2. Check the fuse and see if it has blown and
needs to be replaced. Use 5 Amp Fuse.
3. Reset GFI outlet.
4. Control knob is still in the “OFF” position.
Turn the control knob to 200° F to start-up
the grill. The LCD screen should turn on.
1. Adjust temperature control knob on
temperature
controller.
2. Avoid the temptation to check food too
often.
3. Verify that there are pellets in pellet
hopper.
4. Fire goes out at lower setting.
1. Turn up heat on the control knob.
2. Opening the door allows heat to escape
and causes the temperature to vary
drastically from the set temperature.
3. Add pellets and allow sufficient time for the
pellets to travel from the pellet hopper to
the  re pot (can take up to 5 minutes).
4. Excess ash. Remove all unburned pellets
and ash from the  re pot using the ash
clean-out.
CAUTION! ASSURE THAT THE GRILL
IS COLD TO AVOID A FIRE FROM HOT
ASH.
1. Auger not primed.
2. Auger is jammed.
3. Ignitor has failed.
1. This is normal due to the air pressure
inside the grill. The amount of smoke can
vary depending on cooking conditions.
2. Unplugged grill too soon.
1. Temperature  uctuations are normal for pellet grills. Any signi cant  uctuations can be caused
by wind, air temperature, improper use, or lack of grill maintenance.
1. Before the unit is used for the  rst time
or anytime the hopper is emptied, allow
the auger tube to fully load with pellets to
ensure proper lighting of the grill. Follow
Initial Lighting Instructions.
2. Remove all components inside the  rebox.
Turn the grill to 200* F and inspect the
auger.
3. Ignitor needs to be replaced. Contact our
Customer Service dept. for a replacement
part. Follow Manual Start-Up Procedure
to continue use of the grill.
1. This condition will not affect cooking.
2. Once the grill is turned off the fan will
continue to run for 12 minutes. If you do
not allow the grill to go through the cool
down process it can cause  re to transfer
to the auger tube.
Smoke comes out
of pellet hopper
1. Adjust temperature control 1. Reduce heat by reducing the selected
temperature setting.
For more information, please visit us at www.cuisinart.com
14
THERMOCOUPLE
POWER CORD
BLACK WHITE
DC 12V3A Power
Supply and Control
Wire
WHITE
WHITE
WHITEORANGE
RED
PURPLE
IGNITOR
FIRE POT
AUGER
MOTOR
BLOWER FAN
FUSE HOLER
POWER SUPPLY
5 Amp Fuse
WIRING DIAGRAM:
WHITE
BLUE
GRAY
GREEN
YELLOW
BLACK
WHITE
BLUE
GRAY
GREEN
YELLOW
BLACK
RED
YELLOW
BLACK
Power adapter mounted inside AUGER box
PELLET SENSOR
POWER SUPPLY
DISPLAY PANEL
IC: 25523-0356
FCC ID: 2AURUJINHENG
The device complies with part 15 of the FCC Rules.
Operation is subject to the following two conditions:
(1) This device may not cause harmful interference, and
(2) this device must accept any interference received, including interference that may
cause any undesired operation.
FCC Warning
Warning: Changes or modi cations to this smoker not expressly approved by the party responsible for
compliance could void the users authority to operate the equipment.
FCC Statement
This equipment has been tested and found to comply with the limits for a Class B digital device, pursuant
to Part 15 of the FCC Rules. These limits are designed to provide reasonable protection against harmful
interference in a residential installation. This equipment generates, uses and can radiate radio frequency
energy and, if not installed and used in accordance with the instructions, may cause harmful interference
to radio communications.
However, there is no guarantee that interference will not occur in a particular installation. If this equipment
does cause harmful interference to radio or television reception, which can be determined by turning the
equipment off and on, the user is encouraged to try to correct the interference by one of the following
measures:
1. Reorient or relocate the receiving antenna.
2. Increase the separation between the equipment and receiver.
3. Connect the equipment into an outlet on a circuit different from that to which the receiver is connected.
4. Consult the dealer or an experienced radio/TV technician for help.
The Bluetooth word mark and logos are registered trademarks owned by Bluetooth SIG, Inc. and any use of
such marks by the Jordan Kahn Co., Inc. is under license. Other trademarks and trade names are those of
their respective owners.
OM0036AS/ASO
1019
©2019 The Boltz Group LLC
Carrollton, Texas 75006 U.S.A.
Owner’s Manual for Models
SMK0036AS / SMK0036ASO
WARRANTY
PROOF OF PURCHASE is required to access this warranty program, which is in eff ect from the date of purchase.
Customers will be subject to parts, shipping, and handling fees if unable to provide proof of the purchase or after
the warranty has expired.
If you have any questions or problems, you can call our customer service department at 1-866-212-3150 from
9:00am to 5:00pm Eastern time, Monday through Friday for assistance.
This limited warranty applies to the functionality of the product ONLY and does not cover cosmetic issues such as
scratches, dents, corrosion or discoloring by heat, abrasive and chemical cleaners or any tools used in the assembly
or installation of the appliance, surface rust, or the discoloration of stainless steel surfaces. Paint is not warranted
and will require touch up. RUST is not considered a manufacturing or materials defect.
This limited warranty will not reimburse you for the cost of any inconvenience, food, personal injury or property
damage.
LIMITED WARRANTY
All parts warrantied 3-years from date of purchase.
WARRANTY PROVISIONS
This warranty is non-transferable and does not cover failures due to misuse of improper installation or
maintenance.
This warranty is for replacement of defective parts only, We are not responsible for incidental or consequential
damages or labor costs.
This warranty does not cover corrosion or discoloration after the grill is used, or lack of maintenance, hostile
environments, accidents, alterations, abuse or neglect.
This warranty does not cover damage caused by heat, abrasive and chemical cleaners, or any damage to other
components used in the installation or operation of the gas grill.
Paint is not warranted and may require touch-up. Items considered to be consumable such as batteries are not
covered under this warranty.
DISCLAIMER OF IMPLIED WARRANTIES; LIMITATION OF REMEDIES
Repair of replacement of defective parts is your exclusive remedy under the terms of this limited warranty.
Manufacturer will not be responsible for any consequential or incidental damages caused by weather. This
limited warranty or any applicable implied warranty, or for failure of damage resulting from acts of God, improper
care and maintenance, grease fi re, accident, alteration, replacement of parts by anyone other than manufacturer,
misuse, transportation, commercial use, hostile environments (inclement weather, act of nature, animal tampering),
improper installation not in accordance with local codes or printed manufacturer instructions.
For replacement parts, call our customer service department at 1-866-212-3150 from 9:00am to 5:00pm Eastern
time, Monday through Friday for assistance.
  • Page 1 1
  • Page 2 2
  • Page 3 3
  • Page 4 4
  • Page 5 5
  • Page 6 6
  • Page 7 7
  • Page 8 8
  • Page 9 9
  • Page 10 10
  • Page 11 11
  • Page 12 12
  • Page 13 13
  • Page 14 14
  • Page 15 15
  • Page 16 16
  • Page 17 17

Cuisinart SMK0036AS User manual

Category
Barbecues & grills
Type
User manual

Ask a question and I''ll find the answer in the document

Finding information in a document is now easier with AI