Page is loading ...

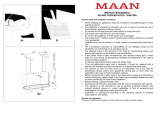
TECHNICAL PASSPORT
TECHNISCHER PASS
ПАСПОРТ ТЕХНИЧЕСКОГО ИЗДЕЛИЯ
COOKER HOODS
DUNSTABZUGSHAUBE
КУХОННАЯ ВЫТЯЖКА
SLIMLUX IV

16
TECHNICAL PASSPORT ENGLISH
Сooker hood
CONTENT
1. GENERAL INFORMATION .......................................................................................... 17
2. MAIN TECHNICAL SPECIFICATIONS .................................................................. 19
3. PARTS SUPPLIED ...........................................................................................................20
4. SAFETY REQUIREMENTS ..........................................................................................21
5. EXTRACTOR HOOD DESCRIPTION ......................................................................21
6. EXTRACTOR HOOD NSTALLATION INSTRUCTIONS ................................. 23
7. INSTRUCTIONS FOR USE OF THE COOKER HOOD ....................................23
8. INSTRUCTIONS TO CARE THE COOKER HOOD ...........................................24

17
ENGLISH TECHNICAL PASSPORT
Сooker hood
Dear customer!!
Thank you for choosing the products
of the brand «KUPPERSBERG». We put
with your choice.
1. GENERAL
INFORMATION
1.1 Prior to installing the
extractor hood carefully read our
recommendations, following which
will provide safe work of the appliance.
Save this User’s manual, as it contains
answers to the questions which may
arise later.
ATTENTION!
Before starting the operation
(switching on) the appliance must be
held at the room temperature for at
least two hours.
1.2 This appliance is intended
for extraction of polluted air from the
space above the cooking appliance,
and intended for domestic use and the
household environment only and meets
the requirements of State EN 603352-
2:2010/А11:2012.
ATTENTION!
Use of the appliance in goals other
than domestic is forbidden. The risk of
injury and property damage increases in
case of use of the extractor hood with
purposes other than intended,
What will lead to warranty
cancellation.
1.3 Use of the extractor hood
decreases the content of harmful
products of incomplete combustion of
natural gas, as well as odors produced
during cooking in the air, and prevents
pollution of walls, ceiling, and furniture
with grease and soot.
1.4 The appliance is an air
purifying device of the exhaust type
with a diameter fan (turbine), completed
with a grease picking aluminum is
manufactured from sheets of carbon
steel with a decorative protective
coating of powder paints – 500/600 mm
in width.
1.5 Depending on the installation
scheme over the cooker, the extractor
hood can work in two variants:
- in the mode of air extraction into the
stationary ventilation shaft (chimney) of
the kitchen using corrugated aluminum
or plastic air-ducts Ø150mm or
Ø120mm (see item 5.3);
- in the recirculation mode (closed
circular air circulation in the kitchen),
when the extractor hood is not
connected to chimney, and the air is
and is returned to the kitchen (see
paragraph 5.3).
1.6. ATTENTION! Do not start
extractor hood installation before
connecting it to electricity network and
checking its technical serviceability, and
checking all of its functions.
1.7. We recommend that all
installation works, connection, and
repair of your extractor hood should
professionally engaged in the execution
of such works.
1.8. The manufacturer does not
bear responsibility for any damages and

18
TECHNICAL PASSPORT ENGLISH
Сooker hood
failures, caused by incorrect installation,
operation, and repair of the extractor
hood.
1.9. The manufacturer reserves the
right to modify the product in order to
improve its quality and technical
1.10. the extractor hood are
indicated in this manual and on the
label attached to the inner surface of
the body (access to it
ATTENTION!
The extractor hood should be
installed on the wall at the distance of
650-750mm above the electric cooker
and at the distance 750-850 mm above
the gas cooker.

19
ENGLISH TECHNICAL PASSPORT
Сooker hood
2. MAIN TECHNICAL SPECIFICATIONS
MODEL OF KITCHEN EXTRACTOR
HOOD
SLIMLUX IV 50 / 60
Network voltage, V
220-230
AC frequency, Hz
50
Control type
Mechanical
Number of operation modes
3
Rated power consumption,
W
Of the motor 120
Lighting (LED) 2x3
Общая 126
Productivity while connecting to
standard ventilation system m3/hour
550
Overall dimensions of
the extractor hood, mm
Width 500 / 600
Depth 300
Height 178
Connection size of ventilation duct,
mm
Ø150 / Ø120
Weight (net), kg
6,1 (500mm) / 6,3 (600mm)
Noise level, dB
60,9 (500mm) / 61,8 (600mm)
Protection class
I
Operation mode
S1 (long-lasting)
Electro cable type
Armoured and grounded
Accessories (optional)
Charcoal lter KFM1

20
TECHNICAL PASSPORT ENGLISH
Сooker hood
3. PARTS SUPPLIED
ITEM QUANTITY
Kitchen extractor hood
1 pcs.
Plastic pipe adapter (from Ø150 to Ø120mm)
1 pcs.
Metric screw М5х35
4 pcs.
2 pcs.
User’s manual
1 pcs.

21
ENGLISH TECHNICAL PASSPORT
Сooker hood
4. SAFETY
REQUIREMENTS
ATTENTION!
It is forbidden to connect the
extractor hood
To the network of the electric cooker.
Protect electric cord from mechanical
and thermal damage.
4.1. While installing, the operation
of conducting technical services, it is
strictly forbidden to:
• connect the extractor hood to the
electricity network with a voltage and
frequency that does not correspond to
use lighting lamps with a power output
of more than 3 Watts (LED);
• carry out maintenance, replace
hood without removing the plug from
the mains socket;
• operate the extractor hood with
or heating elements; Heating elements
should be always covered with dishes;
• prepare food with use of alcohol;
• leave the fryer unattended;
• operate the extractor hood with
connect the extractor hood to the
electric network of the cooker, cut
the socket of the electric cord while
installing.
ATTENTION!
It is forbidden to use gas (electric)
cooker if the extractor hood is turned
off.
4.2. In order to avoid damage by
electric current, the extractor hood must
be plugged into a grounded outlet.
4.3. The extractor hood connected
to the separate ventilation shaft. It is
forbidden to connect other appliances
to the same ventilation shaft.
4.4. Using the extractor hood
together with other heating appliances
(gas, oil, ovens, etc.), besides electric, it
is necessary to provide the premises, it
which the extractor hood is installed
(for example to open the window).
4.5. For air extraction to the
chimney use air duct Ø150 / 120mm. A
smaller diameter will create additional
air resistance, which will increase
noise and vibration, as well as motor
overheating.
4.6. Provide timely cleaning of non-
disposable aluminum removal
4.7. It is forbidden to turn on the
extractor hood in case of ignition with
the purpose of reduction of smoke until
4.8. In case of ignition under the
cloth, disconnect the extractor from
the electric network, do not use water to
electrical appliances are located.
4.9. Protect the cord for connection
to the electric network from the
mechanic and thermal damages.
5. EXTRACTOR HOOD
DESCRIPTION
Ventilation kitchen cooker hood
«SLIMLUX IV» is an air-purifying device
of exhaust type with a fan (turbine) and
is equipped with aluminium grease a
single-motor performance with a width
of 500/600 mm from carbon steel sheet,
followed by decorative-protective
coating with powder paints.

22
TECHNICAL PASSPORT ENGLISH
Сooker hood
5.2 The cooker hood refers to the
type of “built-in pull-out” hoods and
is built into the furniture sets of the
kitchen above the stove.
5.3 Depending on the installation
scheme over the cooker, the extractor
hood can work in two variants (see item
1.5):
- in the mode of air extraction into
the chimney of the kitchen (Fig. 1).
- in the recirculation mode (Fig. 2)
(closed circular air circulation in the
kitchen).
“It is necessary to consider, that
when the extractor hood is on, the
pressure is automatically lowered in the
Distance H:
• • To electric cooker 65-75cmTo electric cooker 65-75cm
• • To gas cooker 75-85cmTo gas cooker 75-85cm
Fig. 1 Fig. 2
enclosed room, and should be balanced
with an by opening doors and windows
or with ventilation”.
5.4 The cooker hood consists of the
following parts (Fig. 3 / 3.1):
1 – body of a cooker hood
2 – turbofan outlet (Ø150 mm).
3 – electric cord with ground
(protection class - I) 4 – light and
mode switches
5 – pull-out panel
6 – a pad pull-out panel
7 – aluminium lter (500/600 mm -
1 pcs.)
8 – aluminium lter (500/600 mm -
1 pcs.)
9 – lighting lamps (LED).
Fig. 3
Fig. 3.1

23
ENGLISH TECHNICAL PASSPORT
Сooker hood
6. EXTRACTOR
HOOD NSTALLATION
INSTRUCTIONS
6.1 This model of the cooker hood
is installed (mounted) on the bottom of
the kitchen closet.
6.2 Remove a cooker hood from the
packing box.
6.3 Check the work of the cooker
hood, connect to the electric mains and
check all its functions.
We remind that the height of
installation of a cooker hood over the
electric cookers should be at least
650mm, and above the gas one – not
less than 750mm (Fig. 1).
6.4 For mounting, an opening for
air outlet and exhaust pipe connection
must be installed and equipped.
6.5 To install the cooker hood in
the kitchen closet, make 4 holes of 6-7
mm in diameter in the lower shelf the
cooker hood with 4 screws M5х3
(Fig. 4.1).
6.6 Connect the bubbler to the
turbine outlet (with pipe adapter of
bubbler Ø150x120mm). Remove the
other end of the bubbler into the
ventilation shaft (Fig. 4 / 4.1).
6.7 If the cooker hood is to operate
in air
exhaust mode, mount the bubbler
of the selected diameter in accordance
with the instructions, ensuring that it is
tight.
6.8 If the cooker hood will work in
the recirculation mode, then the bubbler
is not required. It is to be installed
separately).
6.9 Check the reliability of the cooker
hood mounting, feed and connect the
cord to the mains through socket.
In order to provide additional in the
network, it is recommended to connect
the extractor hood via an additional
automatic circuit breaker 6A.
Fig.4
Fig.4.1

24
TECHNICAL PASSPORT ENGLISH
Сooker hood
7. INSTRUCTIONS FOR
USE OF THE COOKER
HOOD
7.1. The cooker hood with mecha-
nical switch has 3 speeds of ventilation.
Depending on the amount of
evaporation during cooking, you can
choose a low, medium or high of
ventilation level.
7.2 Before cooking, turn on the
hood in the required operating mode.
It is recommended to continue work of
the cooker hood for 3-5 minutes after
cooking, thus the air in the kitchen
will be cleared from the residue of the
vapours.
7.3. On the sides of the body there
is a key switch for operating modes of
the engine and switching the lighting
lamps (Fig. 5).
I speed (low speed) – press the
switch to position “I”
II speed (average speed) – press
the switch “TURBO” to position “II”
III speed (high speed) – press the
switch “TURBO” to position “I” (on the
speed I and II switch “TURBO” should
remain in the position 0) 0 – fan is off).
Fig. 5
The key switch with the symbol of
the light bulb, intended to turn on the
lamp at insufcient illumination of the
working area of the cooker, is located on
the left side of body of the cooker hood.
0 – light is off;
II – light is on independently of the
position of the pull-out panel with the
lter;
I – light is on when the panel pulled-
out.
8. INSTRUCTIONS TO
CARE THE COOKER
HOOD
ATTENTION!
BEFORE CLEANING THE COOKER
HOOD, DISCONNECT IT FROM THE
ELECTRIC MAINS.
8.1 For external cleaning of
stainless steel cooker hoods, use
special means in accordance with the
relevant instructions.
8.2 Never use abrasive detergents
and means that contain soda, acid,
chlorides or solvents, coarse sponges to
clean the cooker hoods.
8.3 By washing avoid moisture
entering the current-carrying parts of
the cooker hood, and especially into the
electronic control unit; after washing,
wipe the surface with a soft cloth.
8.4 For cleaning glass surfaces,
conventional glass cleaning means are
suitable.

25
ENGLISH TECHNICAL PASSPORT
Сooker hood
8.5. The aluminium lter, holding oil
and dust from the air, is clogged and
should be washed after being soaked
in hot water with an effective detergent
once every 1.5 to 2 months. Changing
the control of the lter after washing
does not affect the quality of its work.
8.6. To remove the aluminium
lter (Fig. 6), press the spring lock of
the aluminium lter 1 and remove it.
Extract the pull-out panel with lter
2 and remove the aluminium lter 3.
The lter installation is performed in
reverse order. Do not install the lter
after washing until it is completely dry.
8.7 To replace the lamp, it is
necessary to remove aluminium lter
1, pull out the panel with the lter 2,
pull the holder of the bulb socket, so
that the lamp 3 came out of the body
of cooker hood, holding the bulb socket,
lightly press the lamp in the direction
of the bulb socket and, turning it
counterclockwise, take out from the
Fig. 6
Replacement of the lighting lamp.
Fig. 7
Aluminium lter removing
body of the cooker hood (Fig. 7). Insted?
it is necessary to install a new one with
the same characteristics and install an
aluminium lter 1.

27
ENGLISH TECHNICAL PASSPORT
Сooker hood
Manufacturers:
CIARKO Spółka z ograniczoną odpowiedzialnością Sp.K.
38-500 Sanok, ul.Okulickiego 10, Polska
Importers:
LLC «MG Rusland», 141400
Moscow region, Khimki, Butakovo, 4
The manufacturer reserves the right to make any changes to design, outside
appearance and scope of supply of appliance.
/