Overview
SquareFold Trimmer User Guide8
1.
2.
Trimmer setting
Tip: Booklets exiting/leaving the SquareFold Trimmer
Module may contain trim remnants/scraps from the
previously trimmed booklet. This is due to static electricity
build-up and is normal. If booklets contain trim
remnants/scraps, simply remove and discard them.
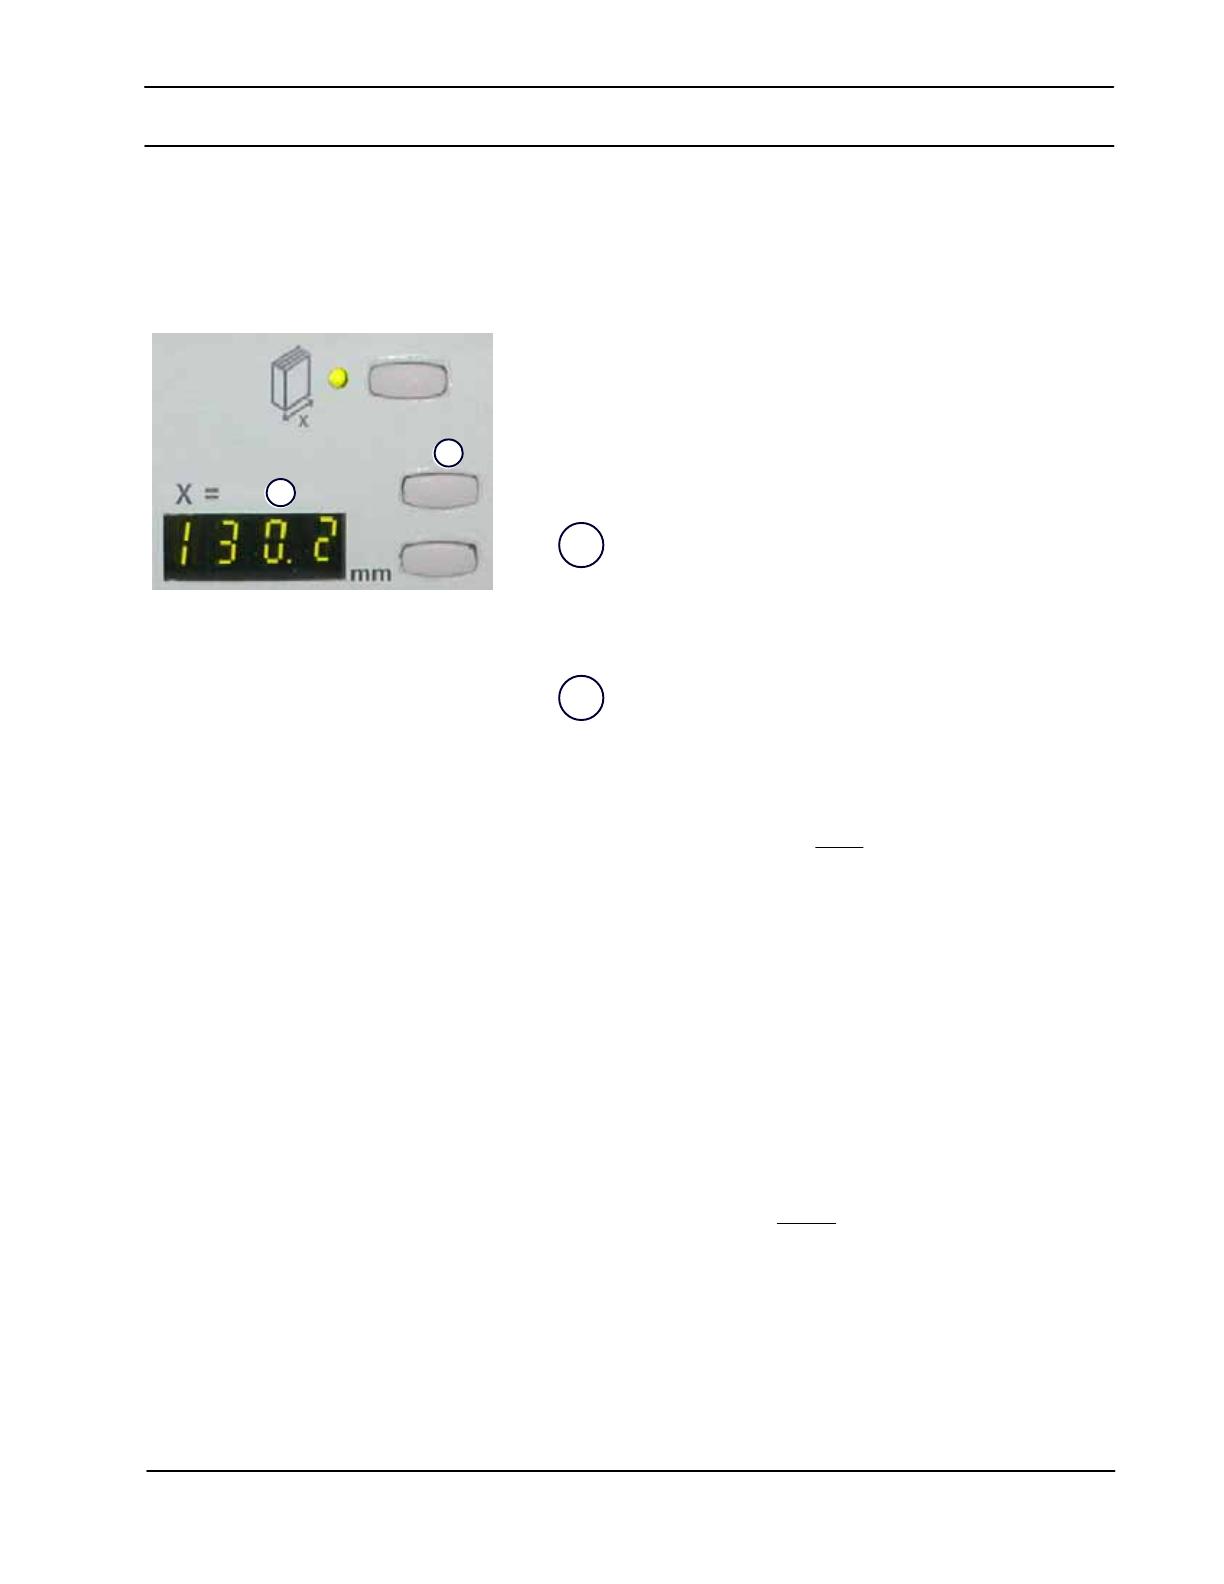
Trimmer Mode Settings
2.
1.
Trimmer setting up/down buttons
Note: Trim settings cannot be adjusted to remove less than
2 mm (0.078 in.) or more than 20 mm (0.787 in.) of edge
material from the booklet. Adjustments less than 2 mm
(0.078 in.) may produce poor trim quality, and adjustments
greater 20 mm (0.078 in.) will result in no trimming to the
booklet edge.
The trimmer setting is based on:
Note: Trim settings are always entered using millimeters
(mm).
Important!:You may have to experiment with various
settings in order to determine the best settings for your
particular job. Also, you may want to run one or more test
prints/copies before running larger jobs in order to ensure the
best possible booklet output.
Adjustments can be made in 0.1 mm increments by pressing
the up/down buttons on the Control Panel.
The Trimmer Mode Settings are found on the SquareFold
Trimmer Module control panel. The settings can be switched
on or off based on user preference. When the settings are
switched on, you can enter a desired setting by pressing the
up/down buttons.
The number of sheets in the finished booklet,•
The finished booklet• width
size (such as 8.5 in./210 mm
or 5.5 in/149 mm),
The media type (coated/uncoated, glossy, etc.), and•
The media weight•


