Page is loading ...

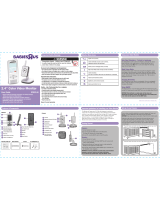
USER’S GUIDE
Model: SCOUT1500
DIGITAL VIDEO PET MONITOR with
INDOOR & OUTDOOR PET UNITS
USER’S GUIDE
The features described in this User's Guide are
subject to modifications without prior notice.

This User's Guide provides you with all the information you need to get
the most out of your product.
Before you can use your new Digital Video Pet Monitor, we recommend
that you fully charge the battery of the digital video pet monitor by
inserting it in the owner unit. This will allow it to continue to work even if
you disconnect it from the power supply to carry it to another location.
Please read the Safety Instructions on page 7 before installation.
Got everything?
• 1 x Owner Unit
•
1 x Indoor Pet Unit
•
1 x Outdoor Pet Unit
•
1 x Rechargeable Ni-MH Battery Pack for the Owner Unit
•
1 x Power adapter for the Owner Unit
•
1 x Power adapter for the Indoor Pet Unit
•
1 x Power adapter with connector for the Outdoor Pet Unit
•
4 x Mounting Screws and Dry Wall Plugs
•
1 x Tamper-proof Screw
• 1 x Metal Bracket
•
1 x Wrench Key
In multi-camera packs, you will find one or more additional pet units with
power adapter units.
Welcome...
to your new Motorola Digital Video Pet
Monitor with Indoor & Outdoor Pet Units!
Thank you for purchasing your new Digital Video Pet Monitor with
Indoor and Outdoor pet units. If you have always wondered what your
pet is up to when you are away, wonder no more. Now you can monitor
your pet's activities from another room. With the outdoor pet unit, you
can also see what your pet(s) is doing in the backyard.
Please retain your original dated sales receipt for your records. For
warranty service of your Motorola product, you will need to provide a
copy of your dated sales receipt to confirm warranty status. Registration
is not required for warranty coverage.
For product related questions, please call:
US and Canada 1-888-331-3383
On the Web: www.motorola.com

1. Display (LCD screen)
2. Up Key
+
Normal Mode: Tilt Up
Menu Mode: Up
3. Down Key
-
Normal Mode: Tilt Down
Menu Mode: Down
4. Left Key
<
Normal Mode: Pan Left
Menu Mode: Left
5. Right Key
>
Normal Mode: Pan Right
Menu Mode: Right
6. Menu Key
M
Press to open the Menu
options
7. OK Key
O
8. Quick Scan key >>
Press to double the video pan
and tilt
sp
eed.
Pre
ss again to return to normal
speed.
9. Talk Key
T
Press and hold to talk to
your pet
10. P
ower Adapter / Battery
LED
BLUE w
hen power on.
RED when battery low.
11. Unit ON/OFF LED (Green)
12. Audio Leve
l LED (Green,
Or
ange, Red, Red)
13. Microphone
14. Power / Video ON-OFF ke
y
VP
Press and Hold to turn the unit
ON/OF
F
Press once to turn
ON and
OFF
the LCD display
15. Antenna
Lift the antenna for op
timal
reception
16. Batter
y cover
17. Stand
18. Speaker
19. USB connector
Connection to AV output
* A
V Cabl
e (Optional
accessor
y,
purchased
separ
ately)
20. Powe
r Adapter Connector
Overview of the Owner Unit

1. Photo Sensor (Night Vision
Mode)
2. Camera Lens
3. Infared LEDs
4. Power LED
5. Microphone
6. Speaker
7. ON/OFF Switch
8. Power Adapter Connector
9. Antenna
10. Temperature Sensor
11. Pair Key
Owner unit menu icons
Overview of Indoor Pet Unit
1
Signal Level (5 Levels)
No RF Signal
Night Vision Mode (Screen changes to Black/White)
T
Talk Mode (for Indoor Pet Unit only)
Battery Level Control (4 Levels)
Pan Left
Pan Right
Tilt Up
Tilt Down
Pan/Tilt at normal speed
Pan/Tilt at double speed
Volume Level Control (8 Levels)
Brightness Level Control (8 Levels)
Soothing Pet Music Control (5 Song Selection)
Z
Zoom Level Control (1X, 2X)
Alarm Setting (6h, 4h, 2h, OFF)
Cam Control (scan, view, add, del)
Temperature Reading (HH °C / °F or LL °C / °F)
Icon & reading turn RED > 29°C / 84°F, and reading
displays > HH °C / °F (if > 36°C / 97°F)
Icon & reading turn RED < 14°C / 57°F, and reading
displays > LL °C / °F (if < 1°C / 34°F)
(For Indoor Pet Unit only)

Important guidelines for installing your digital video pet
monitor
• To use your Pet Units and Owner Unit together, you must be able to
establish a radio link between them, and the range will be affected
by environmental conditions.
•
Any large metal object, like a refrigerator, a mirror, a filing
cabinet,
met
allic doors or reinforced concrete between the Camera and
Owner Unit may block the radio signal.
•
The signal strength may also be reduced by other solid structures
,
lik
e walls, or by radio or electrical equipment, such as TVs,
computers, cordless or mobile phones, fluorescent lights or dimmer
switches.
•
Use of other 2.4GHz products, such as wireless networks (Wi-Fi
®
routers), B
luetooth
®
systems, or microwave ovens, may cause
interference with this product, so keep the monitor at least 5ft
(1.5m) away from these products, or turn them off if they appear to
be causing interference.
•
If the signal is weak, try moving the Monitor and/or the Pet Units to
different positions in the rooms or outdoor area.
Overview of Outdoor Pet Unit
1. Camera Lens
2. Infared LEDs
3. Pair Key
4. Antenna

6 Table of contents
Table of contents
1. Safety Instructions .........................................................................7
2. Getting Started..............................................................................12
2.1 Indoor Pet Unit Power Supply ......................................................12
2.2 Owner Unit Battery Installation.....................................................12
2.3 Owner Unit Power Supply ............................................................13
2.4 Outdoor Pet Unit Installation ........................................................14
2.4.1 Mounting the Outdoor Pet Unit ......................................15
2.5 Registration (Pairing)....................................................................17
2.6 View Video Through TV ...............................................................17
3. Using the Digital Video Pet Monitor............................................18
3.1 Setting up .....................................................................................18
3.2 Pan and Tilt ..................................................................................18
3.3 Night Vision Mode ........................................................................18
3.4 Talk Mode (Not applicable for Outdoor Pet Unit) .........................18
3.5 Video ON/OFF..............................................................................19
3.6 Temperature Display (HH °C / °F or LL °C / °F)
(Not applicable for Outdoor Pet Unit) ...........................................19
4. Owner Unit Menu Options............................................................20
4.1 Volume (Not applicable for Outdoor Pet Unit) ..............................20
4.2 Brightness ....................................................................................20
4.3 Soothing Pet Music (Not applicable for Outdoor Pet Unit) ...........20
4.4 Zoom ............................................................................................20
4.5 Alarm ............................................................................................21
4.6 Camera Control ............................................................................21
4.6.1 Add (pair) a camera .......................................................21
4.6.2 View a camera ...............................................................21
4.6.3 Delete a camera ............................................................22
4.6.4 Scan camera ..................................................................22
4.7 Temperature (Not applicable for Outdoor Pet Unit)......................22
5. Disposal of The Device (environment) .......................................23
6. Cleaning.........................................................................................24
7. Help ................................................................................................25
8. General Information......................................................................27

Safety Instructions 7
ENGLISH
1. Safety Instructions
This symbol indicates that dangerous voltage constituting a risk
of electric shock is present within this unit.
This symbol indicates that there are important operating and
maintenance (servicing) instructions in the literature
accompanying the unit.
WARNING: VOLTAGES IN THIS UNIT ARE HAZARDOUS TO LIFE.
DO NOT REMOVE COVERS. THERE ARE NO USER SERVICEABLE
PARTS INSIDE.
CAUTION: TO PREVENT ELECTRIC SHOCK, MATCH THE WIDE
BLADE OF THE PLUG TO THE WIDE SLOT
WARNING:
STRANGULATION HAZARD - In case this unit is being used to
monitor infants or children, keep the unit and adapter cord more
than 3 feet from the crib and out of their reach. Never place
camera or cords within a crib or near a bed. Secure the cord away
from children's reach. Never use extension cords with AC
Adapters. Only use the AC Adapters provided.
As with any electrical device, supervision of your pet's usage
should be exercised until your pet is acclimated to the product.
If your pet is prone to chewing, we strongly recommend you keep
this and all other electrical devices out of its reach.
CAMERA SET UP & USE:
● Determine a location for the CAMERA that will provide the best
view of
your pet in its area of activity.
● Place the CAMERA on a flat surface, such as a dresser,
desk or
she
lf.

8 Safety Instructions
WARNING
This digital video pet monitor is compliant with all relevant standards
regarding electromagnetic fields and is, when handled as described in the
User's Guide, safe to use. Therefore, always read the instructions in this
User's Guide carefully before using the device.
•
Adult assembly is required. Keep small parts away
from children and
pet(s) w
hen assembling.
•
This product is not a toy. Do not allow children or pet(s) to play with it.
•
This digital video pet monitor is not a substitute for responsib
le
sup
ervision and interaction.
•
Keep this User's Guide for future reference.
• Do not place the Indoor Pet Unit or cables in the crib or within reach of
the pet (the unit should be at least 3 feet away).
•
Keep the cords out of reach of children and pet(s).
•
Do not cover the digital video pet monitor with a towel or blanket.
•
Never use extension cords with power adapters. Only use the powe
r
adapters provided.
•
Test this monitor and all its functions so that you are familiar wi
th it
pr
ior to actual use.
•
Do not use the digital video pet monitor near water.
•
Do not install the digital video pet monitor near a heat source.
• Only use the chargers and power adapters provided. Do not use other
chargers or power adapters as this may damage the de
vice and
batter
y pack.
•
Only insert a battery pack of the same type.
•
Do not touch the plug contacts with sharp or metal objects.
CAUTION
There is a risk of explosion if battery is replaced by an incorrect type.
Please dispose of used batteries according to the instructions.

Safety Instructions 9
ENGLISH
Important instructions:
• Read and Follow Instructions - Please read all the safety and
oper
ating instructions before operating the product. Follow
all
oper
ating instructions.
• Ret
ain Instructions - The safety and operating instructions should be
retained for future reference.
• Heed
Warnings - Comply with all warn
ings on the product and in the
oper
ating instructions.
• Po
larization - Do not defeat the safety purpose of the polariz
ed or
g
rounding-type plug. A polarized plug has two blades with one wi
der
than the
other. A grounding type plug has two bl
ades and a third
g
rounding prong. The wide blade or the third prong is provided fo
r
y
our safety. If the supplied plug does not fit into your out
let, consult an
electr
ician for replacement of the obsolete outlet.
• P
ower Sources - This product should be operated only from the type
of power source indicated on the marking label. If you are not sure
of
the type of po
wer supplied to your location, consult your camera
dealer or local power company. For products intended to opera
te from
batter
y power, or other sources, please refer to the oper
ating
i
nstructions
• Overload
ing - Do not overload wall outlets or extension cords as
this
can result in th
e risk of fire or electric shock. Overloaded AC outlets
,
e
xtension cords, frayed power cords, damaged or cracked wi
re
insulation, and brok
en plugs are dangerous. They ma
y result in a
shoc
k or fire hazard. Periodically examine the cord, a
nd if its
appear
ance indicates damage or deteriorated insulation, have
it
replaced by your service technician.
• P
ower-Cord Protection - Power supply cords should be ro
uted so
that the
y are not likely to be walked on or pinched by items
placed
upon or against
them. Pay particular attention to cords at plugs
,
con
venience receptacles, and the point where they exit from th
e
pro
duct.

10 Safety Instructions
• Surge Protectors - It is highly recommended that the camera
equipment be connected to a surge protector. Doing so will protect the
equipment from damage caused by power surges. Surge protecto
rs
sho
uld bear the UL listing mark or CSA certification mark.
• Unin
terruptible Power Supplies (UPS) - Because this prod
uct is
designed
for continuous, 24/7 operation, it is recommended that y
ou
con
nect the product to an uninterruptible power supply.
An
unin
terruptible power supply has an internal battery that will ke
ep the
product r
unning in the event of a power outage. Uninterruptible powe
r
sup
plies should bear the UL listing mark or CSA certification mark
.
CA
UTION: Maintain electrical safety. Power line operated equipmen
t
or accessor
ies connected to this product should bear the UL
listing
mar
k or CSA certification mark on the accessory itself and
should not
be modifie
d so as to defeat the safety features. This will help avoid any
potential hazard from electrical shock or fire. If in do
ubt, contact
qualified ser
vice personnel.
• V
entilation - Slots and openings on the case are provided fo
r
v
entilation to ensure reliable operation of the product and
to protect it
from o
verheating. These openings must not be blocked or cove
red.
The op
enings should never be blocked by placing the camera
equipment on a bed, sofa, rug, or other similar surface. This pr
oduct
sho
uld never be placed near or over a radiator or heat register
. This
product should not be placed in a b
uilt-in installati
on such as a
bookcase or r
ack unless proper ventilation is provided and the product
manufacturer's instructions have been followed.
• Attachments - Do not use attachments unless recommended by the
product man
ufacturer, as they may cause a hazard.
• W
ater and Moisture - Do not use receivers or video monitors nea
r
w
ater - for example, near a bath tub, sink or laundry tub, in a we
t
basement, near a s
wimming pool, etc.
• Heat
- The product should be located away from heat sources such as
radiators, heat registers, stoves, or other pr
oducts (including
amplifiers) that
produce heat.

Safety Instructions 11
ENGLISH
• Accessories - Do not place this camera equipment on an unstable
car
t, stand, tripod, or table. The camera equipment may fa
ll, causing
ser
ious damage to the product. Use this product only with a car
t,
stand, tr
ipod, bracket, or table recommended by the manufa
cturer or
sold w
ith the product. Any mounting of the
product should be
accordin
g to the manufacturer's instructions and use a moun
ting
accessor
y recommended by the manufacturer.
• C
amera Extension Cables - Check the rating of your extension cable
to verify its compliance prior to installation.
• Mounting - Th
e cameras provided with this system should
be
mounted
only as instructed in this guide or the instructions that ca
me
with y
our cameras, using the supplied mounting brackets.
•
Cam
era Installation - Cameras are not intended for submersion
in
w
ater. Not all cameras can be installed outdoors. Check your camera
environmental rating to confirm if they can be installed outdoors.
When installing cameras outdoors, installation in a sheltered ar
ea is
req
uired.

12 Getting Started
2. Getting Started
2.1 Indoor Pet Unit Power Supply
1. Connect the small plug of the power adapter to the Indoor Pet Unit
and the other end to the electrical outlet.
NOTE
Only use the enclosed power adapter (5.9V DC / 1000mA).
2. Slide the ON/OFF switch to the ON position. The power LED will
light up in green.
3. Slide the ON/OFF switch to the OFF position to turn the Indoor Pet
Unit off.
2.2 Owner Unit Battery Installation
1. Insert the wire tab of the rechargeable battery pack into the contact
slot as shown above and fit the battery pack into the compartment.
2. Replace the battery cover over the compartment and gently tighten
the screw in a clockwise direction using a small screw driver.
Black Red
small screw driver

Getting Started 13
ENGLISH
2.3 Owner Unit Power Supply
IMPORTANT
Installing the rechargeable battery pack and charging it fully before use is
recommended. This will allow the unit to operate on battery in the event
of a power failure.
1. Connect the small plug of the power adapter to the Owne
r unit and
th
e other end to the electrical outlet. Only use the enclosed powe
r
a
dapter (6V DC/500mA).
2. Press and hold the
P POWER ON/OFF button for 1 second to
tu
rn ON the Owner unit.
3. Once the Pet and Owner units are switched on, the display on
the
Owne
r unit will show the video captured by the Indoor Pet Unit.
4. If there is no connection or you are out of range, the video displa
y
will go off and
will be shown on the LCD display, and the unit will
b
eep every 5 seconds. Move the Owner unit closer to the Indoor Pe
t
U
nit until the link is re-established.
5. Press and hold the
P POWER ON/OFF button, until the progress
b
ar finishes scrolling, to turn OFF the Owner unit.
NOTE
The battery icon
0 turns RED to indicate that the battery is low, and it
gives a beep every 16 seconds. The battery needs to be recharged. The
battery pack takes about 16 hours to be fully charged.
When charging
1. During power OFF, when adapter is plugged in, an adap
ter logo will
d
isplay on screen and then a flashing battery logo will display fo
r
4
5 sec. The Blue LED at top left corner light up indi
cates that the
a
dapter is plugged in.

14 Getting Started
2. During power ON, when the adapter is plugged in, the battery icon
on screen's top right corner will show that the battery is charging.
The Blue LED at the top left corner lights up to indicate that the
adapter is plugged in.
2.4 Outdoor Pet Unit Installation
IMPORTANT
• This product is not intended for submersion in water. For outdoor use,
mount it in a sheltered place where it is not directly exposed to rain or
snow.
• Determine a location for the Pet Unit that will provide the best
• view of the surrounding environment and activities you wish to
monitor.
• Select a location for the camera that has an ambient temperature
between 14°F~122°F (-10°C~50°C).
• Avoid installing the camera where there are thick walls or obstructions
between the camera and the owner unit.
• Avoid installing in a location which requires the wireless signal to pass
through cement, concrete, and metal structures. This will reduce the
range of transmission.
• Carefully plan where and how the Pet Unit will be positioned and
where you will route the cable that connects the Pet Unit to the power
adapter.
• Aim the camera(s) to best optimize the viewing area: select a location
for the camera that provides a clear view of the area you want to
monitor, that is free from dust, and that is not in line-of-sight to a
strong light source or direct sunlight.
• Before starting permanent installation, verify the Pet Unit's
performance by observing the image on a monitor when the Pet Unit
is positioned in the same location/position where it will be permanently
installed.
• Avoid letting power cords rub against any sharp edges or lie across
any high traffic areas where people might trip over them.

Getting Started 15
ENGLISH
2.4.1 Mounting the Outdoor Pet Unit
The Pet Unit is built with durable aluminum, weather resistant housing*
so you can use it outdoors in almost any weather condition. Use the
provided wall mounting accessory pack (4 mounting screws and drywall
plugs, 1 tamper-proof screw, 1 metal bracket, 1 wrench key) and follow
the process below for installing the Outdoor Pet Unit.
*Not for use in direct exposure to water, rain or snow.
1. Mark the position of the screw holes on the wall.
2. Drill 4 holes and hammer the drywall plugs (included) into the ho
les
a
s needed.
3. Fasten the mounting plate on the wall with the 4 prov
ided Philips
h
ead screws.

16 Getting Started
4. Place the 4 mounting slots of the camera base on to the 4 catches
on th
e mounting plate. Make sure the Pet Unit sits firm
ly on the
moun
ting plate with the center holes of the 2 parts lined up.
5. Fasten the Pet Unit to the mounting plate at the ce
nter hole with the
tampe
r-proof screw with the wrench key provided.
6. Plug the Pet Unit's power adapter into the cord on the camera
and
then
plug the adapter into the electrical outlet.
NOTE
Only use the enclosed power adapter (5.9V DC / 1000mA).

Getting Started 17
ENGLISH
2.5 Registration (Pairing)
The Indoor and Outdoor Pet Units are pre-registered to your Owner Unit.
You do not need to register it again unless the Indoor Pet Unit loses its
link with the Owner Unit.
To re-register your Indoor Pet Unit, or register a new Indoor Pet Unit,
follow the procedure below:
1. Press the
M button of the Owner unit and the menu bar will pop up.
2. Press the
< LEFT button or > RIGHT button until is highlighted,
and the / / / menu will pop up.
3. Press the
+ UP button or - DOWN button to select , and press
the OK button to confirm.
4. 1 / 2 / 3 / 4 will pop up, press the
+ UP button or - DOWN
button to select the desired CAM and press the OK button to start
searching for a pet unit. The green audio level LED will flash rapidly
while searching.
5. Press the OK button to confirm.
6. Press and hold the PAIR button underneath the Indoor Pet Unit until
the Owner unit finds the camera, beeps and the video from the
camera appears.
NOTE
If a particular Indoor Pet Unit was registered previously, registering this
current Indoor Pet Unit again will overwrite the previous registration.
2.6 View Video Through TV
Connect a suitable AV cable into the AV OUT socket on the side of the
Owner Unit and into the AV input of the TV. Scroll through the AV inputs
on the TV menu until the Indoor Pet Unit picture is visible.
An AV cable is an optional accessory available for purchase separately.
NOTE
The Indoor Pet Unit's power button must be turned ON and CAM pre-
selected before connecting the AV cable. Once the AV cable is
connected, the Indoor Pet Unit's controls cannot be activated.

18 Using the Digital Video Pet Monitor
3. Using the Digital Video Pet Monitor
3.1 Setting up
• Place the Indoor Pet Unit in a convenient location (e.g. on a table) and
point the camera lens towards the area you want to monitor.
• Mount the Outdoor Pet Unit on the wall under the shelter (recommended)
and point the camera lens towards the area you want to monitor.
• Adjust the Indoor Pet Unit's head angle by rotating the camera up, down,
left and right until you are satisfied with the image in the Owner unit.
NOTE
Do not place the Indoor Pet Unit within reach of a child or pet(s)! If there
is interference with the picture or sound, try moving the units to different
locations, and ensure they are not close to other electrical equipment.
3.2 Pan and Tilt
The camera can be remotely controlled from the Owner unit.
1.
Press the
+
UP button or
-
DOWN button to tilt upward or downward.
2. Press the < LEFT button or > RIGHT button to pan left or right.
NOTE
You can press the Quick Scan button to double the pan and tilt speed
for quick search. Toggle the button again for returning to normal speed.
3.3 Night Vision Mode
The Indoor Pet Unit has 8 high-intensity infrared LEDs for picking up clear
images in the dark. When the built-in photo sensor detects a low level of
ambient light, the LEDs will automatically activate and the screen on the
Owner unit will display in black and white. The icon will be displayed on
the screen.
3.4 Talk Mode (Not applicable for Outdoor Pet Unit)
Press and hold the T TALK button on the Owner unit to talk to your pet
through the Indoor Pet Unit's loudspeaker. The
T icon will be displayed
at the top of the LCD screen.

Using the Digital Video Pet Monitor 19
ENGLISH
3.5 Video ON/OFF
3. Press V VIDEO ON/OFF key to turn the LCD display on or off, but
will still leave the audio monitor on.
3.6 Temperature Display (HH °C / °F or LL °C / °F)
(Not applicable for Outdoor Pet Unit)
The temperature reading from the temperature sensor at the back of
the Indoor Pet Unit will be displayed at the top of the LCD screen.
The readings will turn RED if the temperature goes above 29°C / 84°F
or below 14°C / 57°F. The reading will change to HH °C / °F if the
temperature goes above 36°C / 97°F. The reading will change to
LL °C / °F if the temperature goes below 1°C / 34°F.

20 Owner Unit Menu Options
4. Owner Unit Menu Options
4.1 Volume (Not applicable for Outdoor Pet Unit)
1. Press the M button and the menu bar will pop up.
2. Press the
< LEFT button or > button until is highlighted.
3. Press the
+ UP button or - DOWN button to select the desired
volume level from level 1 ~ 8. (The default volume level setting is
level 4.)
4.2 Brightness
1. Press the M button and the menu bar will pop up.
2. Press the
< LEFT button or > button until is highlighted.
3. Press the
+ UP button or - DOWN button to select the desired
brightness level from level 1 ~ 8. (The default brightness level setting
is level 4.)
4.3 Soothing Pet Music (Not applicable for Outdoor
Pet Unit)
1. Press the M button and the menu bar will pop up.
2. Press the
< LEFT button or > button until is highlighted.
3. Press the
+ UP button or - button to select the desired song from
the 5 pet songs available, or the cycle option to play all 5 songs in turn.
If an individual song is selected it will only play once and then stop.
(The default setting is music OFF)
4. Press OK on the selected song to select the desired song sound
level.
4.4 Zoom
1. Press the M button and the menu bar will pop up.
2. Press the
< LEFT button or > button until Z is highlighted.
3. Press the
+ UP button or - DOWN button to select the
1X
or
2X
zoom. (The default setting is 1X.)
/