Page is loading ...


Fill in and retain!
The vacuum cleaner you have just purchased is a combination
cleaner. It is used for carpet and rug cleaning and may be used with
cleaning tools for other tasks.
The model and serial number appear on the back of the cleaner hood,
For your personal records, please enter the COMPLETE model and
serial number in the spaces provided below and retain in a safe place.
Your cleaner is model
and has serial number
It is suggested that you attach your sales receipt to this owner's
manual. Verficiation of date of purchase may be required for warranty
service of your Hoover product.
Save!
Index
Assembling Cleaner. • .......................... .5
Cleaner Description and Unpacking ............. 3,4
Energy Saving Tips ............................ 18
How to Use
Cleaning Tools. • ........................... 9-10
Special Features ............................ 7-9
Upright Cleaner. • ........................... 5-7
If You Have a Problem .......................... 19
Important Safeguards ........................... 2
Lubrication ................................... 18
Maintenance
Authorized Service .......................... 19
Clearing Obstructions ........................ 13
Replacing Belts ........................... 15-17
Replacing Agitator Brush Roll ................. 17
Replacing Headlight. • ..................... 13-14
Replacing Throw Away Bag ................ 11-12
@1987, 1988 The Hoover Company

Important Safeguards!
• Read all instructions before using this appliance,
• Warning: Electric shock could occur if used outdoors or on wet
surfaces.
• Close supervision is necessary when any appliance is used by or
near children. Do not allow vacuum cleaner to be used as a toy or to
run unattended at any time.
• Keep hands, feet, loose clothing, and hair away from rotating
agitator. Do not operate cleaner in bare feet or when wearing open
toe shoes or sandals.
• Do not pull or carry by cord, use cord as a handle, close a door on
cord or pull cord around sharp edges or corners. Do not run
appliance over cord. Keep cord away from heated surfaces.
• Do not use cleaner to pick up matches, or live ashes and cigarette
butts.
• Never vacuum in the presence of flammable or combustible liquids
or fumes.
• Avoid picking up hard, sharp objects with the cleaner. They may
damage the cleaner and the bag.
• Unplug cleaner when not in use. Turn off all controls before
unplugging.
• Always disconnect cord from electrical outlet before servicing the
cleaner.
• Change bag frequently when picking up very fine materials such as
powder. Do not use without dust bag and/or filters in place.
• Use extra care when cleaning on stairs.
• Grasp the plug to disconnect from wall outlet to avoid damage to
cord, plug, prongs, or receptacle. Never handle plug or appliance
with wet hands.
• The use of an extension cord is not recommended.
• Do not use with damaged cord or plug. If appliance is not working
as it should, has been dropped, damaged, left outdoors, or dropped
into water, take it to a Hoover Factory Service Center or Authorized
Hoover Warranty Service Dealer.
• Use vacuum cleaner only for its intended use as described in this
owner's manual. Use only attachments recommended by The
Hoover Company; others may cause hazards.
Save these instructions!

Unpacking
Unpack the cleaner from the
carton and identify the parts
shown. Remove and dispose of
the cardboard packing.
A. Cleaner assembly
B. Throw away bag
C. Air freshener disc
J
II |
13 \
The cleaner assembled will
look like the drawing below.
I 1
2
3
_4
5
3
6
12,
11
10
9
After identifying each part,
begin ossernbling cleoner.

1. Handle
2. ON-OFF-POWER SURGE TM switch
3. Cord storage hooks: wrap cord around hooks for storage. The top
cord storage hook can be rotated right or left for easy cord release.
4, Carrying handle: located on back of handle section.
S, Cloth outer bag
6, Air freshener control: move control to the left to increase
fragrance or to the right to decrease fragrance.
7, Handle release lever: step on lever to lower handle to Operating and
Low position. Whenever handle is placed in upright position,
agitator will automatically shut off.
8. Agitator drive pedal: push pedal forward to turn agitator off for
"Hard Floor" setting; push pedal forward a second time to turn
agitator on for "Carpet".
NOTE: The cleaner is shipped with pedal on "Hard Floor" setting.
Change setting to clean carpet.
9. Carpet height adjustment: slide nozzle control knob to correct
setting for height of carpet pile being cleaned.
10. Furniture guard: helps prevent cleaner from marking furniture,
11. Headlight
12, Tool converter door: press down on rear section to open for
attaching tool converter.
13, Hood
Operate cleaner only at voltage specified on data plate on back of
cleaner hood.

Assembling
cleaner
Attach handle
Remove screw from lower handle
section. Lift attached handle sec-
tion and align with lower handle
section. Push upper handle
section firmly onto lower section.
Insert screw into handle sections
and tighten securely.
Insert air freshener
disc
For instructions on inserting air-
freshener disc, see "Special fea-
tures" section.
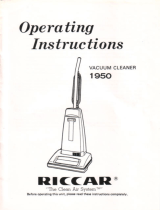
How to use
ON-OFF 'POWER
SURGE' switch
Operate your cleaner at normal
speed by pushing the switch
down one position. To turn
cleaner off, push switch up.
Normal Speed is to be used for
regular cleaning of carpet and
rugs and when using cleaning
tools.
Your cleaner is also equipped
with a 'Power Surge' switch.
When the switch is pushed down
as far as possible it is in the
'Power Surge' speed.
'Power Surge' Speed is to be
used for extra cleaning power on
a heavily soiled area of carpet.
Slide the switch down as far as
possible and hold it in that posi-
tion to engage the 'Power Surge'
speed. When the switch is
released, it will return to the
NORMAL speed position.
5
OFF
NORMAL_
'POWER
SURGE

Handle positions
The handle of your cleaner has
three positions: upright for stor-
age and when using tools (agita-
tor is automatically turned off );
operating for general operation
on carpet and floors; low for
reaching under low furniture.
Press handle release lever to
lower the handle.
t NOZZLE
Carpet height
adjustment
The cleaning of carpet and rugs
takes place at the nozzle.
INOZZLE
1CONTROL KNOB
It is necessary to raise and lower
the nozzle for various carpet pile
heights, by sliding the nozzle
control knob to the correct setting
for the carpet being cleaned. For
ease in sliding knob tilt the
cleaner forward.
1 for low pile and kitchen
carpet
for carpet with normal
2 pile height and for re-
uuuu moving loose dirt from
hard surface floors
3 for carpet with normal
UUUU pile height but thicker
density
4 for very long or shag
UUIJ.i,ecarp°t
Select the correct setting for the
carpet pile height according to
this chart.
Note: If the cleaner is difficult to
push, move the nozzle control
knob to a higher setting.

Cleaning lightweight
flexible rugs
Stand on one end of rug and
move cleaner toward other end
or edge. Before reaching edge,
push down on the handle. This
will lift up the nozzle (front of
cleaner) and will prevent rug from
clinging to cleaner. Continue to
lift up nozzle so that when you
have reached the edge, it is com-
pletely off the rug. Move cleaner
back to start again, lower the
nozzle, and use only forward
strokes.
Special features
Air freshener dispenser
The air freshener dispenser on your cleaner is designed to release a
pleasant fragrance as you clean. A HOOVER air freshener disc has been
packed with your cleaner. To insert the disc, unzip the outer bag and lift
up lower part of throw away bag.
Remove cover of disc holder at
bottom of bag cavity by grasping
tabs on holder, turning counter-
clockwise and lifting up.
Remove disc from the package
and place it in the recessed area.

Replace cover, aligning center
opening with shaft and lock by
turning clockwise.
Zip outer bag, depressing spring
loaded cap.
P
The amount of fragrance released
is regulated by the air freshener
control on the front of the cleaner.
Move the control to the left L_'
to increase the fragrance or to
the right _' to decrease it.
Use only HOOVER disc refills to
be assured of proper fit, compati-
bility and performance of your
Hoover cleaner.
Air freshener discs may be
obtained from your local author-
ized Hoover dealer, a Hoover
Factory Service Center, or by
using the mail order form packed
with your cleaner.
Carrying handle
Your cleaner has a convenient
carrying handle located on the
back of the lower handle.
8

Edge cleaning
Brushed edge cleaning is provided on both sides of the nozzle to remove
imbedded dirt in carpet near baseboards and furniture. Guide either side
of the nozzle parallel to the edge of the carpet or furniture.
Agitator drive control
When cleaning hard surface
floors, press forward on agitator
drive pedal to stop agitator from
rotating, and move carpet height
adjustment indicator to lowest
setting. When returning to carpet
cleaning, press pedal forward a
second time to start agitator
rotating, and move adjustment
indicator to the correct setting.
Cleaning tools
(Available at additional cost)
The cleaning tools allow you to
do specific cleaning tasks and to
clean hard to reach areas.
The tool set includes a hose,
wand, crevice tool, furniture
nozzle and dusting brush.
A. Attach hose to cleaner
Place cleaner handle in upright
position, and press down on rear
section of tool converter door as
indicated.
Note: The door will not open
unless cleaner handle is in upright
position.
Push converter (rectangular) end
of hose firmly into opening. Suc-
tion is now channeled from the
nozzle to the hose and cleaning
tools.
J

3
B. Select the proper
cleaning tool
The cleaning tools have many
uses. Select the tool best suited
for the cleaning task from the
descriptions below.
1. Dusting brush may be used
for carved furniture, table tops,
books, lamps, lighting fixtures,
Venetian blinds, baseboards,
shutters and registers.
2. Furniture nozzle may be used
for upholstered furniture, draper-
ies, tapestries, mattresses, cloth-
ing, automobile interiors and
carpeted stairs.
3. Crevice tool may be used in
tight spaces, corners and along
edges in such places as dresser
drawers, upholstered furniture,
stairs and baseboards.
4. Wand used to give extra
length to your hose. Use it with
any of the above tools.
C. Attach wand and tools
The tools may be attached to the
hose or the wand in the same
manner.
Turn plastic latch ring on hose
grip until outer slot aligns with
inner slot.
Insert tool so that button on tool
fits into slot in hose grip.
Turn plastic ring as shown to lock
tool in place. To remove tool,
reverse the procedure.
For additional length, attach
wand to hose as described above.
For added stability, the carpet
height adjustment should be set
at the lowest position.
10

To clean tools
To clean the hose wipe off dirt with a cloth dampened in a liquid deter-
gent. Rinse with a damp cloth. Cleaning tools may be washed in warm
water with a detergent. Rinse and allow to dry before using.
Maintenance
The following sections are concerned with proper maintenance of the
cleaner. Familiarize yourself with these home maintenance tasks and
keep this owner's manual in a convenient place where you can refer to it
when needed. Proper use and care of your cleaner will ensure continued
cleaning effectiveness.
The bag
Your cleaner has a durable outer bag which covers the throw away bag.
A light wiping with a damp cloth will keep this outer bag clean.
When to replace throw away bag
Check bag from time to time. It is recommended that you change the
bag when dirt reaches the dotted line on the bag. If you let more dirt than
this accumulate, your cleaner may not operate effectively.
CAUTION: Very fine materials, such as face powder, cornstarch, fire-
place ashes or fireplace soot, may seal the throw away bag and may
cause it to burst even though it is only partially full of dirt. When
cleaner is used to remove material of this nature, change bag often.
Where to buy bags
Throw away bags may be purchased from your local Authorized Hoover
Dealer or from a Hoover Factory Service Center. When ordering bags,
be sure to give the model number of your cleaner.
What bags to buy
Use HOOVER bag type B with this cleaner.
To assure that your cleaner operates at peak
performance, it is imperative that you use only
genuine HOOVER throw away bags distributed
by The Hoover Company. HOOVER bags can be
identified by these trademarks -- --
11

#
Z
How to change bag
Disconnect cleaner from electri-
cal outlet.
To change throw away bag,
unzip outer bag, grasp sides of
bag collar and pull collar from
tube.
Note: Do not clean out old bag
and re-use. Discard used bag.
Install new bag by pushing
bottom of bag collar and then top
firmly onto tube. Push collar
past the raised portion on both
top and bottom of tube.
Pull out pleats on edges of bag.
Zip outer bag, pressing down on
cap as you reach top of bag.
12

Clearing obstructions
To maintain the strong suction
and cleaning effectiveness of
your cleaner, remove any large
items from the carpet surface
before vacuuming. However, if
your cleaner picks up a larger
object than can be exhausted in
the bag, it can be caught in the
bellows.
To remove an obstruction, first
disconnect cleaner from electri-
cal outlet. Depress button at
lower back of handle to discon-
nect the bellows.
Lower handle to lowest position
and pull bellows from lower bag
area. Remove any obstruction.
Reposition bellows in lower bag
area. Return handle to upright
position, making sure button on
lower back handle returns to
original position.
The headlight
How to replace headlight
Disconnect cleaner from electri-
cal outlet.
This cleaner uses a 12 volt,
wedge base type bulb, part No.
48122-501.
Depress the handle release lever
and lower handle to lowest posi-
tion. Turn cleaner over and
remove the three bottom plate
screws. Lift off bottom plate.
13

Remove the four hood mounting
screws, as shown.
Turn cleaner over, pull up on
nozzle control knob to disengage;
and lift up hood. Pull out old bulb
and push in a new one.
With agitator drive pedal set for
"HARD FLOOR" replace hood,
carefully fitting edges inside fur-
niture guard. Reposition nozzle
control knob and press down into
place. Turn cleaner over and
secure hood with screws.
Replace bottom plate by fitting
front edge under tabs on front
of nozzle. Insert screws and
tighten.
14

The belts
The belts on your HOOVER
cleaner cause the agitator to
rotate and are important for the
effective operation of the cleaner.
The belts are located under the
bottom plate of the cleaner and
should be checked from time to
time to be sure they are in good
condition.
When to replace belts
To check belts, remove bottom
plate as shown below. Replace
either belt if it is stretched, cut or
broken.
Which belts to buy
To assure effective operation,
use only genuine HOOVER belts
with your cleaner. When pur-
chasing new belts, ask for these
part numbers: Flat Belt- Hoover
part no. 38528-517; V-Belt -
Hoover part No. 38528-523.
How to replace belts
Disconnect cleaner from electri-
cal outlet.
1. Set agitator drive control on
"CARPET" and place handle in
lowest position.
2. Turn cleaner over and remove
the three bottom plate screws.
Lift off bottom plate. Refer to the
following instructions for the belt
you are replacing.
V-BELT
3. Lift up end of agitator and
remove old V-belt from agitator
and idler pulley.
4. Place new belt on outer end of
idler pulley and into belt groove
on agitator. Proceed to step 8.
15
FLAT
PULLEY-_
V-BELT

FLAT BELT
3. Remove agitator and V-belt as
directed in replacing V-belt.
4. Work old flat belt off motor
and idler pulleys.
5. Slide new flat belt as far as
possible onto motor pulley.
6. Stretch belt and roll outer
surface onto idler pulley.
Be sure lower edges of belt are
positioned between sides of wire
guide.
7. Replace V-belt on outer end of
idler pulley and into belt groove
on agitator.
SQUARE
PROJECTION
8. Reposition agitator by sliding
square projection on belt end of
agitator into square slot on side
of nozzle. Then slide round pro-
jection on other end of agitator
into round slot.
16

Note: Be sure ribs on agitator fit
outside ribs in cleaner as shown.
9. Roll idler pulley to make sure
flat belt and V-belt are positioned
properly.
10. Replace bottom plate by fit-
ting front edge under tabs on
front of nozzle. Insert screws
and tighten.
Agitator roll
When to replace agitator
roll sleeve
Disconnect cleaner from electri-
cal outlet.
When agitator brushes are worn,
sleeve should be replaced.
To check condition of brushes,
move edge of card across agitator
opening while rotating agitator.
To maintain cleaning effective-
ness, replace agitator roll sleeve if
brushes do not touch edge of
card.
How to replace agitator
roll sleeve
Hoover part No. 48414-513
1, Remove bottom plate, as
shown in "How to replace belt".
Pull out agitator and slip off
V-belt.
2. Turn end plates of agitator in
opposite directions until one end
plate comes off.
3. On the belt groove end,
remove the bearing and wave
washer.
17

4. On the opposite end, pry off
end section of agitator roll, using
a screwdriver.
DISPOSABLE AGITATOR ROLL SLEEVE END SECTION
SQUARE r_ ,.llllllllll 4 l_ _'e'e'_ ROUNO
i BEARING _ '" BE,_"Hi'iG
' WASHE 7"
" WASHER SHAFT PLAST C g_.P ' END
END PLASTIC CUP. FELT ',', _' $ _' ER PLATE
PLATE FELT WASHER
5. Replace parts onto new
agitator roll sleeve.
Note: Be sure that end plate with
flat-sided projection is screwed
onto belt end of agitator roll.
6. Reinstall agitator into cleaner.
7. Replace bottom plate Isee step
10 and drawing at top of
preceding page).
Lubrication
The motor is equipped with two ball bearings which contain sufficient
lubrication for the life of the motor. The addition of lubricant could cause
damage. Therefore, do not add lubricant to either motor bearing.
The agitator is equipped with two ball bearings that should be '_ubricated
periodically by a Hoover Factory Service Center or an Autho, zed Hoover
Warranty Service Dealer.
Energy saving tips
1. Replace throw away bag promptly, before overfilled. Use a genuine
HOOVER bag made for your model cleaner.
2. To maintain effective cleaning, replace agitator roll sleeve and belts
when necessary.
3. Turn off cleaner when not in use, such as when moving furniture.
4. Keep your cleaner operating at peak performance level - have
inspection and service performed by a Hoover Factory Service Center
or Authorized Hoover Warranty Service Dealer.
18

If you have a problem
This appliance was inspected thoroughly and was in good operating
condition when it was shipped from the factory. If a minor problem
occurs, it usually can be solved quite easily when the cause is found.
Therefore, this check list is provided for your convenience.
Problem Possible cause Possible solution
Cleaner 1. Not firmly plugged in. 1. Plug unit in firmly.
won't 2. No voltage in wall plug, 2. Check fuse or breaker.
run 3. Blown fuse/tripped 3. Replace fuse/reset
breaker, breaker.
Cleaner 1. Broken or worn belt.
won't 2. Agitator brushes worn.
pick up 3. Bag full.
Cleaner
hard
to push
.
,
1.
Incorrect carpet height
setting.
Agitator drive pedal set
for "HARD FLOOR".
Incorrect carpet height
setting.
1. Replace belt.
2. Replace brushes.
3. Change throw away
bag.
4. Move nozzle control
knob to type of carpet
being cleaned.
5. Change setting to
"CARPET".
1. Move nozzle control
knob to a higher setting.
Service
If the problem persists, check the Yellow Pages of your telephone book
under "Vacuum Cleaners - Household" for your nearest Hoover Factory
Service Center or Authorized Warranty Service Dealer where approved
HOOVER service and genuine HOOVER replacement parts may be
obtained. The warranty provided with this product has a listing of the
Hoover Factory Service Centers. If you are unable to obtain the
information you need from the Yellow Pages, contact a Hoover Factory
Service Center to find your nearest Authorized Warranty Service Dealer.
For service under warranty, follow the instructions in the warranty
provided with this product.
Do not send your cleaner to The Hoover Company in North Canton for
service as this will only result in delay.
Always identify your cleaner by the complete model number when
requesting information or ordering replacement parts. (The model
number appears on the back of the cleaner hood.)
If further assistance is needed, contact The Hoover Company Con-
sumer Affairs Department, North Canton, Ohio 44720, 216-499-9200.
HOOVER and are registered trademarks of
THE HOOVER COMPANY, NORTH CANTON, OHIO 44720
R 2 11-88 U4231/33 Litho USA 5651 1-273
/