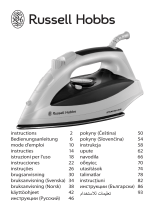
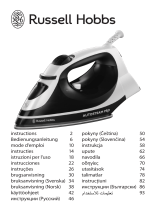
Philips hi424 User manual

Category
Irons
Type
User manual
HI 414-444
2
English Page 4
Keep pages 3 and 62 open when reading these operating instructions.
Français Page 12
Pour le mode d'emploi: dépliez les pages 3 et 62.
Deutsch Seite 20
Schlagen Sie beim Lesen der Gebrauchsanweisung Seiten 3 und 62
auf.
Nederlands Pagina 28
Sla bij het lezen van de gebruiksaanwijzing de pagina's 3 en 62 op.
Italiano Pagina 36
Prima di usare l'apparecchio, aprite le pagine 3 e 62 e leggete
attentamente le istruzioni per l'uso.
Ελληνικά Σελίδα 44
Για τις δηγίες ρήσεως, ανίτε τις σελίδες 3 και 62.
Türkçe Sayfa 52
Kullanım kılavuzunu okuduπunuzda 3. ve 62. sayfaları açınız.
3
1
G
L
K
C
P
A
M
E
HQ
I J N
F
D
B
O
HI 444
4
Important
Read the instructions for use and look at the illustrations
before you start using the steam iron.
To prevent damage: check if the voltage indicated on the
appliance corresponds to the local mains voltage before you
connect the appliance.
Never use the iron if it is damaged or does not function
properly.
Make sure that children cannot touch the hot appliance and
that they cannot pull at the mains cord.
The ejected steam is very hot and therefore dangerous. Never
direct the steam at people.
Remove the mains plug from the socket before you fill the iron
with water and before you pour out the remaining water after
use.
Never immerse the iron in water.
When you have finished ironing and also when you leave the
iron for even a short while, always:
- set the steam control dial to position O
- put the iron on its heel
- remove the mains plug from the wall socket
Some parts of the iron have been slightly greased. As a result,
the iron may smoke slightly when you use it for the first time.
This phenomenon is harmless and will soon cease.
Remove any sticker or protective foil from the soleplate before
you use the appliance for the first time. Clean the soleplate with
a soft cloth.
Do not put vinegar or other descaling agents in the water
reservoir.
Do not use chemically descaled water for steaming.
Do not allow the cord to touch the soleplate when it is hot.
If the mains cord of this appliance is damaged, it may only be
replaced by an authorised service centre, as repair requires
special tools and/or parts.
English
5
General description (fig. 1)
A Temperature control dial
B Steam control dial
O = no steam
1 = minimum steam output
4 = maximum steam output
C Spray button T (press)
D Spray nozzle
E Shot-of-steam button U (press)
F Filling opening with lid for easy filling and ironing without
spilling water
G Soleplate
H Temperature pilot light (orange) (only types HI 414 - 434)
I Self-clean button for self-cleaning or descaling
J Water reservoir
K Cord storage
L Type plate
M Filling jug
N Cord clip
O Auto-stop pilot light (red) (only type HI 444)
P Temperature pilot light (orange) (only type HI 444)
Q Temperature indicator showing the temperature setting selected
with the temperature control dial (A)
Filling with water (for steam-ironing and spraying)
Use tap water the first time you fill the iron.
After the first time, you can still use tap water. However, if the water is
very hard (harder than 17° DH / 21° Clarke), it is advisable to use
demineralised or distilled water, which can be obtained from e.g.
chemists.
Unplug the iron before filling it. Set the steam control (B) to position O
(= no steam).
Open the lid of the filling opening (fig. 2).
Fill the filling jug (M) with water (max. 240 ml). Hold the iron in a tilted
position and pour the water into the filling opening (fig. 3).
Close the lid of the filling opening (fig. 4).
6
Ironing temperature
First check if the article to be ironed contains a label with ironing
instructions (see table). Always follow the instructions on the label.
If there are no ironing instructions but you do know what kind of fabric
the article is made of, you can use the table below.
The table is valid for plain materials only; it does not take into account
any kind of finish (gloss, crinkle, relief, etc.) that has been applied to the
material. Materials to which some kind of finish has been applied, are
best ironed at lower temperatures.
Sort the laundry according to the ironing temperature allowed before
you start ironing.
B
C
D
Z
Synthetic
fabrics
e.g. acrylic
viscose
polyamide
(nylon)
polyester
Silk
Wool
Cotton
Linen
0
1 - 2
3 - 4
U
U
U
T
T
T
Table
Instructions
on label
Type of
fabric
Temperature
control
Steam
control
Shot of
steam
Spraying
MIN
AA
AA
11
AA
AA
AA
AA
AA
AA
22
AA
AA
33
MAX
X
F
F
O
|
O
X
A
M
L
E
I
N
E
N
L
I
N
N
E
B
.
W
O
L
L
E
B
O
M
U
L
L
W
O
L
L
E
Y
L
L
E
N
Y
L
O
N
N
Y
L
O
N
S
E
I
D
E
S
I
L
K
E
Please note that Z on the label means that a
this article may not be ironed!
U
U
U
Vertical shot
of steam
X
X
U
7
The iron heats up more quickly than it cools down, so always start with
the fabrics that require the lowest ironing temperature (synthetic
fabrics).
If the article consists of various kinds of fibres, always select the
temperature required by the most delicate fibre (so the lowest
temperature). If, for example, a piece of fabric consists of 60% polyester
and 40% cotton, it should be ironed at the temperature required by
polyester (
11
) without any steam.
If you are not sure what fabric the article to be ironed is made of, find
out which temperature is appropriate (starting at a relatively low
temperature) by ironing a piece of material that will not be visible when
you wear or use the article.
100% woollen fabrics may be pressed with the iron set to a steam
position. It is advisable to set the steam control to position 2 and to use
a dry pressing cloth.
When woollen fabrics are steam-ironed, shiny patches may occur. You
can prevent this by ironing the article inside out.
Velvet and other fabrics that tend to acquire shiny patches should be
ironed in one direction only (along with the nap) without exerting any
pressure. Keep the iron moving constantly.
Synthetic materials and silk should preferably be ironed inside out to
prevent the fabric from becoming shiny. Do not spray any water onto the
fabric since this might cause stains.
Setting the temperature
- Put the iron on its heel.
- Set the temperature control dial (A) to the temperature as indicated on
the label of the article or in the table (fig. 5).
- Put the mains plug in the socket.
- The iron is ready to be used as soon as the orange temperature pilot
light (H) has gone out and then comes on again.
Type HI 444: the iron is ready to be used as soon as the orange pilot
light (P) has gone out and then comes on again.
While you are ironing, the orange pilot light will go on from time to time.
If you set the temperature control dial to a lower setting after ironing at a
high temperature, do not begin ironing again until the orange pilot light
has come on and has gone out again.
8
Spraying
By pressing the spray button
TT
(C) a few times, you can moisten the
article to be ironed at any selected temperature (fig. 6). Make sure there
is enough water in the water reservoir.
Steam-ironing
As the temperature control dial (A) and the table indicate, steam-ironing
is only possible at higher ironing temperatures:
22
to
33
for a little steam.
33
to MAX for a lot of steam.
If the selected temperature is too low, water may drip from the soleplate
of the iron. This may cause stains. The HI 424, HI 434 and HI 444 irons
have been equipped with a ‘Drip Stop’ steam shut-off system, which
will automatically stop the iron from steaming if the selected
temperature is too low. When this happens, you may hear a ‘click’.
Now set the temperature control dial (A) to the recommended setting.
The steaming will start again as soon as the iron has reached the
appropriate (higher) temperature.
Make sure there is enough water in the water reservoir (J).
- Put the iron on its heel.
- Set the temperature control dial (A) to one of the settings in the ‘steam
area’ (
22
to MAX) (fig. 7).
- Put the mains plug into the socket.
- As soon as the orange temperature pilot light (H) has gone out and then
comes on again you can start ironing.
Type HI 444: the iron is ready to be used as soon as the orange pilot
light (P) has gone out and then comes on again.
- Set the steam control dial (B) to the desired position (fig. 8).
9
Shot of steam
When you press the shot-of-steam button U (E), a powerful burst of
steam will be ejected from the soleplate (fig. 9). This function is very
useful, e.g. for removing stubborn creases.
The shot-of-steam function can only be used when the iron has been set
to a high temperature (settings
22
to MAX).
Vertical shot of steam
The shot-of-steam function can also be used when the iron is held in
vertical position (fig. 10). This is very useful if you want to remove creases
from hanging curtains, clothes etc. (settings
33
to MAX).
Ironing without steam
If you want to iron without steam, follow the same procedure as described
for steam-ironing, yet set the steam control dial to position O (= no
steam).
“Auto Stop” automatic safety shut-off
(Only for type HI 444)
If the iron is not moved for some time, the heating element is shut off
automatically. To indicate that the appliance has switched itself off, the
red auto-stop pilot light (O) will start to blink (fig. 11).
If the iron is in horizontal position, it will be shut off after 30 seconds.
If the iron is in vertical position, it will be shut off after 8 minutes.
When you pick up the iron again, the red auto-stop pilot light (O) will go
out.
The orange temperature pilot light (P) will go on, indicating that the iron
is heating up again.
Wait for the orange temperature pilot light (P) to go out before you start
ironing again.
10
Maintenance
It is important to clean the appliance at least once every two weeks by
means of the self-clean function to remove scale and other impurities.
Depending on the hardness of the water used to fill the iron with, you
will have to use the self-clean function more often. The harder the
water, the more the iron will have to be descaled.
Self-cleaning
- Set the stream control dial (B) to O (= no steam).
- Open the lid of the filling opening (F) and fill the water reservoir (J) to
the maximum level (MAX).
- Close the lid of the filling opening (F).
- Set the temperature control dial (A) to MAX.
- Put the mains plug in the socket.
- Leave the iron to heat up until the orange temperature pilot light (H)
has gone out (pilot light (P) for type HI 444).
- Unplug the appliance.
- Hold the iron horizontally over the sink.
- Press the self-clean button (I) (fig. 12) and keep pressing it. Boiling
water and steam will now be ejected through the vents in the soleplate,
washing away impurities and scale (if any) from the iron.
- Gently shake the iron from side to side while it is self-cleaning.
- Release the self-clean button after one minute or if the water reservoir
is empty.
- If the water reservoir still contains scale or other impurities, repeat the
self-clean procedure.
- After the self-clean procedure, put the iron on its heel.
- Put the mains plug in the socket again and leave the iron to heat up
again.
- Move the iron backwards and forwards over an (old) cloth to make sure
that the soleplate is dry when you put the iron away.
Types HI 434/444 only: the built-in Anti Calc Cassette guarantees a
longer working life of the appliance.
11
Cleaning
- Before you start cleaning the iron, unplug the appliance and leave it to
cool down sufficiently.
- Scale or other dirt can be wiped off the soleplate by means of a damp
cloth and some non-abrasive (liquid) cleaner.
Keep the surface of the soleplate smooth: avoid hard contact with
metal objects.
- The upper part of the iron can be cleaned with a damp cloth.
- Clean the water reservoir from time to time by filling it with water and
shaking the iron well. Afterwards, empty the reservoir again.
Storage
- Unplug the appliance.
- Pour the remaining water, if any, out of the water reservoir (fig. 13).
- Set the steam control dial to O.
- Put the iron on its heel and leave it to cool down sufficiently.
- Wind the cord around the heel of the appliance (fig 14). Make a loop
first before winding the rest of the cord.
- Always put the iron away on its heel (fig. 15).
Regularly check if the cord is still in good and safe condition.
22
Ziehen Sie vor dem Füllen stets den Netzstecker aus der Steckdose.
Stellen Sie den Dampfregler (B) auf 0 (= kein Dampf).
Öffnen Sie die Klappe der Einfüllöffnung (Abb. 2).
Füllen Sie den Meßbecher (M) mit maximal 240 ml Wasser. Halten Sie
das Bügeleisen etwas schräg, und gießen Sie das Wasser ein (Abb. 3).
Schließen Sie die Einfüllöffnung (Abb. 4).
Tabelle
B
C
D
Z
Synthetics
z.B.Acetat,
Acryl,
Viskose
Polyamid
(Nylon)
Polyester
Seide
Seide
Wolle
Baum-
wolle
Leinen
0
1 - 2
3 - 4
U
U
U
T
T
T
Bügel-
vorschrift
Textilart Temperatur-
einstellung
Dampf-
regler
Dampfstoß Dampf-
sprühen
MIN
AA
AA
11
AA
AA
AA
AA
AA
AA
22
AA
AA
33
MAX
X
F
F
O
|
O
X
A
M
L
E
I
N
E
N
L
I
N
N
E
B
.
W
O
L
L
E
B
O
M
U
L
L
W
O
L
L
E
Y
L
L
E
N
Y
L
O
N
N
Y
L
O
N
S
E
I
D
E
S
I
L
K
E
Z Vorsicht: Diese Teile dürfen nicht gebügelt werden.
U
U
U
In senkrech-
ter Haltung
aufdämpfen
X
X
U
30
Kijk altijd eerst of er een etiket met strijkvoorschrift op het stuk textiel is
genaaid (zie de tabel).
Volg in alle gevallen de aanwijzingen van het strijkvoorschrift op.
Als het strijkvoorschrift ontbreekt maar u wel weet welke soort textiel het
betreft, dan kan de tabel u behulpzaam zijn.
De tabel geldt voor onbewerkte textielsoorten.
Als het textiel een bepaalde "finish" heeft gekregen (glans, kreuk,
structuur, reliëf), dan kunt u beter op een wat lagere temperatuur
strijken.
Sorteer het strijkgoed vooraf, rekening houdend met de
strijktemperatuur.
Het strijkijzer warmt snel op, maar koelt langzamer af.
Tabel
B
C
D
Z
Synthe-
tische
stoffen,
bijv.
acetaat,
acryl,
viscose,
polyamide
(nylon),
polyester
Zijde
Wol
Katoen
Linnen
0
1 - 2
3 - 4
U
U
U
T
T
T
Etiket met
strijkvoor-
schrift
Textiel Temperatuur
regelaar
Stoom-
regelaar
Stoomstoot Sproeien
MIN
AA
AA
11
AA
AA
AA
AA
AA
AA
22
AA
AA
33
MAX
X
F
F
O
|
O
X
A
M
L
E
I
N
E
N
L
I
N
N
E
B
.
W
O
L
L
E
B
O
M
U
L
L
W
O
L
L
E
Y
L
L
E
N
Y
L
O
N
N
Y
L
O
N
S
E
I
D
E
S
I
L
K
E
Let op! Z op het etiket betekent:
“Dit artikel kan niet gestreken worden!”
U
U
U
Verticale
stoomstoot
X
X
U
55
Ütü S›cakl›k Ayar›
Ütüye bafllamadan önce ütüleyece¤iniz kumafl›n etiketinde ütü talimat›
olup olmad›¤›n› kontrol ediniz (tabloya bak›n›z). E¤er varsa bu
talimatlara uyunuz.
E¤er etikette ütü talimat› yoksa ancak kumafl›n cinsini biliyorsan›z, bu
durumda afla¤›daki tablo size yard›mc› olacakt›r.
Bu tablo simli, kabartmal› materyaller içermeyen kumafllar için
geçerlidir. Kabartma, sim, vs gibi materyaller içeren kumafllar› düflük ›s›
ayarlar›nda ütüleyiniz.
Öncelikle ütüleyece¤iniz kumafllar› cinslerine göre ay›r›n›z : Yünlüler,
pamuklular vs.
B
C
D
Z
Sentetik
kumafllar,
örn.
asetat,
akrilik,
viskos,
nylon
(polyamid),
polyester
‹pek
Yün
Pamuklu
Keten
0
1 - 2
3 - 4
U
U
U
T
T
T
S›cakl›k ve Buhar Ayar Tablosu
Ütüleme
talimatlar›
Kumafl türü S›cakl›k Ayar
dü¤mesi
Buhar
Kontrol
dü¤mesi
fiok Buhar
dü¤mesi
Spreyleme
MIN
AA
AA
11
AA
AA
AA
AA
AA
AA
22
AA
AA
33
MAX
X
F
F
O
|
O
X
A
M
L
E
I
N
E
N
L
I
N
N
E
B
.
W
O
L
L
E
B
O
M
U
L
L
W
O
L
L
E
Y
L
L
E
N
Y
L
O
N
N
Y
L
O
N
S
E
I
D
E
S
I
L
K
E
Lütfen unutmay›n›z: Z Bu sembol “Bu kumafl ütülenemez!”
anlam›na gelmektedir.
U
U
U
Dikey Buhar
X
X
U
62
5 7
8
12
15
F
F
O
|
O
X
A
M
LEINEN
LINNE
B.WOLLE
BOMULL
WOLLE
YLLE
NYLON
NYLON
SEIDE
SILKE
10
2
4
3
6
F
F
O
|
O
X
A
M
L
EIN
EN
LIN
N
E
B
.W
O
LL
E
B
O
M
U
LL
W
O
LL
E
Y
L
LE
N
Y
LO
N
N
Y
LO
N
S
EID
E
S
ILK
E
9
F
F
O
|
O
X
A
M
L
E
IN
E
N
L
IN
N
E
B
.W
O
L
L
E
B
O
M
U
L
L
W
O
L
L
E
Y
L
L
E
N
Y
L
O
N
N
Y
L
O
N
S
E
ID
E
S
IL
K
E
HI 444
11
13
14
4239 000 43423
u
  • Page 1 1
  • Page 2 2
  • Page 3 3
  • Page 4 4
  • Page 5 5
  • Page 6 6
  • Page 7 7
  • Page 8 8
  • Page 9 9
  • Page 10 10
  • Page 11 11
  • Page 12 12
  • Page 13 13
  • Page 14 14
  • Page 15 15
  • Page 16 16
  • Page 17 17
  • Page 18 18
  • Page 19 19
  • Page 20 20
  • Page 21 21
  • Page 22 22
  • Page 23 23
  • Page 24 24
  • Page 25 25
  • Page 26 26
  • Page 27 27
  • Page 28 28
  • Page 29 29
  • Page 30 30
  • Page 31 31
  • Page 32 32
  • Page 33 33
  • Page 34 34
  • Page 35 35
  • Page 36 36
  • Page 37 37
  • Page 38 38
  • Page 39 39
  • Page 40 40
  • Page 41 41
  • Page 42 42
  • Page 43 43
  • Page 44 44
  • Page 45 45
  • Page 46 46
  • Page 47 47
  • Page 48 48
  • Page 49 49
  • Page 50 50
  • Page 51 51
  • Page 52 52
  • Page 53 53
  • Page 54 54
  • Page 55 55
  • Page 56 56
  • Page 57 57
  • Page 58 58
  • Page 59 59
  • Page 60 60
  • Page 61 61
  • Page 62 62
  • Page 63 63
  • Page 64 64

Philips hi424 User manual

Category
Irons
Type
User manual

Ask a question and I''ll find the answer in the document

Finding information in a document is now easier with AI