-USER’S INSTRUCTIONS -
24/04/2014
Rev. 1.0
Page 1 of 4
USER’S INSTRUCTIONS
valid for item ref. 2S.4011.03.K13/CS3 – 2S.4011.BG.K13/CS3
-----------------------------------------------------------------------------------------------------------------------
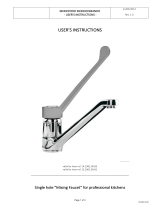
Wall-mount Pre-rinse Unit with S-shaped Swivel Spout
for Professional Kitchens

-USER’S INSTRUCTIONS -
24/04/2014
Rev. 1.0
Page 2 of 4
INSTALLATION
a)Insert the washers (1) on the threaded eccentric fittings (2) of the faucet
b)Insert the the faucet 's threaded eccentric fittings (2) into the holes on the wall
c) Unscrew the small screw (3) from the faucet's body, mount the swivel nozzle (4) to the faucet and tighten its
screw (3). Being careful not to demage nozzle gaskets, check that nozzle turns properly.
d) Screw the stainless steel pipe (5) in the faucet’s seat (detail A).
e) Install the wall bracket (6) onto the stainless steel pipe (5). If the wall bracket is too long, remove the screw on the
round flange (detail B) using the allen key provided with the Pre-Rinse Unit. Saw off the wall bracket rod to the
desired length (please use saw for metals). Re-assemble the round flange to the shortened bracket and tighten the
screw. Fix the wall bracket to the wall.
f) Install the Spray Gun Bracket (7) onto the stainless steel pipe (5). Do not tighten its screws yet.
g) Install the spring holder (8) onto the stainless steel pipe (5) at about 15-20cm (6-8”) from the upper end of the
pipe. Firmly tighten the screw on the spring holder using the allen key provided with the Pre-Rinse Unit. Make sure
the spring holder (8) will not slide along the stainless steel pipe (5).
h) Connect the flexible hose (9) to the upper end of the stainless steel pipe (5) using the gasket (10) provided with
the Pre-Rinse Unit.
i) Insert the flexible hose (9) through the riser spring (11). Place the spring on the spring holder (8) and make sure it
is firmly in place.
l) Assemble the spray gun (12) to the other end of the flexible hose (9), using the gasket (13) provided with the
spray gun. Tighten the spray gun to the flexible hose by and, do not use a wrench.
m) Adjust the position of the spray gun bracket (7). Firmly tighten the screws on the spray gun bracket, using the allen
key provided with the Pre-Rinse Unit. Make sure that the spray gun bracket will not slide along the stainless steel pipe
(5) and will not turn.
n) Test the right working of the pre-rinse system before starting using it. Following the evidence of the opening and
closing the knobs and spray gun. Also check supply spout switch (detail C): 1) knobs open, turn the switch clockwise
(closed) and ensure that water provision is excluded from the spout – 2) knobs open, turn the switch counter-
clockwise (open) and ensure that water is supplied from spray gun and spout.
Operating parameters:
Water output from the spout 35 l./min. and from the spray gun 16 l./min. at 0,3 Mpa
Maximum water temperature and pressure: < 85° and < 1 Mpa
Raccomended water temperature and pressure: < 65° and < 0,5 Mpa
USE:

-USER’S INSTRUCTIONS -
24/04/2014
Rev. 1.0
Page 3 of 4
–Do not move swivel nozzle violently and do not hang anything on the nozzle
–Keep the faucet’s surfaces clean and dry using a soft cloth, in order to prevent limestone or corrosive
substances fouling (do not use aggressive and/or corrosive detergents)
–Remove the aerator often and keep it clean with suitable solvents and water
–Pre-Rinse-Unit is suitable for use with water only, do not mix water with other substances
*CLEANING INSTRUCTIONS*
•DO NOT clean the faucet surfaces when hot. They should be cleaned when they are at room temperature
•DO NOT use agressive and / or corrosive detergents
•DO NOT use abrasive cleaning pads
•After cleaning with soft detergent rinse well the surfaces with cold water to remove any traces of chemicals
and dry them with a soft cloth.
•Avoid contact between detergents and rubber gaskets

-USER’S INSTRUCTIONS -
24/04/2014
Rev. 1.0
Page 4 of 4
/


