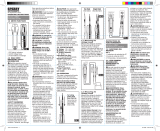
Page is loading ...

2
Table of Contents
Description .............................................................................................................3
Safety .....................................................................................................................3
Purpose...................................................................................................................3
Important Safety Information..............................................................................4–6
Identification ........................................................................................................... 7
Symbols on Unit ..............................................................................................7
Display Icons ..........................................................................................................8
Product Features ..............................................................................................9–22
Rotary Switch Positions ..................................................................................9
Alarm Feature and Set-up .............................................................................10
Navigation .....................................................................................................10
Set-up Menus ..........................................................................................11–19
Memory .........................................................................................................22
Auto-Power Off .............................................................................................. 22
Measurement Mode ......................................................................................22
Theory of Operation ..............................................................................................23
Operation ..............................................................................................................24
Typical Applications ........................................................................................25–27
Frequently Asked Questions .................................................................................28
Accuracy .........................................................................................................28–29
Specifications .......................................................................................................30
Overvoltage Installation Categories ...................................................................... 30
Maintenance ......................................................................................................... 31
Battery Replacement ............................................................................................31

CMGRT-100A
3
Description
The Greenlee CMGRT-100A Clamp-On Ground Resistance Tester is a hand-held testing device intended to
evaluate grounding systems. It has two modes:
• Standard Mode: Standard Loop Resistance & Leakage Current Measurements
• Advanced Mode: Refine Measurements to find Impedance at the Selected Frequency & to compute
Contact Voltage
Furthermore, it can also give an idea about the integrity of the ground systems, the quality of connections or
bonds within the system.
The tester can measure Loop Resistance in the range of 0.01 Ω to 1500 Ω as well as leakage current in the
range of 0.2 mA to 40A. It comes with a data storage function, that can log up to 300 measurements (Both
Ω and/or A). Furthermore, the meter also allows the user to select test frequency between 50, 60, 128,
or 2083 Hz.
Safety
Safety is essential in the use and maintenance of Greenlee tools and equipment. This instruction manual and
any markings on the tool provide information for avoiding hazards and unsafe practices related to the use of
this tool. Observe all of the safety information provided.
Purpose
This instruction manual is intended to familiarize all personnel with the safe operation and maintenance
procedures for the Greenlee CMGRT-100A Clamp-On Ground Resistance Tester.
Keep this manual available to all personnel.
Replacement manuals are available upon request at no charge.
Greenlee and are registered trademarks of Greenlee Textron.
KEEP THIS MANUAL
Do not discard this product or throw away!
For recycling information, go to www.greenlee.com.
All specifications are nominal and may change as design improvements occur. Greenlee Textron Inc.
shall not be liable for damages resulting from misapplication or misuse of its products.
® Registered: The color green for electrical test instruments is a registered trademark of
TextronInnovations Inc.

4
Important Safety Information
Read and understand this material before operating or servicing this
equipment. Failure to understand how to safely operate this tool can result in
an accident causing serious injury or death.
This symbol is used to call your attention to hazards or unsafe practices which could result in an
injury or property damage. The signal word, defined below, indicates the severity of the hazard. The
message after the signal word provides information for preventing or avoiding the hazard.
SAFETY ALERT SYMBOL
Immediate hazards which, if not avoided, WILL result in severe injury or death.
Hazards which, if not avoided, COULD result in severe injury or death.
Hazards or unsafe practices which, if not avoided, MAY result in injury or property damage.
Electric shock hazard:
Contact with live circuits can result in severe injury or death.

CMGRT-100A
5
Important Safety Information
Electric shock and fire hazard:
• Do not expose this unit to rain or moisture.
• Do not use the unit if it is wet or damaged.
• Clamp meter, test leads or any other clamp accessory, when used to make a measurement, create a System.
The System is rated for CAT IV 600 VAC when using the test leads or accessories provided with the meter.
The System CAT and voltage rating is limited by the lowest rated component in the System when using test
leads or accessories not provided with the meter.
• Inspect the test leads or accessory before use. They must be clean and dry, and the insulation must be in
good condition. Do not use the test lead if the contrasting inner layer of insulation is visible.
• Use this unit for the manufacturer’s intended purpose only, as described in this manual. Anyotheruse can
impair the protection provided by the unit.
Failure to observe these warnings could result in severe injury or death.
Electric shock hazard:
• Do not operate with the case open.
• Before opening the case, remove the test leads from the circuit and shut off the unit.
• Keep hands and fingers below the barriers on the test leads and the clamp meter body.
Failure to observe these warnings could result in severe injury or death.

6
Electric shock hazard:
• Unless measuring voltage, current, or frequency, shut off and lock out power. Make sure that all capacitors
are discharged. Voltage must not be present.
• Set the selector and connect the test leads so that they correspond to the intended measurement. Incorrect
settings or connections can result in incorrect measurements or damage to the unit.
• Using this unit near equipment that generates electromagnetic interference can result in unstable or inaccu-
rate readings.
Failure to observe these warnings could result in severe injury or death.
Electric shock hazard:
• Do not change the measurement function while the test leads are connected to a component or circuit.
• Do not clamp the jaw around a conductor carrying a frequency greater than 400Hz. The magnetic circuitry
may reach a hazardous temperature if this frequency is exceeded.
Failure to observe these precautions may result in injury and can damage the unit.
Electric shock hazard:
• Do not attempt to repair this unit. It contains no user-serviceable parts.
• Do not expose the unit to extremes in temperature or high humidity. Refer to “Specifications.”
Failure to observe these precautions may result in injury and can damage the unit.
Important Safety Information

CMGRT-100A
7
Identification
1. Jaw
2. Guard
3. Lever
4. Rotary Switch
5. Display Backlight ON/OFF
6. Stores Measurements in Memory
7. Navigate/Validate Measurement Displays
8. HOLD Button
9. OLED Display
10. Calibration Loop (52084190)
Symbols on the Unit
Warning—Read the
instruction manual
Warning—Risk of Electric Shock
Double insulation
Application around or removal from
hazardous live conductors is permitted
Recyclable in accordance with
ISO 14040 standard
1
2
3
4
5
6
7
8
9
Ω
MEM
OFF
+ A
A
MR
SET-UP
HOLD
6
0
0
V
C
A
T
I
V
4
0
A
~
10

8
Display Icons
11. Advance Mode
12. Inductive Component = Resistive Component (Advanced Mode)
13. Main Display. Displays OR (Out of Range) when the measured
resistance is over 1500 Ω or/and when the measured current is over 40A
14. Resistance/Impedance (Advanced Mode)
15. Storage Mode
16. Memory Recall Mode
17. Memory Location
18. Hazardous Voltage (Blinks when Voltage exceeds 50V)
19. Alarm Threshold High/Low Indicator
20. Alarm Threshold Display
21. Units of Alarm Displayed
22. Units of Main Display
23. Units of Top Display (Loop Inductance/ Current)
24. Top Display (Advanced Mode)
25. Low Battery
26. Auto Power Off Disabled
27. Open Jaw
28. Presence of Stray Noise (Current) In Loop
(Measurements not valid)
29. Main Display Indicates Date When Lit
30. Freeze Measurement
31. Speaker Enabled
11
24
12
23
13
22
14
15
16
31
17
30
18
2829
19
27
20
26
21
25

CMGRT-100A
9
Product Features
Rotary Switch Positions:
OFF – Instrument Powered Off
Ω + A – Measure Loop Impedance & Leakage Current
A – Measure Current
MR – Display Stored Data
SET-UP – Access to Instrument settings & Data Selection
Alarm Feature:
There are four distinct patterns of audio signal being employed for various warnings and instrument
operations. They can be disabled if required. The different pattern and their purposes are listed below:
Low – pitched with short intervals:
Normal instrument operations
Low – pitched with a permanent signal:
Alarm thresholds triggered for either Ω or A
High – pitched with a short intervals:
Irregular occurrence which may include OR in measurements or a full memory
High – pitched with a permanent signal:
Alarm threshold for V triggered
Thresholds are user defined values. The alarm is enabled with a user defined threshold when or when
icons are displayed.
– Alarm Enabled for measurement above defined threshold
– Alarm Enabled for measurement below defined threshold
Ω
MEM
OFF
+ A
A
MR
SET-UP
HOLD
6
0
0
V
C
A
T
I
V
4
0
A
~

10
Instrument SET-UP
There are twelve accessible menus in the SET-UP position of the rotary switch that allows user defined
parameters to configure the instrument.
Navigation
Navigating through the features is made possible using the following buttons on the instrument:
– Move up in the menu tree
– Move down in the menu tree
– Select menu or return to previous menu
When the user enters the menu tree, the selected menu starts blinking, indicating the state of the menu.
Product Features (cont'd)
No. Function
1 Erase stored data.
2 Enables/ disable audible alarm.
3 Enables/disables Auto Power OFF
4 Sets the impedance alarm threshold (Ω)
5 Sets the voltage alarm threshold (V)
6 Sets the current alarm threshold (I)
7 Sets the date.
8 Sets the time.
9 Selects the Standard or Advanced operating mode.
10 Selects the test frequency for the impedance.
11 Enables/disables the AUTO-HOLD mode.
12 Displays the version number.
13 Not used.

CMGRT-100A
11
Product Features (cont'd)
SET-UP Menus
1. CLr – Erase Stored Data
• Enter menu by . CLr blinks.
• Hold and buttons simultaneously for 6 seconds to erase all recorded data.
The meter indicates MEM 0.
• Return to the previous menu by .
2. SNd – Enable/Disable Audible Alarm
• Enter menu by . SNd blinks.
• Press or to enable/disable alarm sound.
• Alarm enabled when icon is visible and disabled when it is masked.
• Return to the previous menu by .
MEM
OFF
+ A
A
MR
SET-UP
HOLD
MEM
OFF
+ A
A
MR
SET-UP
HOLD
MEM
OFF
+ A
A
MR
SET-UP
HOLD
MEM
OFF
+ A
A
MR
SET-UP
HOLD
MEM
OFF
+ A
A
MR
SET-UP
HOLD
MEM
OFF
+ A
A
MR
SET-UP
HOLD

12
3. stOP – Enable/Disable Auto Power OFF
• Enter menu by . stOP blinks.
• Press or to enable/disable Auto Power OFF.
• Auto Power OFF deactivated when icon is displayed.
• Return to the previous menu by .
4. AL. Ω – Impedance Alarm Threshold
• Enter menu by . AL. Ω blinks.
• Press or to select state of the alarm:
— Disabled
— Enabled for a measurement exceeding the threshold
— Enabled for a measurement below the threshold
• Validate by .
Product Features (cont'd)
MEM
OFF
+ A
A
MR
SET-UP
HOLD
MEM
OFF
+ A
A
MR
SET-UP
HOLD
MEM
OFF
+ A
A
MR
SET-UP
HOLD
MEM
OFF
+ A
A
MR
SET-UP
HOLD
MEM
OFF
+ A
A
MR
SET-UP
HOLD

CMGRT-100A
13
MEM
OFF
+ A
A
MR
SET-UP
HOLD
MEM
OFF
+ A
A
MR
SET-UP
HOLD
MEM
OFF
+ A
A
MR
SET-UP
HOLD
MEM
OFF
+ A
A
MR
SET-UP
HOLD
4. AL. Ω – Impedance Alarm Threshold (cont'd)
Setting the Alarm Value:
• Press or to select the impedance alarm threshold
• Validate by .
Product Features (cont'd)

14
5. AL. V – Voltage Alarm Threshold
• Enter menu by . AL. V blinks.
• Press or to select state of the alarm:
— Disabled
— Enabled for a measurement exceeding the threshold
• Validate by .
Note: Voltage Alarm can only be triggered for measurements exceeding threshold
• Enter the menu tree further to select an alarm threshold and return to main menu
Setting the Alarm Value:
• Press or to select the impedance alarm threshold
• Validate by .
Product Features (cont'd)
MEM
OFF
+ A
A
MR
SET-UP
HOLD
MEM
OFF
+ A
A
MR
SET-UP
HOLD
MEM
OFF
+ A
A
MR
SET-UP
HOLD
MEM
OFF
+ A
A
MR
SET-UP
HOLD
MEM
OFF
+ A
A
MR
SET-UP
HOLD
MEM
OFF
+ A
A
MR
SET-UP
HOLD

CMGRT-100A
15
6. AL. A – Current Alarm Threshold
• Enter menu by . AL. A blinks.
• Press or to select state of the alarm:
— Disabled
— Enabled for a measurement exceeding the threshold
• Validate by .
Setting the Alarm Value:
• Press or to select the impedance alarm threshold
• Validate by .
Note: Current Alarm can only be triggered for measurements exceeding threshold
• Enter the menu tree further to select an alarm threshold and return to main menu
Product Features (cont'd)
MEM
OFF
+ A
A
MR
SET-UP
HOLD
MEM
OFF
+ A
A
MR
SET-UP
HOLD
MEM
OFF
+ A
A
MR
SET-UP
HOLD
MEM
OFF
+ A
A
MR
SET-UP
HOLD
MEM
OFF
+ A
A
MR
SET-UP
HOLD
MEM
OFF
+ A
A
MR
SET-UP
HOLD

16
7. dAtE – Set Date
• Enter menu by . dAtE blinks.
• Press or to select a year and validate by .
• Press or to select the month and validate by .
• Press or to select the date.
• Validate and return to the previous menu by .
Product Features (cont'd)
MEM
OFF
+ A
A
MR
SET-UP
HOLD
MEM
OFF
+ A
A
MR
SET-UP
HOLD
MEM
OFF
+ A
A
MR
SET-UP
HOLD
MEM
OFF
+ A
A
MR
SET-UP
HOLD
MEM
OFF
+ A
A
MR
SET-UP
HOLD
MEM
OFF
+ A
A
MR
SET-UP
HOLD

CMGRT-100A
17
MEM
OFF
+ A
A
MR
SET-UP
HOLD
MEM
OFF
+ A
A
MR
SET-UP
HOLD
MEM
OFF
+ A
A
MR
SET-UP
HOLD
7. dAtE – Set Date (cont'd)
8. HOUR – Set Time
• Enter menu by . HOUR blinks.
• Press or to select AM/PM or a 24-hour display mode (24H), which blinks.
Validate by .
• Press or to select the hour, which blinks. Validate by .
• Press or to select the minutes value, which blinks. Validate by .
• Validate and return to the previous menu by .
Product Features (cont'd)
MEM
OFF
+ A
A
MR
SET-UP
HOLD
MEM
OFF
+ A
A
MR
SET-UP
HOLD

CMGRT-100A
19
9. USE – Select Standard/Advanced Mode
• Enter menu by . USE blinks.
• Press or to select between Standard or Advanced Mode.
— Advanced Mode: The + icon is displayed
— Standard Mode: Std is displayed
• Validate and return to the previous menu by .
Product Features (cont'd)
MEM
OFF
+ A
A
MR
SET-UP
HOLD
MEM
OFF
+ A
A
MR
SET-UP
HOLD
MEM
OFF
+ A
A
MR
SET-UP
HOLD
MEM
OFF
+ A
A
MR
SET-UP
HOLD
MEM
OFF
+ A
A
MR
SET-UP
HOLD

20
10. FrEQ – Select Test Frequency
• Enter menu by . FrEQ blinks.
• Press or to select among the four available transposition frequencies for
measured impedance
• Validate and return to the previous menu by .
Product Features (cont'd)
MEM
OFF
+ A
A
MR
SET-UP
HOLD
MEM
OFF
+ A
A
MR
SET-UP
HOLD
MEM
OFF
+ A
A
MR
SET-UP
HOLD
MEM
OFF
+ A
A
MR
SET-UP
HOLD
MEM
OFF
+ A
A
MR
SET-UP
HOLD
MEM
OFF
+ A
A
MR
SET-UP
HOLD

CMGRT-100A
21
11. HOLd – Enable/Disable AUTO-HOLD
• Enter menu
• Use movement buttons to enable or disable AUTO-HOLD. It is enabled when
icon is displayed
Product Features (cont'd)
MEM
OFF
+ A
A
MR
SET-UP
HOLD
MEM
OFF
+ A
A
MR
SET-UP
HOLD
MEM
OFF
+ A
A
MR
SET-UP
HOLD
MEM
OFF
+ A
A
MR
SET-UP
HOLD
MEM
OFF
+ A
A
MR
SET-UP
HOLD

22
Product Features (cont'd)
12. VER – Display Version Number
• Enter menu and the version number is displayed
13. CAL – Reserved for Factory Use
Memory:
The instrument can store up to 300 measurements. A full memory is represented by FULL. A data can be
stored by pressing the button. Storage is confirmed with an audible sound.
Switch rotary switch to to display stored data.
Auto Power OFF:
Auto Power OFF can be enabled/disabled in SET-UP. If enabled the instrument remains powered on for
exactly 5 minutes, when inactive, until it automatically powers off to save/extend battery life.
Measurement Modes:
1. Standard Mode – Only one measurement screen is available. The loop impedance and the
leakage current is displayed. Measurement frequency is 2083 Hz.
2. Advanced Mode – Three measurements screens are available.
• Screen 1 displays the same as Standard Mode. However, the loop impedance at the
other frequencies can be displayed using SET-UP.
• Screen 2 displays the contact voltage calculated using the loop impedance and
current measurement.
• Screen 3 displays loop resistance (R) and loop inductance (L) In case of a negligible
inductive component, the symbol R=L is displayed
MEM
OFF
+ A
A
MR
SET-UP
HOLD
MEM
OFF
+ A
A
MR
SET-UP
HOLD
MEM
OFF
+ A
A
MR
SET-UP
HOLD
/