Page is loading ...

Gebrauchsanleitung
Guide d’Utilisation
Guida di Avvio
Guia de Usario
User Guide
communication in motion
™
™
TeamSet
™
PRO

© Cardo Systems, Inc.
The Bluetooth® word mark and logos are owned by the Bluetooth SIG, Inc. Any use of such marks by Cardo Systems, Inc. is under license.
Other trademarks and trade names are those of their respective owners.
2
scala rider
®
TeamSet
™
PRO

CONTENTS OF RETAIL BOX
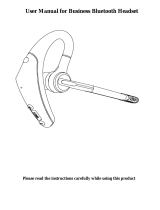
INTRODUCTION
Congratulations and thank you for choosing the scala rider
TeamSet
pro
Bluetooth® Headset package for bikers.
This User Guide will help you operate the headset, but you should rst
familiarize yourself with the Bluetooth functionality of your cellular phone
and/or GPS device before using the scala rider
TeamSet
pro
.
This retail box contains two scala rider
TeamSet
pro
headsets that
already factory paired (see details below).
The scala rider
TeamSet
pro
headset can serve as a stand alone unit
for the following connectivity modes:
communication in full duplex
Bluetooth communication**
Each
TeamSet
pro
headset can establish an audio connection
with one Bluetooth device at a time. Read the section “Using the Headset”
on how to switch the audio connection between the paired devices.
We wish you a great scala rider experience and remain available for any
inquiries you may have. Just write us at
Visit to download this
manual in other languages
____________________
* Full duplex calls allow you to speak and hear the other party speak simultaneously
** Mobile phones that do not support the Bluetooth Handsfree prole may prevent you
from using the Redial and Call Reject features. The
TeamSet
pro
supports headset and
handsfree proles at up to 10 m / 30 ft. distance from the mobile phone
*** Requires Bluetooth compatibility on the part of the GPS device
Intercom Button
• Initiate/Terminate
Intercom call
• Reject a call
CTRL – Control Button
• Power On, Power O
• Answer/End Call
• Pairing
Charging
Jack
Volume
Down
Volume
Up
Two Headsets
Two Helmet Clamps
Tab
Sliding Plate
Microphone
Right Speaker
(long cord)
Left Speaker
(short cord)
MP3 Jack
Back
Plate
English
3
scala rider
®
TeamSet
™
PRO

1 Dual Wall Charger
2 Allen Wrenches
2 sets of Velcro Pads
2 MP3 Cables
2 MP3 Cable Holders
2 Glue Plates
2 Pre-moistened Towelettes
2 Carry-Pouches
4 Microphone Sponges
Flat sponge for full-face helmets and round sponge for other helmet types
User Guide, including Warranty and Registration form
IMPORTANT:
The cover tongue protecting the Charging Jack should be kept tightly
closed at all times to prevent moisture from entering the device.
WHILE MOST INSTRUCTIONS IN THIS MANUAL REFER TO THE HEADSET IN THE
SINGULAR, THEY APPLY TO BOTH UNITS UNLESS INDICATED OTHERWISE.
BEFORE USING (CHARGING THE
HEADSET)
Make sure that the headset is fully charged for at least four hours
before initial use.
1. Connect the wall charger to the headset’s Charging Jack (located
between the two Volume Buttons).
2. While charging, the Red Light turns on (it may take up to 15
seconds until the Red Light turns on). When charging is complete,
the Red Light will turn o.
SET UP AND CONFIGURATION
Pairing is a one time process that is required for mutual recognition
between a headset and other Bluetooth devices. Once the two head-
sets are paired, they will remain paired and automatically recognize
each other whenever they are within range. The two headsets in
your retail box are already factory paired and relate to each other as
the Buddy connection. If for any reason, you have to pair them again,
proceed as follows:
1. If either headset is turned OFF, turn it ON by pressing and holding
the CTRL Button until the Blue Light ashes three times.
2. Make sure that both headsets are now ashing slowly in Blue.
Mobile
phone
Driver-to-
Passenger
Full-duplex
Intercom
Connection
GPS
MP3
player
4
scala rider
®
TeamSet
™
PRO

3. Pick up one headset and simultaneously press and hold the CTRL
Button and Intercom Button for at least six seconds until the Red
Light begins ashing rapidly, indicating it is in Intercom Pairing mode.
4. Repeat Step 3 again for the second scala rider
TeamSet
pro
headset. Both headsets should now be ashing rapidly in Red.
5. Within a few seconds, both headsets will show a solid Red light
for two seconds, and then begin ashing slowly in Blue.
If the Pairing process is not completed within one
minute the headset will return to Standby mode.
If you have a Bluetooth enabled mobile phone and would like to
make and receive phone calls using the scala rider
TeamSet
pro
,
you must rst pair your headset to the mobile phone.
If you have a compatible Bluetooth GPS device you wish to
use with the scala rider
TeamSet
pro
, please skip this step, and
continue ahead to BLUETOOTH
Pairing is a one time process. Once the headset is paired to a specic
mobile phone during this Setup Procedure, they will remain paired
and automatically recognize each other whenever they are within
range. If the connection between the phone and headset is lost, tap
the CTRL button to reconnect the devices.
To pair the scala rider
TeamSet
pro
to a Bluetooth phone proceed as
follows:
1. Turn on your phone and make sure its Bluetooth function is
activated.
2. With the scala rider
TeamSet
pro
headset turned ON, press
and hold the CTRL Button for at least six seconds until the Red
and Blue Lights begin rapidly alternating.
3. Search for Bluetooth devices on your phone by following the
phone’s instructions. Please consult your phone’s User Manual
for more information.
4. After a few seconds the phone will list the “scala rider
as a discovered device. Select it and follow your
phone’s instructions to accept the pairing.
5. When prompted enter 0000 (four zeros) as your PIN or passkey.
6. Your phone will conrm that pairing has succeeded and the
headset will begin ashing slowly in Blue.
If the Pairing process is not completed within two minutes the
headset will return to Standby mode.
With some mobile phones, you may need to tap the CTRL button
to connect the headset to the phone after pairing is complete. The
scala rider
TeamSet
pro
headset will automatically connect to the
last phone connected to the headset.
BLUETOOTH
If you have a Bluetooth enabled GPS device and would like to transmit
navigation instructions and sounds from the GPS device through the
headset’s speakers, you must rst pair your headset to the GPS device.
NOTE: Not all Bluetooth enabled GPS devices allow connections to
Bluetooth headsets like the scala rider
TeamSet
pro
. Please consult
your GPS device’s User Manual for more information.
To pair the scala rider
TeamSet
pro
to a Bluetooth GPS device
proceed as follows
1. Turn on your GPS device. Make sure Blutetooth mode is activated.
2. With the scala rider
TeamSet
pro
headset turned ON, press
and hold the CTRL Button for at least six seconds until the Red
and Blue Lights begin rapidly alternating.
3. Search for Bluetooth headsets on your GPS device by following
the device’s instructions. Please consult your GPS device’s User
Manual for more information.
English
5
scala rider
®
TeamSet
™
PRO

4. If your GPS device prompts for a PIN or Passkey enter 0000 (four zeros).
5. Your GPS device will conrm that pairing has succeeded. The
headset will begin ashing slowly in Blue.
6. If you wish to use a Bluetooth mobile phone to make and
receive calls through the headset, you must now pair your
mobile phone to your GPS device by following your GPS
and/or mobile phone’s instructions.
If the Pairing process is not completed within two
minutes the headset will return to Standby mode.
You can delete all of the headset’s pairings at any time.
1. With the scala rider
TeamSet
pro
headset turned ON, press
and hold the CTRL Button for at least six seconds until the Red
and Blue Lights begin rapidly alternating.
2. Once the Red and Blue Lights begin ashing rapidly, press and
hold Volume up for three seconds.
3. The Red and Blue Lights will ash ve times, conrming that
the Reset Pairing was successful.
GETTING STARTED
The Helmet Clamp must be attached to the left side of the helmet.
Once attached, the headset unit can be mounted or released from
the Helmet Clamp at any time. If you wish to connect your MP3 player
to your headset, please refer rst to the assembly instructions listed in
section: USING THE MP3 PLAYER WITH YOUR HEADSET.
There are two methods that can be used in order to attach the Clamp
onto the helmet:
Standard Method: Recommended for most helmet types.
Glue Plate Method: Recommended for helmets to
which the standard method cannot be applied,
using the Glue Plate included in the box.
1. Use the enclosed Allen Wrench to loosen the
two screws on the Back Plate.
2. Slide the Back Plate between the internal
padding and the external shell of the helmet.
3. Adjust the clamp’s location so that the
microphone is located opposite your mouth
and then tighten the screws. You may need to
reposition the Clamp repeatedly until you
identify the best spot. The microphone must
be positioned vertically and not horizontally.
You have the option to glue the Helmet Clamp onto your helmet,
when the above standard method cannot be used, or in case you
prefer to secure the Helmet Clamp with adhesive glue. This option
has been successfully used for a range of high end helmets.
NOTE: While we have no reason to believe that the gluing option might
negatively aect any helmet, Cardo does not assume any responsibility to
that aect, irrespective of its nature and circumstances. The Glue Plate is
oered as a free option that you may choose to use at your own risk and
subject to renouncement of any future claims.
Caution: This process can be done only once!
1. Use the enclosed Allen Wrench to remove both Allen
screws and release the Helmet Clamp’s back plate.
2. Determine the location on the helmet where the Hel-
met Clamp must be attached.
6
scala rider
®
TeamSet
™
PRO

3. Adjust the Helmet Clamp’s location on the Helmet so that the
microphone is located opposite your mouth.
You may need to reposition the Clamp
repeatedly until you identify the best spot. The
microphone must be positioned vertically and
not horizontally (Be sure to clean the selected area prior to the
gluing process).
4. Use the pre-moistened Towelette to clean the helmet area where
you want to install the Glue Plate. Allow to dry thoroughly.
5. Peel the foil cover from the Glue Plates’ adhesive pad.
6. Place the Glue Plate into position according to #3. Press rmly 15
seconds on all 3 parts of the Glue Plate.
7. The adhesive pad bonds to full strength over the next 24 hours.
Therefore it is recommended to not use the headset during this 24
hour period.
8. Fasten the Clamp to the Glue Plate using the Allen screws that were
previously removed.
POSITIONING THE SPEAKERS
Speaker A
Speaker B
Attach the speakers to the Velcro inside
your helmet opposite your ears (short
speaker cord for the left ear [A] and the
long speaker cord [B] for the right ear).
You may want to use the supplied Velcro
pad.
Speaker A
Speaker B
Speaker B
Cable
Using two speakers inside the helmet may be prohibited in certain
jurisdictions. If this is the case, you
should tuck away the long corded
speaker underneath the helmet
padding as follows:
Lead the speaker cord [B] along-
side the rim of the padding to
the right side and then back to
the left side, near speaker [A].
Then place the speaker [B] under-
neath the padding.
ATTACHING AND REMOVING THE
HEADSET FROM THE HELMET CLAMP
Slide the headset downwards along the
sliding panel until a clicking sound indi-
cates that the headset is locked in place.
Press here
to remove
Your headset can be removed for charg-
ing and storage by pressing your nger
gently against the tab and sliding the
headset up with the other hand.
We recommend that you remove the
headset from the helmet when not in use.
English
7
scala rider
®
TeamSet
™
PRO

USING THE HEADSET
headset
Press the CTRL Button steadily for at least three
seconds
headset
Press the CTRL Button steadily for at least three
seconds
Tap the Volume Up Button
Tap the Volume Down Button
AGC (Automatic Gain Control): In addition to manual Volume Control,
the scala rider
TeamSet
pro
will automatically increase and reduce
its volume according to ambient noise and driving speed.
The dierent Audio Sources that are connected to the scala rider
TeamSet
pro
are prioritized as follows:
1. Mobile phone Audio / GPS device (Incoming/outgoing calls ,
GPS audio and navigation instructions)
2. Intercom Buddy Audio
3. MP3 Connectivity
A high priority Audio Source will always interrupt any lower priority
Audio Source.
i.e. Mobile phone call interrupts Intercom call
Intercom call interrupts MP3 connectivity
USING THE INTERCOM
while the headset is
on Standby you can either:
A Buddy Intercom call will be
established and stay on until
both sides are quiet for 30
seconds.
A Buddy Intercom call will be
established. To end the Buddy
Intercom call, single tap the
Intercom Button again.
NOTE: While the Intercom is on, the Redial and Voice Dial functions will be
disabled
On the scala rider
TeamSet
pro
, if you attempt to start
a Buddy Intercom call with a Buddy that is already on a Phone/GPS/In-
tercom call, you will hear a double beep indicating the Buddy is busy.
If the scala rider
TeamSet
pro
and
its Intercom Buddy headset go out of range and disconnect from
each other, the scala rider
TeamSet
pro
will automatically try to
reconnect to its Intercom Buddy for ve minutes.
You can at any time by tapping the Intercom
Button.
If you are not speaking with any one, once the other party tries to
initiate a Buddy Intercom call, the call will begin immediately.
or
8
scala rider
®
TeamSet
™
PRO

The scala rider
TeamSet
pro
The scala rider
TeamSet
pro
oers VOX technology for safe and
hands-free operation of some key functions.
For incoming calls, just pronounce loudly any word (e.g. “hello”). To
reject an incoming call, you need only to remain silent for about 15
seconds. To reject an intercom call remain silent for 30 seconds.
While on standby press and hold the Volume Up and Volume Down
Buttons simultaneously for three seconds until you hear a beep. The
default status is Voice Connect enabled.
The Enable/Disable Voice Connect feature aects only the
Intercom functionality.
MAKING AND RECEIVING MOBILE
PHONE CALLS
Tap the CTRL Button or speak loudly any word
of your choice during an incoming call.
Tap the Intercom Button or remain silent for
15 seconds during an incoming call.
Tap the CTRL Button to end a call.
During Standby, tap the CTRL Button and
state the name of the person you wish to
call. This feature is supported only by mobile
phones that support the Voice Dial feature.
Press and hold the Volume Down Button for
three seconds during Standby.
If your Bluetooth mobile phone is paired to a Bluetooth GPS
device, not directly to the scala rider
TeamSet
pro
, some of the
above Phone functions may not be available.
When the headset is on an active phone call, any Buddy Intercom call
request will be rejected automatically.
Once the phone call audio link drops, you can initiate and accept
Buddy Intercom calls.
STATUS LIGHT STATES
None
Alternating red/blue ashes
Rapid red ashes
1 blue ash every 3 seconds
2 blue ashes every 3 seconds
1 red ash every 3 seconds
2 red ashes every 3 seconds
Solid red
English
9
scala rider
®
TeamSet
™
PRO

USING THE MP3 PLAYER WITH YOUR
HEADSET
Your scala rider
TeamSet
pro
headset can be connected to
an MP3 player device by plugging it to the Helmet Clamp’s
jack with the MP3 cable.
At your option, you may further secure the MP3 cable by
using the MP3 cable holder. For this purpose please proceed as
follows:
MP3 cable holder hook
1. Use the enclosed Allen Wrench to
remove both Allen screws from
Helmet clamp and release the
clamp’s back plate.
2. Place the MP3 cable holder on the
helmet clamp. Both pins on the
MP3 cable holder should be xed
into corresponding indentations on clamp.
3. Place the Back Plate on top of the MP3 cable holder and secure
all parts together using the Allen screws that were previously
removed, as shown in photo.
4. Attach the clamp and headset onto your helmet as described
previously in section “ATTACHING THE CLAMP ON THE HELMET”.
5. Attach the speakers to your helmet as described in section
”POSITIONING THE SPEAKERS”.
Insert cable in hook
6. Connect the MP3 cable to your MP3
player device’s jack and the other
side to the helmet Clamp’s jack,
inserting the cable through the MP3
cable holder.
Make sure that the cable plug clicks
into place.
7. Tuck the MP3 cable into the hook of the MP3 cable holder.
8. In order to use your MP3 player, power on the headset to have it
on Standby mode, ashing slowly in Blue.
Operate the MP3 Player device by using its buttons (FF/REW/
PLAY/PAUSE).
Volume can only be adjusted through the MP3 Player.
Any other audio connection will automatically mute the MP3
Player. The audio signal will return only when headset is once
again in Standby mode.
SUPPORT
For additional information please visit our website at
FAQ:
or contact us at:
Phone:
USA and Canada:
International:
NOTICES
Federal Communications Commission (FCC) Statement
15.21
You are cautioned that changes or modications not expressly approved by the part
responsible for compliance could void the user’s authority to operate the equipment.
15.105(b)
This equipment has been tested and found to comply with the limits for a Class
10
scala rider
®
TeamSet
™
PRO

B digital device, pursuant to part 15 of the FCC rules. These limits are designed
to provide reasonable protection against harmful interference in a residential
installation. This equipment generates, uses and can radiate radio frequency
energy and, if not installed and used in accordance with the instructions, may cause
harmful interference to radio communications. However, there is no guarantee that
interference will not occur in a particular installation. If this equipment does cause
harmful interference to radio or television reception, which can be determined
by turning the equipment o and on, the user is encouraged to try to correct the
interference by one or more of the following measures:
• Reorient or relocate the receiving antenna.
• Increase the separation between the equipment and receiver.
• Connect the equipment into an outlet on a circuit dierent from that to which the
receiver is connected.
• Consult the dealer or an experienced radio/TV technician for help.
Operation is subject to the following two conditions:
1) this device may not cause interference and
2) this device must accept any interference, including interference that may cause
undesired operation of the device.
FCC RF Radiation Exposure Statement:
This equipment complies with FCC radiation exposure limits set forth for an uncontrolled
environment. End users must follow the specic operating instructions for satisfying
RF exposure compliance. This transmitter must not be co-located or operating in
conjunction with any other antenna or transmitter.
Industry Canada (IC) Statement
15.21
You are cautioned that changes or modications not expressly approved by the part
responsible for compliance could void the user’s authority to operate the equipment.
15.105(b)
This equipment has been tested and found to comply with the limits for a Class
B digital device, pursuant to part 15 of the IC rules. These limits are designed
to provide reasonable protection against harmful interference in a residential
installation. This equipment generates, uses and can radiate radio frequency
energy and, if not installed and used in accordance with the instructions, may cause
harmful interference to radio communications. However, there is no guarantee that
interference will not occur in a particular installation. If this equipment does cause
harmful interference to radio or television reception, which can be determined
by turning the equipment o and on, the user is encouraged to try to correct the
interference by one or more of the following measures:
• Reorient or relocate the receiving antenna.
• Increase the separation between the equipment and receiver.
• Connect the equipment into an outlet on a circuit dierent from that to which the
receiver is connected.
• Consult the dealer or an experienced radio/TV technician for help.
Operation is subject to the following two conditions:
1) this device may not cause interference and
2) this device must accept any interference, including interference that may cause
undesired operation of the device.
IC RF Radiation Exposure Statement:
This equipment complies with IC radiation exposure limits set forth for an uncon-
trolled environment. End users must follow the specic operating instructions
for satisfying RF exposure compliance. This transmitter must not be co-located or
operating in conjunction with any other antenna or transmitter.
European CE Notice
The scala rider
TeamSet
™
pro
headset (the “Product”) is in conformity with the fol-
lowing essential requirements of Council Directive 1999/5/EC (referred to as R&TTE
Directive): Articles 3.1a, 3.1.b and 3.2. The Product is manufactured in accordance
with Annex II of the above directive.
Declaration of Conformity (DOC)
The scala rider
TeamSet
™
pro
headset is compliant with and adopts the Bluetooth®
Specication 2.0 and has successfully passed all interoperability tests that are speci-
ed in the Bluetooth® specication. However, interoperability between the device
and other Bluetooth®-enabled products is not guaranteed.
WAIVER AND GENERAL RELEASE
Using a communication device while riding a motorcycle, scooter, moped, ATV,
quad-bike or any other vehicle or equipment, whether on land, water or air (jointly
referred to as “Vehicle”) requires your complete and undivided attention. Cardo
Systems, Inc., including its Ocers, Directors, Aliates, Parent Company, Repre-
sentatives, Agents, Contractors, Sponsors, Employees, Suppliers and Resellers
(jointly referred to as the “Company” or “Cardo”) strongly advises you to take all
necessary precautions and remain alert to the trac, weather and road conditions
if you choose to use the scala rider
TeamSet
pro
headset, including all derivative
models irrespective of its commercial name or branding (the “Device”), and stop
your Vehicle on the roadside prior to initiating or receiving calls. Any publications,
advertisements, announcements or similar notes that refer to using the Device
while riding a Vehicle are solely intended to address its technical capabilities and
should not be misconstrued as if encouraging users to operate the Device while
actively involved in trac.
English
11
scala rider
®
TeamSet
™
PRO

By way of purchasing this Device and not returning it for a full refund (see below),
you are irrevocably releasing, indemnifying from any liability, loss, claim and ex-
pense (including attorneys fees) and holding Cardo harmless for any bodily injuries,
harm or death as well as losses or damages in goods, to any Vehicles including
your own, or to any property or asset that belong to you or to third parties, any of
which may result from using the Device under any circumstances or conditions and
irrespective of jurisdiction. Cardo will not be responsible for any physical damages,
irrespective of reasons, conditions or circumstances, including malfunctioning of
the Device, and all risks associated with operating it rest solely and entirely with
the user of this Device, irrespective of whether the Device is used by the original
purchaser or any third party.
Cardo hereby noties you that using this Device may also be in contravention to
local, federal, state or national laws or regulations, and that any use of the Device is
entirely at your sole risk and responsibility.
1. You, your heirs, legal representatives, successors or assigns, hereby voluntarily
and forever release, discharge, indemnify and hold harmless Cardo from any and
all litigation, claims, debts, demands, actions and liability which may arise, directly
or indirectly, from using the Device for any distress, pain, suering, discomfort,
loss, injury, death, damages to or in respect to any person or property however
caused, WHETHER ARISING FROM THE NEGLIGENCE OR OTHERWISE, and which
may hereafter accrue to you on some future date as a result of said use, to the
fullest extent permitted by law.
2. You fully understand and assume the risks in using the Device, including risk of
negligent acts or omissions by others.
3. You conrm that you are physically capable to use the Device and that you have
no medical conditions or needs that may infringe upon your abilities to do so in
a safe manner. You conrm that you are at least eighteen (18) years of age and
that you have been advised of the risks associated with the use of the Device.
You further conrm that you will not consume any alcohol that may aect your
alertness or any mind-altering substance, and will not carry, use or consume these
substances before or during the use of the Device.
4. You fully acknowledge our warnings and understand that: (a) risks and dangers
exist in using the Device while in trac, including but not limited to injury or
illness, strains, fractures, partial and/or total paralysis, death or other ailments
that could cause serious disability; (b) these risks and dangers may be caused by
the negligence of the manufacturers or its agents or any third party involved in
designing or manufacturing the Device; (c) these risks and dangers may arise from
foreseeable or unforeseeable causes. You hereby assume all risks and dangers
and all responsibility for any losses and/or damages, whether caused in whole or
in part by the negligence or other conduct of others, including the Company.
5. You conrm that you have read this release of liability and fully understand its
terms and that you have given up substantial rights by not returning the Device
for a full refund (see refund option below).
Disclaimer of Warranty
CARDO DISCLAIMS ALL EXPRESS AND IMPLIED WARRANTIES WITH REGARD TO THE
ENCLOSED DEVICE, INCLUDING WITHOUT LIMITATION ANY IMPLIED WARRANTIES
OF MERCHANTABILITY, FITNESS FOR A PARTICULAR PURPOSE, AND NON-
INFRINGEMENT. THE DEVICE AND ITS ACCESSORIES ARE PROVIDED “AS IS” AND “AS
AVAILABLE” WITHOUT WARRANTY OF ANY KIND BEYOND THOSE ASSUMED IN THE
ENCLOSED MANUAL.
Limitation of Liability
IN NO EVENT SHALL CARDO BE LIABLE FOR ANY SPECIAL, INDIRECT, PUNITIVE,
INCIDENTAL, EXEMPLARY OR CONSEQUENTIAL DAMAGES, OR ANY DAMAGES
WHATSOEVER RESULTING FROM THE USE OF THE DEVICE, WHETHER BASED ON
BREACH OF CONTRACT, TORT (INCLUDING NEGLIGENCE), PRODUCT LIABILITY
OR OTHERWISE, EVEN IF ADVISED OF THE POSSIBILITY OF SUCH DAMAGES. YOU
ACKNOWLEDGE AND AGREE THAT THE LIMITATIONS SET FORTH ABOVE ARE
FUNDAMENTAL ELEMENTS OF THIS AGREEMENT AND THE DEVICE WOULD NOT
BE PROVIDED TO YOU ABSENT SUCH LIMITATIONS. SOME STATE STATUTES MIGHT
APPLY REGARDING LIMITATION OF LIABILITY.
www.cardosystems.com
12
scala rider
®
TeamSet
™
PRO
/