HQ Power VDPL300CB User manual

Category
Stroboscopes & disco lights
Type
User manual

HQ Power VDPL300CB is a lively, multi-colored LED effect light that can be operated in stand-alone, master/slave, or DMX-512 modes. This fixture offers 82 lenses that project an array of colored beams over a 360° area. With a low power draw, long lifespan, and no lamp replacements, this effect light is ideal for professional use on stages, in discos, or theaters.

HQ Power VDPL300CB is a lively, multi-colored LED effect light that can be operated in stand-alone, master/slave, or DMX-512 modes. This fixture offers 82 lenses that project an array of colored beams over a 360° area. With a low power draw, long lifespan, and no lamp replacements, this effect light is ideal for professional use on stages, in discos, or theaters.

VD
P
LED
Z
LED
Z
LED
Z
LED
Z
LED
Z
USER
M
GEBRU
MODE
MANU
A
BEDIE
N
P
L30
0
Z
IRCON –
6
Z
IRCON –
L
Z
IRCON –
E
Z
IRCON –
6
Z
IRCON –
6
M
ANUAL
IKERSHAN
D
D’EMPLOI
A
L DEL USU
A
N
UNGSANLE
0
CB
6
X 3W L
E
L
ED-EFFE
C
E
FFET LE
D
6
X 3W E
F
6
X 3W L
E
LEIDING
A
RIO
ITUNG
E
D EFFECT
C
T – 6 X
3
D
DE 6 X 3
F
ECTO LE
D
E
D-EFFEK
T
3
8
13
18
23
– DMX C
O
3
W – DMX
-
W – PILO
T
D
– CONT
R
T
– DMX-G
O
NTROLL
E
-
GESTUU
R
T
AGE DM
X
R
OLADO P
O
ESTEUER
T
E
D
R
D
X
O
R DMX
T
VDPL300CB
V. 01 – 05/07/2012 2 ©Velleman nv
terminator – eindweerstand – résistance de
terminaison – terminación – Terminierung
How to turn the controller line from 3-pins into 5-pins (plug and socket).
Controller line van 3-pin naar 5-pin aanpassen (stekker en contact).
Modifier la ligne du contrôleur de 3 broches en 5 broches (fiche et contact).
Modificar la línea del controlador de 3 polos y 5 polos (conector y contacto).
Die Controller-Linie von 3-Pin nach 5-Pin anzupassen (Stecker und Kontakt).
V. 01 –
0
1.
I
To all r
e
Import
a
Thank y
o
service.
I
2.
S
This
quali
Mak
e
man
u
Do n
nece
Use
a
Inst
a
subs
t
Resp
3.
G
Refer to
t
0
5/07/2012
I
ntroducti
o
e
sidents of th
e
a
nt environme
This symbol
o
could harm t
h
waste; it sho
u
returned to y
o
rules.
If in doubt,
c
o
u for choosing
I
f the device w
a
S
afety Inst
Be very
c
electros
h
Always
d
activitie
s
Indoor
u
liquids.
Keep thi
s
Caution
Do not
s
epile
tem
p
per
m
There ar
e
service
a
device falls un
d
fied person car
r
e
sure that the
a
u
al.
ot crimp the po
ssary.
a
n appropriate
s
a
ll the VDPL300
C
t
ances.
ect a minimum
G
eneral Gu
t
he Velleman
®
Keep thi
s
Protect t
h
o
n
e
European Un
ntal informati
o
n the device or
h
e environment.
u
ld be taken to
a
o
ur distributor
o
c
ontact your l
o
HQPower™! Pl
e
a
s damaged in
t
ructions
c
areful during t
h
h
ocks.
d
isconnect main
s
are performed
u
se only. Kee
p
s
device away f
r
: device heats
u
s
tare directly
a
ptic seizure in
s
p
orarily loss of
s
m
anent (irrever
s
e
no use
r
-servi
c
a
nd/or spare pa
r
d
er protection cl
r
y out the elect
r
a
vailable voltag
wer cord and p
r
s
afety cable to
f
C
B at a minima
distance of 0.5
idelines
®
Service and
Q
s
device away f
r
h
is device from
VDPL3
0
3
USER M
A
ion
on about this
the package in
Do not dispos
e
a
specialized c
o
o
r to a local rec
y
o
cal waste di
s
e
ase read the m
t
ransit, don't in
s
h
e installation:
s power when
d
. Handle the po
p
this device aw
a
r
om children a
n
u
p during use.
a
t the light so
s
ensitive peopl
e
s
ight (flash blin
d
s
ible) eye dama
c
eable parts ins
r
ts.
ass I. It is ther
e
r
ic connection.
e does not exc
e
r
otect it agains
t
f
ix the device (
e
l distance of 0.
5
m between th
e
Q
uality Warr
a
r
om dust and e
x
shocks and ab
u
0
0CB
A
NUAL
product
dicates that dis
e
of the unit (o
r
o
mpany for rec
y
y
cling service.
R
s
posal authori
t
anual thorough
s
tall or use it a
n
touching live w
d
evice not in us
e
wer cord by th
e
a
y form rain, m
n
d unauthorized
urce, as this m
e
d
ness)
ge.
ide the device.
e
fore essential
t
e
ed the voltage
t
damage. Hav
e
e
.g. VDLSC7N
o
5
m from flam
m
e
device’s light
o
a
nty on the last
x
treme temper
a
u
se. Avoid brut
e
posal of the de
v
r
batteries) as u
y
cling. This devi
c
R
espect the loc
a
t
ies.
ly before bringi
n
d contact your
ires can cause l
e
or when servi
e
plug only.
oisture, splashi
users.
ay cause
Refer to an aut
t
hat the device
stated in the s
p
e
an authorised
o
r VDLSC8N).
m
able and explo
s
o
utput and any
pages of this
m
a
tures.
e
force when op
©Velle
m
v
ice after its lif
e
nsorted munici
p
c
e should be
a
l environment
a
ng this device i
n
dealer.
ife-threatening
cing or mainte
n
ng and drippin
g
horized dealer
f
be earthed. Ha
v
p
ecifications of
t
dealer replace i
s
ive objects or
illuminated sur
f
m
anual.
erating the dev
m
an nv
e
cycle
p
al
a
l
n
to
n
ance
g
f
or
v
e a
t
his
t if
f
ace.
ice.
VDPL300CB
V. 01 – 05/07/2012 4 ©Velleman nv
Familiarise yourself with the functions of the device before actually using it. Do not allow operation
by unqualified people. Any damage that may occur will most probably be due to unprofessional use
of the device.
All modifications of the device are forbidden for safety reasons. Damage caused by user modifications
to the device is not covered by the warranty.
Only use the device for its intended purpose. All other uses may lead to short circuits, burns,
electroshocks, lamp explosion, crash, etc. Using the device in an unauthorised way will void the
warranty.
Damage caused by disregard of certain guidelines in this manual is not covered by the warranty and
the dealer will not accept responsibility for any ensuing defects or problems.
Mechanical wear and LEDs are not covered by warranty.
A qualified technician should install and service this device.
Do not switch the device on immediately after it has been exposed to changes in temperature.
Protect the device against damage by leaving it switched off until it has reached room temperature.
This device is designed for professional use on stage, in discos, theatres, etc. The VDPL300CB should
only be used indoors. Use only the included power adapter.
Lighting effects are not designed for permanent operation: regular operation breaks will prolong their
lives.
There may be a particular smell when the device is activated for the first time. This is normal and
any smell will gradually disappear.
Do not repeatedly switch the fixture on and off. This shortens the life time.
Keep away from electronic equipment that may cause interference.
Never leave the device running unattended.
Use the original packaging if the device is to be transported.
Keep this manual for future reference.
4. Features
compact but bright LED effect
82 lenses projecting a multitude of coloured beams over 360°
DMX-512 control possible via 6 channels (RGB separate colour control, rotation, shutter and effect
control)
stand-alone, master/slave or sound-activated mode via built-in microphone
very low power consumption, long lifetime and no lamp replacements.
5. Overview
Refer to the illustrations on page 2 of this manual.
Front Back
1 display 4 DMX input
2 control buttons 5 DMX output
3 microphone 6 fuse holde
r
7 power supply
6. Installation
Mounting the device
Have the device installed by a qualified person, respecting EN 60598-2-17 and all other applicable
norms.
The carrying construction must be able to support 10 times the weight of the device for 1 hour
without deforming.
The installation must always be secured with a secondary attachment e.g. a safety cable.
Never stand directly below the device when it is being mounted, removed or serviced. Have a
qualified technician check the device once a year and once before you bring it into service.
Install the device in a location with few passers-by that is inaccessible to unauthorised persons.
VDPL300CB
V. 01 – 05/07/2012 5 ©Velleman nv
Overhead mounting requires extensive experience: calculating workload limits, determining the
installation material to be used… Have the material and the device itself checked regularly. Do not
attempt to install the device yourself if you lack these qualifications as improper installation may
result in injuries.
Make sure there is no flammable material within a 0.5 m radius of the device.
Have a qualified electrician carry out the electric connection.
Connect the device to the mains with the power plug. Do not connect it to a dimming pack.
The installation has to be approved by an expert before the device is taken into service.
DMX-512 connection
When applicable, connect an XLR cable to the female 3-pin XLR output of a controller (not incl.) and
the other side to the male 3-pin XLR input [4] of the VDPL300CB. Multiple VDPL300CBs can be linked
through serial linking. The linking cable should be a dual core, screened cable with XLR input and
output connectors.
Maximum recommended serial data link distance is 500 meters (1640 ft). Maximum recommended
number of fixtures on a serial data link is 32 fixtures.
A DMX terminator is recommended for installations where the DMX cable has to run a long distance
or is in an electrically noisy environment (e.g. discos). The terminator prevents corruption of the
digital control signal by electrical noise. The DMX terminator is simply an XLR plug with a 120
resistor between pins 2 and 3, which is then plugged into the XLR output socket [5] of the last
device in the chain.
7. Operation
The VDPL300CB can be used in the following modes:
stand-alone mode: automatic or sound-activated
master/slave
with a DMX512 controller.
7.1 Control Panel Navigation
Access the control panel functions using the four panel buttons [2] located directly underneath the
display [1]. From left to right:
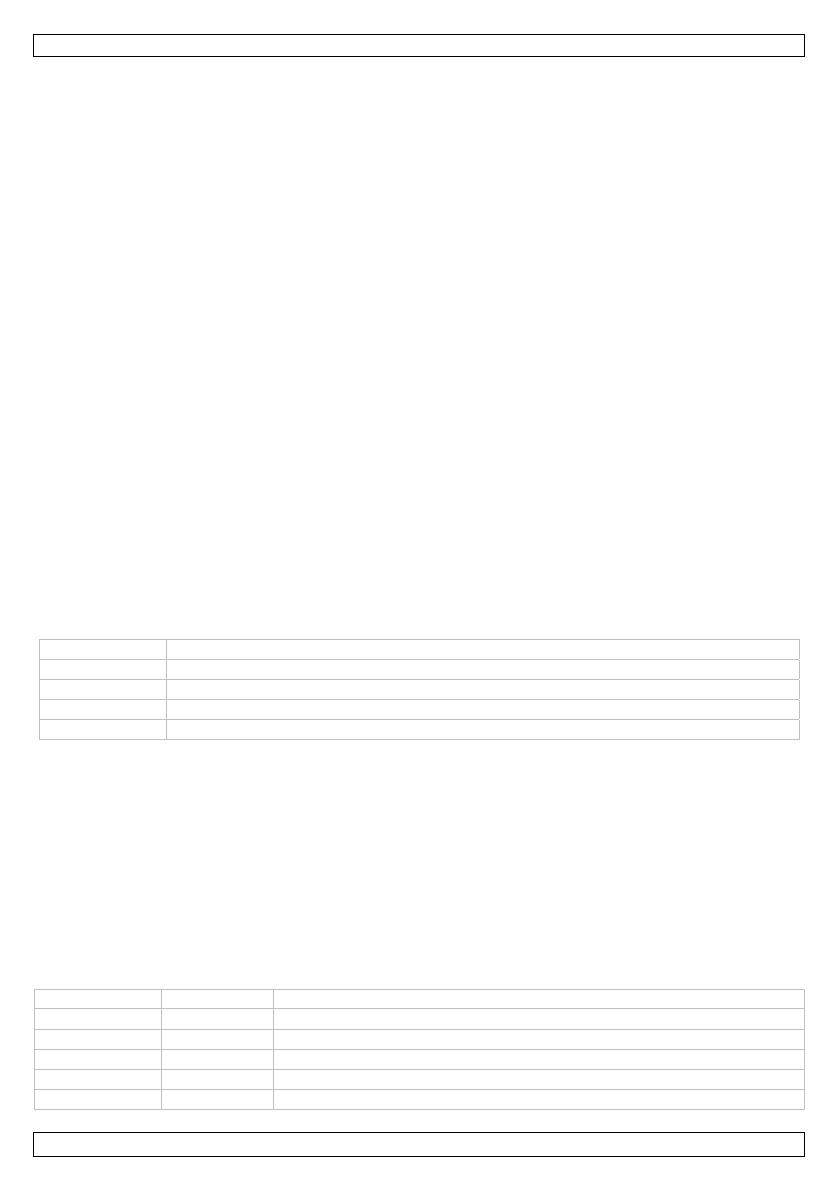
Button Function
<MENU> used to access the menu or to return to a previous menu option
<UP> scrolls through the menu options in ascending orde
r
<DOWN> scrolls through the menu options in descending orde
r
<ENTER> used to select and store the current menu or option within the menu
The control panel display shows the menu items you select from the menu map. When a menu
function is selected, the display will show immediately the first available option for the selected menu
function. To select a menu item, press <ENTER>.
Use the <UP> and <DOWN> buttons to navigate the menu map and menu options. Press <ENTER>
to access the menu function currently displayed or to enable a menu option. To return to the
previous option or menu without changing the value, press the <MENU> button.
7.2 Stand-alone mode
In stand-alone mode, the device runs one of the built-in programs: automatic or sound-controlled.
To set the device to stand-alone mode:
1. Connect nothing to the DMX input [4] of the device.
2. Press <MENU> until <AXX> is displayed and press <ENTER>.
3. Use <UP> and <DOWN> to select a built-in program:
From To Description
A11 A19 Red lights on, motor rotates from fast to slow
A21 A29 Green lights on, motor rotates from fast to slow
A31 A39 Blue lights on, motor rotates from fast to slow
A41 A49 3 colours, changing patterns, motor rotates from fast to slow
A51 A59 7 colours, changing patterns, motor rotates from fast to slow
VDPL300CB
V. 01 – 05/07/2012 6 ©Velleman nv
From To Description
A61 A69 Fade in and out, motor rotates from fast to slow
A71 A79 Strobe mode, motor rotates from fast to slow
So1 So1 Sound control, coloured lights and rotation
So2 So2 Sound control, white light and rotation
7.3 Master/slave mode
The master/slave mode allows for connecting several devices to a single master device. All slave devices
then work synchronously with the master device.
You need to set one device to master mode and all other devices to slave mode.
1. Connect all devices in series with DMX cables.
2. The first unit in the chain functions as the master fixture. Set up the unit as described in Stand-
alone mode.
3. On each of the connected slave units, set the DMX starting address to <A001> as follows: press
<MENU> until <A001> is displayed and press <ENTER>. Use <UP> and <DOWN> to select
<A001> and press <ENTER>.
4. Repeat for each slave unit.
7.4 DMX mode
This mode allows you to control the fixture by any universal DMX controller.
All DMX-controlled devices need a digital start address so that the correct device responds to the
signals. This digital start address is the channel number from which the device starts to “listen” to
the DMX controller. The same starting address can be used for a whole group of devices or an
individual address can be set for every device.
When all devices have the same address, all the units will “listen” to the control signal on one
particular channel. In other words: changing the settings of one channel will affect all devices
simultaneously. If you set individual addresses, each device will “listen” to a separate channel
number. Changing the settings of one channel will only affect the device in question.
In case of the 6-channel VDPL300CB, you will have to set the start address of the first unit to 1
(CH1~6), the second to 7 (1 + 6) (CH7~12), the third to 13 (7 + 6) (CH13~18), and so on.
To set the device to work with a DMX controller:
1. Press <MENU> until <A001> is displayed and press <ENTER>.
2. Use <UP> or <DOWN> to set the DMX starting address (A001 ~ A512) and press <ENTER>.
DMX channel values
Channel From To Description
1
0 5 Switch
6 255 Strobe from fast to slow
2
0 0 Red off
1 255 Gradual change from dark to light
3
0 0 Green off
1 255 Gradual change from dark to light
4
0 0 Blue off
1 255 Gradual change from dark to light
5
0 5 Motor stop
5 127 Motor is turning
128 255 Motor reverse
6
0 5 Sta
r
t up CH1-CH5
6 250 Built-in program, CH1-CH5 off
251 255 Sound control
VDPL300CB
V. 01 – 05/07/2012 7 ©Velleman nv
8. Cleaning and maintenance
All screws should be tightened and free of corrosion.
The housing, the lenses, the mounting supports and the installation location (e.g. ceiling, suspension,
trussing) should not be deformed, modified or tampered with; e.g. do not drill extra holes in
mounting supports, do not change the location of the connections…
Mechanically moving parts must not show any signs of wear and tear.
The electric power supply cables must not show any damage. Have a qualified technician maintain
the device.
Disconnect the device from the mains prior to maintenance activities.
Wipe the device regularly with a dry, lint-free cloth. Do not use alcohol or solvents.
There are no user-serviceable parts, apart from the fuse.
Contact your dealer for spare parts if necessary.
Replacing the fuse
Only replace the fuse by a fuse of the same type and rating.
1. Before replacing the fuse, unplug the mains lead.
2. Unscrew the fuse holder on the rear panel of the base with an appropriate screwdriver.
3. Remove the old fuse and install the new fuse in the fuse holder.
4. Replace the fuse holder in the housing and tighten it.
9. Technical Specifications
power supply 12VDC (adaptor incl.)
power consumption 30W
LEDs 6 x 3W RGB (2pcs each colour)
DMX channels 6
dimensions Ø175 x 150mm
weight 0.58kg
Use this device with original accessories only. Velleman nv cannot be held responsible in the
event of damage or injury resulted from (incorrect) use of this device.
For more info concerning this product and the latest version of this manual, please visit our
website www.hqpower.eu.
The information in this manual is subject to change without prior notice.
© COPYRIGHT NOTICE
The copyright to this manual is owned by Velleman nv. All worldwide rights reserved. No part
of this manual may be copied, reproduced, translated or reduced to any electronic medium or otherwise
without the prior written consent of the copyright holder.
  • Page 1 1
  • Page 2 2
  • Page 3 3
  • Page 4 4
  • Page 5 5
  • Page 6 6
  • Page 7 7

HQ Power VDPL300CB User manual

Category
Stroboscopes & disco lights
Type
User manual

HQ Power VDPL300CB is a lively, multi-colored LED effect light that can be operated in stand-alone, master/slave, or DMX-512 modes. This fixture offers 82 lenses that project an array of colored beams over a 360° area. With a low power draw, long lifespan, and no lamp replacements, this effect light is ideal for professional use on stages, in discos, or theaters.

Ask a question and I''ll find the answer in the document

Finding information in a document is now easier with AI