Be sure to read and understand all of these
instructions before you begin.
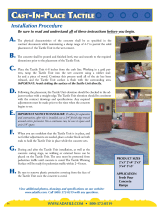
A. e installation area should be cleaned of all debris, oil and grease, making
sure the area is completely free of moisture. Tactile Panel may be surface
mounted on existing pre-cleaned substrate.
B. Lay out the Tactile Panel on the substrate as it will appear when installed.
•Ifrequired,theTactilePanelmaybecutusingatablesawandmarble
tipped blade. See web site for more details.
C. Place a 3/8” bead of adhesive on the frame of the bottom of each Tactile
Panel. Adhesive yield: 10SF per 10 ounce cartridge.
D. Set the Tactile Panel in the installation area. Make all necessary adjustments
prior to fastening.
E. Fasteners shall be installed in pre-formed fastener locations. Holes shall be
drilled using a hammer drill with 1/4” x 2” min SDS bits. e drilled holes
must be a minimum of 2” deep. Place fasteners in hole and hammer into place.
•Ifadditionalfastenersarerequired,usea1/2”,sixpoint,82degree
countersink to add a new fastener location. Follow the same drilling
method for installing the fastener.
F. Caulk around perimeter of entire installation using BASF NP1 or equivalent.
•AllconcretedustpresentontheTactilePanelresultingfromthedrilling
process must be cleaned o of the Tactile Panel prior to using any
caulking materials.
*Not recommended or warrantied for asphalt installation.
suRfaCe mount taCtIle
Installation Procedure
APPLICATION
View additional photos, drawings and specications
on our website: www.adatile.com.
Call (800) 372-0519 with any questions.
26