Page is loading ...

10283
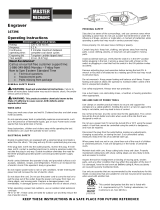
13W ENGRAVER
Product
Info
https://help.tools/
Ensure you keep your manual in a safe place for
future reference.
Read all safety warnings and all instructions
thoroughly before operating this product.
IM Ed3 07/2019
User Manual
Original Instruction

QR codes take you where you want to go
quicky and easily
Whether you require product information, spare parts or
accessories, details on warranties or aftersales service, or if you
want to watch a product demonstration video, our QR codes will
take you there in no time at all.
What is a QR code?
A QR-code (QR=Quick Response) is a type of matrix that can be
read with a smartphone camera and that contains a link to a
website or contact details, for example.
Advantage: You are not required to manually enter a website
address or contact details.
How it works
To scan the QR code, all you need is a smartphone with QR
codes reader software and an Internet connection*. This type of
software can be downloaded for free from your smartphone’s
app store.
Try it out now
Just scan the QR code with your smartphone and find out more
about the Aldi product you have
purchased*.
* Depending on your tariff you may be charged for the connection.
Product
Info

1
1
Contents
Pack contents / parts...................................................
................
....
02
Description of symbols...................................................................04
General Safety Warnings.....................................
....................
......05
Component List ....................
....................................................
.....09
Assembly .........................
............................................................
..10
Operation ...................
...
....
.......................................................
..
.
.11
Maintenance
...
.............
.......
.............................
....................
........
...
13
Warranty .................................
.................................................
......14
Environmental protection......................................
.......................
14
What your 3 year warranty means.
.........................................
....
15
Service Support..
.........
.........................................................
...
......
.15
FAQ/Troubleshooting..
....
.
.
.....
............................
...................
....
.....
.16
Technical Specifications.........
................
...............................
......
..
17

2
2
Pack contents / parts
Application
Congratulations in choosing to buy a Workzone
®
13W Engraver.
All products bought to you by Workzone
®
are manufactured to the
highest standards of performance and safety and, as part of our
philosophy of customer service and satisfaction, are backed by our
comprehensive 3 Year Warranty. We hope you will enjoy your purchase
for many years to come.
When you open your packaging, first remove all items and check there
are no parts damaged or missing. If you find anything wrong, do not
operate the product until the parts have been replaced or the fault has
been rectified. Failure to do so could result in serious personal injury.
NOTE: First time users or inexperienced operators pay particular
attention to the operation of the 13W Engraver, including details of
starting and stopping and correct use of the 13W Engraver on pages
11, as well as the maintenance instructions on pages 12.
Intended use of the 13W Engraver
NOTE: This product is for private domestic DIY use only. It is not
suitable for commercial or trade use.
This 13W Engraver is used for engraving or decorating a wide
variety of materials like, metal, plastic, glass, ceramic, wood
and leather.
The tool is to be used only for its prescribed purpose. Any other use is
deemed to be a case of misuse.

3
3
Contents of carton
1 x 13W Engraver
1 x Tungsten carbide tip
2 x Stencils
1 x Instruction manual
1 x Warranty Card & Certificate

4
4
Description of symbols
To reduce the risk of injury, user must read instruction manual
Wear ear protection
Wear eye protection
Wear breathing protection
Conforms to relevant standards for electrical safety and
electromagnetic compatibility.
Double insulation
36 Months Warranty
The instruction manual, rating plate, or on the product itself, may
show these symbols. These represent important information about the
product or instructions on its use.
36

5
5
General safety warnings
PRODUCT SAFETY
General Power Tool Safety Warnings
WARNING Read all safety warnings, instructions,
illustrations and specifications provided with this power
tool.
Failure to follow all instructions listed below may result in electric
shock, fire and/or serious injury.
Save all warnings and instructions for future reference.
The term “power tool” in the warnings refers to your mains-operated
(corded) power tool or battery-operated (cordless) power tool.
1) Work area safety
a) Keep work area clean and well lit. Cluttered or dark areas invite
accidents.
b) Do not operate power tools in explosive atmospheres, such
as in the presence of flammable liquids, gases or dust. Power
tools create sparks which may ignite the dust or fumes.
c) Keep children and bystanders away while operating a power
tool. Distractions can cause you to lose control.
2) Electrical safety
a) Power tool plugs must match the outlet. Never modify the
plug in any way. Do not use any adapter plugs with earthed
(grounded) power tools. Unmodified plugs and matching outlets
will reduce risk of electric shock.
b) Avoid body contact with earthed or grounded surfaces,
such as pipes, radiators, ranges and refrigerators. There is an
increased risk of electric shock if your body is earthed or grounded.
c) Do not expose power tools to rain or wet conditions. Water

6
entering a power tool will increase the risk of electric shock.
d) Do not abuse the cord. Never use the cord for carrying,
pulling or unplugging the power tool. Keep cord away from
heat, oil, sharp edges or moving parts. Damaged or entangled
cords increase the risk of electric shock.
e) When operating a power tool outdoors, use an extension
cord suitable for outdoor use. Use of a cord suitable for outdoor
use reduces the risk of electric shock.
f) If operating a power tool in a damp location is unavoidable,
use a residual current device (RCD) protected supply. Use of an
RCD reduces the risk of electric shock.
3) Personal safety
a) Stay alert, watch what you are doing and use common sense
when operating a power tool. Do not use a power tool while
you are tired or under the influence of drugs, alcohol or
medication. A moment of inattention while operating power tools
may result in serious personal injury.
b) Use personal protective equipment. Always wear eye
protection. Protective equipment such as dust mask, non-skid
safety shoes, hard hat, or hearing protection used for appropriate
conditions will reduce personal injuries.
c) Prevent unintentional starting. Ensure the switch is in the
off-position before connecting to power source and/or
battery pack, picking up or carrying the tool. Carrying power
tools with your finger on the switch or energising power tools that
have the switch on invites accidents.
d) Remove any adjusting key or wrench before turning the
power tool on. A wrench or a key left attached to a rotating part
of the power tool may result in personal injury.
e) Do not overreach. Keep proper footing and balance at all
times. This enables better control of the power tool in unexpected
situations.
f) Dress properly. Do not wear loose clothing or jewellery. Keep
your hair and clothing away from moving parts. Loose clothes,

7
jewellery or long hair can be caught in moving parts.
g) If devices are provided for the connection of dust extraction
and collection facilities, ensure these are connected and
properly used. Use of dust collection can reduce dust-related
hazards.
h) Do not let familiarity gained from frequent use of tools
allow you to become complacent and ignore tool safety
principles. A careless action can cause severe injury within a
fraction of a second.
4) Power tool use and care
a) Do not force the power tool. Use the correct power tool for
your application. The correct power tool will do the job better and
safer at the rate for which it was designed.
b) Do not use the power tool if the switch does not turn it on
and off. Any power tool that cannot be controlled with the switch
is dangerous and must be repaired.
c) Disconnect the plug from the power source and/or remove
the battery pack, if detachable, from the power tool before
making any adjustments, changing accessories, or storing
power tools. Such preventive safety measures reduce the risk of
starting the power tool accidentally.
d) Store idle power tools out of the reach of children and do
not allow persons unfamiliar with the power tool or these
instructions to operate the power tool. Power tools are
dangerous in the hands of untrained users.
e) Maintain power tools and accessories. Check for
misalignment or binding of moving parts, breakage of parts
and any other condition that may affect the power tool’s
operation. If damaged, have the power tool repaired before
use. Many accidents are caused by poorly maintained power tools.
f) Keep cutting tools sharp and clean. Properly maintained cutting
tools with sharp cutting edges are less likely to bind and are easier
to control.
g) Use the power tool, accessories and tool bits etc. in

8
accordance with these instructions, taking into account the
working conditions and the work to be performed. Use of the
power tool for operations different from those intended could result
in a hazardous situation.
h)Keep handles and grasping surfaces dry, clean and free from
oil and grease. Slippery handles and grasping surfaces do not allow
for safe handling and control of the tool in unexpected situations.
5) Service
a) Have your power tool serviced by a qualified repair person
using only identical replacement parts. This will ensure that the
safety of the power tool is maintained.
Electric engraver safety warning
1. Recommendation that the tool always be supplied via a
residual current device with a rated residual current of 30 mA
or less.

13W Engraver
AFTER SALES SUPPORT
(toll free) MODEL No.: DC-11-1 • 07/2019 10283
e-mail: [email protected]
AUS
9
1300 889 028
AUS
1. Engraving tip
2. Stroke adjustment dial
3. On/off switch
4. Power cord
5. Stencil x 2
6. 1.5mm Hex key
7. Tip release screw
2
6
3
7
4
1
5
Component list

13W Engraver
AFTER SALES SUPPORT
(toll free)MODEL No.: DC-11-1 • 07/2019 10283
e-mail: [email protected]
AUS
10
1300 889 028
AUS
Assembly
Installing an engraver tip (see fig. A1, A2)
WARNING! Disconnect the engraver from the power supply,
turn the on/off switch (3) to the OFF position, before making any
adjustments or undertaking maintenance procedures.
1) Loosen the tip release screw (7) by turning it anti-clockwise with the
hex key (6) supplied.
2) To fit the new engraving tip (1), insert the tip through the centre
of the hole of the engraver, ensuring the tip fully enters the
housing. A new tip should protrude from the end of the housing by
approximately 8.5mm.
3) Tighten the tip release screw (7) fully by rotating in a clockwise
direction.
A2
A1

13W Engraver
AFTER SALES SUPPORT
(toll free) MODEL No.: DC-11-1 • 07/2019 10283
e-mail: [email protected]
AUS
11
1300 889 028
AUS
Operation
WARNING!
• Always wear safety glasses when using this tool.
• After 30 minutes continuous working, the tool needs to be stopped
to cool down to room temperature before use again.
Using the engraver (see fig. B)
1) Before using the engraver you must ensure there is an engraving tip
(1) installed.
2) Connect the engraver power cord (4) to the power supply and hold
the engraver firmly.
3) To turn the engraver on, press the on/off switch (3) to the “I”
position. To turn the engraver off, push the on/off switch (3) to the
“O” position.
4) Hold the machine in a vertical position (almost 90°to the workpiece).
Try to execute individual lines in one uniform movement without
stopping if possible as later on it will be possible to make out paused
and uneven movements on the engraved workpiece. Sketch out the
outlines on the workpiece prior to engraving if necessary (e.g. with
the aid of the stencils provided. It may also assist to clamp down the
stencil onto the work piece to sketch the outlines) in order to make
it possible to engrave more even lines.
NOTE: Do not press down hard while engraving, use light pressure
while guiding the point over the work to be completed.

13W Engraver
AFTER SALES SUPPORT
(toll free)MODEL No.: DC-11-1 • 07/2019 10283
e-mail: [email protected]
AUS
12
1300 889 028
AUS
Adjusting the depth of engraving (see fig. C)
The stroke adjustment dial (2) located on the side of the engraver
controls the stroke length and therefore the depth of engraving.
1) For a fine mark, turn the stroke adjustment dial (2) anti-clockwise to
position ‘1’.
2) For a deeper, thicker mark, turn the stroke adjustment dial (2)
clockwise to position ‘5’.
NOTE: It is recommended that you practice on scrap material before
you start.
C
B

13W Engraver
AFTER SALES SUPPORT
(toll free) MODEL No.: DC-11-1 • 07/2019 10283
e-mail: [email protected]
AUS
13
1300 889 028
AUS
General inspection
Regularly check that all the fixing screws are tight. They may vibrate
loose over time.
Power cord maintenance
If the supply cord is damaged, it must be replaced by the manufacturer,
its service agent or similarly qualified persons in order to avoid a
hazard.
Storage
Store in a secure, dry place out of the reach of children. Do not place
other objects on the product.
Maintenance
WARNING! Always ensure that the Engraver is switched off and
the plug is removed from the power point before making any
adjustments or undertaking maintenance procedures.
1) Use a soft brush to remove any accumulated dust. Wear safety
glasses to protect your eyes whilst cleaning.
2) If the body of the engraver needs cleaning, wipe it with a soft damp
cloth. A mild detergent can be used but never alcohol, petrol or
other harsh cleaning agents.
3) Never use caustic agents to clean plastic parts. Keep the motor
ventilation slots clean.
Caution: Water must never come into contact with the
engraver.

13W Engraver
AFTER SALES SUPPORT
(toll free)MODEL No.: DC-11-1 • 07/2019 10283
e-mail: [email protected]
AUS
14
1300 889 028
AUS
Warranty
Your new WORKZONE
®
13W Engraver will more than satisfy your
expectations.
It has been manufactured under stringent WORKZONE
®
Quality
Standards to meet superior performance criteria.
You will find your new 13W Engraver easy and safe to operate, and,
with proper care, it will give you many years of dependable service.
CAUTION. Carefully read through this entire instruction manual before
using your new WORKZONE
®
13W Engraver. Take special care to heed
the Cautions and Warnings.
Your WORKZONE
®
13W Engraver has many features that will make your
job faster and easier. Safety, performance, and dependability have been
given top priority in the development of this 13W Engraver, making it
easy to maintain and operate.
Use only WORKZONE
®
replacement parts for your product. Non-
conforming parts or modifications made to parts will void your
warranty.
Environmental protection
Recycle unwanted materials instead of disposing of them as
waste. All tools, hoses and packaging should be sorted, taken to
the local recycling centre and disposed of in an environmentally
safe way.

13W Engraver
AFTER SALES SUPPORT
(toll free) MODEL No.: DC-11-1 • 07/2019 10283
e-mail: [email protected]
AUS
15
1300 889 028
AUS
What your 3 year warranty means
Great care has gone into the manufacture of this product and it should
therefore provide you with years of good service when used properly.
In the event of product failure within its intended use over the course
of as quickly as possible once it has been brought to our attention.
In the unlikely event of such an occurrence, or if you require any
information about the product please contact us via our after sales
support services, details of which can be found in this manual and on
the product itself.
After Sales Support TEL: 1300 889 028
Service Support
If you have any issues with the operation of your product, please call
our Customer Service on 1300 889 028 for advice, or email us at

13W Engraver
AFTER SALES SUPPORT
(toll free)MODEL No.: DC-11-1 • 07/2019 10283
e-mail: [email protected]
AUS
16
1300 889 028
AUS
Troubleshooting
Fault Cause Remedy
After powered on,
the engraver does
not work.
On/off switch (3) is in
“O” position.
Press the on/off
switch (3) to “I”
position.
Engraving too deep
or too shallow.
The depth of
engraving is not set
properly.
Adjust the stroke
adjustment dial to a
proper position.
Engraving tip loosen
or detached.
Tip release screw not
tightened.
Tighten the Tip release
screw.
For further inquiries or issues associated with your tool, call our
Customer Service on 1300 889 028 or email us at

13W Engraver
AFTER SALES SUPPORT
(toll free) MODEL No.: DC-11-1 • 07/2019 10283
e-mail: [email protected]
AUS
17
1300 889 028
AUS
This 13W Engraver complies with the following Standards:
Safety:
IEC 62841-1
AS/NZS 62841.1
EMC:
EN 55014-1
EN 55014-2
EN 61000-3-2
EN 61000-3-3
Technical Specifications
Input power ( Operating time ) 13W ( S2 30min )
Power supply 230-240V~50Hz
No Load Speed 6000 /min
Engraving bit Tungsten Carbide Tipped steel
Cord length 1.8 m
Tool Weight: 0.28 kg
Product Dimensions 170*50*85 mm
Technical Specifications

ALDI guarantees that our exclusive brand products are developed to
our stringent quality specications. If you are not entirely satised with
this product, please return it to your nearest ALDI store, within 60 days
from the date of purchase, for a full refund or replacement, or take
advantage of our after sales support by calling the supplier’s Customer
Service Hotline.
Made in China
Workzone
®
is a registered trademark of ALDI Stores
DISTRIBUTED BY:
ALDI STORES
1 SARGENTS ROAD
MINCHINBURY NSW 2770
www.aldi.com.au
AUS
1300 889 028 (toll free)
MODEL No.: DC-11-1 • 07/2019 10283
e-mail: [email protected]
/