Page is loading ...

1
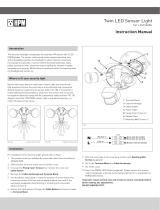
Infrared Motion Sensor
Model: PELL0047
and PELL0048

2
INSTALLATION
POSITIONING
• The sensor is suitable for mounting on plasterboard, wood or masonry surfaces.
• Do not install on damp or conductive surfaces such as metal. It should be placed
away from any ammable materials.
• Before drilling any xing holes, check that there are no hidden obstructions behind
the mounting surface such as pipes or cables.
Please read these instructions carefully before use and retain for future reference.
This sensor must be installed by a qualied electrician in accordance with current
building and IET wiring regulations (BS7671).
IMPORTANT SAFETY INFORMATION
• This sensor is suitable for all lighting ttings (Class I or II).
• Check that the voltage indicated on the rating plate corresponds with that of the
local network before connecting the appliance to the mains power supply.
• The sensor is suitable for connection to a 220-240V, 50Hz supply. It is designed
for permanent connection to xed wiring, which must be a suitable circuit protected
by an RCD with an operating current not exceeding 30mA and an MCB or fuse of
the correct rating.
• Avoid mounting the sensor close to heat sources such as heating vents.
• Avoid pointing the sensor toward objects that may move in wind.
• It is suitable for use in an ambient temperature between -20°C and +40°C.
WHAT’S INCLUDED
• IR Sensor.
• User manual.
• Pack of screws and wall plugs.
• Ensure the mains supply is disconnected or isolated.
• Remove the screw in the centre of the front cover and lift o the cover.
• With regard to the location of the mains feed cable oer the sensor assembly to
the wall and mark the position of the two mounting holes.
• Drill the wall where marked and t the wall plugs then feed the supply and load
wires through the grommet and attach the sensor assembly to the wall using the
screws.

3
OPERATION
• Allow at least 30 sec for the sensor to initialise before making adjustments.
• There are three adjustments on the bottom of the PIR sensor, one adjusts the
duration (TIME) the load lighting remains lit, the second one is for the sensitivity of
movement detection (SENS) and the third is to set the level of ambient light (LUX)
before the sensor triggers the illumination.
• Some trial and error may be required to set these
correctly.
• Adjust the SENS to alter the sensitivity/range of
the motion detection.
• Adjust the TIME setting for the required duration
you require the load light to remain illuminated.
• Adjust the LUX so the load light doesn’t activate
until the light level is low enough for lighting to be
required.
• Turn the controls clockwise to increase the
settings.
• Ensure the wires pass through the cable clamp and are correctly restrained.
• The supply and load wiring should be collected as follows:
• When all wires are connected locate the terminal block onto the two pins on the
back plate.
Note: If the load light tting has a ground, connect the supply and the load ground
wires using the spare connector in the terminal block.
• Replace the front cover and secure with the screw.
• Restore the power supply.

4
SPECIFICATION
Input Voltage 220 - 240V AC 50Hz
Power consumption 0.5W approx
Ambient light <3 - 2000 Lux (adjustable)
Time delay Min 10 sec / Max 7 min approx (adjustable)
Rated load 300W CF/LED ~ 1200W Incandescent
Detection angle 180o
Detection range 5 - 12m (adjustable)
Installation height 1.8 - 2.5m
Ingress rating IP44
INFORMATION ON WASTE DISPOSAL FOR CONSUMERS OF
ELECTRICAL & ELECTRONIC EQUIPMENT.
When this product has reached the end of its life it must be treated as Waste Electrical & Electronic
Equipment (WEEE). Any WEEE marked products must not be mixed with general household waste,
but kept separate for the treatment, recovery and recycling of the materials used. Contact your local
authority for details of recycling schemes in your area.
Made in China. PR2 9PP
Man Rev 1.0
CLEANING & MAINTENANCE
• Clean the sensor only with a soft dry cloth. Do not use any chemicals, abrasives or
solvents that could damage the casing or lens.
/