Page is loading ...

User’s Manual
AM/FM Radio Recorder/Voice Recorder/MP3
Player
MODEL: Radio YourWay™ (32MB)
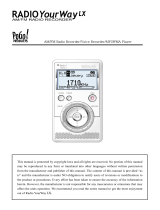
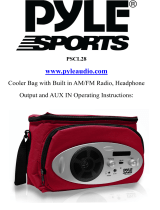
Thank you for purchasing Radio YourWay™. Please read all the information in this User manual
carefully prior to using Radio YourWay™ and keep this guide handy for future reference.

● All rights regarding the information in this manual are reserved for PoGo! Products Inc. No part of
this manual may be copied or distributed or commercially used without the prior written permission
from PoGo! Products Inc., and any violation of that may result in severe legal penalties.
● MP3 File(s) is/are intended only to be used personally and not for any commercial use/ service and
any violation of this clause is against domestic copyright laws.
● Except for personal use, unauthorized copying or distributing of recorded music is prohibited by law.
● ©2003 PoGo! Products! Inc. - Radio YourWay™ is a trademark of PoGo! Products, Inc.
Copyright

1. Radio YourWay™ Series
1). Precautions
2). Player Functions
3). Components and LCD Display
4). Battery Use and Description of Components
5). Basic Functions
6). VOICE/AM/FM/MP3 Buttons
7). Timer and Recording
8). External Memory
9). Play Modes
10). Erasing Files
11). Reserved Recording
12). Line In
13). AM/FM Radio
2. RYM (Radio Your way)-Explorer
1). What is the RYW-Explorer?
2). Quick Software & Drivers Installation Guide
3). RYW-Explorer User Interface
4). Transmitting MP3 Files
5). Transmitting DMF Files to the PC
6). Deleting MP3 & RVF Files
7). Initiating the Flash Memory
3. General Specification
4. Warranty
1). Radio YourWay™ Series
Table of Contents

1). Precautions
● Do not drop Radio YourWay™, it may cause a malfunction.
● Do not leave Radio YourWay™ in the following areas:
- Place of high temperature (above 60℃)
- Exposed to direct sunlight or near heating appliances.
- Inside a car; especially in the summer
- High humidity area like a bathroom
● Avoid any impact to the LCD Display
● Do not place credit cards, phone cards, bank books or subway tickets near Radio YourWay™.
The magnetism of the player may damage the data stored in the magnetic strip.
● We are not responsible for any damage or claims from a third party resulting from the use of
Radio YourWay™.
● We are not responsible for any loss of files caused by any reason.
● Do not repair, disassemble or make modifications to Radio YourWay™.
● Do not use Radio YourWay™ in any area designated No Electronic Devices like airports or
medical facilities.
● Do not operate while driving.
● If Radio YourWay™ is misused by the user, subjected to static electricity or electrical shock
even if just changing the battery, the files stored in the memory may be lost or corrupted.
Backup all important data!
● Only insert a memory card when the unit is off or a malfunction may occur

2). Player Functions
Radio YourWay™ is manufactured under strict quality control procedures to ensure the best
performance and customer experience.
.
● Elegant Design and Exterior Finishing
Radio YourWay™ is designed with the customer in mind. Using a wide LCD Screen and half
miller window to eliminate the closeness of a small display and show off a high class image to
enhance the user’s experience.
● AM/FM/Voice Recording and MP3 PLAYER
Radio YourWay™ can record AM/FM/Voice and play MP3 files.
● External memory
Radio YourWay™ has the ability to expand the memory capacity using SD or MMC memory
cards.
● Record AM/FM RADIO
With Radio YourWay™ you can record live or future AM/FM broadcasts.
● RYW-EXPLORER
With Radio YourWay™ you can transmit data between the device and your PC and even send
those files to a friend using E-mail.
● Recording Timer
Radio YourWay™ can be programmed to record voice or radio at a later time with its built in
timer.

● USB Interface
● Displays file/frequency/current time on the wide LCD Screen
● Built-in calendar up to the year 2099
● Elegant Design and Exterior Finishing
● Built-in microphone
● Separate and record files up to a high tone quality of 99
● Lock (HOLD) function to prevent unnecessary battery consumption caused by an
accidental key press.
● TIMER recording function to allow voice or radio recording at a later time/date.
● REPEAT PLAY allows a message to be played repeatedly
● Section Repeat Play (A↔B REPEAT PLAY)
● Automatic power OFF after 3 minutes of no use.(SLEEP MODE)
● MONITOR Function allows the user to listen to what is being recorded using an earphone
(MONITOR)
● H/D Function may be used as a portable hard disk (32MB)
● Volume adjustable 30 levels
● EQ equalizer modes (NORMAL,ROCK,JAZZ,CLASSIC,POP)
● Repeat (NORMAL/SECTION REPEAT/1 TRACK/ALL TRACK)
● Download and playback of MP3 Files
● Real time or reserved FM RADIO RECORDING function
● Real time or reserved AM RADIO RECORDING function
● AM/FM PRESET CH function
● Setting up to 10 reserved recordings is possible
● S-FORWARD and S-REWIND Searching function (10 times/100 times searching)
● External memory slot (SD-CARD/MMC)
● Built-in high-power speaker
● Easy recording from external audio devices
● Recover time and settings after replacing the battery (BACK-UP Function)

3). Components and LCD Display
Repeat
D.C JACK
HOLD ON/OFF
Mode
Selection
Memory
Selection
Lock
File Info/
Frequency
Order of File
Reserved
Record
Battery
Strength

4). Battery Use and Description of Components
① Open the Battery Cover.
② Close the cover after inserting two AAA batteries corresponding to the correct (+) (-)
polarities.
Battery: (SIZE "AAA" or UM-4)
③ Check the battery strength by pressing the PLAY/STOP or record mode button.
Battery strength is strong. Battery is partially run down.
Battery is almost run down. Replace the battery.
※ Caution
Check the polarities of the batteries if the LCD Display doesn’t turn ON after inserting new
batteries.
※ Note
If you do not use Radio YourWay™ for a long time, the batteries may be run down naturally.
Take out the batteries if you do not plan on using Radio YourWay™ for a long time.
Open

④ Battery Life
Battery Type Recording
Playback via
Speaker
(Volume: Middle)
Playback via Ear phone
Alkaline “AAA” LR-03 Approx 11hr Approx 9hr Approx 15hr
⑤ Caution when Using the Battery
● Do not use different types of batteries together.
● If you do not use this recorder & player for a long time, take the batteries out of the body.
● When using rechargeable batteries, carefully read the manual of the battery and charger
before using them.
⑥ Components
STEREO EARPHONE, INSTALL CD
LINE/IN CABLE, USB CABLE, BATTERY, NECK STRAP,

5). Basic Functions
● Turning the Power ON/OFF
To turn the player on, hold the PLAY button for 1-3 seconds.
If no key is pressed for more than 3 minutes, the power is automatically shut OFF.
If you put in the provided batteries after purchasing Radio YourWay™, the Power should turn ON and
the initial display screen appears
When the power is OFF, you may turn the power ON by pressing the PLAY Button.
● How to Use the HOLD function
When the lock button is in the upper position, the player is in HOLD and will not operate.
Use this recorder & player only after checking the lock switch is released from the HOLD
position.
HOLD OFF HOLD ON
Released Player not operable

6). VOICE/AM/FM/MP3 Buttons
● VOICE FILE Domain (VOICE)
Upon operating the keys, ㅡ means a short press and – - means pressing and holding (longer than 1
sec).
Buttons
Key
Operations
Stopped Upon Recording Playing
ㅡ
Plays the beginning of a file X Pauses a file
ㅡ
Moves to the next file X Begins to play the next file
ㅡ
ㅡㅡ Moves to the previous file X
Plays the previous file
If key held down more than 5 seconds, goes to
the beginning of the file
ㅡ,ㅡㅡ S-FORWARD current file X S-FORWARD current file faster
ㅡ,ㅡㅡ S-REWIND current file X S-REWIND the current file faster
ㅡ Keeps the stop status Stops recording Stops playing
ㅡㅡ
Power OFF
Power OFF after
recording
Power OFF
MODE ㅡ VOICE/AM/FM/MP3 X VOICE/AM/FM/MP3
ㅡ Checks the TIME and sets the
timer for a future recording
X X
TIMER
ㅡㅡ Modifies the TIME Setting X X
A-B
ㅡ Selects from the
external/internal memories
X Repeats the playing section between A-B
REPEAT ㅡ Change the repeat setting X Change the repeat setting
ㅡ Deletes the current file X X
ERASE
ㅡㅡ Deletes all files X X
EQ ㅡ X X X
VOL+ VOLUME+ VOLUME+ VOLUME+
VOL- VOLUME- VOLUME- VOLUME-
HOLD ON/OFF ON/OFF ON/OFF
● AM/FM Radio Domain (RADIO/KEY Operation)
Buttons
Key
Operations
Receiving Upon Recording
ㅡ
PRESET the station X
ㅡ
Changes to the next preset X
ㅡ Changes to the previous preset X
ㅡ,ㅡㅡ SEEK TUNNING/AUTO TUNNING X
ㅡ,ㅡㅡ SEEK TUNNING/AUTO TUNNING X
ㅡ X Stops recording
ㅡㅡ Power OFF Power OFF
MODE ㅡ VOICE/AM/FM/MP3 X
ㅡ Checks TIME and reserved settings X
TIMER
ㅡㅡ Sets and modifies TIME X

VOL+ VOLUME+ VOLUME+
VOL- VOLUME- VOLUME-
HOLD ON/OFF ON/OFF
Note) The earphone plays the role of the antenna in the FM Radio.
If the earphone wire is longer, receiving sensitivity is improved.
● MP3 FILE Domain (MP3)
Buttons
Key
Operations
Upon Stopping Upon Playing
ㅡ
Play the current file Pauses the file
ㅡ
Move to the next file Begins to play the next file
ㅡ
ㅡㅡ Moves to the previous file
Plays the previous file
If key held down more than 5 seconds, goes to
the beginning of the file
ㅡ,ㅡㅡ S-FORWARD current file S-FORWARD current file faster
ㅡ,ㅡㅡ S-REWIND current file S-REWIND current file faster
ㅡ Stop Stops playing file
ㅡㅡ Power OFF Power OFF
MODE ㅡ VOICE/AM/FM/MP3 VOICE/AM/FM/MP3
ㅡ Checks TIME X
TIMER
ㅡㅡ Modifies TIME Setting X
A-B ㅡ Selects from the external/internal memory Repeats playing section between A-B
REPEAT ㅡ Changes repeat setting Changes repeat setting
ㅡ Deletes the current file X
ERASE
ㅡㅡ Deletes all files X
EQ ㅡ ROCK/CLASSIC/NORMAL/POP/LIVE ROCK/CLASSIC/NORMAL/POP/LIVE
VOL+ VOLUME+ VOLUME+
VOL- VOLUME- VOLUME-
HOLD ON/OFF ON/OFF
7). Timer and recording
You need to set the current date and time prior to initiating a recording.
① Press and hold the TIMER Button while the player is stopped.
② When you hold the TIMER Button, the day will be flickering and then if you push the
PLAY Button, the window displaying the time will also be flickering. If you press
or
you can change the hour, press play and do the same thing to change
the minute, press play again to set.

③ When the time setting is completed, you may return to the initial screen by pressing the
STOP button.
④ To check the time, press the TIMER button, the current time (hour/minute/second) will
display, and if you want to change the time, you may change the day/hour/minute by
pressing and holding the TIMER Button.
● How to Record
When you are in VOICE/AM/FM Mode, you may record using the RECORD Button.
① Select the mode by pressing the MODE Button.
(When you are in the AM/FM Mode, the frequency currently received is recorded).
② Press and hold the RECORD (REC/STOP) Button for about 1 second with the microphone
toward the sound source.
The recording is initiated and a red light indicating the recording is ON.
③ To stop recording, press the RECORD/STOP (REC/STOP) Button again.
※ Once recording is initiated, you may not stop recording for the first Five (5) seconds.
※ The recording is automatically recorded at the last available number.
※ When recording for a long time, replace the battery with a new one.
※ Check the capacity of the battery prior to recording.
※ Note
Perform a test recording to avoid an error in recording.
If the battery is completely run down during a recording, the message “low battery (BAT)”
will display on the screen and the power is automatically shut OFF.
Replace the battery with new one.
.
.
● Monitoring a Recording
You may listen to what is being recorded by connecting an earphone.
※ Note
-. Do not take the battery out during a recording because it may cause the recording to be lost or
a malfunction

Take out the battery only when the player is stopped.
-. If the corresponding file exceeds the recording capacity, or there is not enough room for a
recording, the recording will not be available.
When the memory is FULL, the message "FULL" displays.
-. Recording to MP3 or H/D domains is not available (Only playback is available in MP3).

8)External Memory
① If you press the A-B Button in the stop status after inserting an
external memory card, the display screen of INT/CARD will be converted
and the internal and external memory domains will be separated.
② You may record, play, save from the PC and transfer files with the
external memory.
③ Inserting and taking out an external memory card must be performed
only when the player is stopped.
※ Note
Only insert a memory card when the unit is off or a malfunction may occur
-. The external memory is compatible with an SD/MMC-CARD only.
-. If you take out the battery or external memory during recording or playback, it may cause a lost
file or malfunction in playing.
Take out the battery only when the player is stopped and take out the external memory only
after turning-off the power.
-. If the corresponding file exceeds the recording capacity or there is not enough room for the
recording, the recording is not available.
When the memory is FULL, the message "FULL" displays.
-. Recording to MP3 or H/D domains is not available (Only playback is available in MP3).
Inlet
A-B Mode Conversion
Display

9) Playback mode
● Playing a VOICE file
① Select the message you want to listen to.
(Select the file you want 01-99 using Button.)
② You may play by pressing the PLAY () Button.
③ Adjust the volume with the DIGITAL VOLUME button.
Listen to music in quiet areas using the micro speaker.
Use the earphones to avoid interference or surrounding
noises.
④ If you want to stop, press the STOP () Button.
If you want to PAUSE (), press the PLAY Button during playback. PAUSE can be released by
pressing the PLAY/STOP Button.
⑤ For the S-FORWARD and S-REWIND function, press the button.
You may stop this function by pressing the PLAY ()/STOP () Button.
⑥ You may select and play the next file or previous file during playback using the Button.
※ If the battery is completely run down while playing, the message “BAT” will be flickering and
will automatically disappear after the warning. Replace the battery with a new one.
● Playing MP3 files
① Using the MODE Button, select the MP3 Domain.
② If there is no music downloaded, the message “NO.IF” displays on the LCD.
③ If you download a music file (MP3) via the USB, the downloaded music file will be saved in the
MP3 Domain and you may play it using the PLAY Button.
● S-FORWARD and S-REWIND
Selectively play the next file or previous file during playback using Button.
If you press Button shortly during playback, S-REWIND/S-FORWARD is initiated.
● Repeat playing in the VOICE Domain
● Repeat playing in the MP3 Domain
You may set the repeat functions by pressing
the REPEAT Button during playback.
NOR: Plays and stops all music
NOR (1): Plays and stops only one music file
(1) ALL: Repeats playing music
ALL: Keeps playing all music in order

● Repeat a Section A↔B
If you want to repeat playing a specific section, press the A-B button to select the beginning of
that section and then press A-B again to select the end of that section. The selected section will
continue repeating until you push A-B again.
※This only works with one file at a time.
※The section repeat is done the same way for ALL files
● Equalizer Functions
When playing MP3 files, you may play according to genre using the equalizer functions NORMAL,
ROCK, JAZZ, CLASSIC and POP.
You may set the equalizer functions when the player is stopped using the EQ Button.
At this time, the message “NORMAL, ROCK, JAZZ, CLASSIC and POP” displays on the LCD.

10). Erasing files
※ Deleting is only available when the player is stopped.
● Deleting a Message One by One
① Select the message to delete.
Select the message using the Button.
② If you press ERASE, “ERASE” will be flickering on the LCD and the message to be deleted is
displayed for confirmation.
While the message “ERASE” is flickering, press the ERASE Button again to delete the message.
If the message is deleted, the number displayed on the LCD will be forwarded to the next file.
※ While the message “ERASE” is flickering, if you press any button, the erase function is
cancelled.
※ Note: Once a message is deleted, it is not recoverable.
● Deleting all Files
① Select the files to delete using the MODE Button.
② If you press and hold the ERASE Button for longer than 5 seconds, the “AL.ERASE” will be
flickering.
If you press the ERASE Button again at this time, all files will be deleted.
③ You may delete the information in the MP3 Domain the same way.
Deleting HD files is available only using the PC-APPLICATION after connecting your PC with
the USB connection.
※ Note: If you use up (full) the memory by using the hard disk function, No recording capabilities
will be available. Do not turn off the power or take out an external memory card while deleting files. It
may cause a malfunction.

11). Reserved Recording
※ To set a reserved (future) recording, the TIME Setting must be set.
If you press the TIMER Button, the time (Hour/Minute/Day) displays.
If the time setting is done, the correct Day/Hour/Minute/Second will appear on the
display screen. To change it:
① Press and hold the TIMER Button while the player is stopped.
② When you hold the TIMER Button, the day will be flickering and then if you push the
PLAY Button, the window displaying the time will also be flickering. If you press or you
can change the hour, press play and do the same to change the minute, press play again to set.
Example of Displaying the Time Example of Displaying the Reserved Recording
② After the time setting is done, if you press the TIMER Button once, the time displays and
if you press the TIMER Button twice, the reserved recording screen appears.
The minute needle clock indicator and setting channel should be flickering.
Press to select the file number and then push PLAY.
Now the days of the week will flicker. Use to select the desired day and press PLAY.
③ After selecting the day set the hour by using and pushing PLAY to select the
desired hour. Do the same procedure to set the minutes and then set the ending times using
the exact same procedure again. When you finish, you will see the main screen.
(It will seem like you are changing the start time when setting the ending time but trust us
you are setting the ending time)
A start and ending time setting requires 4 PLAY presses.
Exp 1 start hour + 1 start minute + 1 ending hour + 1 ending minute = 4. Makes sense?
④1) The reserved recording is initiated at every Nth time of every day
2) The reserved recording is initiated at every Nth time on Monday - Saturday
3) The reserved recording is initiated on a certain day of every week
You may select using and confirming is done using .
⑤ After setting the day, set the hour and minute
. ⑥ And then, set the hour and minute ending time.

Once END Setting is done, the TIMER icon displays
and the recording is automatically initiated at the
designated time.
* You may set up to 10 reserved recordings for all the sections in AM/FM/VOICE. It is set
the same way described on the last page. A reserved recording is automatically initiated
even when the power is OFF. (Timer function)
12). Line in
● Connecting an External Microphone
- Plug a pre-amplified microphone in the line in terminal of the body.
※. When an external microphone is connected to the line in, the built-in microphone is not
operational.
● Connecting to the External Devices
You may record from almost any device using the line in and using the audio cable and or
adaptor for a phone.
● Connecting to a stereo
When recording from the line in of the voice recorder, connect the audio cable to the line in of
the recorder and to the headphone jack of the outputting device.
How to Connect to a stereo
※ Note
★ When connecting to an external device, make the connections with the power OFF.
★ Before connecting to any external device, carefully read the manual of the external device
●When recording from an external device, record after connecting the audio cable to this device
and decreasing the volume of the external device.
●To record in the external device, play this device and initiate the recording in the external device
at the same time.
(Refer to your devices user manual)
(This timing may be different depending on each device, so make a test recording prior to
performing an actual recording).
/