Soundstream VR-535T Owner's manual
- Category
- Car video systems
- Type
- Owner's manual
This manual is also suitable for
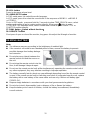
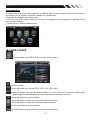
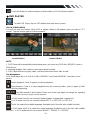
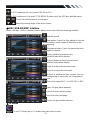
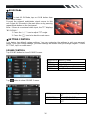
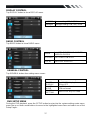
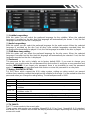
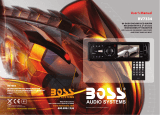
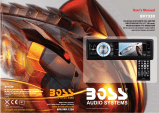
The Soundstream VR-535T is a multimedia powerhouse for your car, featuring a 5.3” touch screen display, DVD/CD/MP3/MP4 playback, AM/FM radio, and a built-in TV tuner. It also has a variety of connectivity options, including USB, SD/MMC card slots, and an AV input, so you can connect your smartphone, MP3 player, or other devices to enjoy your media on the go. With its sleek design and user-friendly interface, the VR-535T is the perfect addition to any vehicle.
The Soundstream VR-535T is a multimedia powerhouse for your car, featuring a 5.3” touch screen display, DVD/CD/MP3/MP4 playback, AM/FM radio, and a built-in TV tuner. It also has a variety of connectivity options, including USB, SD/MMC card slots, and an AV input, so you can connect your smartphone, MP3 player, or other devices to enjoy your media on the go. With its sleek design and user-friendly interface, the VR-535T is the perfect addition to any vehicle.


-
 1
1
-
 2
2
-
 3
3
-
 4
4
-
 5
5
-
 6
6
-
 7
7
-
 8
8
-
 9
9
-
 10
10
-
 11
11
-
 12
12
-
 13
13
-
 14
14
-
 15
15
-
 16
16
-
 17
17
-
 18
18
-
 19
19
-
 20
20
-
 21
21
-
 22
22
-
 23
23
-
 24
24
-
 25
25


Soundstream VR-535T Owner's manual
- Category
- Car video systems
- Type
- Owner's manual
- This manual is also suitable for
The Soundstream VR-535T is a multimedia powerhouse for your car, featuring a 5.3” touch screen display, DVD/CD/MP3/MP4 playback, AM/FM radio, and a built-in TV tuner. It also has a variety of connectivity options, including USB, SD/MMC card slots, and an AV input, so you can connect your smartphone, MP3 player, or other devices to enjoy your media on the go. With its sleek design and user-friendly interface, the VR-535T is the perfect addition to any vehicle.
Ask a question and I''ll find the answer in the document
Finding information in a document is now easier with AI
Related papers
-
Soundstream VR-75XB Owner's manual
-
-
Power Acoustik PTID-6250B Owner's manual
-
Power Acoustik TI-450 Owner's manual
-
-
Power Acoustik VR-701 T Owner's manual
-
-
 Tuvva VIR-7830BT User manual
-
-

Other documents
-
Hyundai H-CMD2009 User manual
-
-
 Boss Audio Systems BV7334 Owner's manual
-
SSL SD430 User manual
-
 Boss Audio Systems BV8728B User manual
-
 Boss Audio Systems BV7330 User manual
-
Lenco DVD-305 Owner's manual
-
Hyundai H-CMMD4059 User manual
-
Power Acoustik PD-710 User manual
-


