AudioSonic DV-1823 User manual

Category
DVD players
Type
User manual
EN
Instruction Manual
NL
Gebruiksaanwijzing
fr
Mode d’emploi
dE
Bedienungsanleitung
Es
Manual de instrucciones
pt
Manual de Instruções
pL
Instrukcje użytkowania
it
Istruzioni per l’uso
sV
Användare
DVD Player
MP3 - USB - SD Slot
dV-1823
3
IMPORTANT SAFETY INSTRUCTIONS AND PRECAUTIONS
Read all instructions carefully before use.
Retain manuals for future reference.
Use this product only in the manner described.
Only use a water-dampened soft-cloth to clean the surface of this product.
Use electronic devices in well ventilated areas & not exposed to excess vibration.
The following will damage this product: any liquid such as water or moisture,
extreme heat, cold, humidity, dusty or sandy environments.
Only place this device on stable surfaces and ensure that any attached cables are
secure and will not cause the device to fall.
There are no user serviceable parts in this product.
Un-authorized attempts to dismantle or repair this product will void product
warranty and may result in dangerous electric shock.
Do not use this product if you are in control of dangerous machinery such as a
motor vehicle.
Remove any power or data cords by pulling them from the plug and not the cord.
Using this device near other electronic devices may cause interference.
Do not open the drive door while disc is spinning.
Ensure that the Portable Dual DVD player is installed in accordance to with the
Instructions and illustrations provided in this manual.
It is the responsibility of the driver of the vehicle to ensure that this product is installed
incompliance with all Federal and State laws governing products of this type.
Mounts this product with thought for other motorist too reduce the amount of
distraction that they may provide to other road users.
CARE OF DISCS
Laser product symbol: located on the rear panel of the unit
indicates that this player is a class 1 laser product; it uses only
weak laser and no hazardous radiation outside of the unit
Do not place discs near any heat source such as direct sunlight or areas or high humidity.
Do not touch the readable area or the disc (underside). Always hold discs by the edges.
Do not use adhesive tape on the disc.
Do not use commercial cleaner liquids on the discs as they may cause damage.
Do not leave discs in a vehicle that may be subject to strong direct sunlight as the
heat build up in the vehicle may damage the discs even if stored in shaded areas.
To clean the disc, always use a very soft damp cloth and wipe from the inside to
the outside of the disc.
Always return the disc to its enclosure when finished with.
WHAT'S IN THE BOX
1X Main DVD player with 7" 16:9 LCD display
1X LCD monitor with 7" 16:9 display
2 X Headrest mounts
2 X Headphones with 1.2m cables
1 X12VDC Power supply
1 X110-240VAC mains power adaptor
1X 1.5mtr power link cable
1X 1.5mtr audio/video link cable
1X Remote control (with battery)
1X User Manual (this document]
Please check the contents of the packaging carefully.
EN
Instruction Manual
1
2 5 7
9 10 11 12 13 14
8
63
4
7 8 9
2 4 6
53
1
4
DVD PLAYER MAIN UNIT
1. Main Power ON/OFF Switch
2. Volume decrease button
3. Volume increase button
4. IR sensor
5. Play/Pause Button
6. Previous button
7. Next Button
8. LCD Display/Drive Access panel
9. 3.5mm Stereo headphone output
10. 3.5mm AV link output
11. SD/MMC/MS Card slot (SDHC compatible)
12. USB host port
13. 12VDC Link output
14. 12VDC input
MONITOR
1. Main Power ON/OFF Switch
2. Volume decrease button
3. Volume increase button
4. Left Button
5. Menu Button
6. Right Button
7. 12VDC Link Cable input
8. 3.5mm AV link input
9. 3.5mm Stereo headphone output jack
Instruction Manual
13
14
15
16
18
22
24
26
27
20
17
19
23
25
21
2
3
5
6
7
9
10
8
11 28
1 12
4
5
INSTALLATION
Indoor Use
Locate a spare mains outlet and turn it OFF.
Plug the supplied AC adaptor in to the outlet,
Connect the other end to the 12VCD input socket.
Turn the main outlet ON.
Turn the main Power Switch on the Player to the ON position.
PLAYBACK
Connecting Headphones
Plug the supplied headphones into the headphone socket on the DVD Player and
the Monitor.
Adjust the volume level on the player or the monitor before wearing the
headsets.
REMOTE CONTROL
1. Menu
2. Power
3. Number Pad
4. 10+
5. DVD Setup
6. Up/Down/Left/ Right
7. Audio
8. Fast Forward
9. Fast Rewind
10. Play/Pause
11. Stop
12. Display
13. Mute
14. Repeat
15. A-B Repeat
16. Search
17. Program
18. Angle
19. Zoom
20. Volume +
21. Confirm
22. Volume -
23. Subtitle
24. Title
25. Previous
26. Next
27. DVD/SD/USB
28. Step
EN
Instruction Manual
6
KEY FUNCTIONS
Button Action
Power Switches the player ON or OFF
DVD/SD/USB
Press to cycle between DVD (Optical
Disc), Card reader or USB drive. Use Up/
Down/Left/Right button to navigate
and the OK button select.
Setup Enter or Exit the setup menu.
Number Pad
Use to enter an item in a menu or to
enter a password.
OK (Confirm)
Press to select an option or validate a
setting.
A-B Repeat
Used to select a portion of Video/Audio
to repeat.
Previous
Press to skip to the previous chapter
or track.
Next
Press to skip to the next chapter or
track.
Play/Pause
Press to start playback or to pause
playback.
Stop Press to stop playback.
Program
This button is used to program the
favourite songs or chapters when using
VCD, Audio CD or DVD discs.
Fast Forward/Rewind
Use to Fast Forward or Rewind at
Speeds of 2X, 4X, 8X, 16X and 32X
normal playback speeds.
Button Action
Mute
Mutes the Audio Output on the Player
and the Monitor.
Volume +/-
These buttons are used to increase or
decrease the Audio Output.
Audio
Select available audio language for
the DVD.
DVD Title Return to Disc Main Menu.
Display
Shows information about the current
disc.
Zoom.
Enlarge the Image 2X ~ 4X the size of
the original image.
Search
Select a title, chapter, track, title time or
tracking Time.
Angle
Display the available angles for discs
containing multi-angles.
Note: Remove the plastic sheet before using the remote control.
Loading and Playing a Disc.
1. After connecting power to the DVD Player, push the Power On/Off switch to the
"on" position.
2. Place a disc gently into the tray.
You should hear and feel the disc snap firmly into place.
Place a disc into the tray with the disc's label facing up.
3. Close the DVD cover until it clicks shut. The unit will now load disc and
commence playback.
4. Stopping Play.
Press the STOP (
) Button during play.
Instruction Manual
7
5. Play/Pause.
Press the Play/Pause (
) button on the remote during play to pause playback.
To resume. Press the Play/Pause ( ) button once again.
6. Fast Forward/Fast Reverse
Press Fast Forward or Fast Reverse to achieve the place you desired with speed
adjustable during 2X, 4X, 8X, 16X, 32X times.
7. Menu
A DVD is divided into sections called titles and chapters. When you play a DVD,
a root menu of the disc will appear on the screen of your DVD player or Monitor.
The contents of the menu vary from disc to disc. Press MENU during playback to
display the menu.
DISPLAY
Playing Time and Remaining Time
During playback, press the "DISPLAY" button to display the current Title Number,
the total Number of Title, The current Chapter Number, The total Number of
Chapters, and the Playing elapsed Time for the title. The heading will disappear
automatically after 3 seconds if DISPLAY button is not pressed.
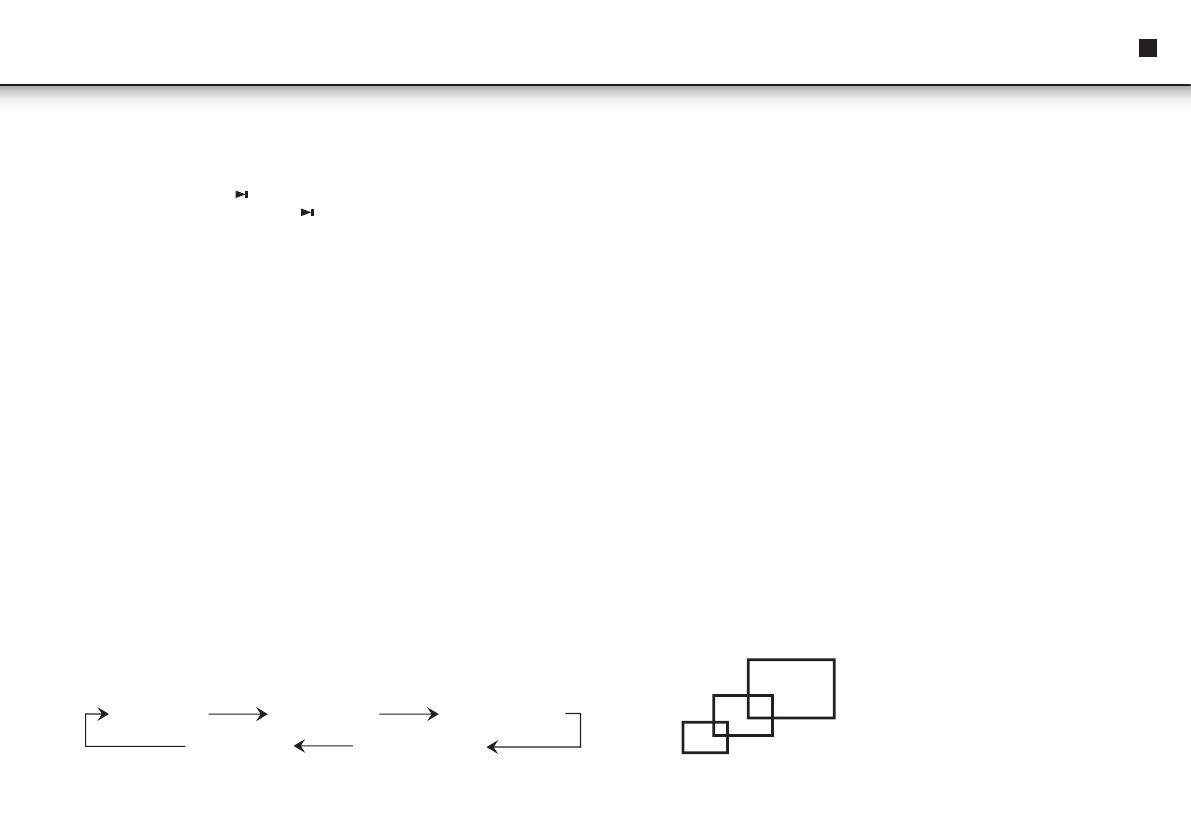
Press "DISPLAY" constantly to choose the options below in sequence.
Title Elapsed: The elapsed time of the title.
Title Remain: The remaining time of the title.
Chapter Elapsed: The elapsed time of the chapter.
Chapter Remain: The remaining time of the chapter.
Display off: The DVD's time information will not be displayed.
Angle
During playback of a disc, press the "ANGLE" button to display the available angles
for discs containing multi-angles, with the current angle number and the total
number of angles displaying. Press "ANGLE" to select another angle, then press again
to exit and return to the normal viewing angle. The angle display will disappear
automatically if the "ANGLE" button is not pressed again within 3 seconds.
Note: Not all discs contain this feature.
Subtitle
During disc playback press "SUB" to select the subtitle language you desire, with
the current Subtitle Language Number and the total Number of Subtitle Languages
displayed. If there are multiple languages press "SUB" again to select another
subtitle language. To turn subtitles OFF, press the "SUB" button until "Subtitle Off" is
displayed. The Subtitle display will disappear automatically if the "SUB" button is not
press again within 3 seconds.
Note: Some DVDs only allow access to this function through DVD Menu.
Audio
During playback press "AUDIO" to select the audio language you desire, with
the current Audio Channel Number and the total number of Audio Channels
displayed. Press "AUDIO" again to select another audio language. The audio
display will disappear automatically if the "AUDIO" button is not pressed within 3
seconds.
Zoom
During playback press "ZOOM" to enlarge the picture by 2X, 3X or 4X with the current
zoom multiple:
Title Elapsed Title Remain Chapter Alapsed
Display OFF Chapter Remain
EN
Instruction Manual
8
A-B Repeat
A. During playback press a first time "A-B" to set the Starting Point A.
B. Press "A-B" a second time to set the Ending Point B and player will repeatedly play
the part between Point A and Point B.
C. Press "A-B" a third time to cancel "A-B" repeat and resume normal playback.
D.
1. 2. 3.
A-B Repeat Starting Point A-B Repeat Ending Point A-B Repeat Cancelled
1/ALL Repeat
During playback press "REPEAT" constantly to see the repeat mode as right.
Chapter: Repeat the current chapter.
Title: Repeat the current title.
All: Repeat all chapters and titles.
Off: Resume normal playback.
PLAYBACK MP3/MPEG4 DISC
When a MP3/MPEG-4 disc is inserted into the unit, the menu screen appears
automatically You can use the menu screen to select your desired folders and songs
or the system plays the songs in the order they were burned onto the disc.
1. Press the or button to choose a folder from the folder list.
2. Press "OK" to select the highlighted folder. The songs available under the folder
will be listed.
3. Use or T button to choose a song from the list. Press "OK" to select and begin
playback of the highlighted song.
4. Use the button to move to the next song. Press the button to move to
the beginning of the previous song.
5. Press the button to select the current folder and press "OK" to confirm. Then
you can back to the folder list.
Playback of DIVX content
The DIVX format is capable of holding high quality video and sound in a highly
compressed file format. File types such as AVI are typically able to hold more data in
a smaller file.
1.5 hours file MPEG-12 Format DIVX Format
DVD(MPEG-2) About 1.5-2GB About600-800MB
VCD(MPEG-l) About 800MB-1 G About 200-300 MB
Comparing MPEG-1, MPEG-2 and MPEG-4
MPEG-1 MPEG-2 MPEG-4
Speed(kb/s)
1380kb/s
(352X288)
6500kb/s
880kb/
s(720X576)
Video quality GOOD Excellent Perfect
Hardware
requirement
Low Middle High
However depending on how the file was encoded, compatibility may still be and
issue with certain types of DivX or MP4 type files.
A
CHAPTER
AB REPEAT OFF
Instruction Manual
9
We highly recommend that Files be tested and Trial & Error" be used to find the best
compromise between quality and file size for encoded files.
Play USB and SD/MMC/MS Card
1. Plug in the USB device noting correct orientation. Press [DVD/SD/USB], then
choose USB to select the content.
2. Insert a memory card to the SD/MMC/MS slot. Press [DVD/SD/USB] and select SD
to play memory card.
SYSTEM SETUP
1. Press "SETUP" on the remote to bring up the SYSTEM SETUP MENU.
2. Press the or buttons to go to or return to the required settings page.
3. When the required page is shown press the "OK" button to enter the page.
4. Use the or buttons to navigate to the feature to be changed and then press
the button to enter the submenu.
5. Use the or buttons to select the submenu item and then press the "OK"
button to confirm.
6. Press the button to return to the previous menu or press the "SETUP" button to
close the Setup Screen.
Note: Not all discs contain these features. Some features are disc dependent.
GENERAL SETUP PAGE
TV Display
4:3: When the player outputs signal to a normal monitor. Wide-screen images are
shown on the screen. But with some parts cropped automatically.
Normal / LB: Normal/LB: When the player outputs signal to a normal monitor,
a normal picture is shown on the screen with a black strip at both the top and
bottom of the screen.
16:9: Wide: When the player outputs signal to a wide screen monitor, a wide
picture is shown on the full screen.
Angle Mark
ON: The screen will show the angle mark icon. (If an angle option is available).
OFF: The screen will not display the Angle Mark.
OSD Language
You can choose one out of several different languages as the OSD setup language
Captions
ON: Captions are displayed. (If an captions available).
OFF: The screen will not display captions.
Screen Saver
ON: Enables screen saver.
OFF: Disables screen saver (off).
Note: The DVD player will enter the Screen Saver mode after approximately five
minutes if the same image remains on the screen.
Last Memory
ON: The unit will return to the last position on the disc.
OFF: The unit will not return to the last position on the disc.
AUDIO
Speaker Setup
Downmix
LT/RT: RIGHT/LEFT Channel: Mixes a 5.1 Ch audio signal to 2 audio channels and
then outputs to the left and right speakers.
Stereo: Outputs a stereo signal to the left and right speakers.
DOLBY
Dual Mono
Stereo: Left/Right channel audio will be played back by the Left/Right speakers.
L-Mono: Playback of Left channel audio only.
EN
Instruction Manual
10
R-Mono: Playback of Right channel audio only.
Mix Mono: Both Left/Right channels are mixed to one mono channel.
Dynamic
Use this mode to level all sound channels to ensure even sound levels.
1. Press The OK Button to enter.
2. Use the or buttons to adjust the dynamic range as required.
3. Press the OK Button aging to confirm the adjustment.
VIDEO
Adjust the image quality.
1. Use the or buttons to select the option to change and the press the "OK"
button.
2. Press the or buttons to adjust the setting and then press the "OK" button to
confirm the changes.
Options are
Sharpness.
Brightness.
Contrast.
PREFERENCES
The Preferences page cannot be accessed if a disc is in the player. Please remove any
disc before accessing this page.
TV Type
Used for settings the Video format output if the player is connected to a display other
than the Monitor Supplied. This requires the use of a cable that is not supplied with
this product.
PAL: Video output is PAL only.
Multi: Video output is as per source material.
NTSC: Video output is NTSC only.
Audio
Sets the default Audio language of DVDs played on this player.
Subtitle
Sets the default Language of the Subtitles of DVDs played on this play.
Disc Menu
Sets the default Language of the DVD Menu of DVDs played on this play.
NOTE: Audio, Subtitle and Disc Menu settings are subject the availability of your
selection on the DVD.
Parental
Select the parental level you desire for disc with lock-out function or multiple rating
levels. There are listed from the level (1 Kid Safe) to the highest level (8 Adult). The
setting allows PLAYBACK to be restricted via password.
Note: This function will only work If the disc contains a parental control lockout.
Password
This function allows you to re-set a new password.
Note: You have to input the correct password to change the password setting. The
default password Is 136900
Default
Used to reset the player to Original Factory Defaults.
Instruction Manual
11
TROUBLESHOOTING
Problem Possible Solution
No sound or
distorted sound?
Make sure your DVD is connected properly. Make sure all
cables are securely inserted into the appropriate jacks.
Make sure the Audio is not muted.
No Power
Ensure that power connection is firmly seated in plug
and there is power to the power supply.
Can't advance
through a movie?
You can't advance through the opening credits and
warning information that appears at the beginning of
movies because the disc is programmed to prohibit that
action.
The icon ( ) appears
on the screen?
The feature or action cannot be completed at this time
because:
The disc's software restricts it.
The disc's software doesn't support the feature (e.g.,
angles)
The feature is not available at the moment.
You've requested a title or chapter number that is out of
range.
Picture Is distorted?
The disc might be damaged. Try another disc.
It is normal for some distortion to appear during forward
or reverse scan.
No forward or
Reverse scan?
Some discs have sections that prohibit rapid scanning or
title and chapter skip.
If you try to skip through the warning Information and
credits at the beginning of a movie, you won't be able
to. This part of the movies often programmed to prohibit
skipping through it.
Problem Possible Solution
IR sensor
Inoperative?
Ensure that the batteries in the remote are fresh.
Ensure that the remote sensor eye is not obstructed.
Ensure that the infrared transmitter is affixed over the
sensor eye of the component to be controlled.
Disc won't play?
Insert a disc with the label side facing up.
Check the type of disc you put into disc tray. This DVD
only plays digital video discs, audio CDs and MPs.
Play starts, but then
stops immediately?
The disc is dirty. Clean it.
Condensation has formed. Allow player to dry out.
To Change the Remote Control Battery
1. Open the Battery Door.
2. Insert one CR2025 size battery.
3. To use the remote control, point it at the remote sensor on the player.
EN
Instruction Manual
12
SPECIFICATIONS
DVD Player
Compatible Disc: DVD/VCD/CD/M P3/JPG/MPEG-4
Signal System: PAL/NTSC
Screen Size: 7 Inch (178MM)
Frequency Response: 20 Hz to 20 KHz
Video Output: 1 Vp-p/75 Ohm, Unbalanced
Audio S/N: Better than 60 dB
Dynamic range: Better than 85 dB
Laser: Semiconductor Laser, Wave Length: 650 nm/795 nm
Power source: DC 9-12V 1.5 amps
Power Consumption: 10W
Working temperature: 5-40°C
Weight: 600 grams. Without mount, disc or cables
Dimensions (LxWxH): 210mm X 1650mm X 380mm
Monitor
Colour System: PAL/NTSC
Screen Size: 7 Inch (178MM)
Power source: DC 9 - 12V
Power Consumption: 6W
Working temperature: 5-40°C
Weight: 400 grams. Without mount, disc or cables
Dimensions (LxWxH): 210mm X 1650mm X 380mm
Instruction Manual
13
14
15
16
18
22
24
26
27
20
17
19
23
25
21
2
3
5
6
7
9
10
8
11 28
1 12
4
45
INSTALACIÓN
Uso en interior
1. Conecte el adaptador CA incluido a la toma.
2. Conecte el otro extremo a la toma de entrada 12VCC.
3. Ponga el interruptor de alimentación del reproductor en posición
ENCENDIDO.
REPRODUCCIÓN
Conexión de auriculares
Conecte los auriculares incluidos a la toma de auriculares del reproductor DVD y
el monitor.
Ajuste el volumen del reproductor o el monitor antes de ponerse los auriculares.
MANDO A DISTANCIA
1. Menu
2. Power
3. Teclado numérico
4. 10+
5. Setup DVD
6. Arriba/Abajo/
Izquierda/Derecha
7. Audio
8. Avance rápido
9. Retroceso rápido
10. Play/Pause
11. Stop
12. Display
13. Mute
14. Repeat
15. Repetir A-B
16. Search
17. Program
18. Angle
19. Zoom
20. Volumen +
21. Confirmar
22. Volumen -
23. Subtitle
24. Title
25. Anterior
26. Siguiente
27. DVD/SD/USB
28. Step
Es
Manual de instrucciones
Tristar Europe B.V., Jules Verneweg 87, 5015 BH Tilburg, The Netherlands , www.tristar.eu dV-1823
  • Page 1 1
  • Page 2 2
  • Page 3 3
  • Page 4 4
  • Page 5 5
  • Page 6 6
  • Page 7 7
  • Page 8 8
  • Page 9 9
  • Page 10 10
  • Page 11 11
  • Page 12 12
  • Page 13 13
  • Page 14 14
  • Page 15 15
  • Page 16 16
  • Page 17 17
  • Page 18 18
  • Page 19 19
  • Page 20 20
  • Page 21 21
  • Page 22 22
  • Page 23 23
  • Page 24 24
  • Page 25 25
  • Page 26 26
  • Page 27 27
  • Page 28 28
  • Page 29 29
  • Page 30 30
  • Page 31 31
  • Page 32 32
  • Page 33 33
  • Page 34 34
  • Page 35 35
  • Page 36 36
  • Page 37 37
  • Page 38 38
  • Page 39 39
  • Page 40 40
  • Page 41 41
  • Page 42 42
  • Page 43 43
  • Page 44 44
  • Page 45 45
  • Page 46 46
  • Page 47 47
  • Page 48 48
  • Page 49 49
  • Page 50 50
  • Page 51 51
  • Page 52 52
  • Page 53 53
  • Page 54 54
  • Page 55 55
  • Page 56 56
  • Page 57 57
  • Page 58 58
  • Page 59 59
  • Page 60 60
  • Page 61 61
  • Page 62 62
  • Page 63 63
  • Page 64 64
  • Page 65 65
  • Page 66 66
  • Page 67 67
  • Page 68 68
  • Page 69 69
  • Page 70 70
  • Page 71 71
  • Page 72 72
  • Page 73 73
  • Page 74 74
  • Page 75 75
  • Page 76 76
  • Page 77 77
  • Page 78 78
  • Page 79 79
  • Page 80 80
  • Page 81 81
  • Page 82 82
  • Page 83 83
  • Page 84 84
  • Page 85 85
  • Page 86 86
  • Page 87 87
  • Page 88 88
  • Page 89 89
  • Page 90 90
  • Page 91 91
  • Page 92 92
  • Page 93 93
  • Page 94 94
  • Page 95 95
  • Page 96 96

AudioSonic DV-1823 User manual

Category
DVD players
Type
User manual

Ask a question and I''ll find the answer in the document

Finding information in a document is now easier with AI