Page is loading ...

Foreword
This booklet is a supplement to the Owner’s Manual for SUBARU
B9 TRIBECA and contains a detailed description and instructions
for proper operation of the Rear Seat Entertainment System provid-
ed in your vehicle.
To ensure optimum and correct use of your Rear Seat Entertain-
ment System, please read this supplement and get acquainted with
the system before using it.
Please keep this supplement together with your Owner’s Manual
and leave it in the vehicle at the time of resale. The next owner will
need the information it contains.
FUJI HEAVY INDUSTRIES LTD., TOKYO, JAPAN
is a registered trademark of FUJI HEAVY INDUSTRIES LTD.
© copyright 2006 FUJI HEAVY INDUSTRIES LTD.

1
Safety Warnings ............................................................ 3
Before Use ..................................................................... 4
System Components ....................................................5
Basic Operations ...........................................................6
What You Can Enjoy with Your Rear Seat Entertainment
System ...........................................................................6
Display .................................................................................7
How to open and close the display ........................................7
Keeping the display clean ......................................................9
Remote Control ..................................................................10
Control buttons and joystick .................................................12
How to use the remote control .............................................14
Replacing the battery ...........................................................16
Wireless Headphones ........................................................18
Replacing the batteries ........................................................20
DVD Player ........................................................................22
Precautions to Observe When Handling Discs ........23
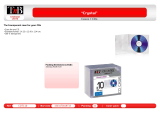
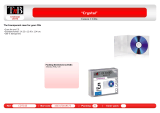
Types of Discs Playable with the Rear Seat Entertainment
System .........................................................................23
DVD video discs ..................................................................25
Copyright .............................................................................26
Playing Discs ............................................................... 27
Playing DVD Video Discs ..................................................27
Starting playback .................................................................27
Stopping playback ...............................................................27
Pausing ................................................................................27
Fast-forwarding ....................................................................28
Fast-reversing ......................................................................28
Skipping chapters forward ...................................................29
Skipping chapters backward ................................................29
Title search ..........................................................................30
Skipping to a predetermined screen .................................... 31
Displaying each disc’s menu on the screen .........................31
Changing the audio language ..............................................32
Changing the subtitle language ...........................................33
Image angle selection on multi-angle recorded scenes .......34
Selecting a dynamic range control setting ...........................35
Playing Video CDs .............................................................36
Starting playback .................................................................36
Stopping playback ...............................................................36
Pausing ................................................................................36
Fast-forwarding ....................................................................37
Fast-reversing ......................................................................37
Skipping tracks forward .......................................................38
Skipping tracks backward ....................................................39
Skipping to a predetermined screen
(Ver 2.0 video CD only) .......................................................39
Sound channel (MAIN/SUB) selection .................................40
Playing Music CDs .............................................................40
Starting playback .................................................................40
Stopping playback ...............................................................40
Fast-forwarding ....................................................................41
Fast-reversing ......................................................................41
Skipping tracks forward .......................................................42
Skipping tracks backward ....................................................42
Repeat playback ..................................................................43
Random playback ................................................................43
Scan ....................................................................................44
Contents

2
Initial Settings ..............................................................45
Setting DVD/Audio/Subtitle Language ............................... 46
Setting the Angle Mark Display ......................................... 47
Setting the Viewer Restriction Level .................................. 48
Password registration .......................................................... 49
Connecting External Devices to Your Rear Seat
Entertainment System ...........................................50
Adjusting Display Conditions and Selecting Display
Mode ........................................................................51
Display Condition Adjustment ............................................ 51
Adjusting method ................................................................. 51
Display Mode Selection ..................................................... 52
Selecting method ................................................................. 53
Error Messages ...........................................................54
Language/Code List ....................................................55
Contents

3
You will find a number of WARNINGs, CAUTIONs and NOTEs in this supplement.
These safety warnings alert you to potential hazards that could result in injury to you or others.
Please read these safety warnings as well as all other portions of this supplement carefully in order to gain a better understanding of
how to use your Rear Seat Entertainment System safely.
NOTE
A NOTE gives information or suggestions how to make better use of your Rear Seat Entertainment System.
A WARNING indicates a situation in which serious injury or death could result if the warning is ignored.
A CAUTION indicates a situation in which injury or damage to your vehicle including the Rear Seat Entertainment System,
or both, could result if the cautions is ignored.
Safety Warnings

4
NOTE
y Using the Rear Seat Entertainment System with the engine stopped could lower the battery’s electricity level. If the initial
charge level were too low, the next engine starting would be impossible. It is recommended that the system be used only
when the engine is running.
y The display screen turns off if you start the engine while using the Rear Seat Entertainment System with the ignition switch
in the “ACC” or “ON” position and the engine not in operation. To turn on the display again, press the “DVD • CD” button
on the remote control. The image will re-appear on the screen.
y Liquid-crystal displays may be difficult to read when wearing polarized glasses.
y Never try watching videos or using other entertainment programs with your Rear Seat Entertainment System by keeping
the vehicle engine running in a garage or other enclosed area. Exhaust gases accumulated in such an area or entering
the vehicle are dangerous, or even lethal.
y The driver must not attempt to operate or watch the Rear Seat Entertainment System while the vehicle is in motion. Doing
so will distract attention from driving and the road, and could lead to an accident.
y The driver must not use headphones. Wearing headphones shuts out or drowns out outside sounds and reduces the
driver’s awareness of dangerous situations, which increases the risk of having an accident.
y If you wish to park your vehicle and enjoy an entertainment program on this system, select a safe place that does not
hinder traffic and has no parking ban.
The display, a component of the Rear Seat Entertainment System, contains mercury. For that reason, it is necessary to
remove display before vehicle disposal. Once removed, please reuse, recycle or dispose of the display as hazardous
waste.
Before Use

5
3
4
2
1
S00100
The Rear Seat Entertainment System
consists of the following components:
1) Display (Refer to Page 7.)
2) DVD player (Refer to Page 22.)
3) External device jacks (Refer to Page
50.)
4) Accessory power outlet (Refer to
Page 50.)
In addition to the components listed
above, there is a remote control and two
sets of wireless headphones as attach-
ments to the system.
System Components

6
What You Can Enjoy with Your Rear Seat Entertainment System
y The Rear Seat Entertainment System is designed to provide your vehicle’s rear-seat passengers with video and music entertainment
programs recorded on DVD video discs, video CDs and music CDs.
y The Rear Seat Entertainment System will operate when the ignition switch is in the “ACC” or “ON” position.
y Playback sounds can be listened to by using the wireless headphones accompanying the system.
y All operations with the Rear Seat Entertainment System can be managed using the remote control accompanying the system (except
when ejecting a disc).
y Replacements of the dedicated headphones and remote control are available from your SUBARU dealer should you lose them.
y You can also enjoy TV games from a home-use TV game machine or video programs from a video tape player with the Rear Seat
Entertainment System if such an external device is connected to one of the external device jacks of the system. For further details,
refer to the instruction manual provided by the manufacturer of each external device.
NOTE
y When the vehicle is parked with the parking brake applied and the selector lever in the “P” position, you can enjoy video
programs on the navigation display on the dashboard if you press the “AUDIO” button on the navigation control panel.
This does not apply when the vehicle is in motion.
y If you press the “AUX/RSE” button on the audio panel, playback sounds from this system will be outputted through the
vehicle’s speakers.
Basic Operations

7
Display
How to open and close the display
Push the release button to open the display.
The display will swing down partway along its full swing angle.
1) Release button
1
S00101
Basic Operations

8
Adjust the display to the desired angle.
To close the display to its storage position, swing and push it up until it locks.
Close the display when it is not in use to help reduce the chance of injury
in the event of an accident or sudden stop.
S00102
S00103
Basic Operations

9
Keeping the display clean
Do not touch the display screen with bare hands. The display screen is easily soiled with hand grease.
Use a soft, dry cloth to clean the display screen surface. Do not use organic solvents.
The screen surface is sensitive to scratches or other physical damage. Avoid pushing on it strongly or rubbing it with a hard cloth or
any other scratchy material.
NOTE
y The screen is made of a liquid crystal display (LCD) panel. When the system is turned on in an extremely low outside tem-
perature, the LCD takes a relatively long time to become bright. On the other hand, when the outside temperature is high,
the LCD may become darker than usual. Both conditions are normal.
y Images on an LCD screen may contain some tiny black spots and/or bright spots. They reflect a characteristic normal to
the LCD and do not indicate any abnormal condition.
Basic Operations

10
Remote Control
1) Remote control
1) Remote control
1
S00114
1
S00116
The Rear Seat Entertainment System can be operated only using the remote control
(except when ejecting a disc). Touching a switch on the display screen directly with
your finger does not have any effect.
y Store the remote control in the center or rear console box when the Rear
Seat Entertainment System is not being used to reduce the chance of in-
jury in case of an accident or sudden stop.
y Be sure to keep the rear console box as well as the upper compartment
of the center console box closed to reduce the chance of injury in case
of an accident or sudden stop.
y Do not disassemble or modify the remote control. Doing so could cause
an accident, fire or electric shock.
y Do not expose the remote control to direct sunlight, strong heat and/or a
highly humid environment. The remote control case could become de-
formed and the battery in it could leak or even explode if exposed to
these conditions.
y Avoid dropping the remote control and hitting it against hard objects.
y Do not sit or step on the remote control. Placing anything heavy on it
should also be avoided.
y Avoid pressing the remote control buttons for longer than necessary, as
the battery is consumed while any button is kept pressed. Also avoid
placing an object on the remote control, as it may press buttons and re-
duce the battery life.
Basic Operations

11
To use the remote control, direct its signal-emitting eye toward the signal reception
window of the display.
1) Signal emitting eye
2) Signal reception window
2
1
S00104
Basic Operations

12
Control buttons and joystick
1) DVD • CD button
When this button is pressed, the Rear Seat Entertainment
System turns on. The display will show DVD mode or CD
mode.
2) VIDEO button
When this button is pressed, the system will accept and op-
erate on the video signal from an external video device con-
nected to the system.
3) OFF button
When this button is pressed, the Rear Seat Entertainment
System turns off.
4) CURSOR button
When this button is pressed, control switches will appear on
the display when the player is in operation.
5) Joystick
The joystick is used to highlight a control switch or a menu
item on the screen and also to make an entry. Click an ap-
propriate one of its four arrow-marked ends (
, , and
) to use it.
6) ENTER button
When this button is pressed, the system will execute a selec-
tion or entry that was made with the joystick.
7) TOP MENU button
When this button is pressed, the title selection screen for the
DVD video disc currently in the player will appear on the dis-
play.
8) SETUP button
When this button is pressed, the initial setup screen will ap-
pear on the display, where you can make your initial settings.
3
1
2
4
6
5
7
8
9
10
11
13
14
15
16
17
18
19
20
12
S00105
Basic Operations

13
9) AUDIO button
When this button is pressed, the desired audio language or
MAIN/SUB sound channel can be selected when the player
is in operation.
10) SEARCH button
When this button is pressed, the title search screen will ap-
pear on the display when the player is in operation. You can
then start playback beginning with the title you have selected
on the screen.
11) DISPLAY MODE button
When pressed, this button allows you to select the screen
size.
12) DISPLAY button
When this button is pressed, the display condition adjust-
ment screen will appear, where you can adjust the bright-
ness, contrast, color and tone for images.
13) ANGLE button
When this button is pressed, the angle selection screen will
appear, where you can select a desired angle when the play-
er is reproducing a multi-angle recorded DVD video disc.
14) SUBTITLE button
When this button is pressed, the subtitle language selection
screen will appear, where you can select a desired subtitle
language when the player is playing a DVD video disc.
15) RETURN button
When this button is pressed, the disc will skip to a predeter-
mined screen.
16) MENU button
When this button is pressed, the menu screen will appear for
the DVD video disc currently in the player.
17) TRACK (
) button
Each brief push (less than 1 second) of this button during op-
eration of the player advances the video scene chapter by
chapter. If you push the button continuously, the scene ad-
vances continuously and quickly (but slowly when playback
is in pause mode) until you release the button.
18) TRACK (
) button
Each brief push (less than 1 second) of this button during op-
eration of the player reverses the video scene chapter by
chapter. If you push the button continuously, the scene re-
verses continuously and quickly (but slowly when playback is
in pause mode) until you release the button.
19) STOP (
) button
This button stops playback when it is pressed during opera-
tion of the player.
20) PAUSE •
PLAY ( ) button
Pressing this button pauses playback when the player is in
operation. Pressing it again restarts playback.
Basic Operations

14
How to use the remote control
You can control the operation of the DVD player using the buttons on the remote
control.
You can also control the player using the joystick on the remote control to highlight
a switch on the display screen and then pressing the “ENTER” button. You cannot,
however, control the player by touching a switch on the screen with your finger.
When a switch is selected with the joystick, the color of the switch changes from blue
to white. When you then press the “ENTER” button, your selection is executed.
To make control switches appear on the screen when playing a DVD video disc or
video CD:
You can use the “CURSOR” button on the remote control to make the control switch-
es appear on the screen. The control switches shown on the next page will be dis-
played when the button is pressed.
To make control switches appear on the screen when playing a music CD:
When a music disc is loaded in the player, playback will start automatically and the
control switches shown on the next page will appear on the screen without the need
for operating the remote control.
S00117
S00118
Basic Operations

15
DVD Video Menu 1
DVD Video Menu 2
When playing a DVD video disc, different
control switches are displayed on the
screens for Menu 1 and Menu 2 (Menu 1
screen appears first when the “CURSOR”
button is pressed). Switch between the
two screens when necessary by highlight-
ing the “PAGE” switch on the screen with
the joystick and then pressing the “EN-
TER” button.
To make the switches disappear from the
screen, push the remote control’s “CUR-
SOR” button again or highlight the “HIDE”
switch on the screen with the joystick and
then press the “ENTER” button. If you
highlight and execute the “HIDE” switch,
the TITLE number, CHAPTER number
and playback time at the bottom of the
screen also disappear.
Video CD Menu
To make the switches disappear from the
screen, push the remote control’s “CUR-
SOR” button again or highlight the “HIDE”
switch on the screen with the joystick and
then press the “ENTER” button. If you
highlight and execute the “HIDE” switch,
the TRACK number and playback time at
the bottom of the screen also disappear.
NOTE
The “RETURN” switch is displayed on
the VIDEO CD menu only when you
play a video CD version 2.0.
Music CD Menu
NOTE
If the “ ” mark appears on the screen
when you select a control switch, it will
not be possible to select or execute the
switch.
Basic Operations

16
Replacing the battery
When the battery begins to get weak, the signal transmission range of the remote control becomes shorter. If this is the case, replace
the battery as soon as possible.
While holding the battery holder pushed in the direction of the arrow with your fin-
gernail inserted in the slot, slide out the holder in the direction of the arrow using a
cross-head mini screwdriver.
Take great care not to allow children to swallow batteries or any other removed part, as these could cause serious injury
or death if swallowed.
Do not let dust, oil or water get on or in the remote control when replacing the battery.
S00106
Basic Operations

17
Remove the battery from the holder.
Install a new battery (Type CR2025 or equivalent) in the holder. Make sure the bat-
tery’s positive (+) side and the “+” mark on the holder are on the same side.
Slide the battery holder into the remote control until it clicks.
S00107
S00108
Basic Operations

18
Wireless Headphones
Use the wireless headphones to listen to audio outputted from your Rear Seat Entertainment System.
y Store the headphones in a door pocket when they are not being used in
order to reduce the chance of injury in case of an accident or sudden
stop.
y Do not disassemble or modify the headphones. Doing so could cause an
accident, fire or electric shock.
y Do not expose the headphones to direct sunlight, strong heat and/or a
highly humid environment. The headphones could become deformed
and the batteries in them could leak or even explode under these condi-
tions.
y Avoid dropping the headphones and hitting them against hard objects.
y Do not sit on the headphones or place anything heavy on them.
y Human voices may have been recorded intentionally at low levels in
some DVDs for special acoustic effects. If you carelessly adjust the vol-
ume in order to hear these voices more clearly, your ears may be ex-
posed to unexpectedly loud sounds at a later point. This may also hap-
pen when you switch to a different audio source. Very loud sounds could
damage your hearing and pose a driving hazard. Keep this in mind when
you adjust the volume.
1
S00115
Basic Operations
1) Wireless headphone

19
Press the “OFF • ON” button on the left earpiece to turn on the headphones: the
power
lamp on the right earpiece will come on.
Adjust the sound level as desired with the volume dial on the right earpiece.
S00127
S00128
1) Power lamp
Basic Operations
Graphics have been changed.
Because the headphone has been
changed to new ones.
Sentence has been changed
according to the power lamp has been
removed from left earpiece to right
earpiece.
/