Page is loading ...

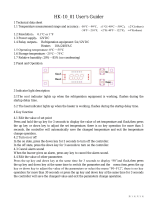
FOUR-STAGE DIGITAL CONTROLLER WITH
ALARM, CYCLICAL TIMER, SOAK FUNCTION,
AND SERIAL COMMUNICATION
MT543EPLUSV05-01P-15725
evolution
MT-543 e plus
Ver.05
MT-543e plus
MT-543e plus
Control
Functions
Shutdown
Functions
lock
Serial
programming
Degree of
protection
IP 65
FRONT
Audible
alarm
Cyclical
timer
Supervisory
system
WARNING
ACCESSORIES:
Only use original accessories of Full Gauge Controls.
If you have any questions, please contact our technical support.
AUTHORIZED SERVICES:
The installation and maintenance of the product must only be performed by qualified personnel.
DUE TO CONSTANT EVOLUTION, FULL GAUGE CONTROLS RESERVES THE RIGHT TO CHANGE THE
INFORMATION CONTAINED IN THIS MANUAL.
BEFORE INSTALLING THE CONTROLLER WE RECOMMEND READING THE INSTRUCTION
MANUAL THOROUGHLY IN ORDER TO AVOID POSSIBLE DAMAGE TO THE PRODUCT.
PRECAUTIONS WHEN INSTALLING THE PRODUCT:
Before performing any procedure in this instrument, disconnect it from the mains; make sure the
instrument has proper ventilation, avoiding installation in panels containing devices that may force
it to work outside the specified temperature limits;
Install the product away from sources that can generate electromagnetic disturbances, such as:
motors, contactors, relays, solenoid valves, etc;
1. DESCRIPTION
2. APLICATIONS
It has four stages that can be applied to refrigeration or heating: the first stage, together with the third
stage, works in systems that require minimum ventilation; the third one also works as a cyclical timer;
the fourth one works as an alarm. The second, third and fourth stages work also in the following modes:
Refrigeration, heating, refrigeration (Sp1), and heating (SP1). Stage 1 can be used in soak mode and
allows configuring up to five different setpoints and the time each one will remain active. MT-543e
plus accepts two types of sensor: NTC thermistor (-50 to 200 °C*), PT-100** (-99 to 300 °C). It has an
intelligent functions lock system, a mode to switch off the control functions, an internal audible alarm
(buzzer), and a configurable digital filter and serial interface for communications with Sitrad.
• Blood banks • Vaccines
• Temperature multistage systems • Beer brewing
• Air conditioners
• Datacenters
Note: Sensor cable length can be increased to up to 200 meters by the user by using a PP 2 x 24 AWG cable.
*It measures temperatures up to 200 °C using the SB59 (sold separately).
**Sensors sold separately
3. TECHNICAL SPECIFICATIONS
4. INDICATIONS AND KEYS
MT-543e plus
Set key
Quick access
menu key (Flatec)
Temperature unit indication
LED
Increase key
Decrease key
Led indicator
(digital output 1 on / off)
Led indicator
(digital output 2 on / off)
Led indicator
(digital output 3 on / off) Led indicator
(digital output 4 on / off)
Buzzer alarm indication led
5. 5. INSTALLATION - PANEL AND ELECTRIC CONNECTIONS
Panel (front view)
Panel
(side view)
Dimensions of the opening
to fasten the instrument
71 mm± 0,5
29 mm± 0,5
FOR INSTA LL ATIONS TH AT RE QU IR E WATER
TIGHTNESS, THE OPENING TO INSTALL THE
CONTROLLER MUST BE 70.5 x 29 mm MAXIMUM. THE
SIDE LATCHES MUST BE FIXED IN ORDER TO PRESS
THE SEALING GASKET TO PREVENT INFILTRATION
BETWEEN THE OPENING AND THE CONTROLLER.
WARNING
1
5678
2349
POWER
SUPPLY
10 11 12 13 14 15 16 17
115 Vac
1
5678
2349
POWER
SUPPLY
10 11 12 13 14 15 16 17
115 Vac
connection
COMMON 1
230 Vac
connection
1
5678
2349
POWER
SUPPLY
10 11 12 13 14 15 16 17
1
5678
2349
POWER
SUPPLY
10 11 12 13 14 15 16 17
12 Vac/dc
connection
12 Vac/dc
24 Vac/dc
24 Vac/dc
connection
IMPORTANT
3/32'' (2.4 mm) SLOTTED SCREW DRIVER FOR ADJUSTMENTS
IN THE SIGNAL TERMINALS;
#1 PHILLIPS SCREW DRIVER FOR ADJUSTMENTS IN THE
POWER TERMINALS.
IT IS ESSENTIAL TO USE PROPER TOOLS IN ORDER TO AVOID
DAMAGES TO THE INSTRUMENT'S CONNECTION TERMINALS:
A
B
SITRAD
NTC
PT-100** 0
COMMON 2
OUT 1
OUT 2
OUT 3
OUT 4
A
B
SITRAD
NTC
PT-100**
A
B
SITRAD
NTC
PT-100**
NTC
PT-100**
A
B
SITRAD
0230 Vac
0
0
COMMON 2
OUT 4
COMMON 2
OUT 4
COMMON 2
OUT 4
6. OPERATIONS
6.1. Quick Access Menu Map
To access or browse the quick access menu, use the ; key (quick touch) while the temperature is being
displayed by the controller. With each touch the next function in the list is displayed. To confirm use the
/ key (quick touch). See chapter 6.3 for more details. The map of functions is shown below:
;
ADJUSTING DESIRED
TEMPERATURE (SETPOINT)
;
FUNCTIONS LOCK
;
CONTROL FUNCTIONS
SHUTDOWN
;
ERASE MAX. AND
MIN. VALUES
MIN. AND MAX.
TEMPERATURE RECORD
;;
ALARM INHIBITOR
FUNCTION SELECTION
;
EXIT FUNCTION
;
MT-543e plus
MT-543e plus
MT-543e plus
MT-543e plus
MT-543e plus
MT-543e plus
MT-543e plus
MT-543e plus
6.2. Quick access keys map
When the controller is on temperature display mode, the following keys can be used as shortcuts for the
following functions:
Hold down for 2 seconds: Setpoint adjustment.
Hold down for 2 seconds: Inhibits the audible alarm and alarm output.
Quick touch: Maximum and minimum temperature display.
/
<
<
<
Hold down for 2 seconds: clear history when records are being displayed.
Held down simultaneously: Enters function selection.
<
<
** This sensor is sold separately.
COMMON 1
OUT 1
OUT 2
OUT 3
COMMON 1
OUT 1
OUT 2
OUT 3
COMMON 1
OUT 1
OUT 2
OUT 3
MT-543e plus
;
SOAK TIMES
CONFIGURATION
;Hold down for 2 seconds: Soak Menu.
/
e
Have this manual to hand using
the FG Finder application.
Control temperature *NTC: -50 to 200ºC / -58 to 392ºF
**PT100: -99 to 300ºC / -146 to 572ºF
Power supply MT-543E Plus: 115~230 Vac ±10% (50/60 Hz)
MT-543EL Plus: 12 or 24 Vac/dc +10%
Operating temperature 0 to 50ºC / 32 to 122ºF
Operating humidity 10 a 90% UR (no condensation)
Dimensions (mm) 76 x 34 x 77 mm (WxHxP)
Maximum output current OUT1, OUT2, OUT3, OUT4: 5(3)A / 250 Vac / 1/8HP
Dimensions of the clip for fixing the
instrument 71 ± 0,5 x 29 ± 0,5 mm (see item 5)
Approximate consumption 0,5 VA

6.3 Basic operations
6.3.1 Adjusting the desired temperature
To enter the setpoint adjustment menu, press / for 2 seconds until [Set,]is displayed or use the
easy access key (item 6.1). The message [Sp1,] and then the value to adjust the setpoint of stage 1
will be displayed in sequence. Use the< or >keys to change the value and press /to confirm.
- If stage 2 is configured to operate as refrigeration controlled by SP2 (F08=0) or heating controlled by
SP2 (F08=1), the message [Sp2,] will be displayed afterwards. Use the< or >keys again to
change the value and press/to confirm.
- If stage 3 is configured to operate as refrigeration controlled by SP3 (F13=0) or heating controlled by
SP3 (F13=1), the message[SP3,]will be displayed afterwards. Use the< or >keys again to
change the value and press /to confirm.
- If stage 4 is configured to operate as refrigeration controlled by SP4 (F30=0) or heating controlled by
SP4 (F30=1), the message[SP4,]will be displayed afterwards. Use the< or >keys again to
change the value and press /to confirm.
If the 3rd stage is configured as a cyclical timer (F13 = 2) or minimum ventilation (F13 = 3), the
adjustment of the time of the cyclical timer of the 3rd stage on ([Con,]) and the time of the cyclical
timer of the 3rd stage off ([Coff]). will be possible. The adjustment of alarm on ([tOn,]) and off
([tOff])times will be allowed if stage 4 is configured as alarm (F30 = 2, 3, or 4).
Finally the indication [----]is signaled concluding the configuration.
6.3.2 Functions Lock
The use of the functions lock brings greater security to the operation of the instrument. The setpoint and
other parameters can be visible to the user when active, but they are protected against undue changes
(F42=2) or only block changes to the control functions and leave the adjustment of the setpoint enabled
(F42=1). To activate the functions lock, access[LOC,]in the quick access menu. The message
[no,,](lock must be enabled and deactivated) will be displayed. When the message is being display
press and hold > for the time configured in (F43) for the functions to be locked. The activation will be
indicated by the message [LOC,][On,,]. To enable the use of this function, F42 must be configured
with 1 or 2.
When trying to change the parameters, the [LOC,] message shown in the display indicates that the
functions lock is active, to deactivate it, turn the controller off and then turn it on again with the>key
held down. Keep the key held down until the [LOC,][OFF,] message indicates the unlocking (10
seconds).
6.3.3 Control Functions Shutdown
Turning the control functions off allows for the controller to operate just as an indicator of temperature,
keeping the control outputs and the alarms disconnected. Use of this feature is enabled or disabled by
the control functions shutdown (F44) function. When enabled, the control and alarms functions are
turned off ([CTRL][OFF,]) or on ([CTRL][ON,,]) through the quick access menu in the option
[CTRL]. When the control functions are off the message [OFF,]will then be displayed alternately
with the temperature and the other messages.
6.3.4 Minimum and maximum temperature record
The display of minimum and maximum temperature records can be checked through the quick access
menu or by pressing the<key. The minimum and maximum temperatures recorded will be displayed
in sequence. To erase the minimum and maximum values recorded, keep the < key pressed for 2
seconds while the records are being displayed or use the option [Creg] in the quick access menu.
The message [rset] indicates that the records were erased.
6.3.5 Selection of units
To select the units the system will use to operate, press <and> simultaneously while the
temperature is being displayed, enter the function [,F01] using the access code [,231] and then
press/. Then select the desired unit [,=C,] or [,=F,] using the<or>keys, and press/.
Whenever the units are changed, the functions' configuration assumes the factory default, so they need
to be configured again.
6.3.6 Selection of the type of sensor
It is required when you want to change the type of sensor connected to the controller. You can choose
the NTC thermistor or PT-100.
To select the type of sensor that the system will use to operate, press <and> simultaneously (quick
touch) while the temperature is being displayed, enter the function [,F01] using the access code
[,312] and then press/. The message [Sens]will be displayed, then select the desired sensor
type[,ntc] (thermistor NTC) ou [pt01](thermistor PT-100*) using the<or>keys, and
press/to confirm. Whenever the type of sensor is changed, the configuration of the functions
assumes the factory default, so they need to be configured again.
6.3.7 Sensor Connection
The NTC or PT100* sensors must be connected according to the picture below.
1
5678
234
NTC
PT-100*
* This sensor is sold separately.
Table of wire gauge / distance ratio.
6.3.8 Audible alarm and alarm output inhibitor
To inhibit the alarm output OUT4 and / or the audible alarm (buzzer), when they are active, press > for
2 seconds. In this case, if OUT4 and buzzer are active, they will both be inhibited.
It is also possible to inhibit the alarm or buzzer through the option [inib] in the quick access ;,
where it is possible to choose the individual alarm to be inhibited ([Out4] or [bu22]) using the< or
> keys and pressing /.
6.3.9 Stages
controller has four stages.
Stages 1 and 2 work only as refrigeration or heating.
MT-543e plus
Diameter Máx. dist.
(AWG) (mm) (metros)
14
16
18
20
22
24
26
1.63
1.29
1.02
0.81
0.64
0.51
0.40
18.1
11.4
7.2
3.0
1.9
1.8
1.1
Temperature [°C]
Setpoint
Cooling
Setpoint + Hysteresis
Time [S]
Temperature [°C]
Cooling
Cyclical
timer
OUT1
Figure 3
Setpoint - Hysteresis
Setpoint
Setpoint + Hysteresis
Time [S]
Cyclical
timer
OUT1
Figure 4
Setpoint - Hysteresis
Besides operating as refrigeration or heating, Stage 3 can act as a cyclical timer or minimum ventilation.
It has five operating modes when configured as cyclical timer:
- Independent (F22=0): the timer cycles are according to the times configured in F20 ([COn,]) and
F21 ([COff]).
- Timer triggered by SP1 (F22=1): the timer is triggered whenever the temperature reaches the value
configured for SP1. The timer switches off when the temperature reaches SP1 + F06 (if stage 1 is
configured as refrigeration) or SP1 - F06 (if stage 1 is configured as heating), as shown in Figure 1.
- Stage 1 linked to the cyclical timer (timer switches on upon power up) (F22=2): in this
configuration, the timer cycles according to the times configured in F20 ([COn,]) and F21 ([COff]) .
The Stage 1 starts to cycle when the temperature reaches SP1 + F06 (if stage 1 is configured as
refrigeration) or SP1 - F06 (if stage 1 is configured as heating), as shown in Figure 1.
- Stage 1 linked to the cyclical timer (timer off upon power up) (F22=3): The operation is similar to
the previous configuration. The difference in this configuration is that the timer starts off.
- Cyclical timer output is on whenever stage 1 output is on (F22=4): in this operating mode timer
cycles according to the times configured in F20 ([COn,]) and F21 ([Coff]) and stage 3 stops
cycling and keeps the output switched on, whenever stage 1 output switches on, as shown in Figure 3.
- Cyclical timer output cycles whenever stage 1 output is on (F22=5): stage 3 will cycle only when
stage 1 output is on, observing the times configured in F20 ([COn,]) and F21 ([COff]), as shown in
Figure 4.
Temperature [°C]
Cooling
Setpoint
Setpoint + Hysteresis
Time [S]
Cyclical
timer
OUT1
Setpoint - Hysteresis
Figure 1
Temperature [°C]
Cooling
Setpoint
Setpoint + Hysteresis
Time [S]
Cyclical
timer
OUT1
Setpoint - Hysteresis
Figure 2
Figure 5
SP1 + F16
Temperature
SP1
SP1 - F06
OUT1
Ventilation
Temperature [°C]
Heating
Stage 3 configured as minimum ventilation; it will act together with stage 1 (configured for heating) in
systems that require minimum ventilation. Functioning as follows: when the temperature is between
SP1 and SP1-F06 or between SP1 and SP1+F16, stage 3 will cycle according to the times configured in
F20 ([COn,]) e F21 ([Coff]). If the temperature is below SP1-F06, the ventilation is switched off,
and if the temperature is higher than SP1+F16, the ventilation remains on, and stays in this condition
until it reaches the setpoint again, as shown in Figure 5.
Like in the previous stages, stage 4 can also be configured as refrigeration or heating. It can also
operate as an in-range alarm, relative out-of-range (F30 = 2, 3, and 4).
6.3.10 Soak Function
In the soak function mode (F45=1) up to five different setpoints can be configured to act for different
times in output OUT1. The first desired setpoint (SSP1) is configured in function F46 and the time in
minutes the controller must remain in this setpoint (F47), as well as the sequential setpoints (SPS2,
SPS3, SPS4, and SPS5) in functions (F48, F50, F52 e F54), and respective permanence times (F49,
F51, F53 e F55).
Time [min]
Temperature
SSP3
SSP2
SSP1
Time in SSP1
Time
in SSP2
Time in SSP3
Buzzer

In the soak mode, the controller operates in the configured setpoint for the chosen permanence time.
The permanence time count is only started when the temperature reaches the soak setpoint for the first
time. Upon finishing the permanence time count, the controller will operate with the next soak setpoint. If
this is the last soak setpoint, the controller switches off output OUT1 and waits for the process to be
restarted through the menu [SOAH] option [,,On]. The stage operating mode (refrigeration or
heating) must be selected in function F03, as well as the control differential (hysteresis) in F06.
6.3.10.1 Soak Menu
The soak control mode is off by default. Follow the steps below to start the process:
a) Access the quick access (;), navigate through the menu pressing ; until reaching the option
[SOAH] and press / or press the ; and/ keys simultaneously to enter the menu [SOAH].
b) Use the <or>keys to navigate to the option [,,On] and press/.
c) Use the<or>keys to select the soak setpoint (SSP) 1, 2, 3, 4, or 5, in which the control will be
started and press/. The message [SOAH][,,On]will be displayed.
If required, follow the steps below to cancel the soak process:
a) Access the quick access (;), navigate through the menu pressing ;until reaching the option
[SOAH] and press/, or press the ;and / keys simultaneously to enter the menu [SOAH].
b) Use the<or>keys to navigate to the option [,Off] and press /. The
message[SOAH][,OFF]will be displayed.
Follow the steps below to view the soak mode control information , such as functions configured for the
current soak point (setpoint and permanence time):
a) Access the quick access (;), navigate through the menu pressing ;until reaching the option
[SOAH] and press/, or press the ; and/keys simultaneously to enter the menu [SOAH].
b) Use the<or>keys to navigate to the option[info]and press/. Depending on the current
soak point, the messages [SSP1],[SsP2],[SSP3],[SSP4]or[SSP5]will be displayed in
sequence, followed by the configured temperature and the permanence time [ttot][00:00]
configured for this soak point.
To erase all the soak point configurations, i.e. reconfigure functions F46 to F55 with the default values,
thus resetting the time of all soak points, follow the steps below:
a) Access the quick access (;), navigate through the menu pressing ; until reaching the option
[SOAH] and press/, or press the ; and/ keys simultaneously to enter the menu [SOAH].
b) Use the <or> keys to navigate to the option [rSet] and press /.
c) Use the <or> keys to select the option [,yes]and press/. The message [SOAH][rSet]
will be displayed indicating that all functions related to the soak control mode have been changed to the
default values, i.e. temperatures changed to 23º C and permanence time to 0.
6.3.10.2 Messages
The following messages are displayed during the soak control mode:
After the soak control mode is started, the message[SSP1],[SsP2],[SSP3],[SSP4]
or[SSP5] will be displayed alternating with the temperature and other messages, indicating which
soak point is active. The countdown timer [00:00](hours : minutes) of the permanence time for the
soak point will only be displayed after the controller reaches the temperature configured as the soak
setpoint, i.e. the countdown timer is not displayed while the control is operating in the transition between
temperatures (slope).
6.3.10.3 Audible warnings
The following audible warnings will occur during the soak control mode:
1) When the control reaches the temperature of the first soak point, i.e. at the moment that the
permanence time count of the first soak point is started, an audible warning will occur, which will be a
constant activation of the buzzer (internal alarm) for approximately 2 seconds.
2) Whenever the control reaches the soak point permanence time and changes the setpoint to the next
soak point, an audible warning will occur, with three consecutive activations of the buzzer (internal
alarm).
3) When the soak point operation is finished, i.e. when the permanence time of the last soak point is
reached, an audible warning will occur with intermittent activations of the buzzer for 10 seconds.
NOTE: When not all five soak points are required, unused soak points must be configured with a
permanence time of 0 (F49, F51, F53, or F55).
NOTE 2: When the controller is powered up in soak mode, output OUT1 will be off and the process will
start only after being activated in menu [sOaH] option [,,On].
NOTE 3: When the controller is operating in soak mode, it is not possible to use the audible warning
(buzzer) as temperature alarm (F23).
IMPORTANT: The controller has no influence on the time the system takes to go from one setpoint
to the next. It controls only the permanence time in the setpoint (soak point). The slope time (incline)
between soak points depends only on the capacity of the system, and not on the controller.
6.4 Advanced Operations
6.4.1 Access to the main menu
The main menu can be accessed through the quick access menu, option [Func] or by pressing
<and> simultaneously (quick touch) while the temperature is being displayed.
6.4.2 Access code
To allow the altering of parameters, enter the function [,F01] by pressing / (quick touch), enter the
access code 123 (one hundred and twenty-three) using the <or> keys, and confirm with /.
6.4.3 Changing the controller parameters
In the function menu, after entering the access code correctly in function [,F01] select the desired
option using the <or>keys. Press / (quick touch) after selecting the function to view its value. Use
<or> to change the value and press / when ready to save the configured value and return to the
function menu. To leave the menu and return to the normal operating mode (temperature indication),
hold down/(long touch) until [----]appears.
6.5 Parameter table
[,F01]
[,F02]
[,F03]
[,F04]
[,F05]
[,F06]
[,F07]
[,F08]
[,F09]
[,F10]
[,F11]
[,F12]
[,F13]
[,F14]
[,F15]
[,F16]
[,f17]
[,f18]
[,F19]
[,F20]
[,F21]
[,F22]
[,F23]
[,F24]
[,F25]
[,F26]
[,F27]
[,F28]
[,f29]
[,F30]
[,F31]
[,F32]
[,F33]
DescriptionFun Min Max Unit
CELSIUS FAHRENHEIT
Min Max Unit
Standard
Standard
Access code
Indication offset
Stage 1 operating mode
Minimum setpoint allowed (stage 1)
Maximum setpoint (stage 1)
Stage 1 control differential (hysteresis)
Minimum delay to switch on stage 1 output again
Stage 2 operating mode
Minimum setpoint allowed (stage 2)
Maximum setpoint allowed (stage 2)
Stage 2 control differential (hysteresis)
Minimum delay to switch on stage 2 output again
Stage 3 operating mode
Minimum setpoint allowed (stage 3)
Maximum setpoint allowed (stage 3)
Stage 3 control differential (hysteresis)
Minimum delay to switch on stage 3 output again
Stage 3 cyclical timer time base
Time to activate stage 3 cyclical timer
Time of cyclical timer of stage 3 on
Time of cyclical timer of stage 3 off
Cyclical timer operating mode
Buzzer operating mode
Buzzer operating point (lower threshold)
Buzzer operating point (upper threshold)
Buzzer on time
Buzzer off time
Alarm inhibition time upon power up
Time to reactivate the buzzer when manually inhibited
Stage 4 operating mode
Minimum setpoint allowed (stage 4)
Maximum setpoint allowed (stage 4)
Stage 4 control differential (hysteresis)
PT-100
Min Max Unit
CELSIUS FAHRENHEIT
Min Max Unit
Standard
Standard
-
-5
0
-50
-50
0.1
0
0
-50
-50
0.1
0
0
-50
-50
0.1
0
0
0
0
0
0
0
-50
-50
0
0
0
Auto
0
-50
-50
0.1
NTC
-
5
1
200
200
20
999
3
200
200
20
999
5
200
200
20
999
1
999
999
999
5
2
200
200
999
999
999
999
6
200
200
20
-
0
1
-50
105
1
0
0
-50
105
1
0
0
-50
105
1
0
0
5
0
0
0
1
-50
105
1
1
0
Auto
3
21
27
1
-
°C
-
°C
°C
°C
sec.
-
°C
°C
°C
sec.
-
°C
°C
°C
sec.
-
sec.
s/m
s/m
-
-
°C
°C
sec.
sec.
Min.
Min.
-
°C
°C
°C
-
°F
-
°F
°F
°F
sec.
-
°F
°F
°F
sec.
-
°F
°F
°F
sec.
-
sec.
s/m
s/m
-
-
°F
°F
sec.
sec.
Min.
Min.
-
°F
°F
°F
-
°C
-
°C
°C
°C
sec.
-
°C
°C
°C
sec.
-
°C
°C
°C
sec.
-
sec.
s/m
s/m
-
-
°C
°C
sec.
sec.
Min.
Min.
-
°C
°C
°C
-
°F
-
°F
°F
°F
sec.
-
°F
°F
°F
sec.
-
°F
°F
°F
sec.
-
sec.
s/m
s/m
-
-
°F
°F
sec.
sec.
Min.
Min.
-
°F
°F
°F
-
9
1
392
392
36
999
3
392
392
36
999
5
392
392
36
999
1
999
999
999
5
2
392
392
999
999
999
999
6
392
392
36
-
-9
0
-58
-58
1
0
0
-58
-58
1
0
0
-58
-58
1
0
0
0
0
0
0
0
-58
-58
0
0
0
Auto
0
-58
-58
1
-
0
1
-58
221
2
0
0
-58
221
2
0
0
-58
221
2
0
0
5
0
0
0
1
-58
221
1
1
0
Auto
3
70
81
2
-
-50
0
-99
-99
1
0
0
-99
-99
1
0
0
-99
-99
1
0
0
0
0
0
0
0
-99
-99
0
0
0
Auto
0
-99
-99
1
-
50
1
300
300
50
999
3
300
300
50
999
5
300
300
50
999
1
999
999
999
5
2
300
300
999
999
999
999
6
300
300
50
-
0
1
-99
300
2
0
0
-99
300
2
0
0
-99
300
2
0
0
5
0
0
0
1
-99
300
1
1
0
Auto
3
21
27
2
-
-90
0
-146
-146
2
0
0
-146
-146
2
0
0
-146
-146
2
0
0
0
0
0
0
0
-146
-146
0
0
0
Auto
0
-146
-146
2
-
90
1
572
572
90
999
3
572
572
90
999
5
572
572
90
999
1
999
999
999
5
2
572
572
999
999
999
999
6
572
572
90
-
0
1
-146
572
4
0
0
-146
572
4
0
0
-146
572
4
0
0
5
0
0
0
1
-146
572
1
1
0
Auto
3
70
81
4

Caption: [no,,]= no
[auto]= automatic
[,F34]
[,F35]
[,F36]
[,f37]
[,f38]
[,F39]
[,F40]
[,F41]
[,F42]
[,F43]
[,F44]
[,F45]
[,F46]
[,F47]
[,F48]
[,F49]
[,F50]
[,F51]
[,F52]
[,F53]
[,F54]
[,F55]
[,F56]
DescriptionFun Min Max Unit
CELSIUS FAHRENHEIT
Min Max Unit
Standard
Standard
Minimum delay to switch on stage 4 output again
Alarm inhibition time upon power up
Time to reactivate the alarm when manually inhibited
Alarm on time
Alarm off time
Alarm inhibition time (delay)
Digital filter operating mode
Digital filter intensity applied to the sensor
Functions lock
Time for functions lock
Control Functions Shutdown
Enable the soak function feature in output Out1
Temperature in the soak point (SSP1)
Permanence time in the soak point
Temperature in the soak point2 (SSP2)
Permanence time in the soak point2
Temperature in the soak point3 (SSP3)
Permanence time in the soak point3
Temperature in the soak point4 (SSP4)
Permanence time in the soak point4
Temperature in the soak point5 (SSP5)
Permanence time in the soak point5
RS-485 network address
PT-100
Min Max Unit
CELSIUS FAHRENHEIT
Min Max Unit
Standard
Standard
0
0
Auto
0
0
0(NO)
0
0
0
15
0(NO)
0
-50
0
-50
0
-50
0
-50
0
-50
0
1
NTC
999
999
999
999
999
999
1
20
2
60
2
1
200
999
200
999
200
999
200
999
200
999
247
0
0
Auto
1
1
0(NO)
0
0
0
15
0(NO)
0
23
0
23
0
23
0
23
0
23
0
1
sec.
Min.
Min.
sec.
sec.
Min.
-
sec.
-
sec.
-
-
°C
Min.
°C
Min.
°C
Min.
°C
Min.
°C
Min.
-
sec.
Min.
Min.
sec.
sec.
Min.
-
sec.
-
sec.
-
-
°F
Min.
°F
Min.
°F
Min.
°F
Min.
°F
Min.
-
sec.
Min.
Min.
sec.
sec.
Min.
-
sec.
-
sec.
-
-
°C
Min.
°C
Min.
°C
Min.
°C
Min.
°C
Min.
-
sec.
Min.
Min.
sec.
sec.
Min.
-
sec.
-
sec.
-
-
°F
Min.
°F
Min.
°F
Min.
°F
Min.
°F
Min.
-
999
999
999
999
999
999
1
20
2
60
2
1
392
999
392
999
392
999
392
999
392
999
247
0
0
Auto
0
0
0(NO)
0
0
0
15
0(NO)
0
-58
0
-58
0
-58
0
-58
0
-58
0
1
0
0
Auto
1
1
0(NO)
0
0
0
15
0(NO)
0
73
0
73
0
73
0
73
0
73
0
1
0
0
Auto
0
0
0(NO)
0
0
0
15
0(NO)
0
-99
0
-99
0
-99
0
-99
0
-99
0
1
999
999
999
999
999
999
1
20
2
60
2
1
300
999
300
999
300
999
300
999
300
999
247
0
0
Auto
1
1
0(NO)
0
0
0
15
0(NO)
0
23
0
23
0
23
0
23
0
23
0
1
0
0
Auto
0
0
0(NO)
0
0
0
15
0(NO)
0
-146
0
-146
0
-146
0
-146
0
-146
0
1
999
999
999
999
999
999
1
20
2
60
2
1
572
999
572
999
572
999
572
999
572
999
247
0
0
Auto
1
1
0(NO)
0
0
0
15
0(NO)
0
73
0
73
0
73
0
73
0
73
0
1
6.5.1 Description of parameters
F01 - Access code (123):
Required when you want to change configuration parameters. This code is not required for viewing the
parameters.
F02 - Indication offset:
Allows for the compensation of possible deviations in the temperature reading caused by the
replacement of the sensor or changes in the cable length.
F03 - Stage 1 operating mode:
[,,,0] - Refrigeration
[,,,1] - Heating
F04 - Minimum setpoint allowed to the end user (1st stage):
Electronic backstop aimed to prevent an exceedingly low temperature being inadvertently adjusted in
the setpoint.
F05 - Maximum setpoint allowed to the end user (1st stage):
Electronic backstop aimed to prevent an exceedingly high temperature being inadvertently adjusted in
the setpoint.
F06 - Stage 1 control differential (hysteresis):
It is the temperature difference (hysteresis) between switching output OUT1 ON and OFF.
F07 - Minimum delay to switch on stage 1 output again:
It is the minimum time the OUT1 output will remain off, i.e. the length of time between the last stop and
the next start up.
F08 - Stage 2 operating mode:
[,,,0]- Refrigeration (controlled by SP2)
[,,,1]- Heating (controlled by SP2)
[,,,2]- Refrigeration (controlled by SP1)
[,,,3]- Heating (controlled by SP1)
F09 - Minimum setpoint allowed to the end user (2nd stage):
F10 - Maximum setpoint allowed to the end user (2nd stage):
Electronic backstop to prevent exceedingly low or high temperatures being inadvertently adjusted in the
setpoint.
F11 - Stage 2 control differential (hysteresis):
It is the temperature difference (hysteresis) between switching output OUT2 ON and OFF.
F12 - Minimum delay to switch on stage 2 output again:
It is the minimum time the OUT2 output will remain off, i.e. the length of time between the last stop and
the next start up.
F13 - Stage 3 operating mode:
[,,,0]- Refrigeration (controlled by SP3)
[,,,1]- Heating (controlled by SP3)
[,,,2]- Cyclical Timer
[,,,3]- Minimum ventilation
[,,,4]- Refrigeration (controlled by SP1)
[,,,5]- Heating (controlled by SP1)
NOTE: The operation of the minimum ventilation is described on item 6.3.9.
F14 - Minimum setpoint allowed to the end user (3rd stage):
F15 - Maximum setpoint allowed to the end user (3rd stage):
Electronic backstop aimed to prevent exceedingly low or high temperatures being inadvertently
adjusted in the setpoint.
F16 - Stage 3 control differential (hysteresis):
It is the temperature difference (hysteresis) between switching output OUT3 ON and OFF.
F17 - Minimum delay to switch on stage 3 output again:
It is the minimum time the OUT3 output will remain off, i.e. the length of time between the last stop and
the next start up. Programmed only if F13=0, 1, 4, or 5.
F18 - Stage 3 cyclical timer time base:
[,,,0] - Seconds
[,,,1] - Minutes
F19 - Time to activate stage 3 cyclical timer:
Whenever the temperature reaches the value configured in [,Sp1], the time configured in this
function is observed before activating the cyclical timer. To activate the timer at the moment [,Sp1] is
reached, configure this function with 0. Only if F22=1.
F20 - Time of cyclical timer of stage 3 on ([COn,]):
Time for which the cyclical timer will remain active.
F21 - Time of cyclical timer of stage 3 off ([COff]):
Time for which the cyclical timer will remain inactive.
F22 - Cyclical timer operating mode:
[,,,0]- Independent cyclical timer
[,,,1]- Cyclical timer triggered by the stage 1 setpoint (SP1)
[,,,2]- Stage 1 linked to the cyclical timer (timer on upon power up)
[,,,3]- Stage 1 linked to the cyclical timer (timer off upon power up)
[,,,4]- Cyclical timer output on whenever stage 1 output is on
[,,,5]- Cyclical timer output cycling whenever stage 1 output is on
F23 - Audible alarm (buzzer) operating mode:
[,,,0] - In-range alarm (F24 and F25)
[,,,1] - Out-range alarm (F24 and F25)
[,,,2] - Out-of-range alarm related to the stage 1 setpoint ([SP1,]-F24 and [SP1,]+F25), the
absolute values of F24 and F25 are considered.
F24 - Buzzer operating point (lower threshold):
It is the lower temperature value for the buzzer alarm to activate according to F23.
F25 - Buzzer operating point (upper threshold):
It is the higher temperature value for the buzzer alarm to activate according to F23.
F26 - Buzzer on time:
It is the time the buzzer will remain on (active cycle). To disable the audible alarm (buzzer), configure this
function with 0.
F27 - Buzzer off time:
It is the time the buzzer will remain off (inactive cycle). To disable the audible alarm (buzzer), configure
this function with 0.
F28 - Alarm inhibition time upon power up:
It is the time for which the buzzer will remain off, even in alarm conditions, for a certain period after
initialization, since the system has not yet reached the working temperature.
F29 - Time to reactivate the buzzer when manually inhibited:
This function allows for three different configurations:
[Auto] - The buzzer will be inhibited until the temperature reaches the normal working condition and
returns to the alarm condition again.
[,,,0] - Buzzer cannot be inhibited by the easy access keys.
[,,,1] to [,999] - Buzzer will be inhibited during this period (in minutes), switching on again if the
alarm condition persists.
F30 - Stage 4 operating mode:
[,,,0]- Refrigeration (controlled by SP4)
[,,,1]- Heating (controlled by SP4)
[,,,2]- In-range alarm (F31 and F32)
[,,,3]- Out-range alarm (F31 and F32)
[,,,4]- Out-of-range alarm related ([,SP1]-F31 and [,SP1]+F32), the absolute values of F31
and F32 are considered.
[,,,5] - Refrigeration (controlled by SP1)
[,,,6] - Heating (controlled by SP1)

F31 - Minimum setpoint allowed to the end user (4th stage):
F32 - Minimum setpoint allowed to the end user (4th stage):
Electronic backstop aimed to prevent exceedingly low or high temperatures being inadvertently
adjusted in the setpoint.
NOTE: When stage 4 is defined as alarm (F30=2, 3, or 4), the activation points are defined in F31 and
F32.
F33 - Stage 4 control differential (hysteresis):
It is the temperature difference (hysteresis) between switching output OUT4 ON and OFF.
F34 - Minimum delay to switch on stage 4 output again:
It is the minimum time the OUT4 output will remain off, i.e. the length of time between the last stop and
the next start up. Programmed only if F30=0, 1, 5, or 6.
F35 - Alarm inhibition time upon power up:
This function serves to inhibit the alarm for a certain period after the start up, because the system has
not yet reached the working temperature (only if F30=2, 3 or 4).
F36 - Time to reactivate the alarm when manually inhibited:
This function allows for three different configurations (only if F30=2, 3, or 4)
[Auto]- The alarm will be inhibited until the temperature reaches the normal working condition and
returns to the alarm condition again.
[,,,0]- Alarm cannot be inhibited by the easy access keys.
[,,,1] to [,999] - Alarm will be inhibited during this period (in minutes), switching on again if the
alarm condition persists.
F37 - Alarm on time ([TOn,]):
To adjust the time output OUT4 will remain active (only if F30=2, 3, or 4).
F38 - Alarm off time ([TOFF]):
To adjust the time output OUT4 will remain inactive (only if F30=2, 3, or 4). To always keep the alarm
active configure this function with 0.
F39 - Time to inhibit the alarms (delay):
When this configuration is active, the temperature must remain in the alarm condition for the defined
inhibit time before the alarm is indicated. This allows avoiding warnings originating from punctual
temperature variations. This configuration is used in the alarm output and in the audible alarm (buzzer).
F40 - Digital filter operating mode:
[,,,0]- The filter operates both when the temperature rises and when it falls.
[,,,1]- The filter operates only on the ascending slope of the temperature. When the temperature
falls the response is immediate.
F41 - Digital filter intensity:
The value adjusted in this function represents the time (in seconds) for the temperature to change by
0.1° C. This function can be switched off by setting it at the minimum value 0.
F42 - Functions lock:
It allows and configures the functions lock (see item 6.3.2).
[,,,0]- Do not allow the functions lock.
[,,,1]- Allow a partial lock where the control functions will be locked but the adjustment of the
setpoint is allowed.
[,,,2]- Allow full locking
NOTE: The view of the minimum and maximum temperature records will always be allowed.
F43 - Time for functions lock:
It configures the time in seconds for the command to activate the functions lock:
[,,15]to [,,60] - Time in seconds for the command to activate the lock.
F44 - Control functions shutdown:
Authorizes switching off the control functions (see item 6.3.3).
[,,,0]-Disables the control functions shutdown.
[,,,1]-Enables activation/deactivation of the control functions only if the functions are unlocked.
[,,,2]-Enables activation/deactivation of the control functions even if the functions are locked.
F45 - Enable the soak function feature in output Out1.
[,,,0]-Disable soak point.
[,,,1]-Enable soak point in output OUT1.
NOTE: The operation of the control in the soak mode is described in item 6.3.10 of this manual.
F46 - Soak Setpoint 1 Temperature (SSP1):
Desired temperature during Soak Point 1.
F47 - Permanence time in the soak point1:
Configures the time in minutes the controller will remain in Soak Point 1.
F48 - Soak Setpoint 2 Temperature (SSP2):
Desired temperature during Soak Point 2.
F49 - Permanence time in the soak point2:
Configures the time in minutes the controller will remain in Soak Point 2.
F50 - Soak Setpoint 3 Temperature (SSP3):
Desired temperature during Soak Point 3.
F51 - Permanence time in the soak point3:
Configures the time in minutes the controller will remain in Soak Point 3.
F52 - Soak Setpoint 4 Temperature (SSP4):
Desired temperature during Soak Point 4.
F53 - Permanence time in the soak point4:
Configures the time in minutes the controller will remain in Soak Point 4.
F54 - Soak Setpoint 5 Temperature (SSP5):
Desired temperature during Soak Point 5.
F55 - Permanence time in the soak point5:
Configures the time in minutes the controller will remain in Soak Point 5.
F56 - Instrument address in the RS-485 network:
Equipment's network address for communicating with Sitrad software.
NOTE: One network must not have different equipment with the same address.
7. SIGNALS
Sensor disconnected or temperature outside specified range.
[Err,]
[Ctrl][On,,]
[Ctrl][OFF,]
[LOC,][On,,]
[LOC,][OFF,]
[eCAL]
[pppp]
Contact Full Gauge.
Reconfigure the function values.
AB
MT-530 super
AA
B B
A B
A
B
AA
B B
A B
AB
AA
B B
A B
Serial Interface RS-485
Device used to establish the
connection of Full Gauge Controls
instruments with Sitrad .
®
Instrument
RS-485 network
Grounded
terminal
External
loop
®
CONV. 32
or
CONV. 256
AA
B B
A B
*CONNECTION BLOCK FOR SERIAL COMMUNICATION
It is used to interconnect more than one instrument to the Interface. The wires
must be connected as follows: Terminal A of the instrument connected to terminal
A of the connection block, which in turn must be connected to terminal A of the
Interface. Repeat the procedure for terminals B and , with being the cable
mesh (optional ground). Terminal of the connection block must be connected to
the respective terminals of each instrument.
*Sold Separately
MT-530 super
Keep Sitrad up-to-date through the
site: http://www.sitrad.com.br
®
8. INTERCONNECTING CONTROLLERS, RS-485 SERIAL INTERFACE, AND COMPUTER
Control functions off.
Functions lock.
Unlocking of functions.
Control functions on.
9. OPTIONAL ITEMS – Sold Separately
EasyProg or later
via Serial TTL connection.
- version 2
It is an accessory which has the main function of storing the controller parameters. At any time you can
load new controller parameters unload them on a production line (of the same controller), for example.
It is provided with three types of connections for loading or unloading the parameters:
- Serial RS-485: It is connected via RS-485 network to the controller (only for those controllers provided
with RS-485).
- USB: It is connected to the computer via USB port, using the Sitrad Preset Editor.
- Serial TTL: The controller may be connected directly to
EasyProg
EASYPROG
IMPORTANT
I N O R D E R T O B E A B L E T O
COMMUNICATE WITH EASYPROG THIS
C O N T R O L L E R M U S T N O T
COMMUNICATE WITH SITRAD.
Extension Frame
To install controllers with maximum dimensions of 76 x 34 x 77 mm (opening dimensions of 71 x 29 mm for
installation in the extended frame) in several situations, because it does not require precision of the
opening to embed the instrument. It allows customization through a sticker with the brand and company
contact, in addition to being accompanied by two 10 A (250 V AC) switches that can trigger internal light, air
curtain, on/off system or fan.
E-case
Recommended for the Evolution line, it prevents water from entering the back part of the instrument.
It protects the product when the installation site thereof is washed.

Electrical noise suppression filter
Wiring diagram of suppressors in
contactors
Suppressor
A1
A2
A1 and A2 are the
contactor coil terminals.
Wiring diagram of suppressors in
direct drive loads
Load
Suppressor
For direct drive
take into account
the maximum specified
current.
RC FILTER
ENVIRONMENTAL INFORMATION
Packaging:
The materials used in the packaging of Full Gauge products are 100% recyclable. Try to
perform disposal through specialized recyclers.
Product:
The components used in Full Gauge controllers can be recycled and reused if
disassembled by specialized companies.
Disposal:
Do not incinerate or dispose the controllers that have reached the end of their service as
household garbage. Observe the laws in your area regarding disposal of electronic
waste. If in doubt, please contact Full Gauge Controls.
WARRANTY - FULL GAUGE CONTROLS
Products manufactured by Full Gauge Controls, as of May 2005, have a two (02) year
warranty, as of the date of the consigned sale, as stated on the invoice. They are guaranteed
against manufacturing defects that make them unsuitable or inadequate for their intended
use.
EXCEPTIONS TO WARRANTY
The Warranty does not cover expenses incurred for freight and/or insurance when sending
products with signs of defect or faulty functioning to an authorized provider of technical
support services. The following events are not covered either: natural wear and tear of parts;
external damage caused by falls or inadequate packaging of products.
LOSS OF WARRANTY
Products will automatically lose its warranty in the following cases:
- The instructions for assembly and use found in the technical description and installation
procedures in Standard IEC60364 are not obeyed;
- The product is submitted to conditions beyond the limits specified in its technical
description;
- The product is violated or repaired by any person not a member of the technical team of
Full Gauge Controls;
- Damage has been caused by a fall, blow and/or impact, infiltration of water, overload
and/or atmospheric discharge.
USE OF WARRANTY
To make use of the warranty, customers must send the properly packaged product to Full
Gauge Controls together with the invoice or receipt for the corresponding purchase. As much
information as possible in relation to the issue detected must be sent to facilitate analysis,
testing and execution of the service.
These procedures and any maintenance of the product may only be provided by Full
Gauge Controls Technical Support services in the company's headquarters at Rua Júlio de
Castilhos, 250 - CEP 92120-030 - Canoas - Rio Grande do Sul – Brasil
Copyright 2016 All rights reserved.
Rev. 03
/