Please read and save these instructions. Read carefully before attempting to assemble, install, operate or maintain
this product. Protect yourself and other by observing all safety information. Failure to comply with instructions
could result in personal injury and/or property damage.
WALL CAP
MODEL 441
We recommend shutter not
be mounted closer to the
fan than 1/3 the diameter of
fan blade.
Do not force shutter into
opening!
Do not open shutter by lifting
individual blades!
Do not install shutter leaning
forward or backward!
TAPA DE PARED
MODELO 441
Installation
1. Shutter frame should be
mounted level and squarely on
outside wall. Care should be
taken not to twist the shutter
frame. Never cover shutter
with siding or masonry work.
Shutter should be mounted so
it can be removed any time
in case of damage.
2. Shutter should operate as freely
after installation as it did before.
3. Caulking compound is
recommended between shutter
frame edges and the wall.
4. Clean and lubricate shutter at
the same time that the fan is
lubricated and cleaned.
Recomendamos que
no se instale a una
distancia menor de 1/3
de diámetro de las hojas
del ventilador.
¡No forzar la persiana
para abrirla!
¡No abrir la persiana
levantando las hojas
individualmente!
¡No instalar la persiana
inclinada hacia adelante
o hacia atrás!
Por favor lea y guarde estas instrucciones. Léalas cuidadosamente antes de intentar montar, instalar, operar o
reparar el producto descrito. Para su propia protección y la de los demás cumpla con lo indicado en la información
de seguridad. ¡El no hacerlo podria ocasionar lesiones personales, daños materiales o ambos!
Instalación
1. El marco de la persiana debe
instalarse bien nivelado y recto en
la pared exterior. Procurar no torcer
el marco. Nunca cubrir la persiana
con las tablas de revestimiento
material de albañileria. La persiana
debe instalarse de modo que
se puede extraer en cualquier
momento en caso de dañarse.
2. La persiana debe funcionar tan
libremente después de instalada
como antes de instalarse.
3. Se recomienda calafatear el
espacio entre el borde del morco de
la persiana y la pared.
4. Limpiar y lubricar la persiana al
mismo tiempo que el ventilador.
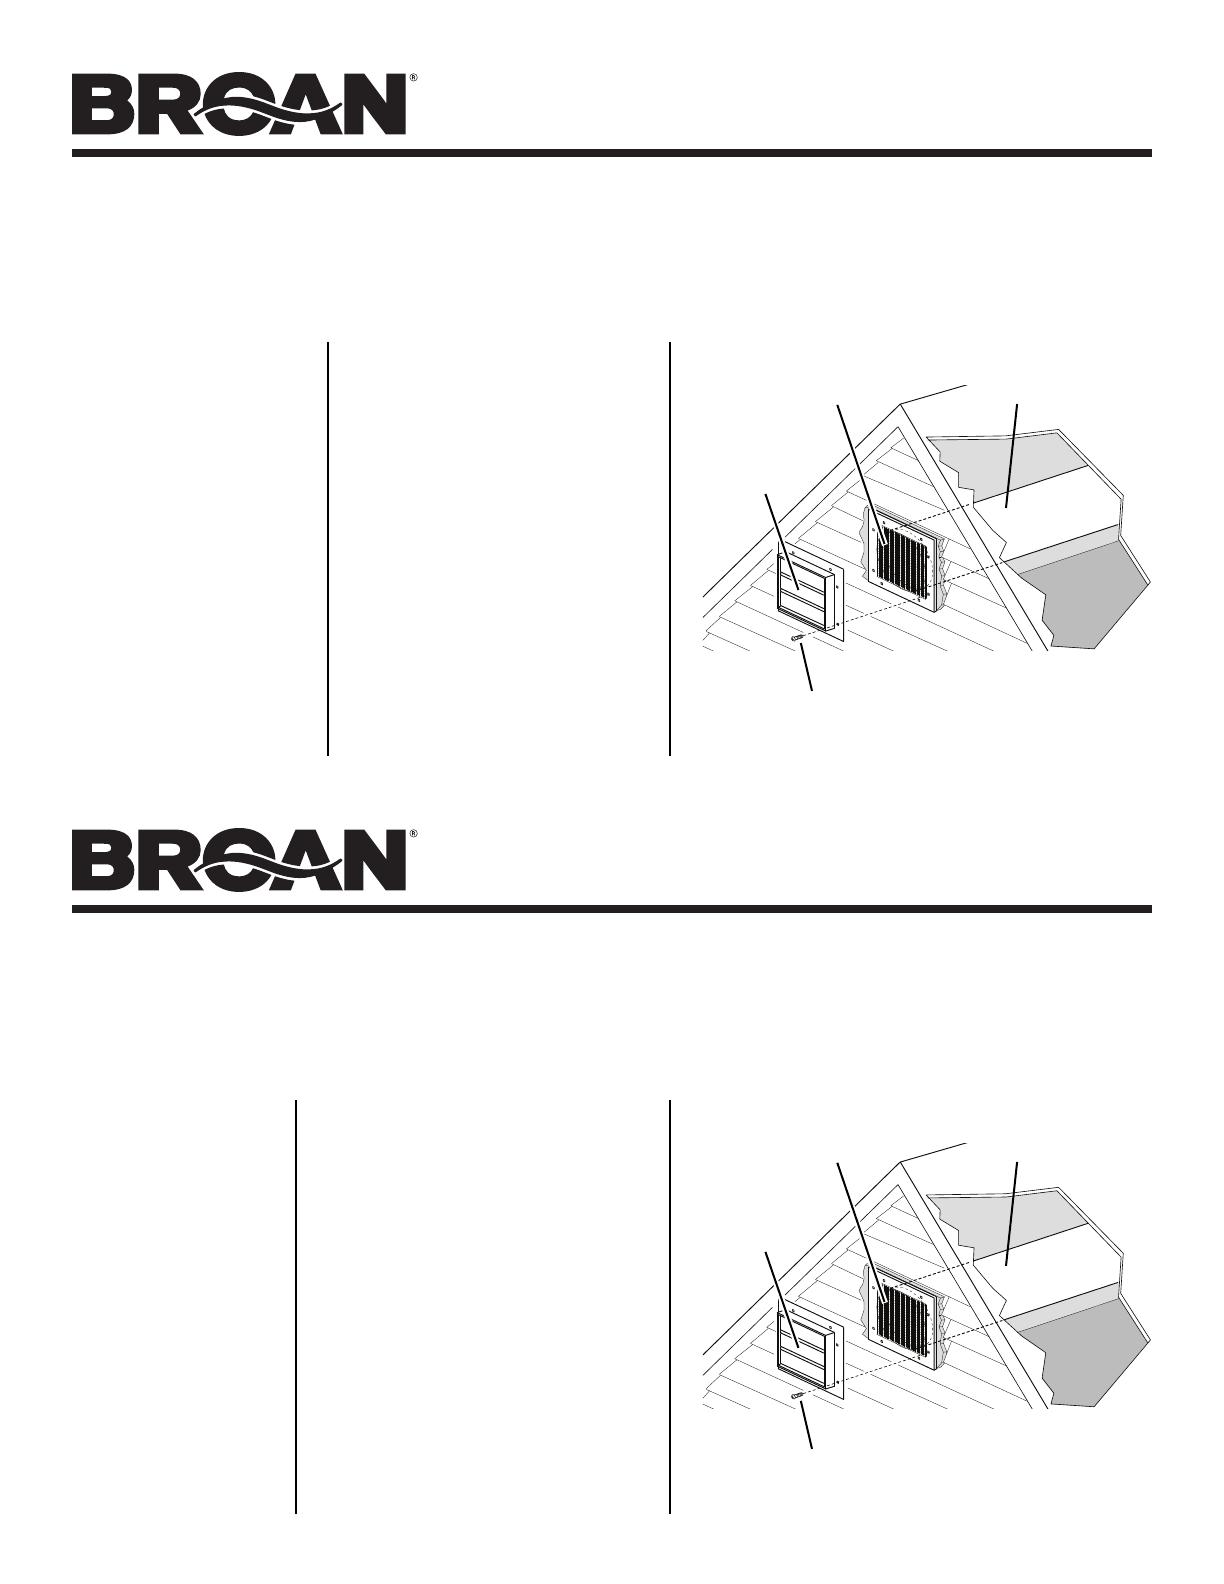
SHUTTER
MOUNTING
SCREWS
(not included)
AIR
FLOW
10-INCH
ROUND
DUCT
BIRD SCREEN /
DUCT COLLAR
í
PERSIANA
TORNILLOS DE
MONTAJE
(no incluidos)
FLUJO
DEL AIRE
CONDUCTO
REDONDO
DE 10 PULG.
PANTALLA DE AVES /
COLLAR DEL
CONDUCTO
í
