Russell Hobbs 20690 User manual

Category
Coffee makers
Type
User manual
80
Read the instructions, keep them safe, pass them on if you pass the appliance on. Remove all
packaging before use.
A IMPORTANT SAFEGUARDS
Follow basic safety precautions, including:
1 This appliance can be used by children aged from 8 years and
above and persons with reduced physical, sensory or mental
capabilities or lack of experience and knowledge if they have
been supervised/instructed and understand the hazards involved.
•Children shall not play with the appliance.
•Cleaning and user maintenance shall not be done by children
unless they are older than 8 and supervised.
•Keep the appliance and cable out of reach of children under 8
years.
h The surfaces of the appliance will get hot.
l Don’t immerse the appliance in liquid.
2 If the cable is damaged, it must be replaced by the manufacturer,
its service agent, or someone similarly qualified, to avoid hazard.
3 Sit the appliance on a stable, level, heat-resistant surface.
4 Keep the appliance and cable away from the edges of worktops.
5 Don’t use accessories or attachments other than those we supply.
6 Don’t use the appliance for any purpose other than those described in these instructions.
7 Don’t use the appliance if it’s damaged or malfunctions.
household use only
U BEFORE USING FOR THE FIRST TIME
Fill the reservoir to the max mark, and run the appliance without coffee.
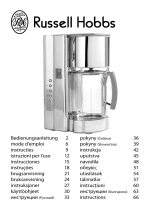
C THE CARAFE IS INSULATED
1 This means you can enjoy fresh, hot coffee anywhere in the home or garden.
2 To close the carafe lid, turn it fully clockwise.
3 The indent will be aligned with (.
4 It should be in this position while the carafe is sitting on the rest, or being carried.
5 To pour, remove the carafe from the rest and turn the lid 90° to align the indent with the
spout.
6 Close the lid after pouring.
7 To remove the lid, turn it 1 full turn from the closed position.
8 The indent will be aligned with (.
9 To replace the lid, align the indent with (, fit the lid to the carafe, then turn it fully clockwise.
10 The indent will be aligned with (.
, Rinse the carafe with hot water, to prewarm it, so it doesn’t take heat from the coffee.
C FILLING
11 Remove the carafe from the rest.
12 Use the grip to open the lid, and expose the reservoir.
13 Fill the reservoir with the exact amount of water required.
14 Open up a #4 paper filter, and put it into the filter holder.
81
]
15 Put 1 scoop of filter-ground coffee into the filter for each cup.
16 Close the lid, and press down to lock it.
17 Replace the carafe on the rest.
C SWITCH ON
18 Put the plug into the power socket.
• The appliance will beep. 12:00 will flash on the display.
C COFFEE NOW
19 Ignore the clock.
20 If you’re making less than 5 cups of coffee, press the B button.
21 A will show on the display.
22 It slows the brewing process, so your coffee will have the same strength as coffee from a full
carafe.
23 Press the 2 button. The button will glow.
24 Shortly afterwards, coffee will start to drip into the carafe.
, The coffee grounds will retain water, so the amount of liquid in the carafe will be slightly less
than the amount of water in the reservoir.
25 If you want to stop the coffee maker while it’s brewing, press the 2 button.
C STATUS LIGHT
26 The status light will change colour to show how fresh the coffee is.
blue = brewing / 0-30 minutes since brewing
blue (flashing) = 30-60 minutes since brewing
auto shut-o
27 After 1 hour, the hotplate will switch off.
28 If left for much more than an hour, chemical changes in the coffee liquor start to affect the
flavour. It’s best to pour it away and make a fresh pot.
C COFFEE LATER
29 The clock will retain its settings until the coffee maker is unplugged.
30 It’s a 24 hour clock.
31 Set the clock to the correct time.
• Use the h and min buttons to set the correct hour and minute.
32 Set the timer to the time you want to start brewing.
• Press the T button.
• Use the h and min buttons to set the correct hour and minute.
, If you don’t press either the h or min buttons within 5 seconds, the coffee maker will revert to
“normal”, and the time will show. You’ll have to press the T button, and start again.
33 If you’re making less than 5 cups of coffee, press the B button.
34 A will show on the display.
C ACTIVATION
35 Press the AUTO button.
36 AUTO will show on the display.
37 At the time you set, the 2 button will glow, and the coffee maker will start up.
38 To cancel the timer before brewing has started, press the button again.
instructions
diagrams
1 grip
2 lid
3 water
4 slot
5 filter holder
6 paper filter #4
(not supplied)
7 lid
8 indent
9 spout
10 carafe
11 rest
12 status light
13 scoop
¬ dishwasher – top rack
82
C REMEMBER
39 If you forget what time you’ve set it to, press and hold the T button, then release it.
C A QUICK CUP
40 You can remove the carafe at any time. To prevent the filter holder overflowing, replace the
carafe on the rest within about 20 seconds.
C A STRONGER BREW
41 If you’re making 5 cups or more, you may use the A function to make the brew slightly
stronger. Just press the B button once.
42 A will show on the display.
C CARE AND MAINTENANCE
43 Unplug the appliance and let it cool.
44 Tip the contents of the filter holder into the bin.
45 Clean the outside surfaces of the appliance with a damp cloth.
46 Hand wash the carafe and filter holder.
47 Turn the filter holder to bring the slot in its rim towards the lid, then lower the filter holder
back into the coffee maker.
48 Close the lid, and press down to lock it.
¬ You may wash these parts in the top rack of a dishwasher.
, If you use a dishwasher, the harsh environment inside the dishwasher will affect the surface
finishes.
•The damage should be cosmetic only, and should not affect the operation of the appliance.
E SELF CLEAN
49 To prevent scale building up, use the self clean function at least monthly in normal water
areas, more often in hard water areas.
50 Ensure the kitchen is well ventilated, as heating vinegar causes an unpleasant smell.
51 This operation will take 45-60 minutes.
52 Mix 6 cups of white vinegar with 4 cups of water in the carafe.
53 Pour the mixture into the reservoir.
54 Close the lid.
55 Replace the carafe on the hotplate.
56 Put the plug into the power socket.
57 Press the E button.
58 E will show on the display.
59 Part of the mixture will come through. The remainder will soak in the boiler for 30 minutes,
then come through.
60 At the end of the operation, the appliance will beep, then switch itself off.
61 Fill the reservoir to the max mark, and run the appliance without coffee.
62 Do this 2 or 3 times, till the vinegar smell has gone.
, Products returned under guarantee with faults due to scale will be subject to a repair charge.
W
ENVIRONMENTAL PROTECTION
To avoid environmental and health problems due to hazardous substances in electrical and
electronic goods, appliances marked with this symbol mustn’t be disposed of with unsorted
municipal waste, but recovered, reused, or recycled.
a
instructions – more detailed instructions are available on our website:
http://www.russellhobbs.com/ifu/ 550981
  • Page 1 1
  • Page 2 2
  • Page 3 3
  • Page 4 4
  • Page 5 5
  • Page 6 6
  • Page 7 7
  • Page 8 8
  • Page 9 9
  • Page 10 10
  • Page 11 11
  • Page 12 12
  • Page 13 13
  • Page 14 14
  • Page 15 15
  • Page 16 16
  • Page 17 17
  • Page 18 18
  • Page 19 19
  • Page 20 20
  • Page 21 21
  • Page 22 22
  • Page 23 23
  • Page 24 24
  • Page 25 25
  • Page 26 26
  • Page 27 27
  • Page 28 28
  • Page 29 29
  • Page 30 30
  • Page 31 31
  • Page 32 32
  • Page 33 33
  • Page 34 34
  • Page 35 35
  • Page 36 36
  • Page 37 37
  • Page 38 38
  • Page 39 39
  • Page 40 40
  • Page 41 41
  • Page 42 42
  • Page 43 43
  • Page 44 44
  • Page 45 45
  • Page 46 46
  • Page 47 47
  • Page 48 48
  • Page 49 49
  • Page 50 50
  • Page 51 51
  • Page 52 52
  • Page 53 53
  • Page 54 54
  • Page 55 55
  • Page 56 56
  • Page 57 57
  • Page 58 58
  • Page 59 59
  • Page 60 60
  • Page 61 61
  • Page 62 62
  • Page 63 63
  • Page 64 64
  • Page 65 65
  • Page 66 66
  • Page 67 67
  • Page 68 68
  • Page 69 69
  • Page 70 70
  • Page 71 71
  • Page 72 72
  • Page 73 73
  • Page 74 74
  • Page 75 75
  • Page 76 76
  • Page 77 77
  • Page 78 78
  • Page 79 79
  • Page 80 80
  • Page 81 81
  • Page 82 82
  • Page 83 83
  • Page 84 84
  • Page 85 85
  • Page 86 86
  • Page 87 87
  • Page 88 88

Russell Hobbs 20690 User manual

Category
Coffee makers
Type
User manual

Ask a question and I''ll find the answer in the document

Finding information in a document is now easier with AI