Page is loading ...

CCT01
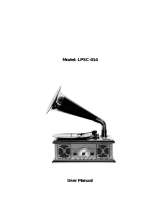
RETRO TURNTABLE WITH BLUETOOTH SPEAKER
- OPERATING INSTRUCTIONS -

* This product is designed for use in moderate climates. Do not use or
install this unit where it would be exposed to direct sunlight or in
extremely hot temperatures, or near a radiator, stove or appliance that
produces heat.
* Do not take this unit into the bathroom, or near a swimming pool. Do
not use it where it would expose to water, moisture, dripping or
splashing.
* No objects filled with liquids, such as vases, should be placed on the
product.
* No naked flame sources, such as candles, should be placed on the
product.
* If water gets inside the unit. Power off the unit and consult your
dealer.
* Do not handle the power cord with wet hands. To avoid electric shock,
NEVER touch any internal parts. Repairs/Servicing should be left too a
qualified service person.
* When connecting or disconnecting from the mains supply, hold the
plug, not the cord. Pulling the cord may damage it and could be
dangerous.
* If the unit fails to operate, disconnect from the mains and consult a
qualified service person.
* Do not insert any metallic object into the unit.
SAFETY PRECAUTIONS
We certify that the power supply is used as a device for
disconnecting the power distribution network, which should stay
easily accessible.

LOCATION OF CONTROLS
1.
2.
3.
4.
5.
6.
7.
8.
45 RPM Adapter
Speaker
Tone Arm
Control Perch
LED Indicator Light
Volume Knob & Power ON/OFF
AUTO-STOP Switch
Speed Control Switch
9. Mode Button & Encoding
10.PREV Button
1
2
3
4
5
6
7
8
9
10
11
12
13
14
15
16
17
18
19
11.Play/Pause
12.NEXT Button
13.AUX OUT/Earphone
14.AUX IN
15.USB play/USB encoding
16.DC IN port
17.Tone Arm Lock
18.Turntable Pickup
19.Vinyl Tray

Carefully unpack the Main unit from its carton (do not attempt to
connect anything at this stage).
You should have the following items:
PREPARATION FOR USE
Power On
Turn the Volume Knob to the ON side to turn on the unit.
USING THE TURNTABLE
1.Power on the unit. The unit was set on Turntable mode, and along with
voice prompt: Turntable Mode. Shortly
press MODE key also can switch into PH
(phonograph) status.
2. Under Turntable mode, the indicator
LED light is solid blue.
3.Place the record on the turntable.
4.Select the speed of record: 33, 45, 78
rpm according to vinyl to played.
5.Remove the stylus guard and push the lift lever upward to raise the
tone arm from the arm park, and then move the cartridge holder over
the record gently, now the platter will run automatically .Then put down
the lever, the tone arm would drop and touch record surface gently. Now
users can enjoy their favorite songs.
Packing included
1. Manual Book
2. Main Unit
3. Charging Cable
4. AUX cable
5. Bag
If any of these items are missing, consult your dealer. Keep any packaging
in case you want to transport the main unit at some later date.
Adjusting the sound
To adjust the sound, turn the Volume Knob located on the Right side of
your system in any mode.

Encoding Operation
6.Push the arm lift lever up to raise the arm, now platter will still running
but play will pause. To continue the play, user just need to put down the
lever.
7. Turn the Volume Knob for volume adjustment.
AUTO-STOP
Switch to OFF position: To cancel the auto-stop function. The turntable
tray won’t stop running after last song of record finished, and have to
switch the AUTOSTOP button back to ON position again to stop running.
Note: the OFF status is used for some irregular records which when the
turntable tray stop but last song has not finished completely.
1. The user could record the records from PHONO to USB flash disk.
Bluetooth cannot be recorded.
2.Insert USB flash disk under the PHONO mode, choose the track you
want to record. Then long press MODE key about 3 seconds, the system
enters into ENCODE status.
3. Long press MODE key again to stop the record.
4. Switch the unit mode into USB status and re-insert the USB flash disk
again, you could playback the records on USB flash disk.
Note: When USB memory is full, the record will not stop automatically.
To avoid the record missing, you may use the big memory USB disk.
Switch to ON position: Turntable tray will auto-stop running after last
song of record finished.
How to replace the stylus
To replace the needle, please refer to the instructions below.
Removing the needle form the cartridge
a. Place a screwdriver at the tip of the needle heads hell and push down
wards in the direction shown in sketch “A”
b. Remove the needle head shell by pulling it forwards and pushing
downwards.
Inserting the needle

BLUETOOTH FUNCTION OPERATION
1.Power on the unit.
2.Shortly press MODE key to switch into bluetooth mode, along with
voice prompt: Bluetooth Mode.
3.The LED indicator is blue and quickly flashing.
4. Set your Bluetooth enable device to search for Bluetooth devices.
5. When the Bluetooth enable device finds the turntable, select CCT01
from the list of the found devices.
If required, enter the password 0000. Select OK or Yes to pair the two
units.
6. After a successful pairing, the indicator LED light will be slow flashing.
7. Shortly press PLAY/PAUSE key to pause or play; Long press this key to
pair a new device.
8. Shortly press NEXT & PREV keys for next or previous song playback.
9. Turn the Volume Knob for volume adjustment.
c. Hold the tip of the needle head shell and insert it by pressing in the
direction illustrated by “B”
d. Push the needle head shell upwards in the direction illustrated by “C”
until the needle locks into the tip position.
AUX-IN OPERATION
1.Power on the unit.
2.Shortly press MODE key to switch into AUX-IN mode, along with voice
prompt: AUX Mode.

3.The LED indicator is solid blue under AUX-IN mode.
4. Connect one end of the included AUX Cable to the AUX-IN port on the
turntable, and the other end to an external speaker system's input port.
5. Open a media player on your device and click on PLAY to start playing
your music.
6. Use the controls on your connected device to control music playback
and volume.
7. Shortly press PLAY/PAUSE key to mute sound.
8. Turn the Volume Knob for volume adjustment.
Note:
1. In AUX mode, insert USB device and long press MODE key about 3 ‘s
could record the sound from AUX-in device; long press MODE key again
to stop encoding.
2. When USB memory is full, the record will not stop automatically. To
avoid the record missing, you may use the big memory USB disk.
USE USB FUNCTION
1.Power on the unit.
2.Shortly press MODE key to switch into USB mode, along with voice
prompt: USB Mode.
3.The LED indicator is solid blue under USB mode.
4. Insert your USB flash disk. Now users can enjoy their favorite songs.
Songs could be in MP3, WMA format.
5. Shortly press PLAY/PAUSE key to pause or play.
6. Shortly press NEXT & PREV keys for next or previous song playback.
7. Turn the Volume Knob for volume adjustment.
Power Charging
LED red light will be slow flashing when unit was in low power status. It
means which built-in battery was in low power and need to make power
charging.
During power charging, red light is solid red and after power charging
finished, red light will be off automatically.

TECHNICAL SPECIFICATIONS
Power Charging Supply: 5V / 1A
Power Consumption: 3W
Audio Output Power: 3W x 1
Vinyl Frequency Range: 2970~3080
Frequency Jitter Scope: 30Hz
Bluetooth Version: JL 4.2
Bluetooth profiles: A2DP, AVRCP
Bluetooth range: Line of sight, 10M or 30FT
Lithium Battery Capacity: 1200mAh
Unit Size: 345x345x100 mm
DETAILS AND PRECAUTIONS ON THE USE OF BATTERIES
- Discard a used battery in nature or garbage pollutes and prevents the
recovery of recyclable materials.
It is therefore important to limit consumption of batteries and follow
these guidelines:
•focus on alkaline batteries (that last longer than the saline batteries)
and when possible, rechargeable batteries
•deposit batteries and accumulators in specific containers arranged
among traders.
For example, metals will be valued and polluted the environment
because they contain heavy metals hazardous to health and the
environment primarily (cadmium and nickel)
- The piles must installation by respecting the polarity indicated on the
apparatus and the pile.
An incorrect positioning can is to damage the apparatus, is to cause
escapes on the level of the pile, is to the extreme to cause a fire or the
explosion of the pile.
- To ensure proper operation, the batteries must be in good condition.
In case of abnormality in the functioning of the device, put fresh
batteries
- Never attempt to recharge non-rechargeable batteries. They could run,
warm up, causing a fire or explosion.

- Replace all batteries at the same time. Never mix zinc batteries with
alkaline batteries or rechargeable batteries
- The batteries must be removed from the device
- Also, remove the batteries from your device if you do not use it for a
long time, if the batteries may leak and cause damage.
- Never try to short-circuit the battery terminals
- Never dispose of batteries in fire, they might explode
- Charging of batteries is to be performed by an adult.
- Remove batteries from the device before reloading.
- We recommend an adult to supervise children when they change the
batteries so that these instructions are complied with or to make himself
the replacement of batteries.
- If a battery is swallowed, immediately consult a doctor or poison
control center nearest you.
Do not forget to carry the product with you.

Warning: changes or modifications to this unit not expressly approved by
the party responsible for compliance could void the user’s authority to
operate the equipment.
NOTE: This equipment has been tested and found to comply with the limits for
a Class B digital device, pursuant to Part 15 of the FCC Rules. These limits are
designed to provide reasonable protection against harmful interference in a
residential installation. This equipment generates uses and can radiate radio
frequency energy and, if not installed and used in accordance with the
instructions, may cause harmful interference to radio communications.
However, there is no guarantee that interference will not occur in a particular
installation. If this equipment does cause harmful interference to radio or
television reception, which can be determined by turning the equipment off
and on, the user is encouraged to try to correct the interference by one of the
following measures:
- Reorient or relocate the receiving antenna.
- Increase the separation between the equipment and receiver.
- Connect the equipment into an outlet on a circuit different from that
to which the receiver is connected.
- Consult the dealer or an experienced radio/TV technician for help.
/