Page is loading ...

Robot Vacuum Cleaner

1
PRODUCT SAFETY PRECAUTIONS
Before using this product, please read all the contents of this user
manual carefully, install the device accordingly and save this manual for
future reference properly. To lower the risk of fire, electric shock or other
injuries, please observe the following operation requirements:
• This appliance is not intended for use by people (including children) with
reduced physical, sensory or mental capabilities, or lack of experience
and knowledge, unless they have been given supervision or instruction
concerning use of the appliance by a person responsible for their safety.
Children should be supervised to ensure that they do not play with the
appliance.
• For European, this appliance can be used by children aged from 8
years and above and people with reduced physical, sensory or mental
capabilities or lack of experience and knowledge if they have been given
supervision or instruction concerning use of the appliance in a safe way
and understand the hazards involved. Cleaning and user maintenance
shall not be made by children without supervision. Children should not
play with the appliance.
• Please don’t suction high-temperature substances (unextinguished
cigarettebutts,matches,hotashesandetc.),supernesubstances(like
lime, cement, sawdust, gesso, ashes and toner), large sharp fragments
(notphysicallydenitematterslikeglass).
• No action needed to shift the product between 50 and 60Hz, product can
adapt itself for both 50 and 60Hz.
• If the supply cord is damaged, it must be replaced by the manufacturer,
itsserviceagentorsimilarlyqualiedpersonsinordertoavoidahazard.
• When charging, please use the Auto-empty Base ZD21 offered by EZVIZ.
• WARNING: To Reduce The Risk Of Electric Shock - Do not use outdoors
or on wet surfaces, commercial or industrial environments.
• WARNING: To Reduce The Risk Of Electric Shock - Use indoors only.
• WARNING: To Reduce The Risk Of Electric Shock – Unplug
SAFETY WARNING

2
BeforeServicing.
• The auto-empty base can only charge lithium-ion batteries containing no
more than 8 cells with a rated capacity of no more than 2600mAh.
• The auto-empty base can not be charged to non-rechargeable batteries.
PROPER USE OF THE DEVICE
• Thedeviceisonlyusedforcleaningtheoorofthehomeenvironment,
and should not be used in outdoor environment (such as open balconies),
non-ground environment (such as stairs), and industrial environment.
• Don’t use the device in suspended environment (such as duplexes, open
balconies and the top of furniture) without protective facilities.
• Children are not allowed to use the device as a toy. Please keep children
and pets away from the device when using it. Don’t put accessories
such as side brush in the place where children can reach, so as to
prevent children from eating by mistake. Don’t place children and pets
on the device body.
• Don’tusethedeviceinanenvironmentwithopenreorfragileobjects.
• Don’tusethedeviceonwaterloggedoorsorwetground.
• Don’t use the device in an environment higher than 40°C or lower than
0°C.
• Don’tusethedevicetocleananyammablematerials(suchasgasoline,
toner).Don’tusethedeviceintheareawithammablematerials.
• Don’t use the device to clean burning items, such as matches, cigarettes
andotheritemsthatmaycausere.
• Don’t use the product to absorb large stones, waste paper and other
items that may block the product. When the suction port is blocked,
please clean the product in time and remove the dust, cotton, hair, etc.
at the suction port.
• Use only the accessories recommended or sold by the manufacturer.
Don’t use the batteries or docking station of any third party, and don’t
use damaged batteries or docking station.
• Dispose of used batteries in accordance with local laws and regulations.
• Don’t burn the device under any circumstances, as the battery may

3
cause explosion.
• After the RGB camera is contaminated with dust during use, it is
recommended to use the air blower to clean the camera, or use a paper
towel and soft dry cloth to wipe and clean, don’t use rough or hard
materials, so as to avoid scratches on the glass surface of the vision
module.
• If the rear surface of the robot is too dusty, it will affect the recharging of
the robot. It is recommended to clean it regularly or as needed. It is also
recommended to use a paper towel or soft dry cloth to clean it.
• If the surface of the edge sensor on the side of the robot is contaminated
with lots of dust, it will affect the posture and mapping positioning effect
of the robot when walking along the wall. It is recommended to clean it
regularly or as needed. Since the sensor is located inside the body, it is
recommended to use the air blowing tool/paper towel/soft dry cloth for
cleaningthecameratowipethesensor.Don’tputyourngersintoitfor
cleaning.
• The bottom of the robot is easy to be contaminated with lots of dust, so
it is recommended to clean it regularly or as needed.
• Please use the device according to the instructions in the manual. Any
loss and injury caused by improper use shall be borne by the user.
• Please don’t touch the plug or any electrified part of the product with
your wet hands in case of electric shock hazard.
• If you will not use the product for a long time, please turn off the power
and unplug the charging plug.

4
Regulatory Information
This product and - if applicable - the supplied accessories too are marked with “CE” and comply therefore with
the applicable harmonized European standards listed under the EMC Directive 2014/30/EU, the RoHS Directive
2011/65/EU, the ErP Directive 2009/125/EC, the LVD Directive 2014/35/EU.
2012/19/EU (WEEE directive): Products marked with this symbol cannot be disposed of as unsorted municipal
waste in the European Union. For proper recycling, return this product to your local supplier upon the purchase
of equivalent new equipment, or dispose of it at designated collection points. For more information see: www.
recyclethis.info
2006/66/EC and its amendment 2013/56/EU (battery directive): This product contains a battery that cannot be
disposed of as unsorted municipal waste in the European Union. See the product documentation for specific
battery information. The battery is marked with this symbol, which may include lettering to indicate cadmium (Cd),
lead (Pb), or mercury (Hg). For proper recycling, return the battery to your supplier or to a designated collection
point. For more information see: www.recyclethis.info
Technical Parameters
Class II
Direct current
Alternating current
For indoor use.
Before charging, read the instructions.
Robot
Model CS-RC3P-TWT2, CS-RC3P-TWT5
Overall Dimension 345×345×78.5 mm
Weight Approx. 2.83kg
Battery Capacity 2,600 mAh
Battery Rated Voltage 14.4 V
Rated Input 24V 1.5A
Rated Power 30W
Auto-empty Base
Model ZD21
Dimensions 220×180×380 mm
Rated Power 950W
Rated Output 24V 1.5A MAX
Rated Voltage 220-240V~, 50/60Hz

5
COPYRIGHT © Hangzhou EZVIZ Software Co., Ltd. ALL RIGHTS RESERVED.
Any and all information, including, among others, wordings, pictures, graphs are the properties of
Hangzhou EZVIZ Software Co., Ltd. (hereinafter referred to as “EZVIZ”). This user manual (hereinafter
referred to as “the Manual”) cannot be reproduced, changed, translated, or distributed, partially or
wholly, by any means, without the prior written permission of EZVIZ. Unless otherwise stipulated,
EZVIZ does not make any warranties, guarantees or representations, express or implied, regarding
to the Manual.
About this Manual
The Manual includes instructions for using and managing the product. Pictures, charts, images and
all other information hereinafter are for description and explanation only. The information contained
intheManualissubjecttochange,withoutnotice,duetormwareupdatesorotherreasons.Please
ndthelatestversioninthe ™ website (http://www.ezviz.com).
Revision Record
New release – January 2023
Trademarks Acknowledgement
™, ™, and other EZVIZ’s trademarks and logos are the properties of EZVIZ in various
jurisdictions. Other trademarks and logos mentioned below are the properties of their respective
owners.
Legal Disclaimer
TO THE MAXIMUM EXTENT PERMITTED BY APPLICABLE LAW, THE PRODUCT DESCRIBED, WITH
ITS HARDWARE, SOFTWARE AND FIRMWARE, IS PROVIDED “AS IS”, WITH ALL FAULTS AND ERRORS,
AND EZVIZ MAKES NO WARRANTIES, EXPRESS OR IMPLIED, INCLUDING WITHOUT LIMITATION,
MERCHANTABILITY, SATISFACTORY QUALITY, FITNESS FOR A PARTICULAR PURPOSE, AND
NON-INFRINGEMENT OF THIRD PARTY. IN NO EVENT WILL EZVIZ, ITS DIRECTORS, OFFICERS,
EMPLOYEES, OR AGENTS BE LIABLE TO YOU FOR ANY SPECIAL, CONSEQUENTIAL, INCIDENTAL, OR
INDIRECT DAMAGES, INCLUDING, AMONG OTHERS, DAMAGES FOR LOSS OF BUSINESS PROFITS,
BUSINESS INTERRUPTION, OR LOSS OF DATA OR DOCUMENTATION, IN CONNECTION WITH
THE USE OF THIS PRODUCT, EVEN IF EZVIZ HAS BEEN ADVISED OF THE POSSIBILITY OF SUCH
DAMAGES.
TO THE MAXIMUM EXTENT PERMITTED BY APPLICABLE LAW, IN NO EVENT SHALL EZVIZ’S TOTAL
LIABILITY FOR ALL DAMAGES EXCEED THE ORIGINAL PURCHASE PRICE OF THE PRODUCT.
EZVIZ DOES NOT UNDERTAKE ANY LIABILITY FOR PERSONAL INJURY OR PROPERTY DAMAGE AS
THE RESULT OF PRODUCT INTERRUPTION OR SERVICE TERMINATION CAUSED BY: A) IMPROPER
INSTALLATION OR USAGE OTHER THAN AS REQUESTED; B) THE PROTECTION OF NATIONAL
OR PUBLIC INTERESTS; C) FORCE MAJEURE; D) YOURSELF OR THE THIRD PARTY, INCLUDING
WITHOUT LIMITATION, USING ANY THIRD PARTY’S PRODUCTS, SOFTWARE, APPLICATIONS, AND
AMONG OTHERS.
REGARDING TO THE PRODUCT WITH INTERNET ACCESS, THE USE OF PRODUCT SHALL BE
WHOLLY AT YOUR OWN RISKS. EZVIZ SHALL NOT TAKE ANY RESPONSIBILITES FOR ABNORMAL
OPERATION, PRIVACY LEAKAGE OR OTHER DAMAGES RESULTING FROM CYBER ATTACK,
HACKER ATTACK, VIRUS INSPECTION, OR OTHER INTERNET SECURITY RISKS; HOWEVER, EZVIZ
WILL PROVIDE TIMELY TECHNICAL SUPPORT IF REQUIRED. SURVEILLANCE LAWS AND DATA
PROTECTION LAWS VARY BY JURISDICTION. PLEASE CHECK ALL RELEVANT LAWS IN YOUR
JURISDICTION BEFORE USING THIS PRODUCT IN ORDER TO ENSURE THAT YOUR USE CONFORMS
TO THE APPLICABLE LAW. EZVIZ SHALL NOT BE LIABLE IN THE EVENT THAT THIS PRODUCT IS
USED WITH ILLEGITIMATE PURPOSES.
IN THE EVENT OF ANY CONFLICTS BETWEEN THE ABOVE AND THE APPLICABLE LAW, THE LATTER
PREVAILS.

6
Table of Contents
Overview ��������������������������������������������������������������������������������������������������7
Package Contents��������������������������������������������������������������������������������������������������������������������������� 7
Basis ���������������������������������������������������������������������������������������������������������������������������������������������� 8
Robot ��������������������������������������������������������������������������������������������������������������������������������������������� 8
Auto-empty Base ���������������������������������������������������������������������������������������������������������������������������� 9
Quick Start Guide �����������������������������������������������������������������������������������12
Preparation ����������������������������������������������������������������������������������������������������������������������������������� 12
Connect the Power Supply to the Auto-empty Base����������������������������������������������������������������������� 12
Remove Shields ���������������������������������������������������������������������������������������������������������������������������� 13
Place the Robot ���������������������������������������������������������������������������������������������������������������������������� 13
Charging ��������������������������������������������������������������������������������������������������������������������������������������� 14
Power On/off �������������������������������������������������������������������������������������������������������������������������������� 14
Start Cleaning ������������������������������������������������������������������������������������������������������������������������������� 15
Pause Cleaning ����������������������������������������������������������������������������������������������������������������������������� 15
Sleep �������������������������������������������������������������������������������������������������������������������������������������������� 15
System Resetting ������������������������������������������������������������������������������������������������������������������������� 15
Routine Maintenance ������������������������������������������������������������������������������16
Dump the Dust Box ����������������������������������������������������������������������������������������������������������������������� 17
Clean the Main Brush �������������������������������������������������������������������������������������������������������������������� 18
Clean/Replace the Side Brush ������������������������������������������������������������������������������������������������������� 19
Clean Universal Wheel ������������������������������������������������������������������������������������������������������������������ 20
Clean Sensor �������������������������������������������������������������������������������������������������������������������������������� 20
Clean the Charging Electrode �������������������������������������������������������������������������������������������������������� 21
Replace the Dust Bag �������������������������������������������������������������������������������������������������������������������� 21
Clean the Dust Channel ����������������������������������������������������������������������������������������������������������������� 22
Environmental Precautions ���������������������������������������������������������������������23
FAQ ��������������������������������������������������������������������������������������������������������24
List of Faults ������������������������������������������������������������������������������������������27
Appendix ������������������������������������������������������������������������������������������������28
Rechargeable Lithium ion Battery ������������������������������������������������������������������������������������������������� 28
INFORMATION FOR PRIVATE HOUSEHOLDS ��������������������������������������������������������������������������������� 28

7
Overview
Package Contents
Robot Vacuum Cleaner *1
(hereinafter referred as to “Robot”)
Auto-empty Base *1
Side Brush *2
(One has pre-installed in the Robot)
High-performance Filter *2
(One has pre-installed in the Robot)
Disposable Dust Bag *2
(One has pre-installed) Cleaning Tool *1
Remote Control *1
(AAA battery *2 included)
Quick Start Guide *2 Regulatory Information *1
• Ahigh-performancelterhavebeeninstalledintherobot.
• The device’s appearance is subject to the actual one you have bought.

8
Basis
Robot
Recharge Sensor
Front Bumper
* Cleaning/On-off Button
Side Brush
* Recharge Button
Button
Recharge Button Press once: back to charging
Cleaning/On-off Button
• Press once: start cleaning
• Presstwice:startxed-pointcleaning
• Press and hold for 4 seconds: turn on/off the Robot
+ Cleaning/On-off Button +
Recharge Button Press and hold for 15s: restore to factory settings
Power Indicator
+
Power Indicator
(on Cleaning/On-off Button &
Recharge Button)
• White:batterylevel≥20%
• Pink:batterylevel<20%
• Red: fault or exceptions
• Slow-asheswhite:Incharging
Edge Sensor *3
Main Brush
Main Brush Cover
Dust Box
Universal Wheel
Side Brush
Drive Wheel *2
Side Brush
Universal Wheel
Edge Sensor*3
Main Brush
Main Brush Cover
Dust Box
Drive Wheel *2

9
Filter Box
Cleaning Tool
Dust Box
Taking-out Button
Dust Collection Port
Filter Opening Button
Infrared Receiving Terminal
Filter Box
Infrared Receiving Terminal
Cleaning Tool
Dust Box Taking-out Button
Dust Collection Port
Filter Opening Button
Suction Inlet
High-performance Filter
Filter Cover
Filter Cover
High-performance Filter
Suction Inlet
Auto-empty Base
Top Cover
Dust Bag Compartment
* Auto-empty Base LED Indicator
Recharging and Dust Collection Sensor
Electrode Sheet
Vacuum Inlet
Top Cover
Dust Bag Compartment
* Auto-empty Base LED Indicator
Recharging and Dust Collection Sensor
Electrode Sheet
Vacuum Inlet

10
Name Description
Auto-empty Base
LED Indicator
Solid White: Robot does not connect to the Auto-empty Base
Off: both of Robot and Auto-empty Base are correctly connected/the Auto-empty Base is sleeping
Solid Red: the Dust Bag is not in place
Fast-ashingRed:abnormalstate
Dust Bag
Dust Bag Handle
Dust Bag Handle
Dust Bag
Remote Control
Power
Recharge
Time Settings
Appointment Settings
Fixed-point Vacuum
Start/pause
Suction Regulation
Sweep Along the Wall
Power
Recharge
Time Settings
Fixed-point Vacuum
Start/pause
Suction Regulation
Sweep Along the Wall Appointment Settings

11
Please ensure that the Robot will response with a beep after you operate the remote control.
Name Description
Power
Press once when the Robot is standby, it will sleep.
* Under the Sleep Mode, the Robot will enter a low energy-comsumption state, you can still use the remote control to
operate it.
Press once when the Robot is operating, it will become standby.
* Under the Standby Mode, the Robot will stop the current task.
Sweep At Fixed
Points
Press to enter Fixed-point Cleaning Mode, it will perform vacuum spirally with a 1.5m in diameter
around the current Robot location.
* Under this mode, the Robot will vacuum with a increasing radius and then a decreasing radius till back to the original
starting point.
Recharge Press once, enter Recharge Mode.
Start/Pause
Press once in Standby Mode, enter the Auto-vacuum Mode.
(clean in Zigzagging way rst and then along the wall)
Press once in any clean mode, enter the Standby Mode.
Suction Regulation Press to adjust the suction regulation.
Standard: Max:
Time Settings
Press when the Robot is powered on, the time on the display screen will blink, and then you can
select the time you want by pressing .
Press or to switch the time for minute adjustment.
Press or to save your settings.
Sweep Along the
Wall
Press once, enter the Along-wall Clean Mode, the Robot will clean along the wall.
* After along-wall cleaning is nished, the Robot will enter the Recharge Mode automaticaly.
Appointment
Settings
Press with the Robot on, icon and the time on the display screen will blink, and you can press
for hour adjustment.
Press or to switch the time for minute adjustment.
After settings are completed, press or to save it.
Press and hold to cancel the appointment settings.
• When controlling the Robot remotely with its Remote Control, stay within the infrared signal range of 7m or the remote
control may fail.
• When the Recharge button is pressed, search may fail due to too complicated surrounding obstacles or the exhaustion of
the Robot's battery.
• As the infrared ray cannot surpass the wall, please operate the remote control within a visible scope.

12
Quick Start Guide
Preparation
Try to avoid using in the environment with stairs (if must, please set up a guardrail), and try to
remove the obstacles on the ground before use.
Connect the Power Supply to the Auto-empty Base
Install the Auto-empty Base in a location that the Robot can easily access. It is recommended
to place the Auto-empty Base against a wall, and on a hard-level surface rather than on rugs or
carpets.
No obstacles 1.5m(4.92’) ahead
>0.5m(1.64′)
>0.5m(1.64′)
>0.5m(1.64’)
>0.5m(1.64’)
No obstacles 1.5m(4.92’) ahead
·In order to avoid external heat damage to the Auto-empty Base, please do not place it
nexttoradiators,heaters,replaces,etc.
·For a normal charging process, please do not place the Charging Base in
environments subjected to direct sunlight, rain,snow or humidity.

13
Remove Shields
Beforeuse,removetheshieldsonbothsidesoftheFrontBumperandallprotectivelmson
both of the Robot and the Auto-empty Base.
Place the Robot
Place the Robot on the Auto-empty Base and align it with the Charging Electrodes. When the
Auto-emptyBaseIndicatorlightgoesoutandthepowerindicatorslow-asheswhite,charging
will begin.

14
Charging
You have two ways to charge the Robot.
Automatic recharging: the Robot will automatically return for recharging after the cleaning
task is completed.
Manual recharging:
Short press when pausing
to begin automatic recharging.
Short press
Short press when pausing
to begin automatic recharging.
when pausing to
begin automatic recharging.
• The Robot needs to be fully charged (approximately 5 hours) to ensure a normal
operation.
• After the Robot is docked with the Auto-empty Base, the Auto-empty Base will start to
collect dust.
• IftheRobotisstuckedorcannotndtheAuto-emptyBase,pleasemanuallyputthe
Robot back to the the Auto-empty Base.
Power On/off
Power on: • Press and hold the button for 4s on the operation panel.
• After the Robot is docking to the Auto-empty Base, it will be powered on
automatically.
Power off: When the Robot is not in the Auto-empty Base, press and hold the button for
4s on the operation panel.
After power the Robot off, you cannot use the remote control to operate it.

15
Start Cleaning
Short press the button to start the Full-house Cleaning Mode.
Recommended start the Full-house Cleaning Mode when the Robot is on the Auto-empty
Base. The Robot will leave the Auto-empty Base and clean in Zigzagging way, and then clean
the area along the wall.
• Ifthebatterylevelistoolowtostartcleaning,pleasechargeitrst.
• Before cleaning, all wires on the ground should be well organized for fear of power
interruption or damage to articles caused by pulling the power cord during cleaning.
• Do not move the Auto-empty Base during cleaning, and make sure that the Auto-empty
Base is powered on, otherwise the Robot may not be able to return for charging.
Pause Cleaning
Pressing will pause the Robot while cleaning.
Pressing will stop the Robot while cleaning.
Sleep
Automatically switch to Sleep Mode:
• The Robot is inactive and the Auto-empty Base is not connected for 10 minutes.
• There is no operation within 10 minutes after the Robot is fully charged.
Manually switch to Sleep Mode:
Press the button on remote control.
System Resetting
In Standby Mode, press and hold the and button for 15s to reset the system.
After resetting the system, the Robot will lose the original settings and restore to factory settings.

16
Routine Maintenance
To maintain the best condition of the device, please maintain the device and replace parts with following frequencies:
Robot Part Maintenance Frequency Replacement Frequency
Side Brush Once every 2 weeks Every 3-6 months
Main Brush Once per week Every 6-12 months
High-performance Filter Once per week Every 3-6 months
Edge Sensor
Obstacle Sensor
Cliff Sensor
Infrared Receiving Terminal
Bumper
Charging Electrode
Universal Wheel/Drive Wheel
Once per week /
Dust Bag About 90 days About 90 days
• Before performing cleaning and maintenance tasks on the Robot, turn the Robot OFF and unplug the Auto-empty Base.
• A multi-function Cleaning Tool is provided for easy maintenance. Handle with care, this Cleaning Tool has sharp edges.
• EZVIZ manufactures various replacement parts and fittings. Please visit www.ezviz.com for more information on
replacement parts.

17
Dump the Dust Box
Press the Dust Box Taking-out Button to pull out the Dust Box, and then pour the dirt into
dust bin.
1
Remove the Filter out of the Filter Box.
2
CleantheFilterwithCleaningToolandushtheFilterandDustBoxthroughlywithwateras
necessary, and then all cleaned elements shall be thoroughly dried.
Do not clean with hot water or detergent,
3
24H
24H

18
Clean the Main Brush
Press the buckles to take out the Main Brush Cover and the Main Brush.
1
Use the blade of the Cleaning Tool to cut off the hair entangled on the Main Brush and
remove the roller at one end of the Main Brush to clean it, and then re-install the Main
Brush into place.
2

19
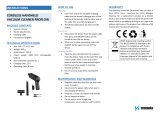
Clean/Replace the Side Brush
Pull the side brush out and then clean the foreign matters like hairs.
Pull out the old side brush and then press the new one into the position.
/