Page is loading ...

User
User Manual
Manual
Foscam Camera
V1.5

Table of Contents
1 Security Warning.....................................................................................................................................................3
2 Overview.................................................................................................................................................................. 3
2.1 Micro-SD Card............................................................................................................................................. 3
3 Access the IP Camera in Foscam App................................................................................................................4
3.1 Download and install the Foscam APP................................................................................................... 4
3.2 Foscam APP Surveillance Window.......................................................................................................... 4
3.3 Watch Live.................................................................................................................................................... 6
3.4 Camera Setting..........................................................................................................................................12
4 Surveillance Software Foscam VMS.................................................................................................................24
4.1 Hardware Connection & Software Installation..................................................................................... 24
4.2 Software Installation................................................................................................................................. 24
4.3 Create Acount............................................................................................................................................ 25
4.4 Add Device................................................................................................................................................. 26
4.5 Surveillance Software GUI...................................................................................................................... 34
4.6 Advanced Camera Settings.....................................................................................................................40
5 Works with Alexa and Google Assistant........................................................................................................... 80
6 FAQ......................................................................................................................................................................... 80
6.1 Unable to connect camera remotely using Foscam app....................................................................80
6.2 Camera is added by others..................................................................................................................... 80
6.3 What are the recommended internet requirements for this device.................................................. 81
7 Default Parameters.............................................................................................................................................. 81
8 CE & FCC.............................................................................................................................................................. 81
9 Statement...............................................................................................................................................................84
10 Obtaining Technical Support............................................................................................................................ 85

3
1 Security Warning
1. Please change the password of your camera regularly, using a combination of numbers, letters and
special characters.
2. We recommend that you regularly update your camera to the latest available software and firmware
versions to help ensure the best experience for your camera.
2 Overview
FOSCAM IP Camera is an integrated wireless IP Camera with a color CMOS sensor. It combines a high
quality digital video camera, with a powerful PC client, to bring clear video to your desktop and mobile
devices no matter where by your local network or over the Internet.
These cameras support P2P function. Thanks to the P2P easy access technology, you don’t need to do
complicated Port Forwarding, you just need to scan the QR code on the bottom of the camera to connect
it to smart phone, or input the UID on CMS software to realize remote access.
FOSCAM provides Smart Phone APP for Android and iPhone users, please search and install Foscam
App named Foscam on App Store and Google Play for iOS and Android devices, then you can view your
camera anywhere, anytime on your smart mobile devices.
FOSCAM offers the most comprehensive central management software video management system, it is
a new tool for PC. It does not require plug-ins and is compatible with Windows & Mac, it supports all
Foscam HD cameras and up to 36 cameras at the same time, as well as recording, playback, and alarm
management with efficient control.
2.1 Micro-SD Card
This camera supports Micro SD Card.
When you plug in the Micro SD card during the camera work process, please reboot the camera again,
or else the Micro SD card might not work well.
On Foscam app go to the SettingsSD CardSD Card Settings page, you can see the SD card
status.

4
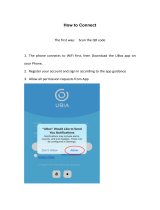
3 Access the IP Camera in Foscam App
3.1 Download and install the Foscam APP
Scan the QR code below to download and install the Foscam APP
To ensure a smoother video experience on your smart phone, it is recommended that your smart phone
meets the following specifications:
iOS: version 11 or higher.
Android: 5.0 or higher, using a device with a Graphics Processing Unit (GPU).
Note: For the best experience, please update the APP to the latest version!
Camera Setup Steps: Please refer to the Quick Setup Guide.
3.2 Foscam APP Surveillance Window
When you launch the Foscam App, the devices page displays.
Device List
Camera Name
Camera Date&Time
Split Screen
Cloud Service
More
Watch Live
Add Device
Family face photo classification
(Only support some models,
see the list in the introduction
for details)
Share
IOT settings
Account
Alarm message
ON

5
Camera Name: A camera name which is displayed in the Foscam Cloud Service.
You can rename your camera’s name by tap Live >Camera Settings >Camera Info .
OSD: This includes the camera name and camera time. If your camera name is in English, the OSD
name will synchronize with the camera name. If it is not in English, the OSD will not be modified and will
default to Foscam_camera. The camera time can be synchronized with the phone.
Camera Date&Time: You can Sync Time, tap Live >Camera Settings >Advanced
Settings >Sync Time.
Share: You can share the camera with your family or other users to watch, tap Live >Camera
Settings >Share Camera >Family or Invite.
Cloud Service: Foscam Cloud can save every alarm detection videos in the cloud, and you can review
every event anywhere, any time.
Alarm message: You can find the alarm message from here.
Device List:You can find out how many devices have been added to the current account from here.
Smart:Set smart rules for IOT here
Account:you can set and view account-related information.
More: Click the button to enter the more options page of the camera, Album, Alarm Settings,
Playback, Notification, Sleep Mode, Settings.
Add Device: Please refer to the Quick Setup Guide.

6
Split Screen: Click button, you can watch the live interface of 4 devices.
3.3 Watch Live
Tap Live to view and listen to a live video.

7
Back: To stop viewing and listening to the live feed, tap the Back.
Resolution: There are three types to identify different streams you have set. If select the UHD /
QHD Mode, the clearer video will become, and it will take up more bandwidth; If select the HD Mode, the
video will not be as clear as UHD / QHD Mode, and it will take up less bandwidth. The FHD Model is a
value between UHD/QHD Mode and SD Mode (UHD support V8EP T8EP, QHD support V4EC G4C G4P
G4EP QJ4 G4 S41 SPC F41 FLC VD1 DWB5 V5EP R3 X3 R5 X5 X4 R4M T5EP V5P D4Z SD4).
.
Resolution: Generally speaking, the larger the bit rate is, the clearer video will become. But the bit rate
configuration should combine well with the network bandwidth. When the bandwidth is very narrow, and
bit rate is large, that will lead to video not play well.
On this screen, you can listen to a live stream, record clips, take a snapshot, activate two-way talk or full
screen.
If you want to catch the smaller details, pinch and drag any image as you do with photos on your smart
phone.
Back
Speaker / Mute the audio
Resolution
Snapshot
Bit Rate
Camera Setting
Full screen
More Function
Two-way audio
Wired connection/
Wireless connection
Mirror
IR LED Schedule
Video
Pan&Tilt
Optical zoom,lens will be larger
Optical zoom,lens will be shrink
Zoom out
Zoom in
Quickly add Preset
Flip
UHD
Restore Position
Focus

8
Speaker / Mute the audio: Here you can see if there is a Speaker or muted.
Video: Click this button to start the recording function.
Snapshot: Click this button to Snapshot the image.
Pan&Tilt: Click this button to PT control (Only those with PT have this function, such as: R2M, R2C,
R4M, R4S, FI9926P, X2, D4Z, SD2, SD4, SD2X, HT2, VZ4, R3 , X3, R5, X5, X5 Lite, R5 Lite, B4)
1----- Up control button, 2-----Down control button,
3------Left control button, 4------Right control button
Click this button and go to center(Except for B4)
Quickly add Preset, Click this button to quickly add to favorite presets(Except for the following
models: R3 , X3, R5, X5).
Zoom Control: If your device supports 4x zoom feature, click or ,The focal length of
the camera lens will be larger or shrink, you can adjust the focus distance to the target object size,
access to high-definition screen.
Zoom in the camera’s lens.
Zoom out the camera’ lens.
Focus Control (Only supported by FI9928P D4Z VZ4 SD2 SD4 HT2 SD2X SD4H SD8EP SD5EP)
If the device support Auto Focus feature, click or ,The focal length of the
camera lens will be larger or shrink, you can adjust the focus distance to the target object size, access to
high-definition screen.
1
2
3
4

9
or Two-way audio: Press and hold this button to enable microphone intercom.
Date: Show date, Display the date, you can select the date through “<” or “>”button.
Timeline: If you have purchased cloud service, you can click the timeline to watch the
storage video at the corresponding time on the cloud.
Camera Setting: Click this button to set more.
IR LED Schedule: On this page, you can enable/disable the IR LED, and set the IR auto switch or
you can schedule it.
Auto: As default, the IR-Cut auto switch is ON, it means that the IR LED will be OFF during
9:00~18:00, and the IR LED will be ON at the other time.
Day: it means that the IR LED will be OFF all the time.
Night: it means that the IR LED will be ON all the time.
Schedule: You can schedule the time to turn the IR LED OFF/ON.
There are two different types of device B4,G4C and V4EC.
B4
Auto: When this mode is selected, in the night vision state, the live broadcast will be black and
white night vision, and the alarm video will be color night vision;
Color mode: When this mode is selected, in the night vision state, whether watching live
broadcast or alarm video, it is color night vision;
Infrared mode: When this mode is selected, both live broadcast and alarm video are black and
white night vision;
G4C and V4EC
Auto: When this mode is selected, in the night vision state, the live broadcast will be black and
white night vision, and the alarm video will be color night vision;
Color mode:When this mode is selected, in the night vision state, whether watching live
broadcast or alarm video, it is color night vision;
Infrared mode: When this mode is selected, both live broadcast and alarm video are black and white
night vision;
OFF mode: If this mode is selected, no fill light will be turned on under night vision.

10
Mirror: You can flip the image horizontally with this button.
Flip: You can flip the image vertical with this button (Except for doorbell).
Wired connection / Wireless connection: You can use this to see whether the current camera is
in a wired or wireless connection.(The pure wireless model does not have a wired connection, E.g. R3
R5 X3E X1 X2 X4,B4,X5 Lite, R5 Lite)
Bit Rate: You can see the current connection bit rate.
Full screen: Click this full screen button, you can live in full screen.
More Function: Here you can set Motion Detection and Sound Detection.
Note: Motion Detection and Human Detection (The doorbell is face Detection) cannot be turned on at
the same time.The default is human detection (The doorbell is face Detection).
Motion Detection:To enable motion detection, follow the steps below:
1 Enable Motion Detection button
2 Select Device-side object detection or Motion Detection (Only V5EP V8EP T5EP T8EP SD4H has
this option)
3 Enable Human Detection or Vehicle Detection, You can choose to turn detection on and off
according to your own needs. This item can only be set if the Device side object detection in step
2 is selected(Vehicle Detection only support V5EP V8EP T5EP T8EP SD4H).
4 Sensitivity---- It supports three modes: Low, Middle and High. The higher the sensitivity, the
camera will be more easily alarmed. Select one motion sensitivity.
5 Triggered Interval----The interval time between two motion detection. Here supports
5s/6s/7s/8s/9s/10s/11s/12s/13s/14s/15s. Select one interval time.
6 Alarm recording duration---- The recording time of the alarm. Here supports 10s/30s/60s/120s.
Select a recording time.

11
7 Schedule: Click the rectangle in the day of the week, and the corresponding time
setting will be selected. For example, click "Sun", the time "00:00~24:00"
will be set in "Sun", which means that when there is an object moving in
the detection area, the APP will receive the camera's Motion alarm Push messages.
8 Specify Detection Area: Drag the selection box to select the alarm area,click back to pop up
Save or Cancel, select save.
.
NOTE: You must set the detection area and detection schedule, or else there is no alarm anywhere and
anytime.
Face Detection:Turn on the face detection, if you turned on the Motion Detection before,it will
automatically turn off the Motion Detection after turning it on. After opening, if a face
is detected, the APP will receive an alarm push message from the camera.
9 Siren Linkage: When the selected alarm is triggered, the alarm sounds.
10 White Light Linkage: When the selected alarm is triggered, the spotlight light on.

12
Sound Detection: To enable Sound detection, follow the steps below:
1 Enable Sound Detection button
2 Sensitivity---- It supports three modes: Low, Middle and High. The higher the sensitivity, the
camera will be more easily alarmed. Select a Sound sensitivity.
3 Schedule: Click the rectangle in the day of the week, and the corresponding time
setting will be selected. For example, click "Sun", the time "00:00~24:00"
will be set in "Sun", which means that when there is an object moving in
the detection area, the APP will receive the camera's Face alarm Push messages.
4 Siren Linkage: When the selected alarm is triggered, the alarm sounds.
5 White Light Linkage: When the selected alarm is triggered, the spotlight light on.
3.4 Camera Setting
Tap the button, goes to Device Settings to make advanced camera settings.(There are certain
differences in the interface display of each model)

13
3.4.1 My Plan
Here you can choose a 7-day free cloud service experience, and you can also purchase related cloud
packages according to your needs. After successful activation, you can enjoy storing videos on the cloud
anytime, anywhere.

14
3.4.2 Alarm
Click this button, and then you can refer to More Function in 2.2
3.4.3 SD Card
If you have an SD card on your device, click this button to enter the SD-Card Video Playback.You can

15
filter the corresponding videos according to the time and type.
Settings
Click the button enter to SD Card settings, you can set SD card info and Recording Schedule.
SD card info
Click the button enter to SD Card settings, you can view the SD card storage information from this
page, and you can also format the SD card.

16
Recording Schedule
Click the button enter to Recording Schedule setting, you can setting Loop Coverage, Voice
Recording and Recording Schedule. Click Recording Schedule set and then click the rectangle in the
day of the week, and the corresponding time setting will be selected. For example, click "Sun", the time
"00:00~24:00" will be set in "Sun", which means that during this time period, the camera will
automatically record to the SD card.
Schedule Recording Sound: Turn on this button, your schedule recording will have a sound.This feature
is disabled by default, you can turn it on if necessary.
Alarm Recording Sound:Turn on this button, your alarm recording will have a sound.This feature is
enabled by default, and you can choose to turn it off or on according to your own needs.
3.4.4 Firmware
You can see the current camera's firmware version and whether there is new software that needs to be
upgraded. If there is new firmware, you can click the “Upgrading” button to upgrade.
3.4.5 Intelligent Detection
To use this function, you need to purchase a cloud service elite plan.

17
3.4.6 Camera Info
You can see the basic information of the camera through this, such as Camera name, UID, MAC ID and
firmware version information. You can also change the camera name here.
3.4.7 My Family
If you set up family members in my family, you can share the camera with your family here.Or you can
invite other users to watch the live broadcast in the form of username and account information.

18
3.4.8 Door Chime (Only VD1 DBW5 support)
You can choose the corresponding Chime type according to the Chime method in your home.
3.4.9 Privacy mask (Some models have this function, if it is not displayed, it is
not supported)
This can be used to set certain masks as private areas on the video. Click + draw a mask area on the
video , the mask area will be black on the video .Click the back button, the save page appears, click save,
click Save to take effect.

19
Back to the surveillance window, you can see the mask area as the following picture:
3.4.10 WiFi Settings (POE models do not support, such as G2EP QJ2 G4EP QJ4
D2EP,V5EP, V8EP, T5EP, T8EP, V4EC etc.)
If you selected Wired Connection via the Foscam, Tap the “WiFi Settings” button > select your WiFi
network and enter your WiFi’s password. After setting up successfully, you can view live video without
the Ethernet cable.
The mask area.
The mask area.

20
3.4.11 Sleep Mode
Most settings options are not available while camera is in sleep mode.If you want to enable settings and
keep camera running, please turn off this mode.
3.4.12 Advanced Settings
Click on advanced settings to enter the advanced settings page, where you can set Security Settings,
Ringtone, Light Settings, Power Frequency, Power Status, Smart Control, Wi-Fi Detection, Sync Time,
Reset Device, NVR Connection, Video Settings, Prompt Settings, Screen Flip and Camera Speaker
Volume settings.
Security Settings
You can modify the username and password of the camera here.
Ringtone(Only support VD1 DBW5)
Here you can set the call ringtone and Push notification Ring
Light Settings
On this page you can set the IR LED Settings and White Light.(White light off is only supported by some
models, such as S41, F41, SPC, FLC, V5EP, V8EP, T5EP, T8EP)
/